Whether you’re a literary fan or a just a pipe smoker, most of you know J.R.R. Tolkein and this famous quote from The Fellowship of the Ring.
All that is gold does not glitter, not all those who wander are lost;
J.R.R. Tolkein, The Fellowship of the Ring
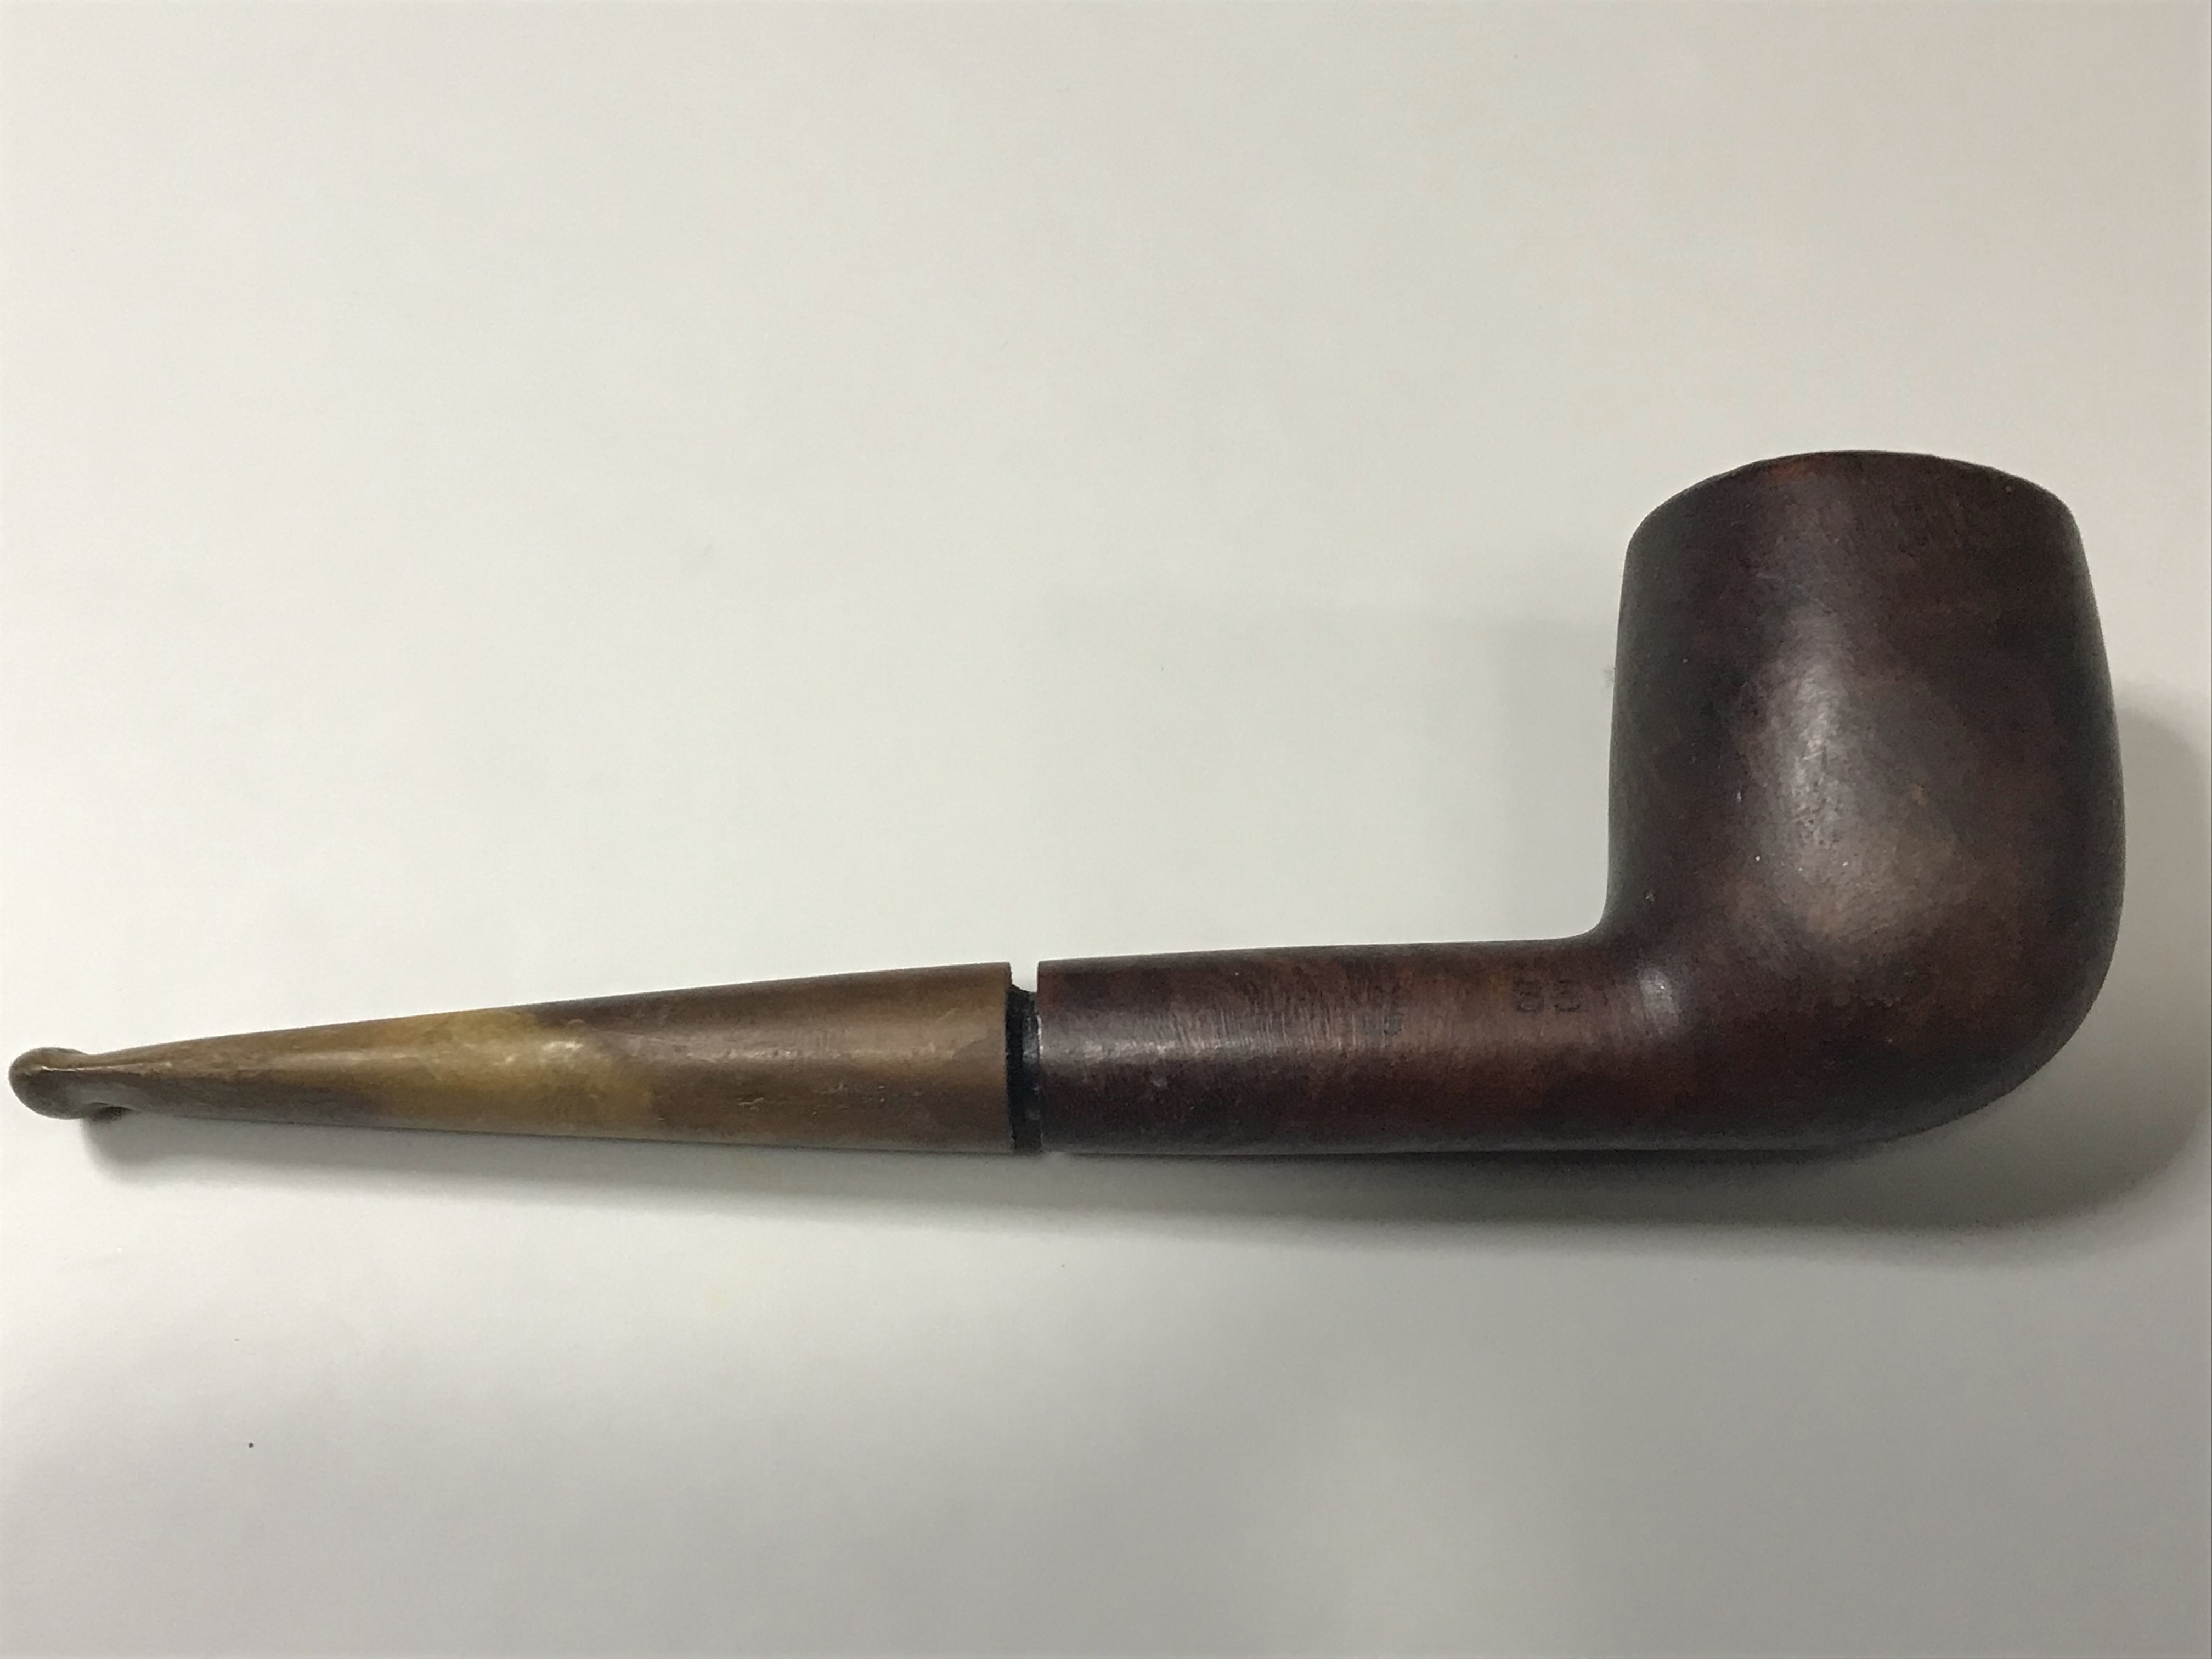
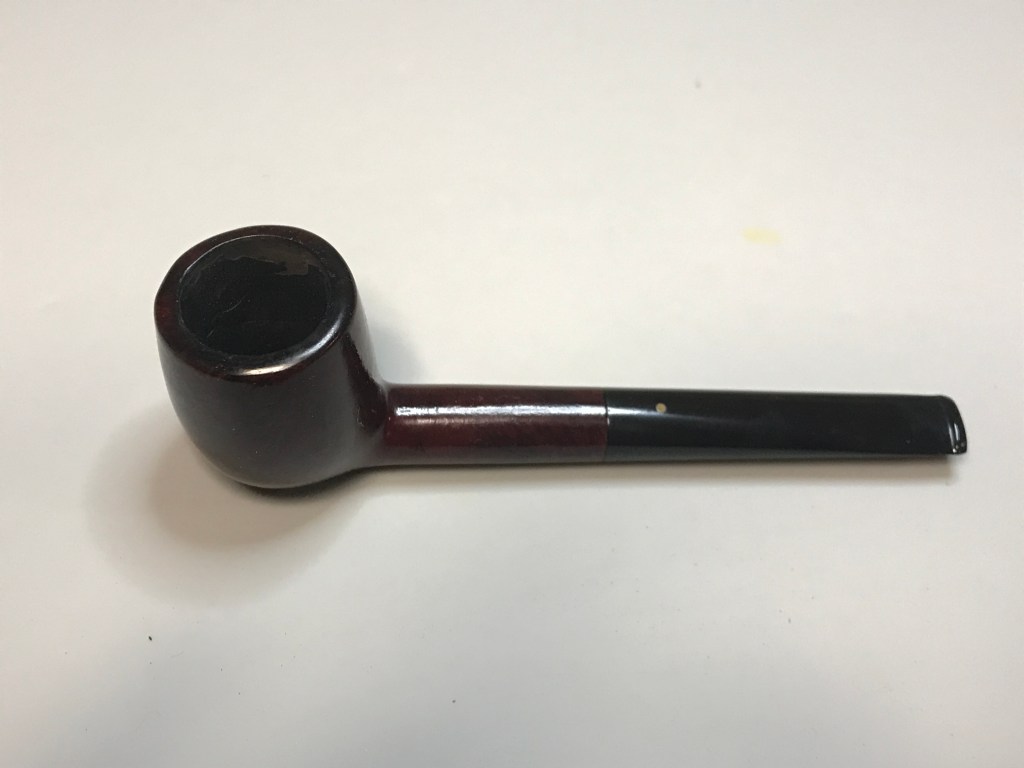
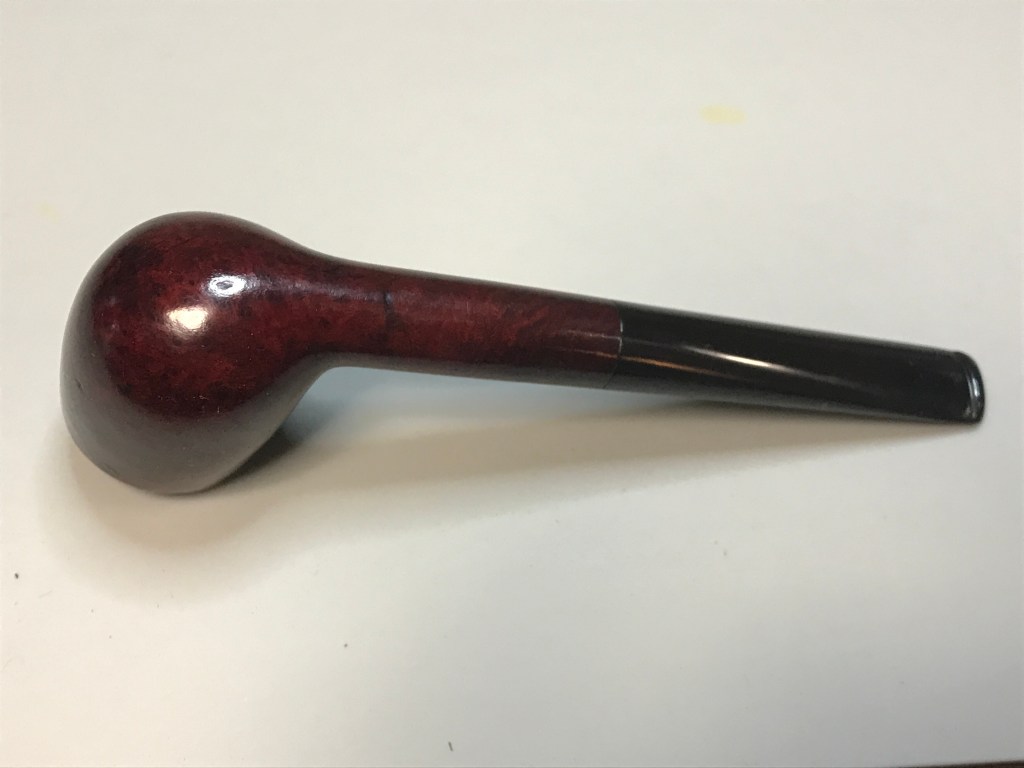
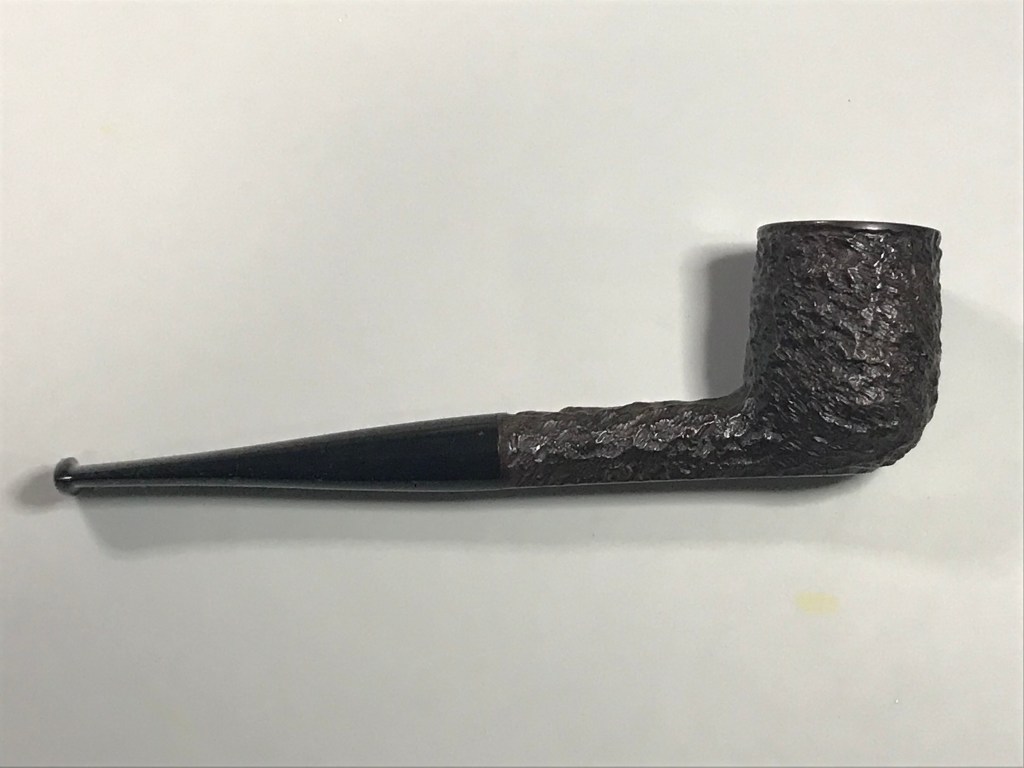
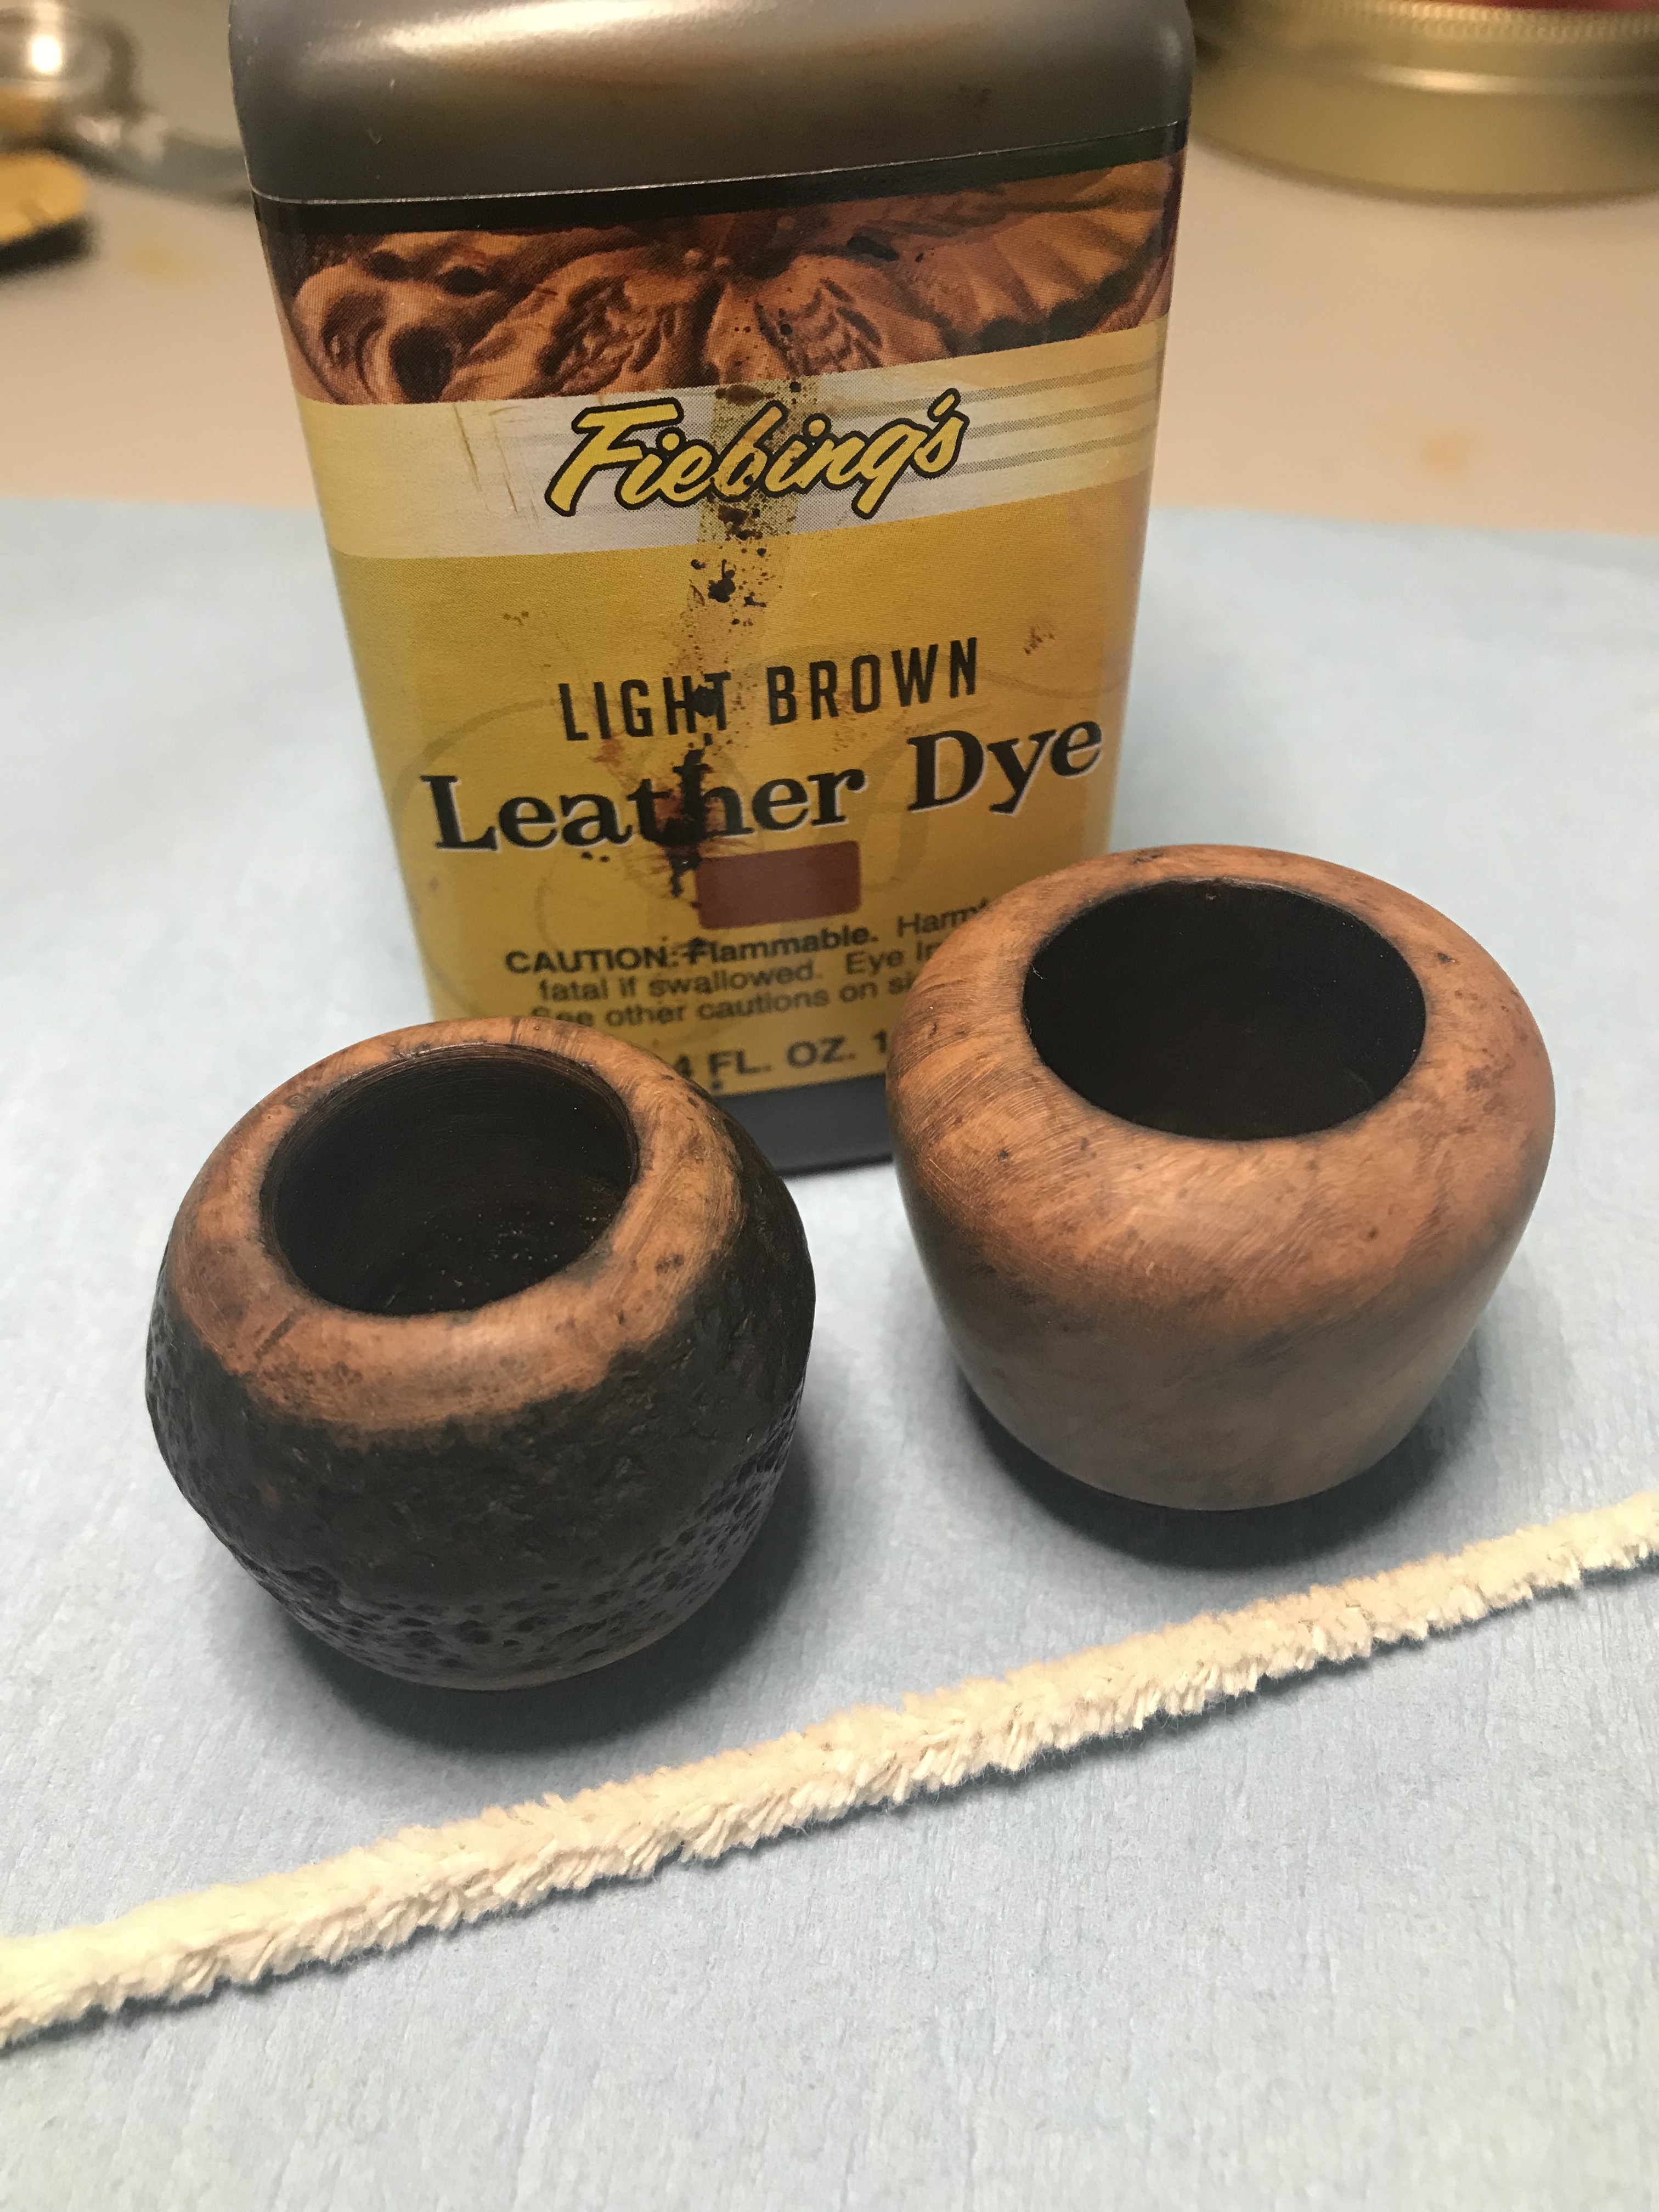
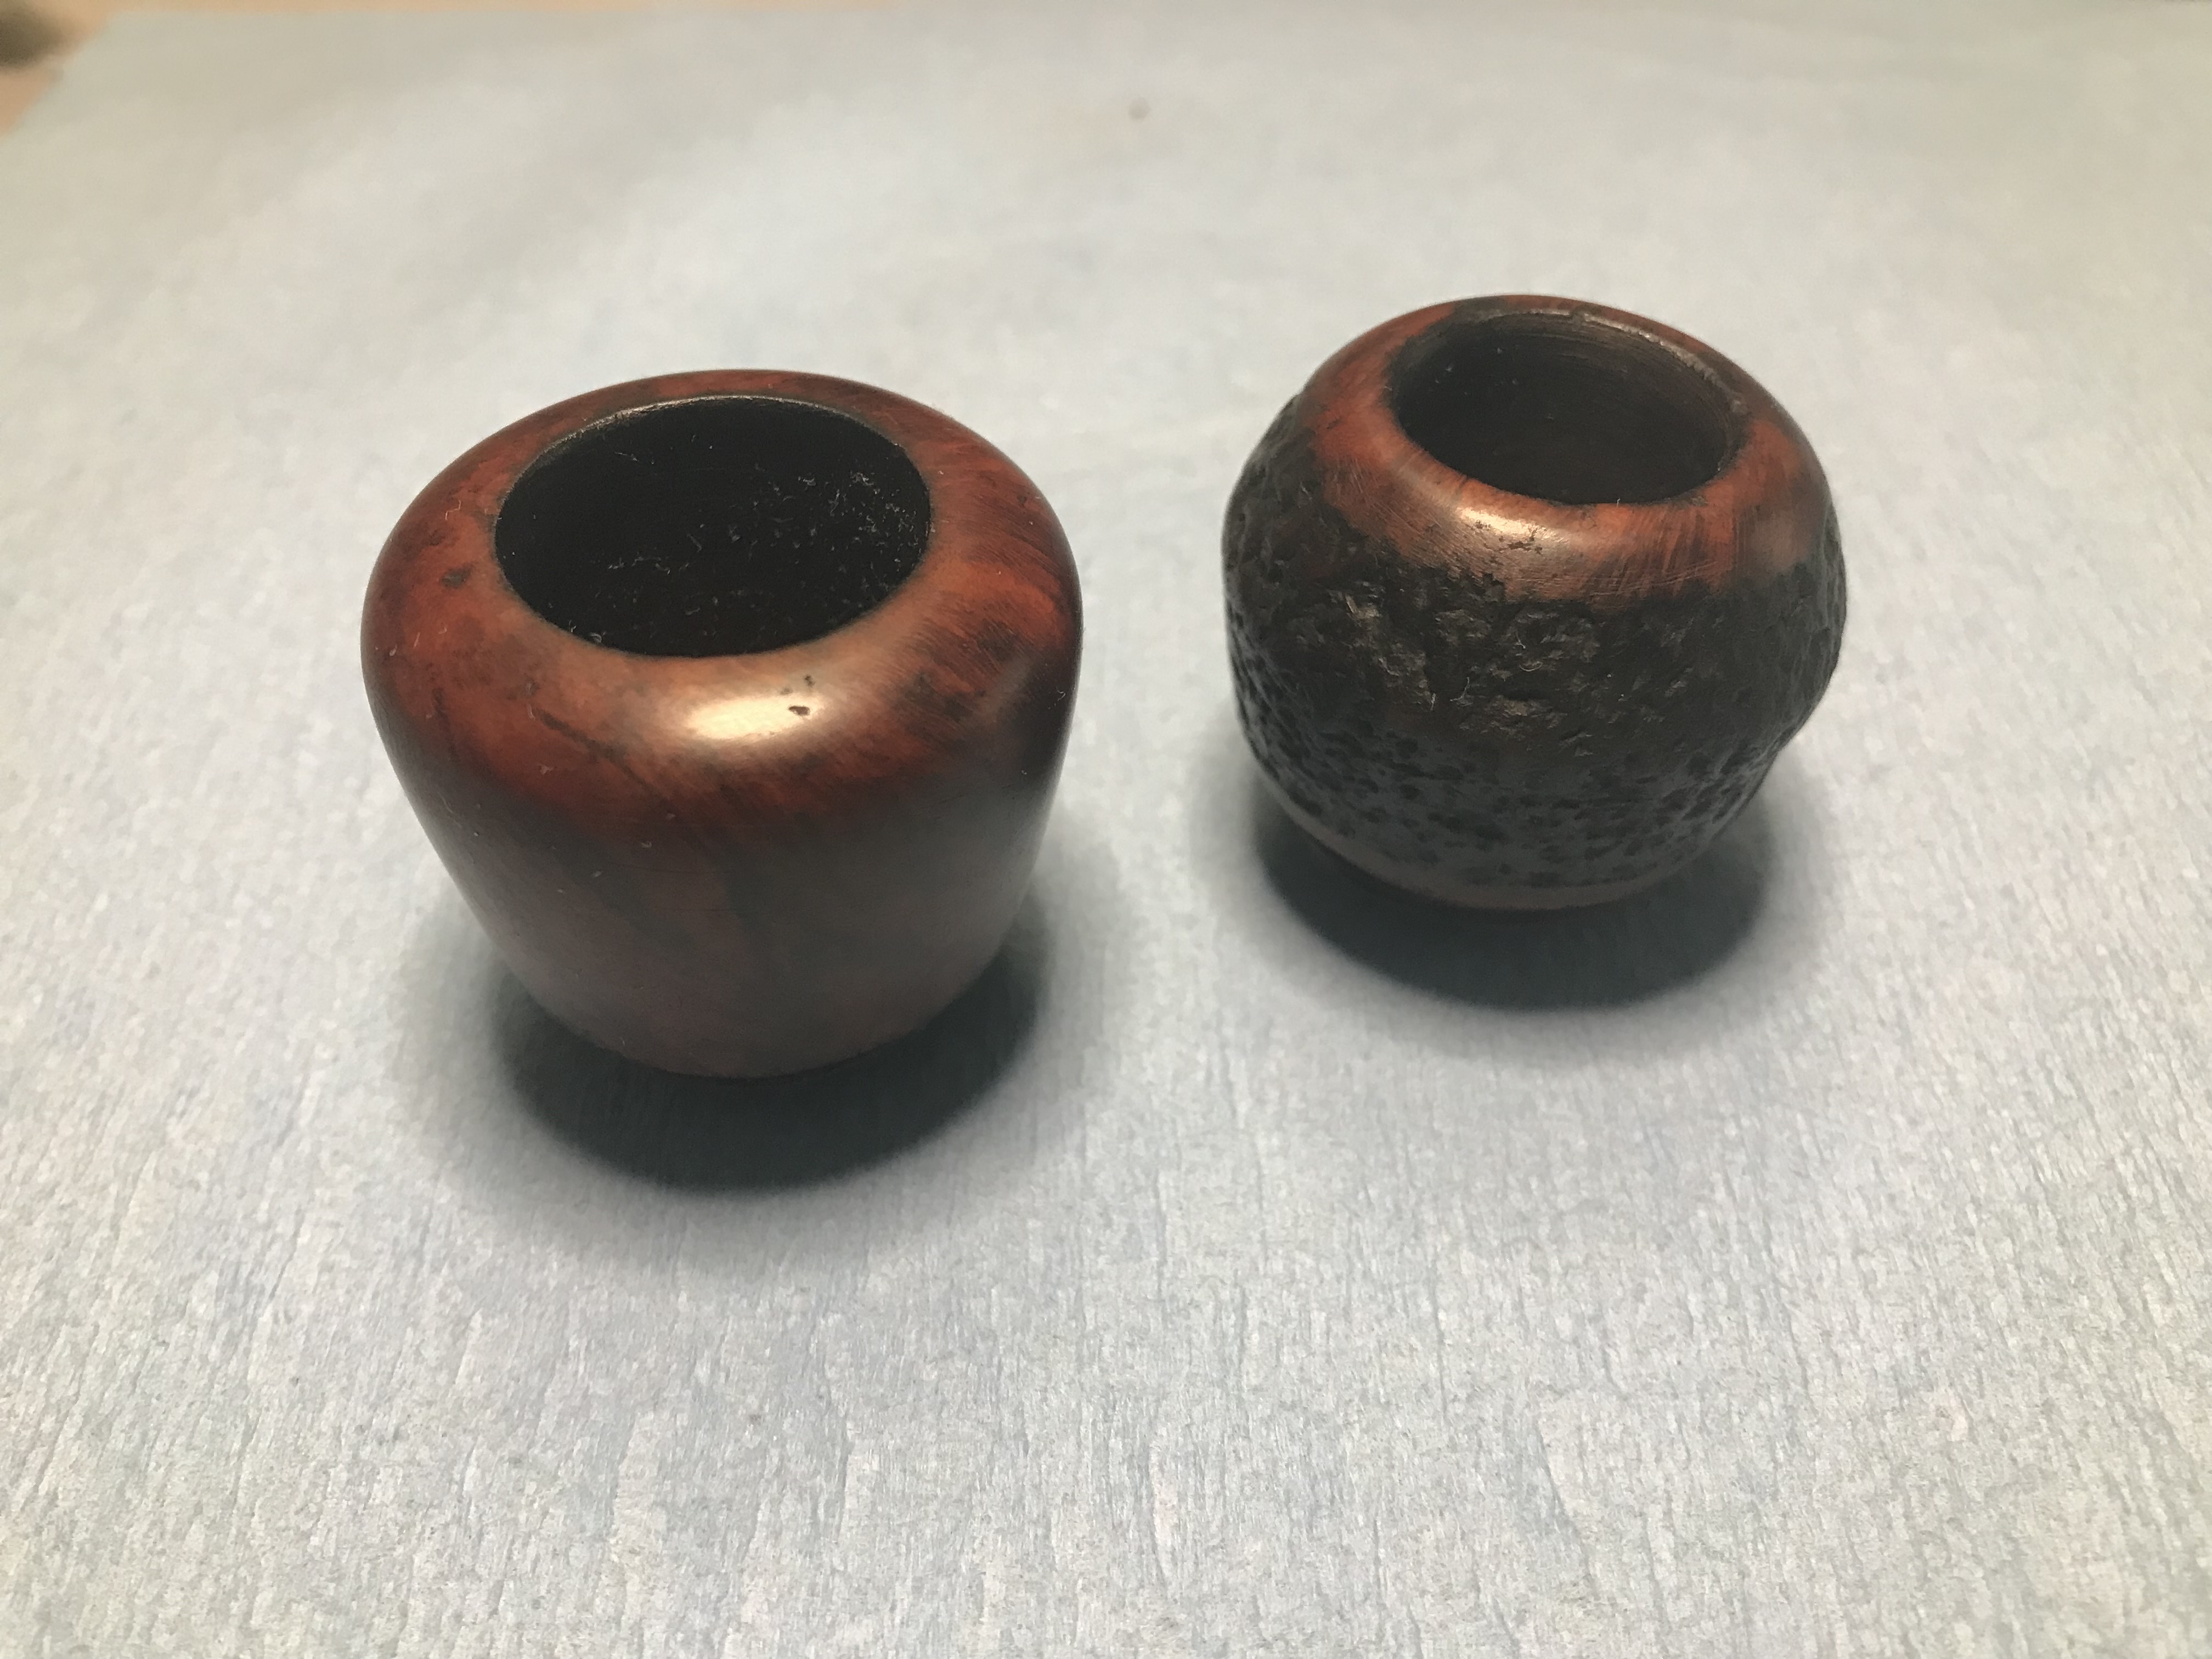
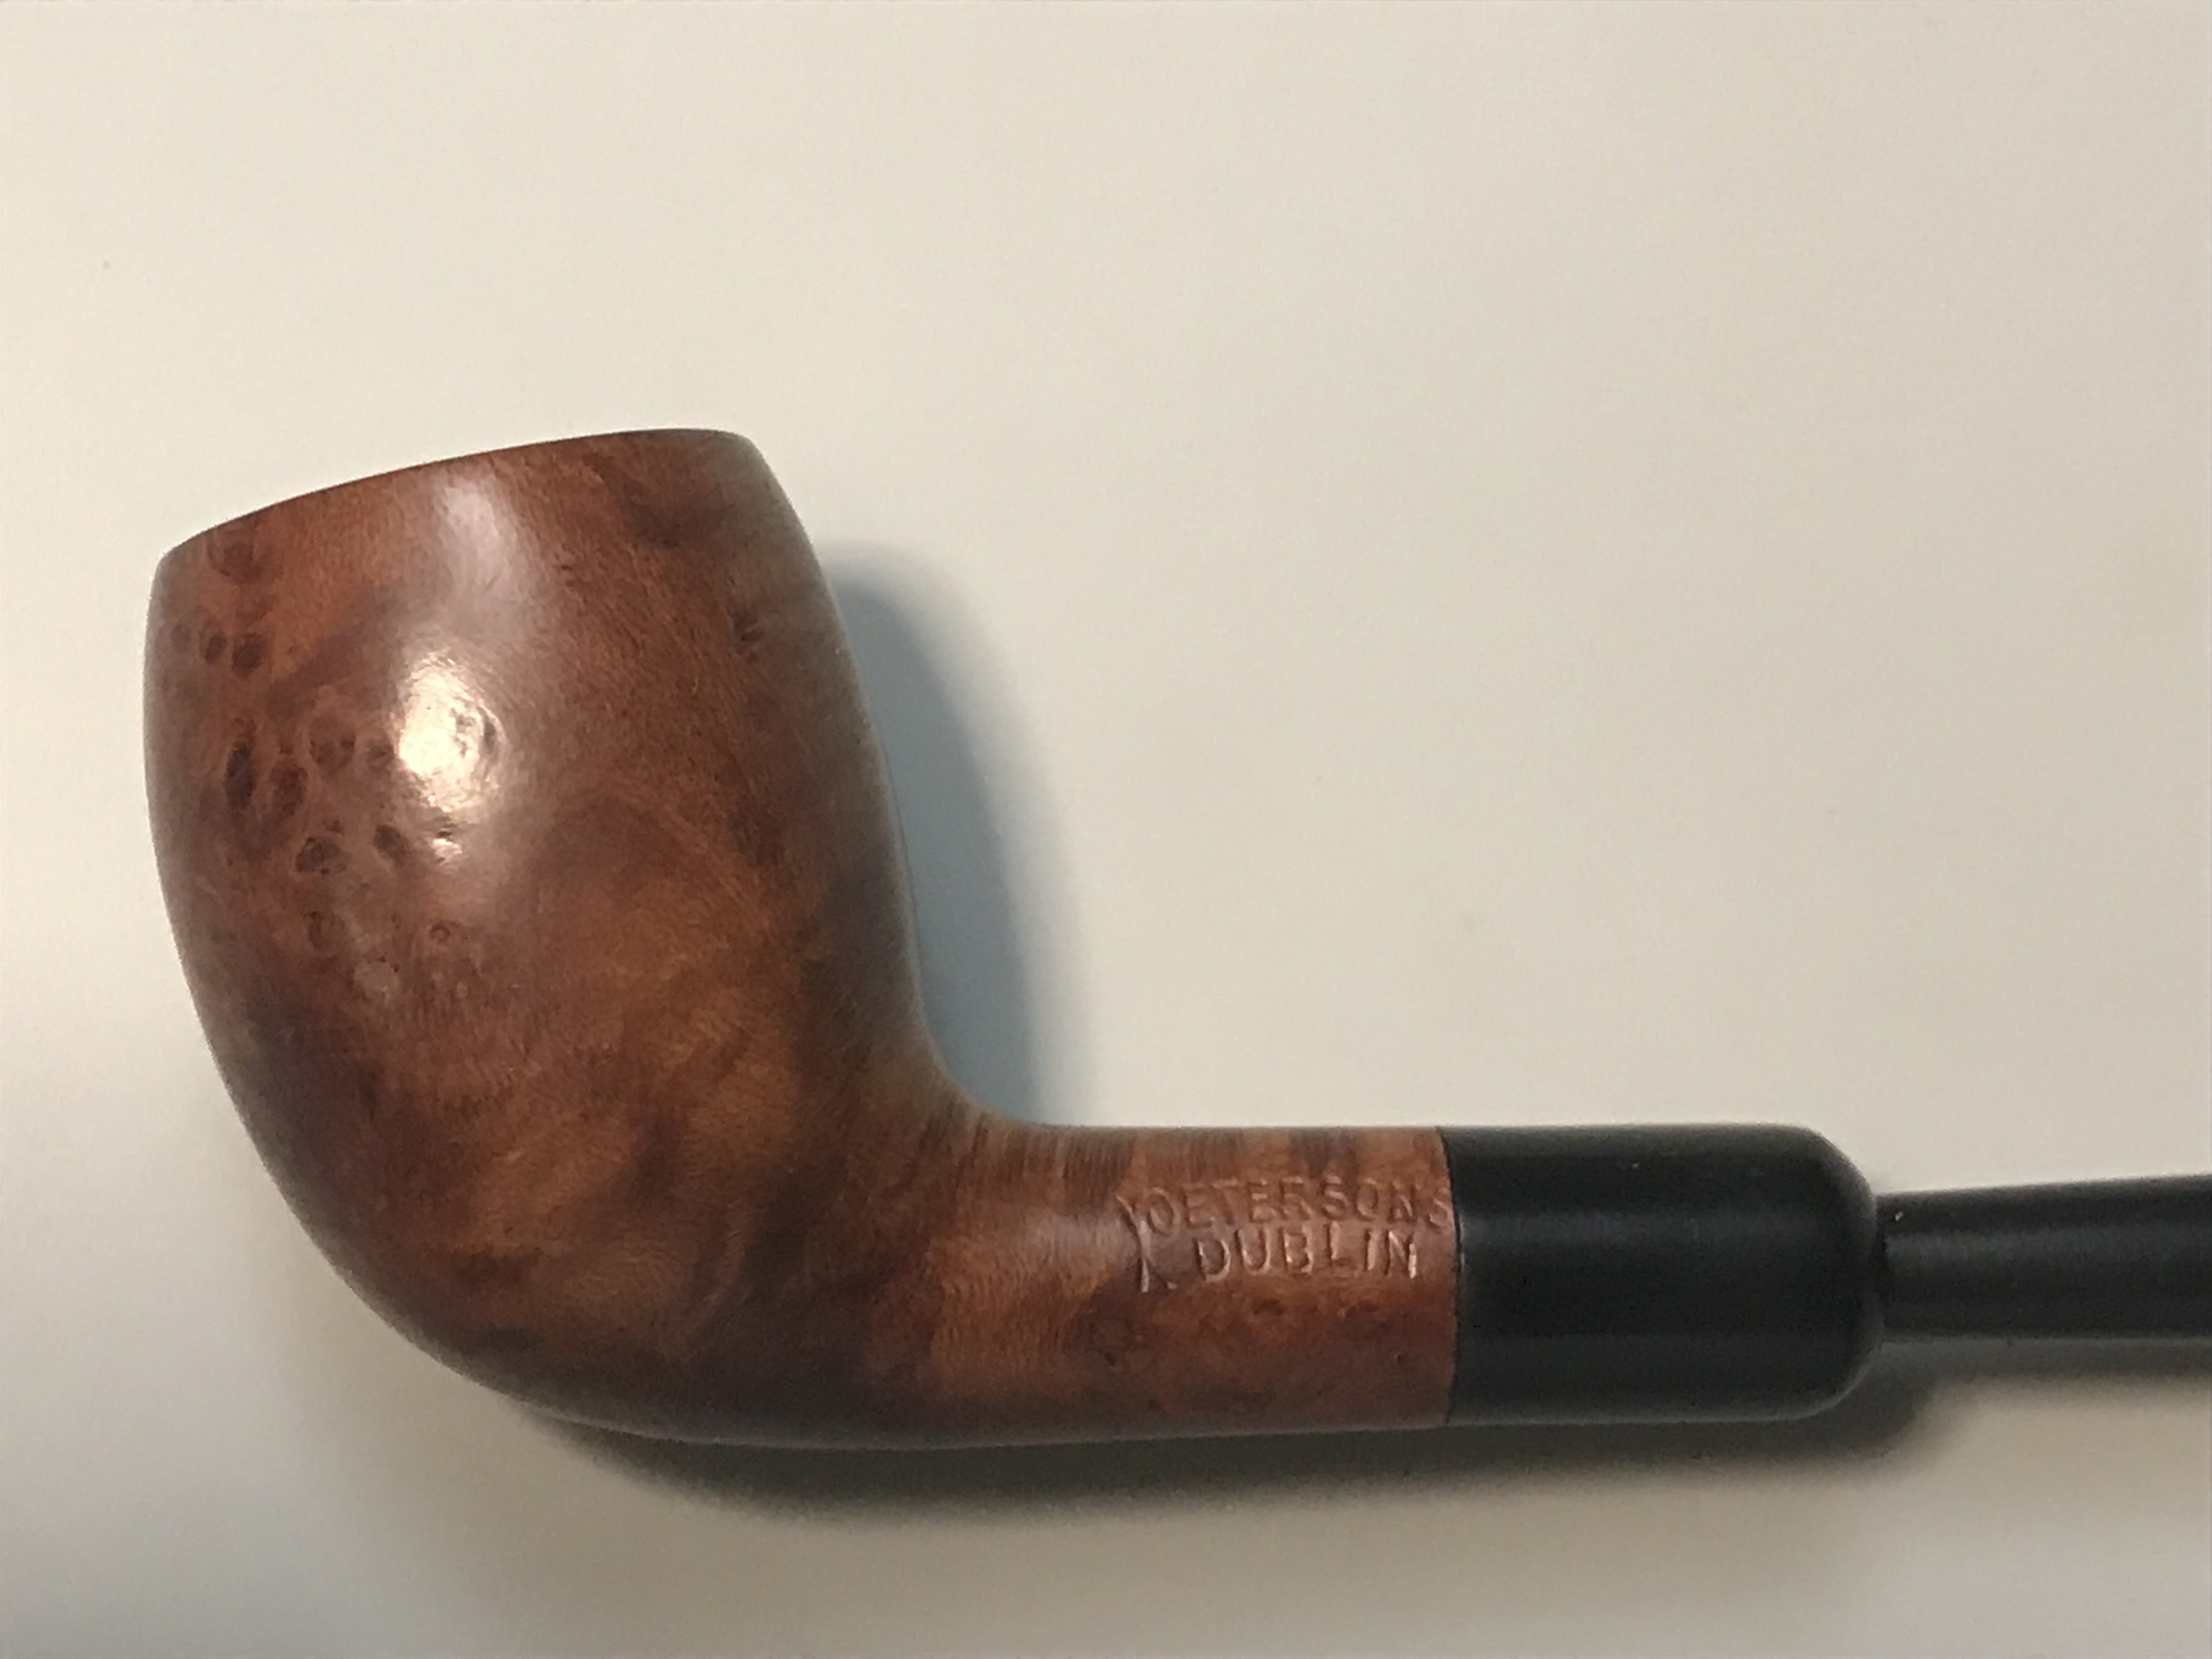
Often times when I come across a pipe to restore I like to imagine the provenance from which it came. In some instances I know, in others, such as this Peterson Dublin, I can only create the fantasy in my head.
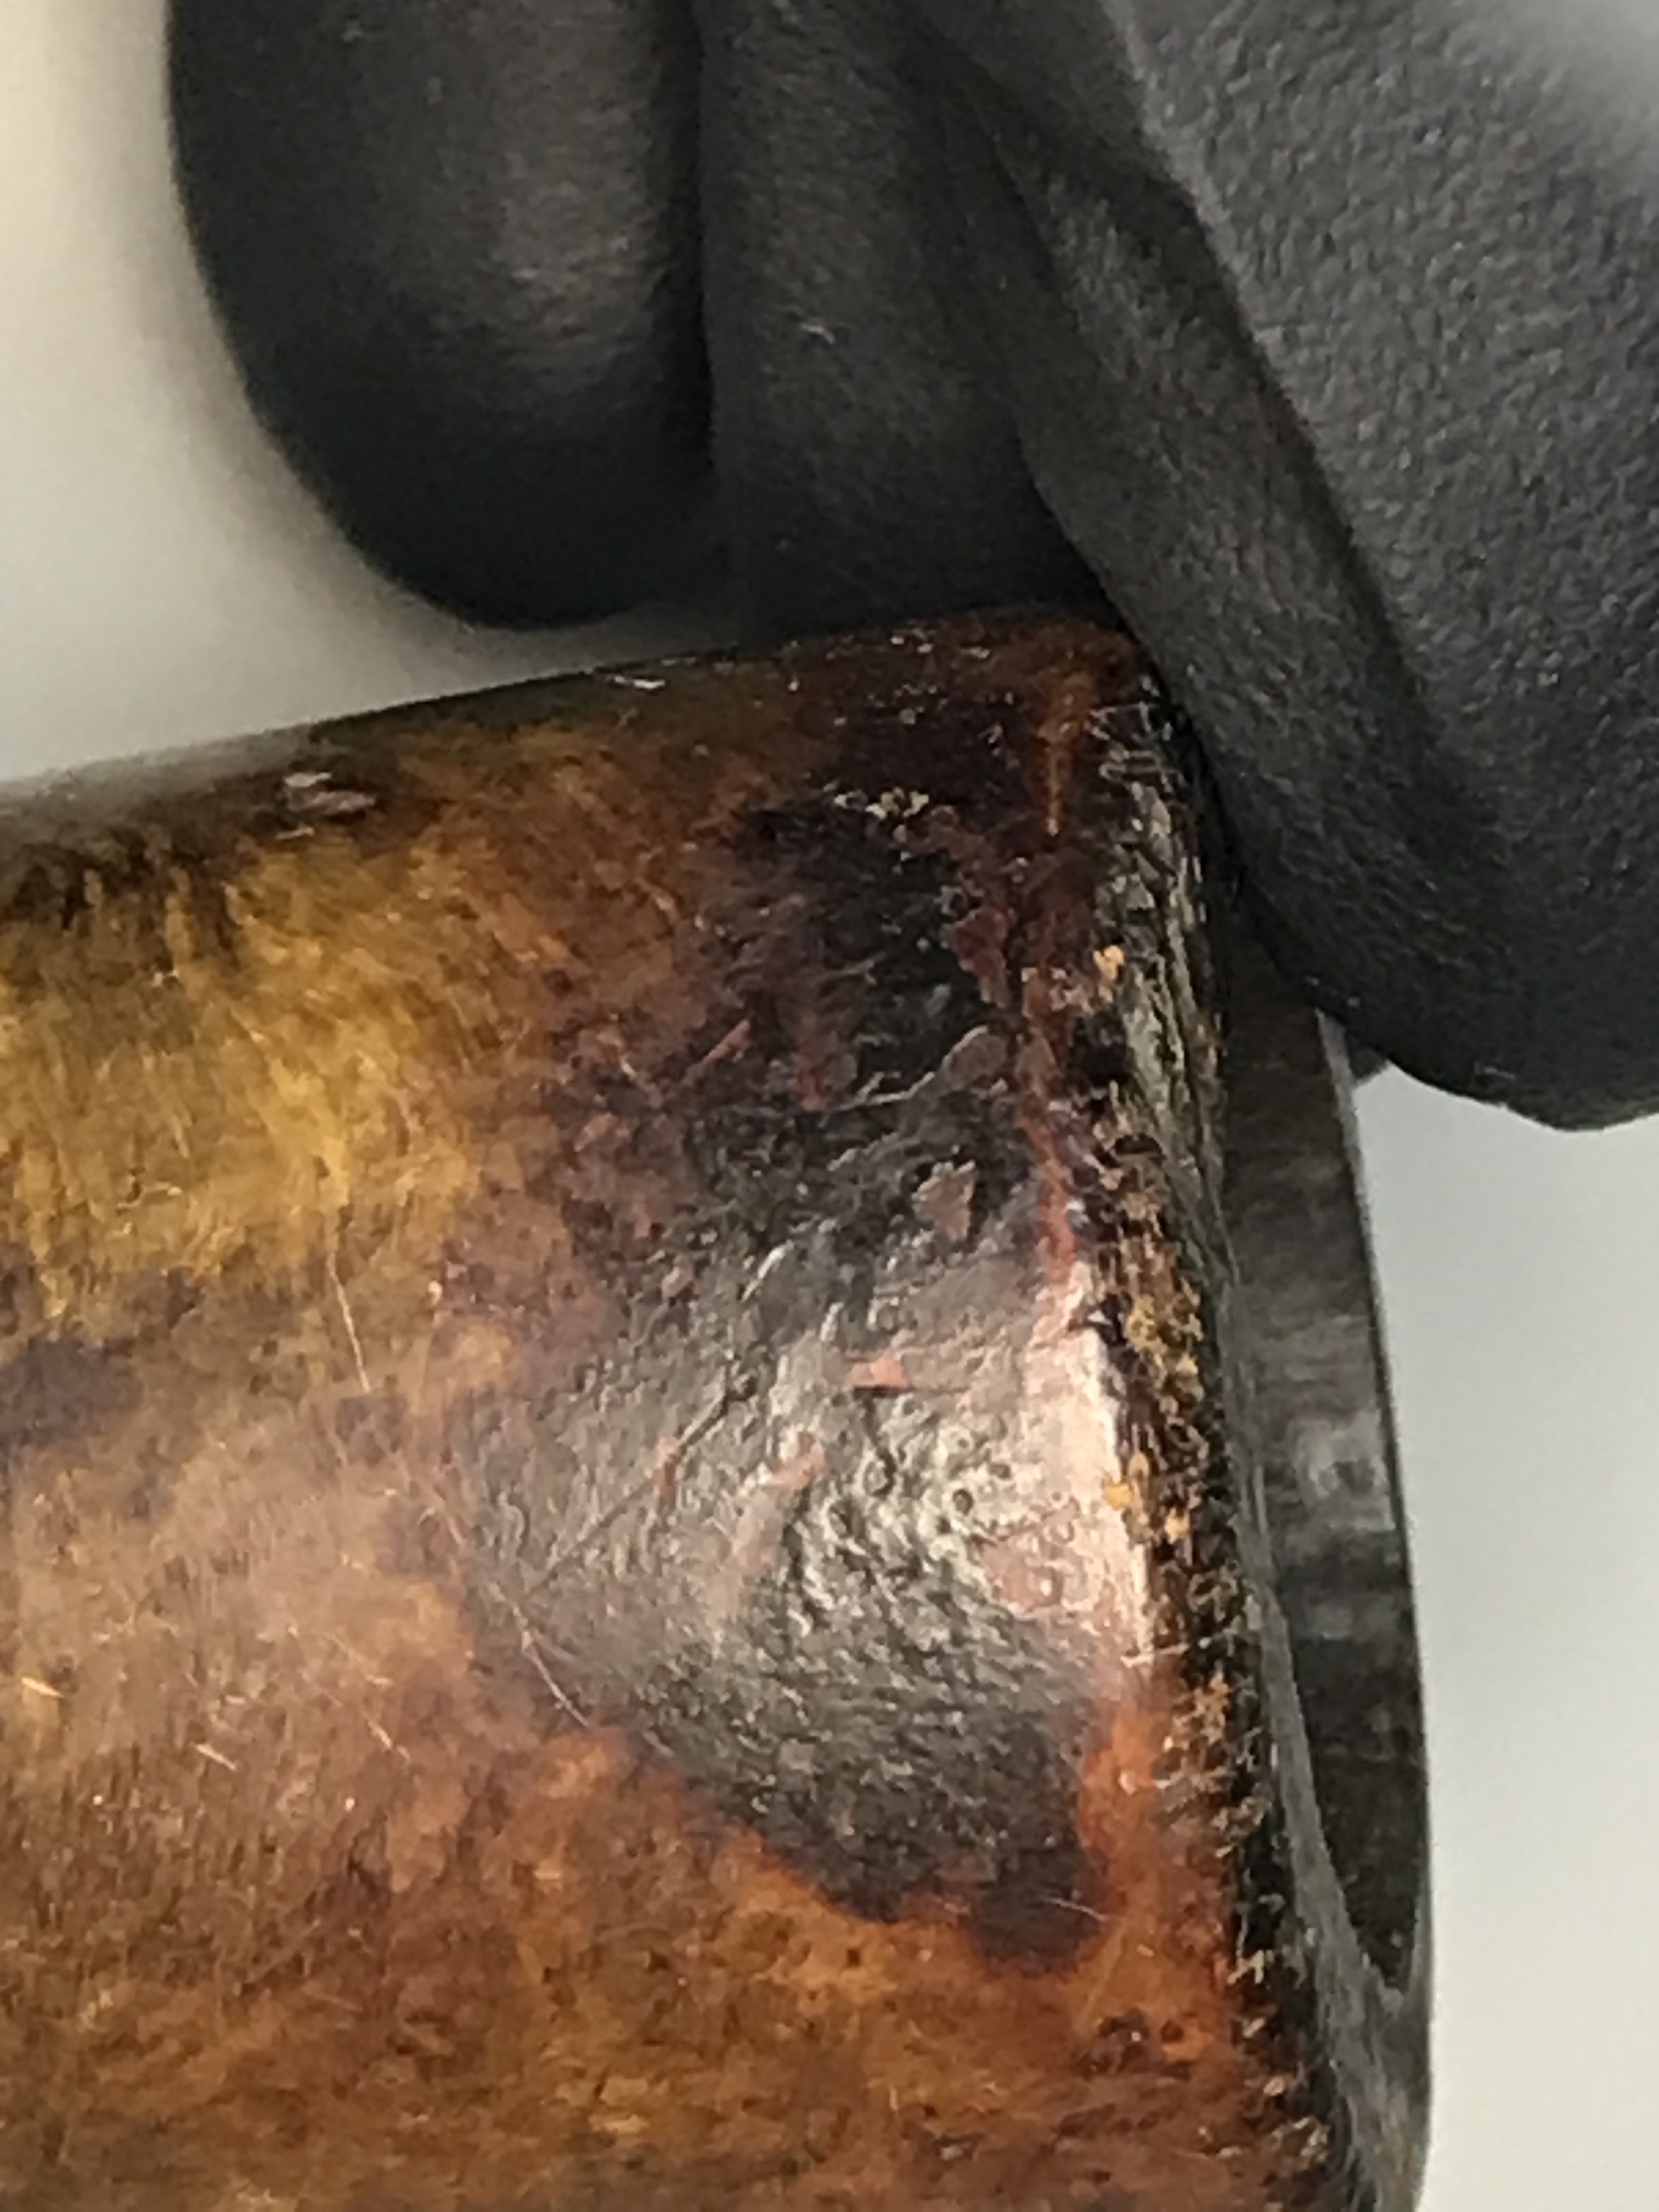
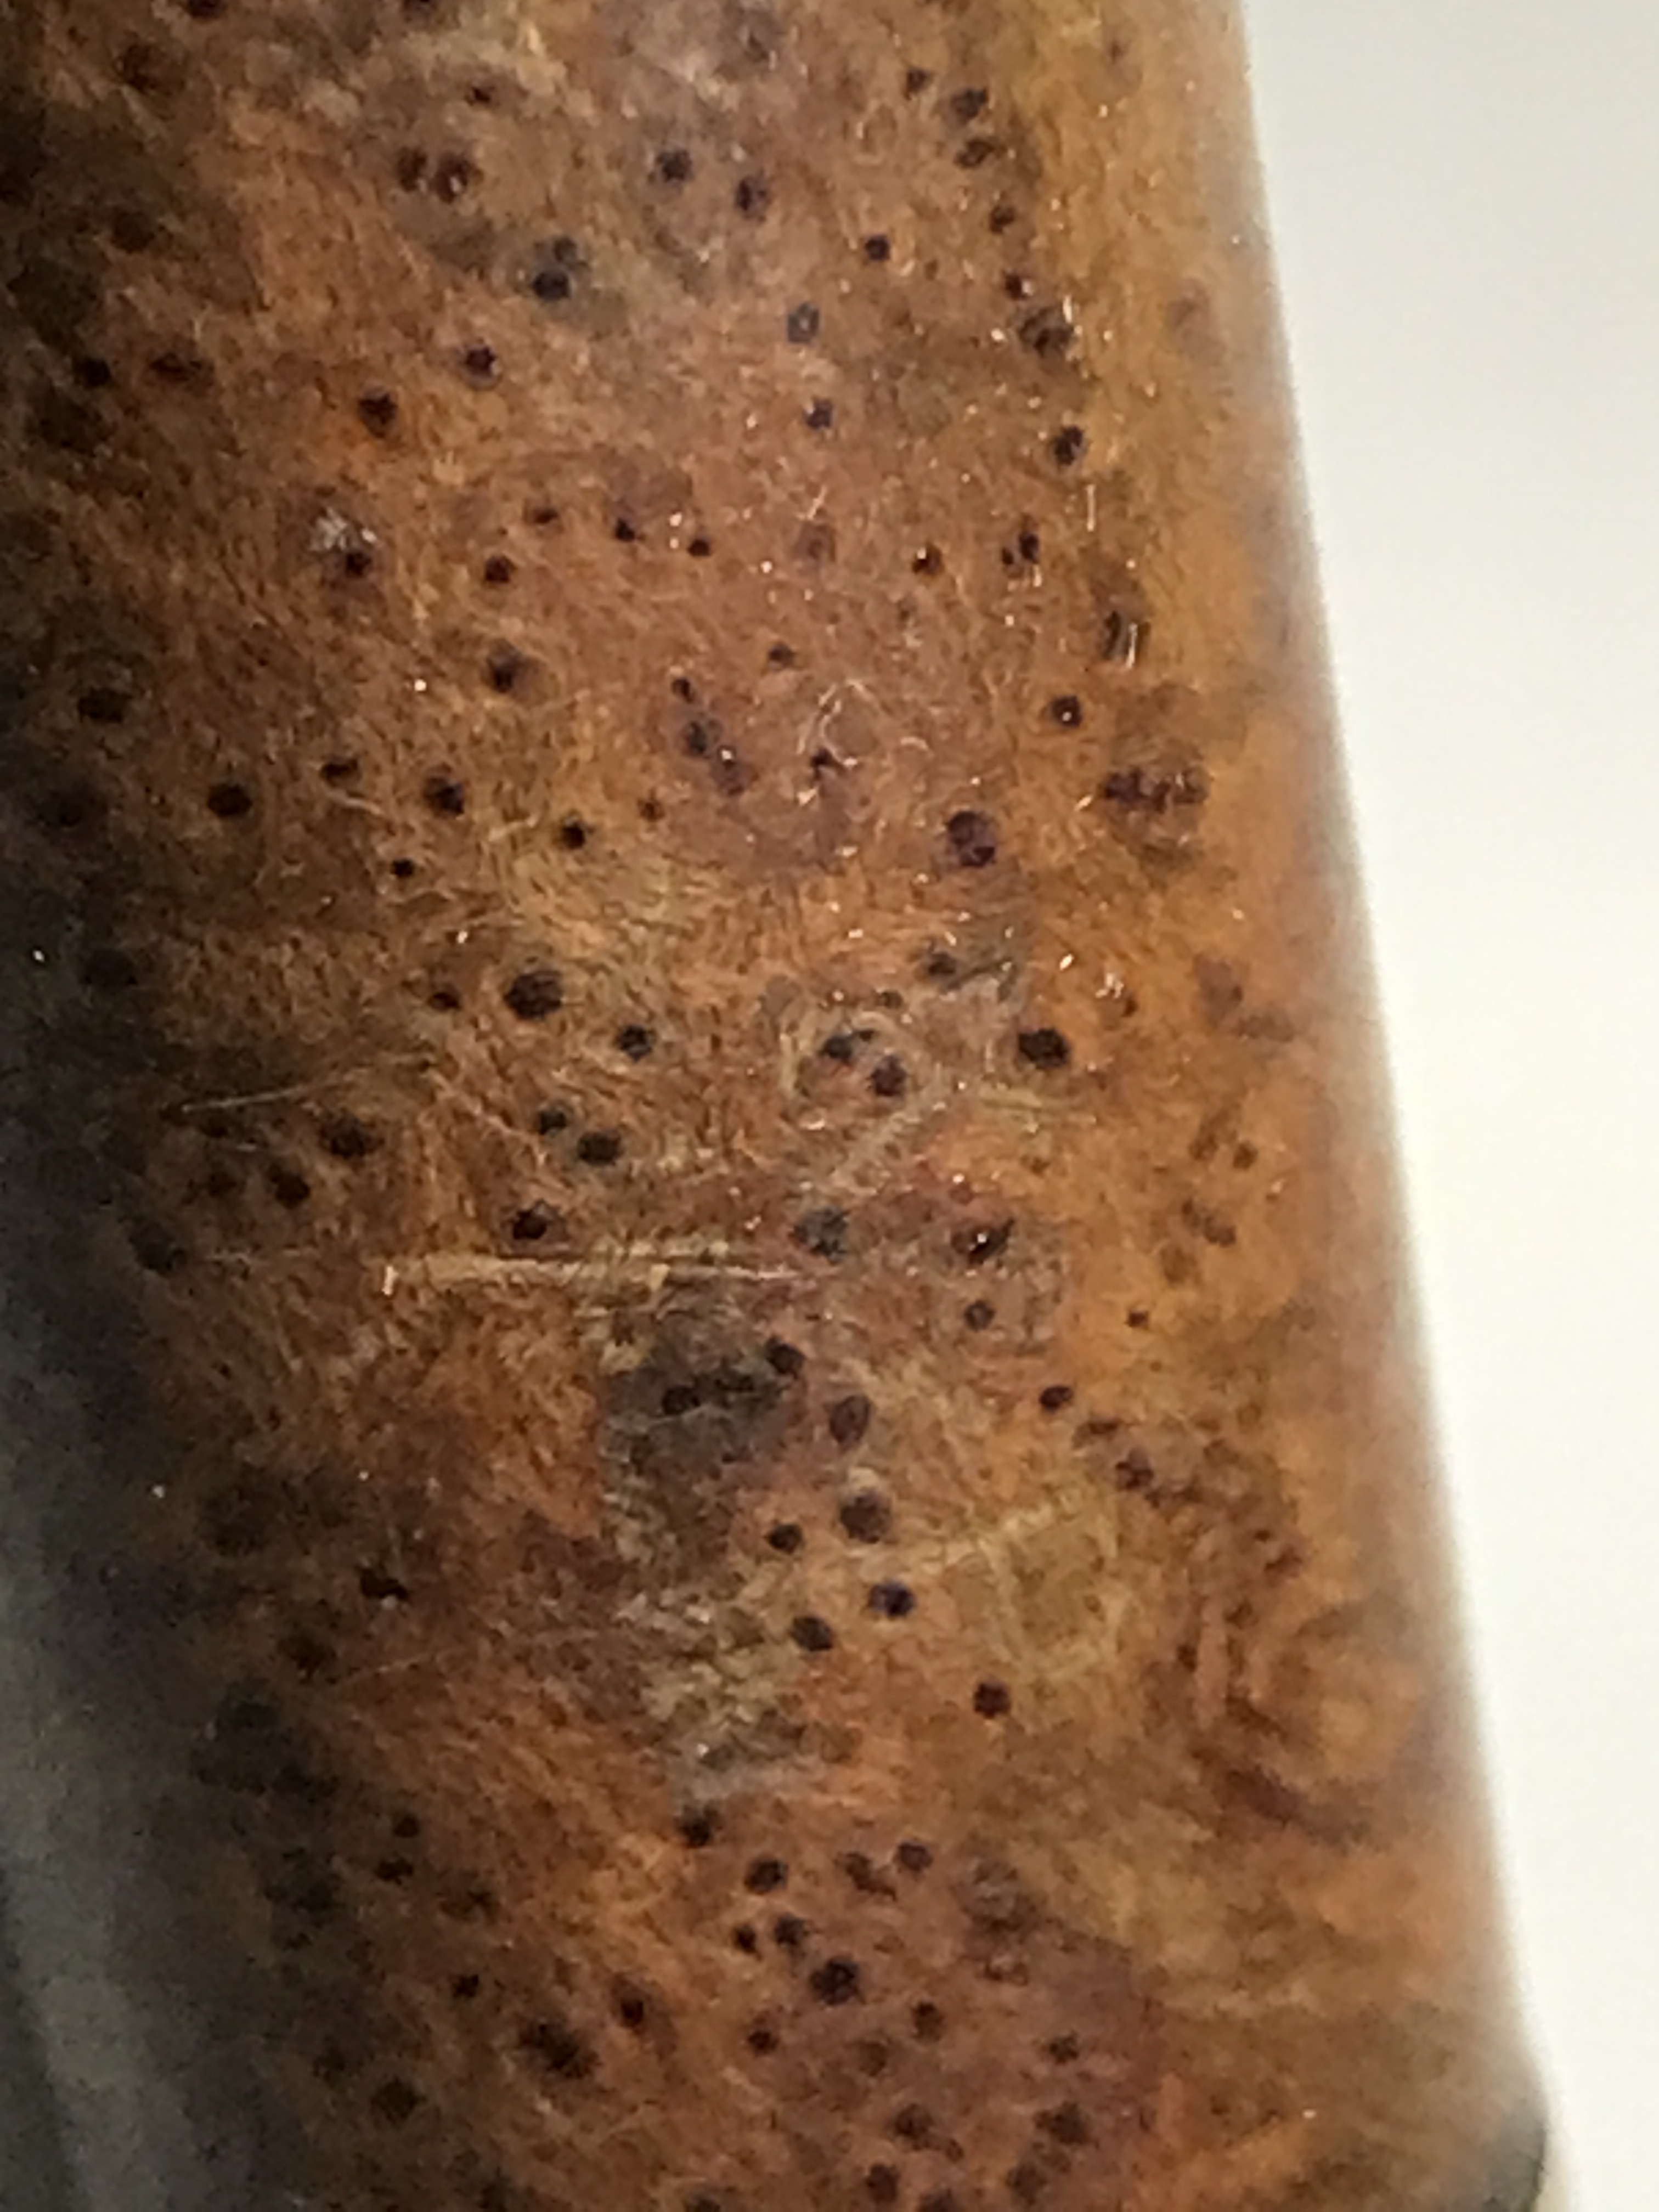
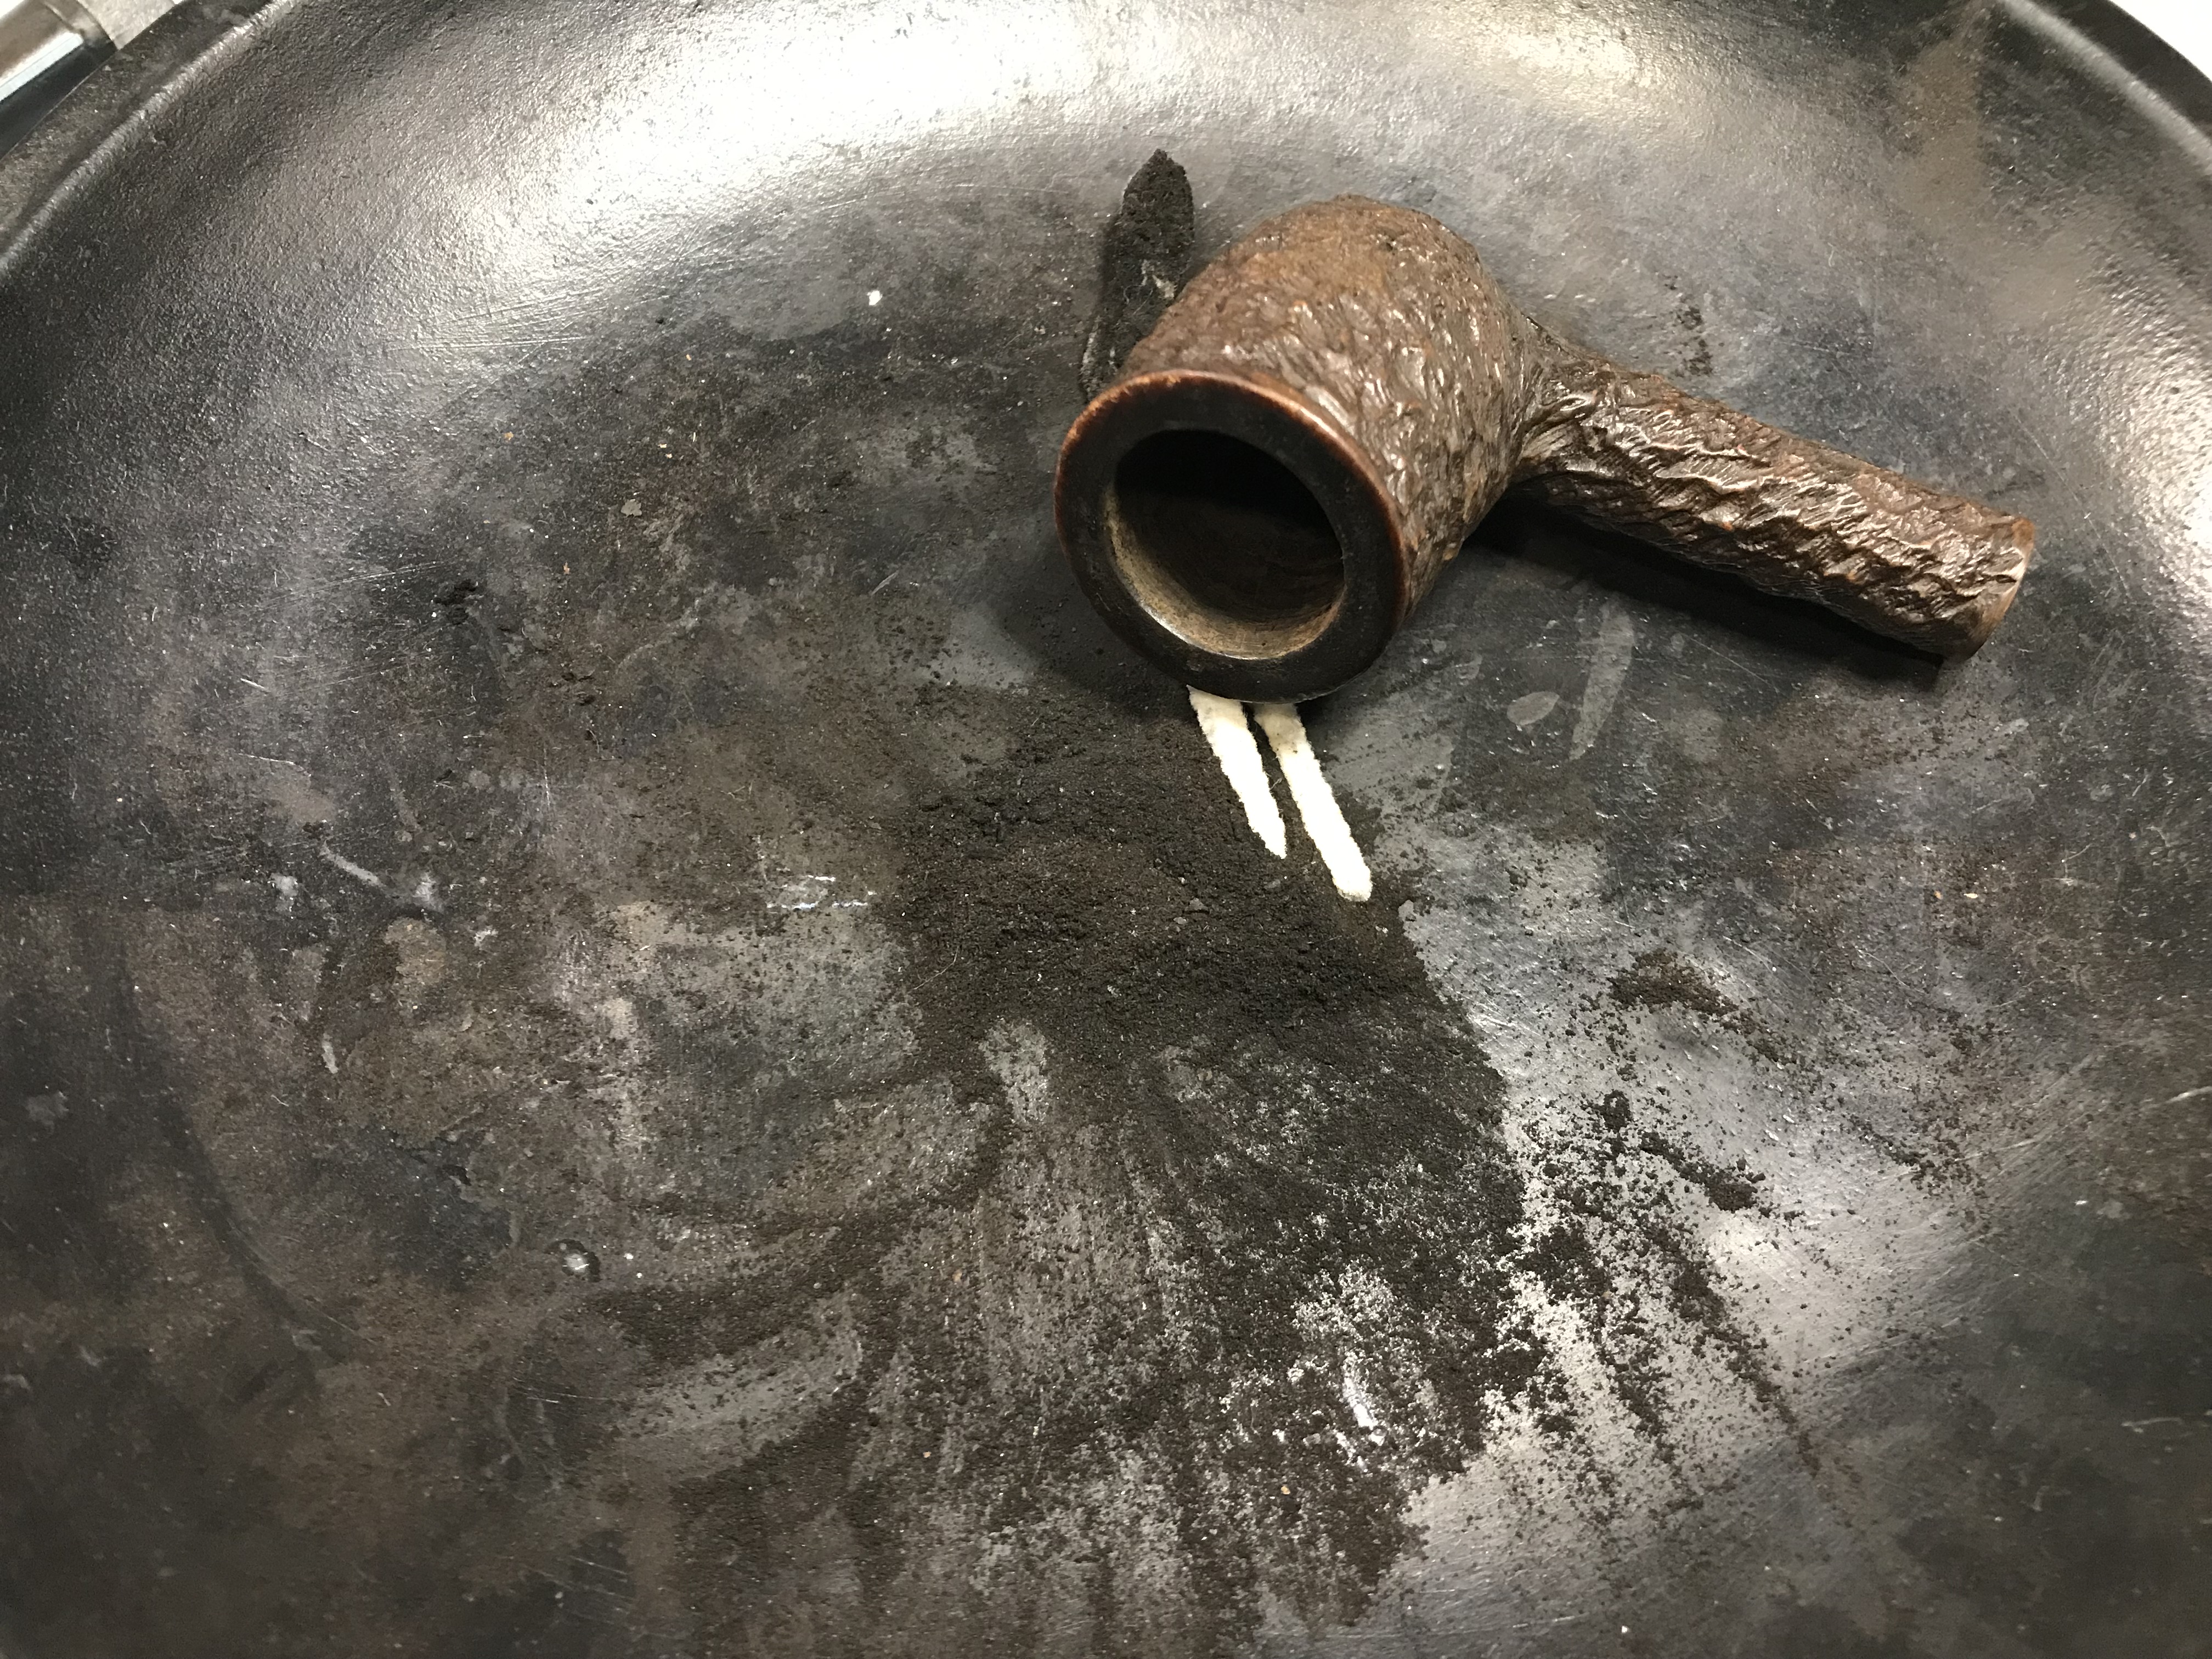
As I held the pipe in my hand I noticed how well loved it was, with heavy cake in the tobacco chamber from years of the smokers favourite tobacco smouldering sweetly in the chamber, a battered rim that had been thumped on the smokers ashtray as he emptied his favourite pipe. At some point the pipe lost its companion stem and its purpose, wandering away from its true purpose, relegated to be forgotten by time. Unless…..an unlikely fellow came upon it and saw past the bumps and bruises. Perhaps, just perhaps “renewed shall be blade that was broken” .
First Impressions:
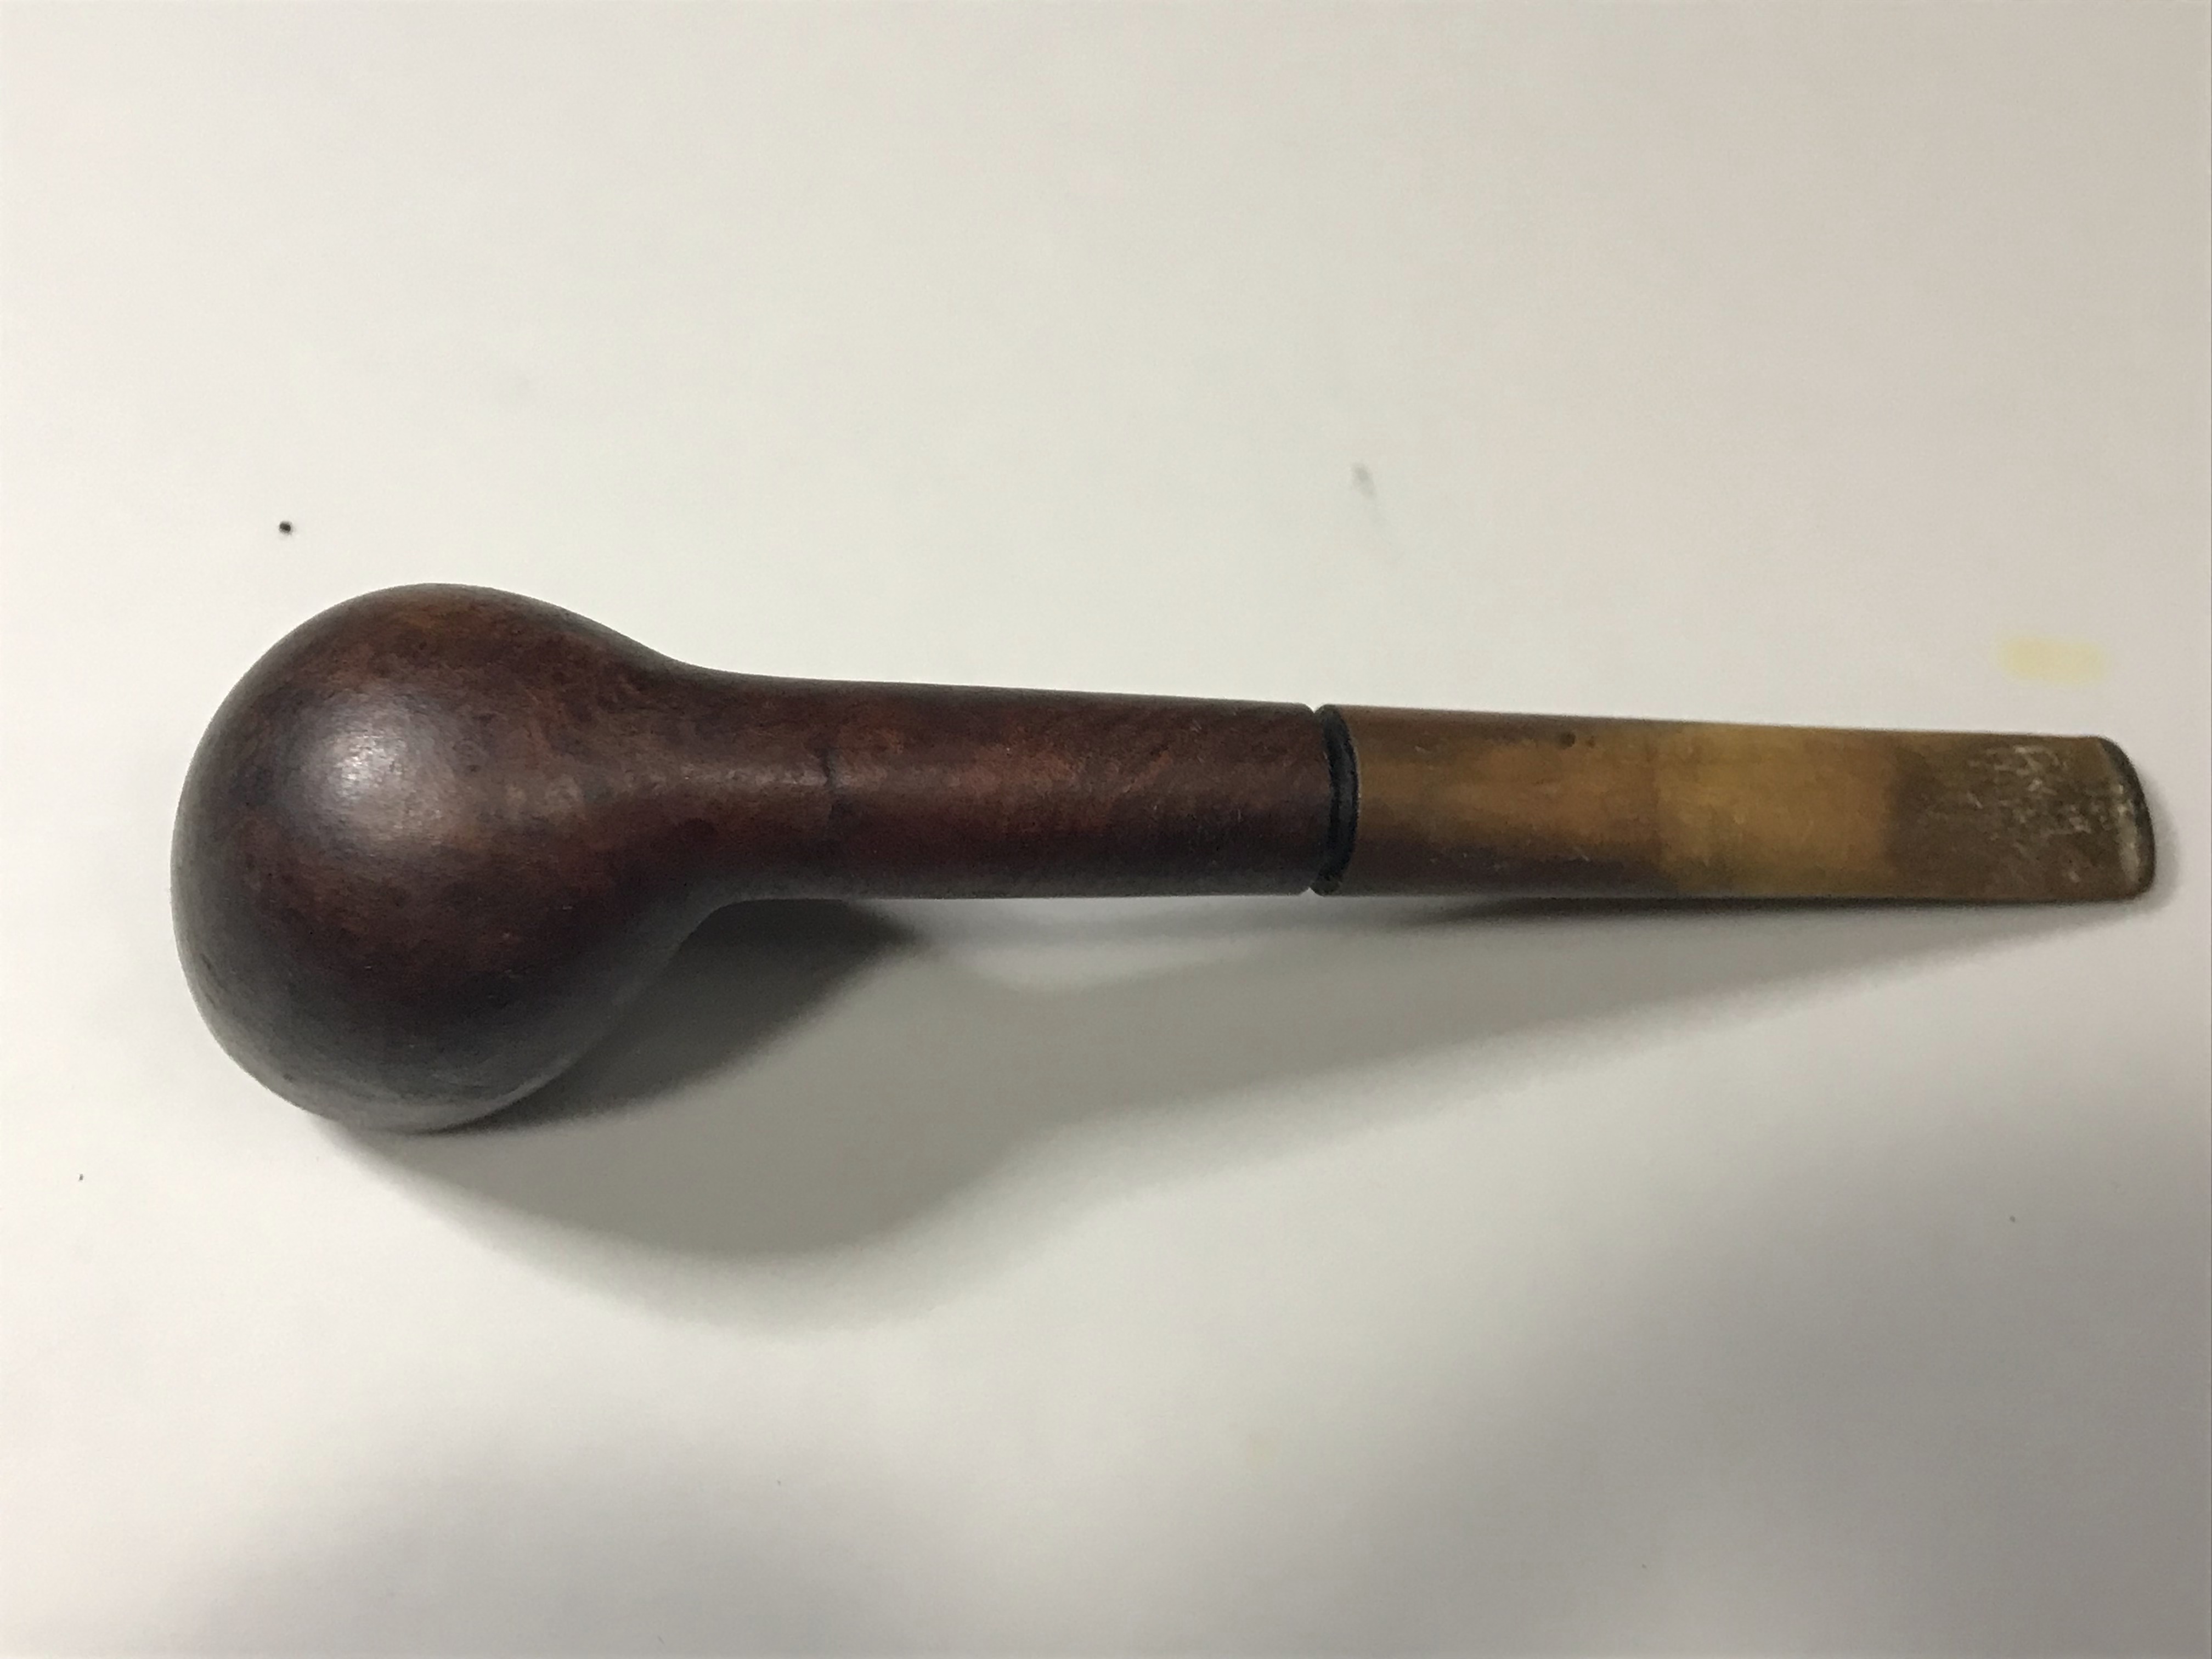
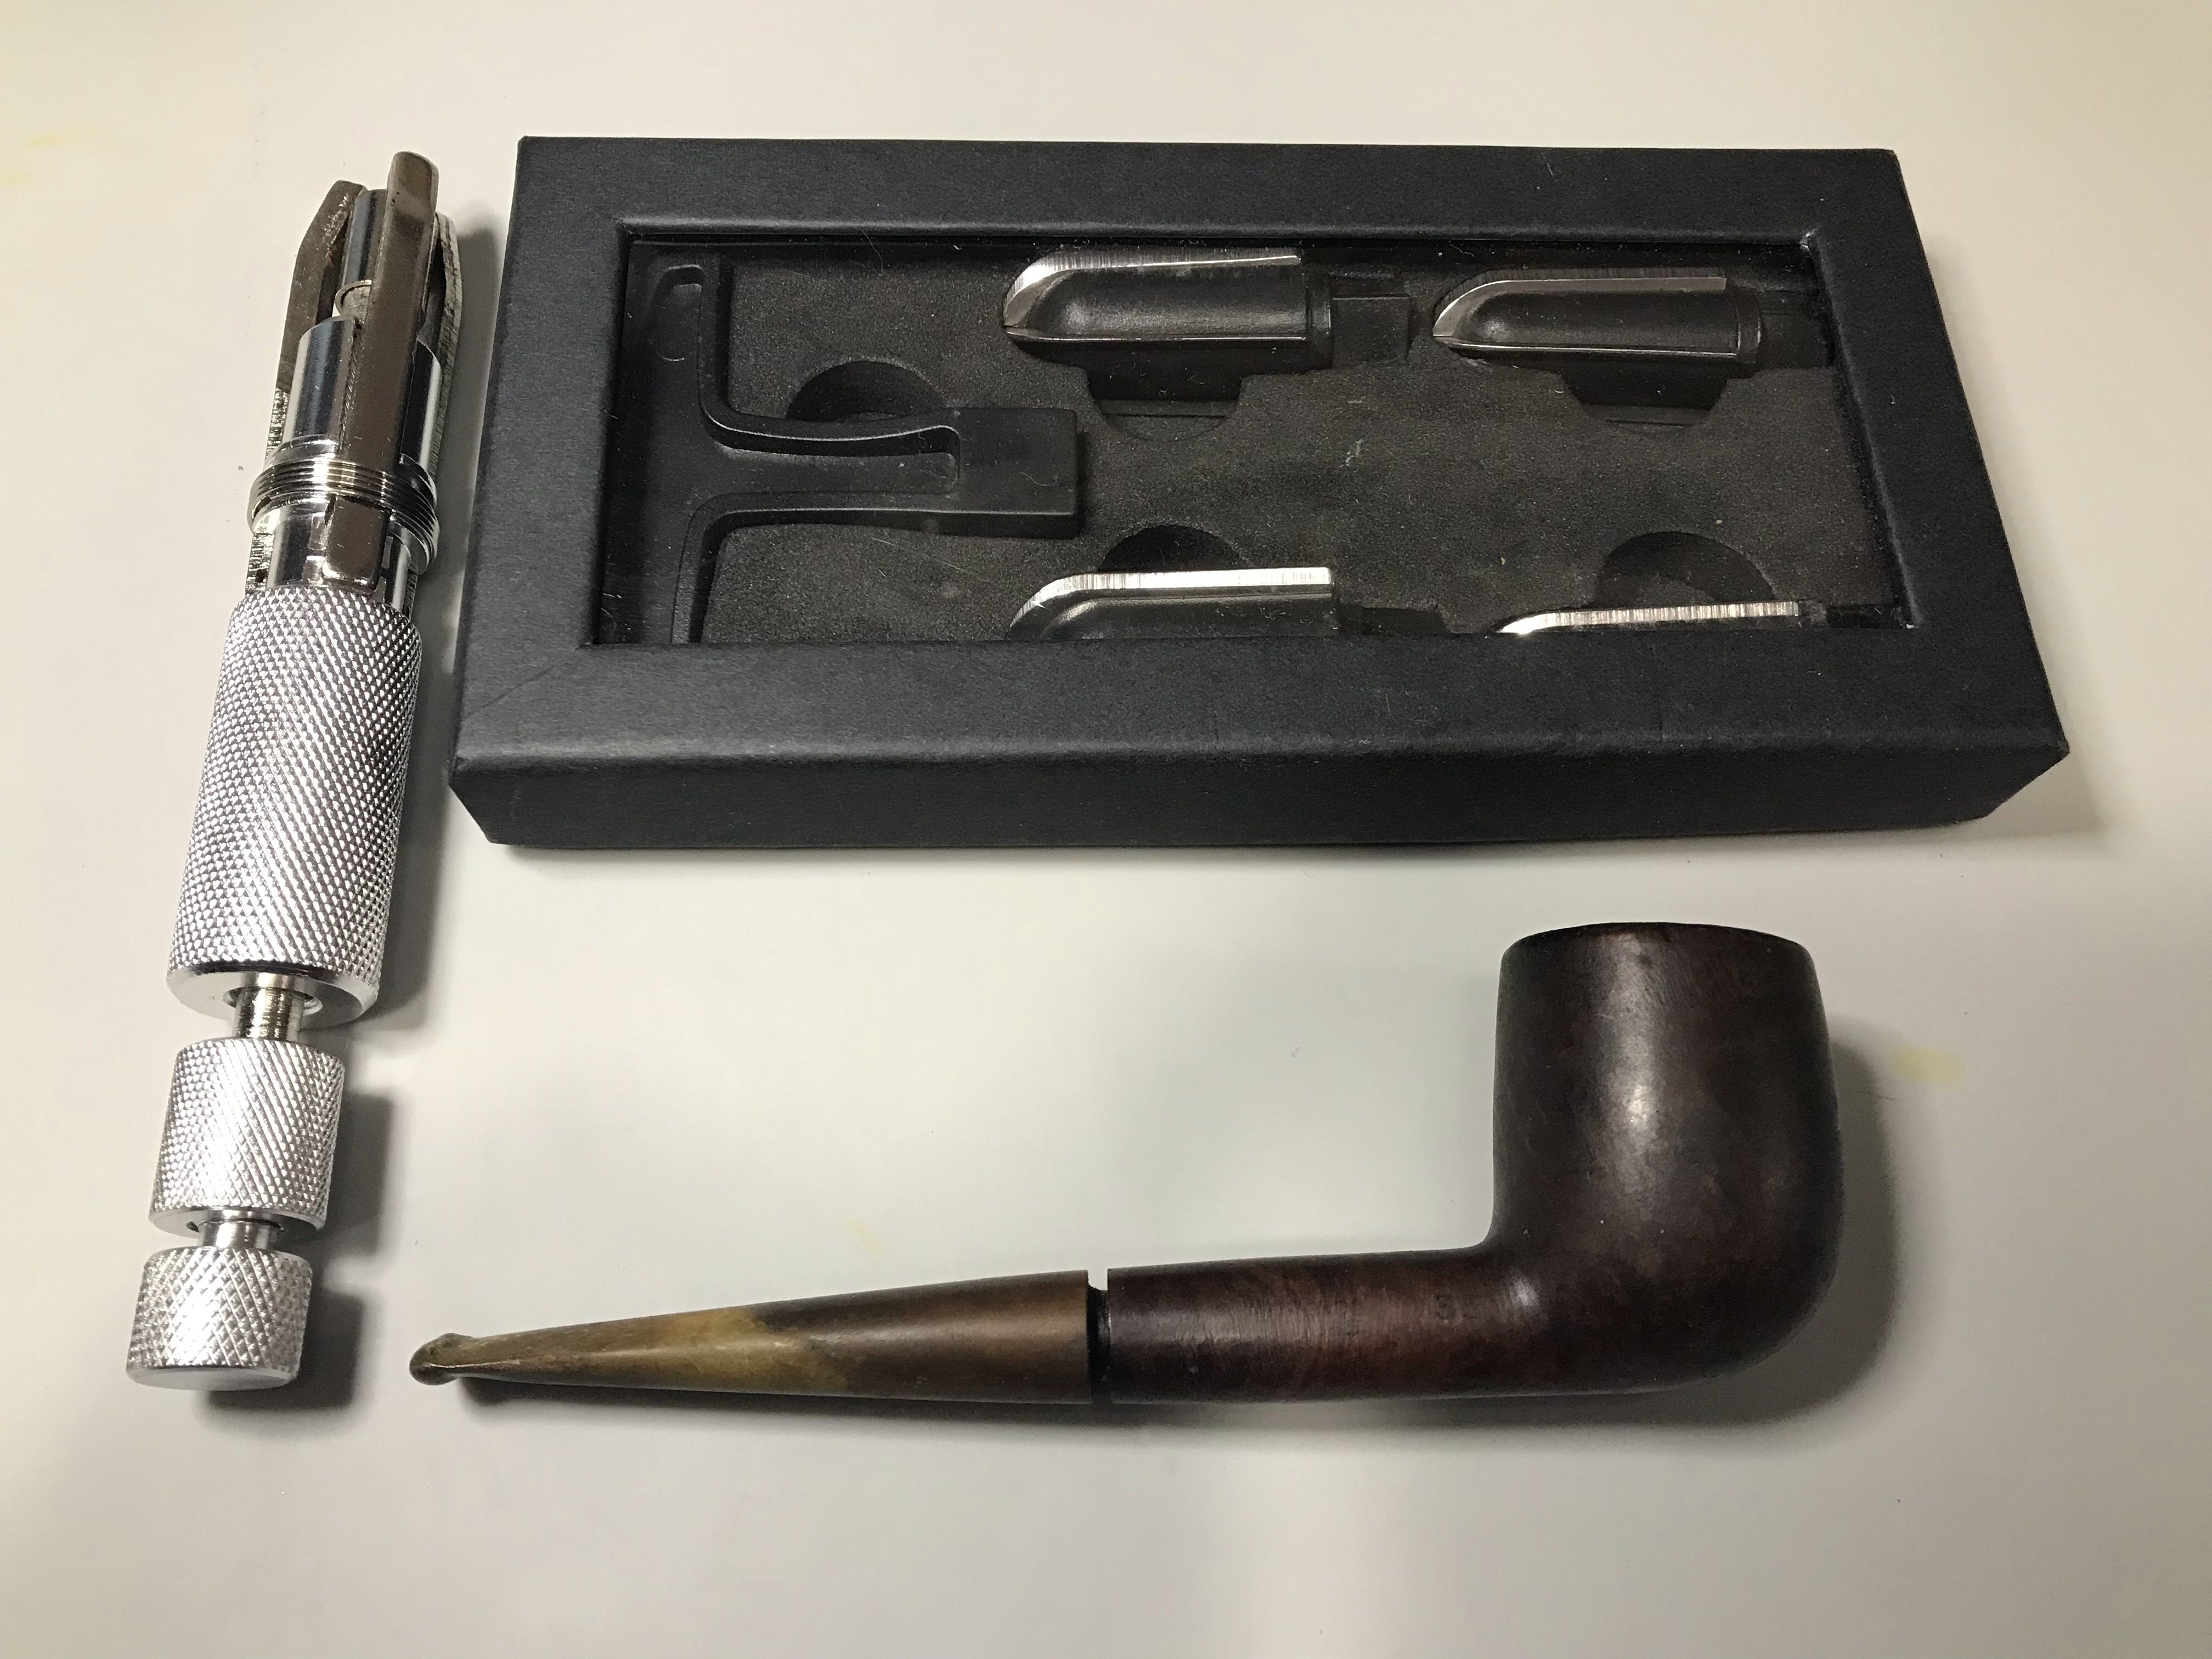
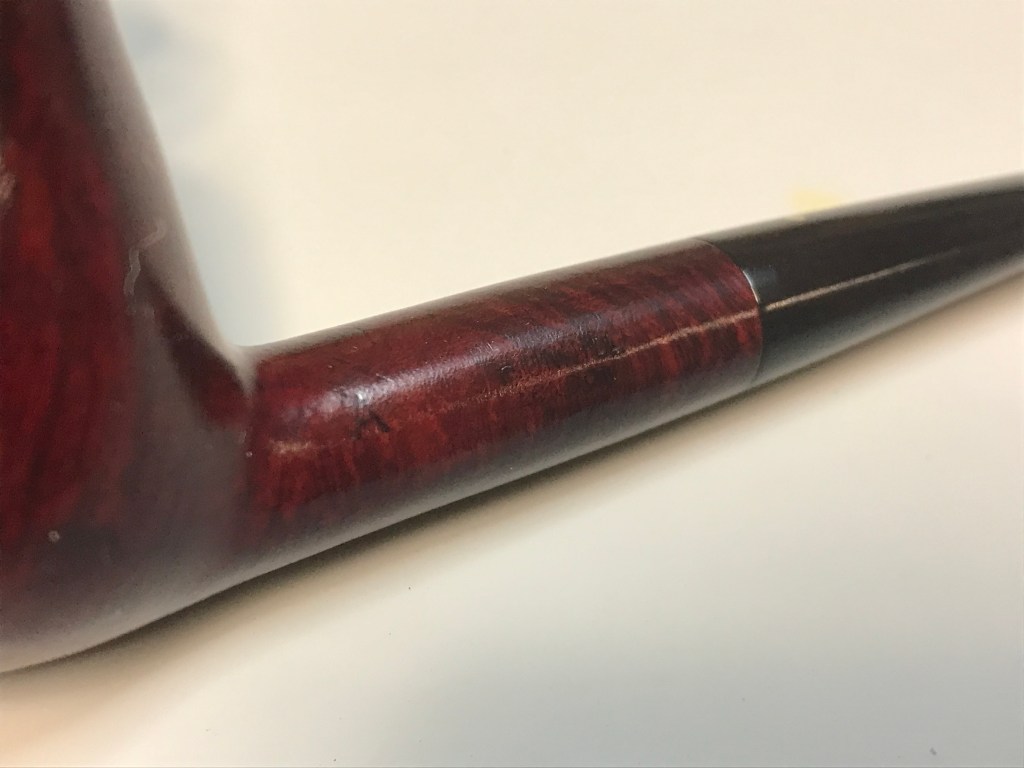
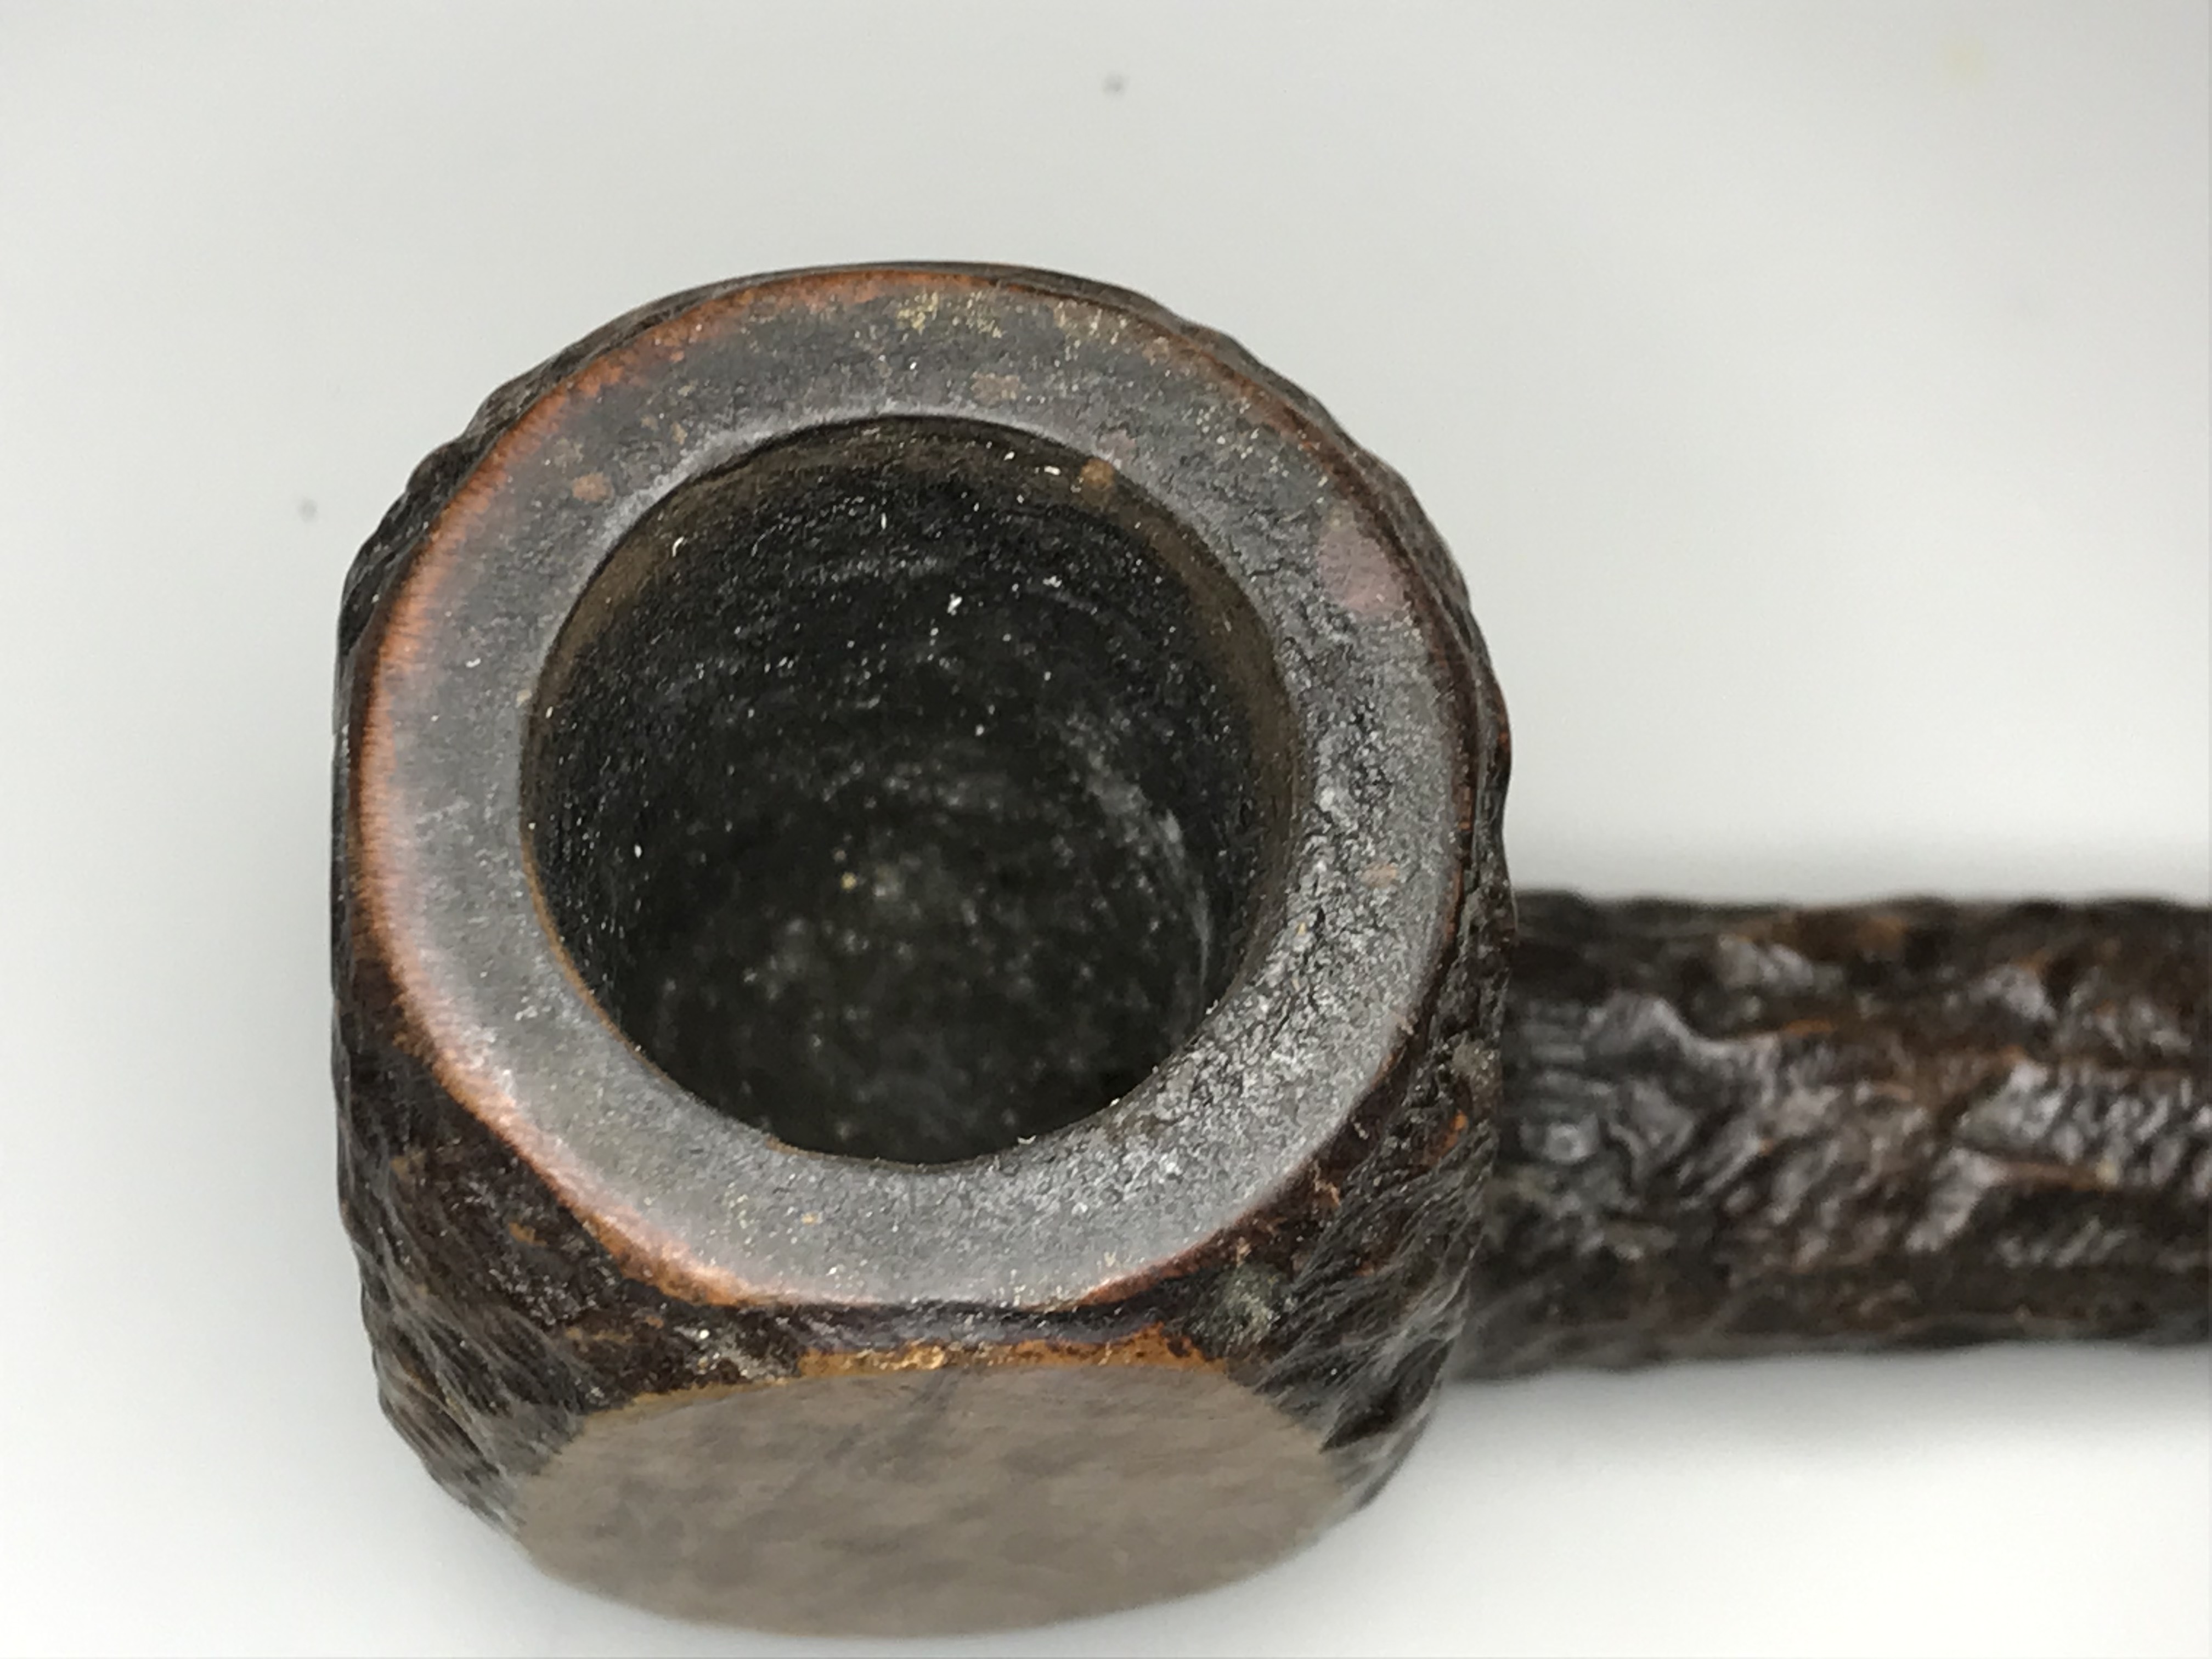
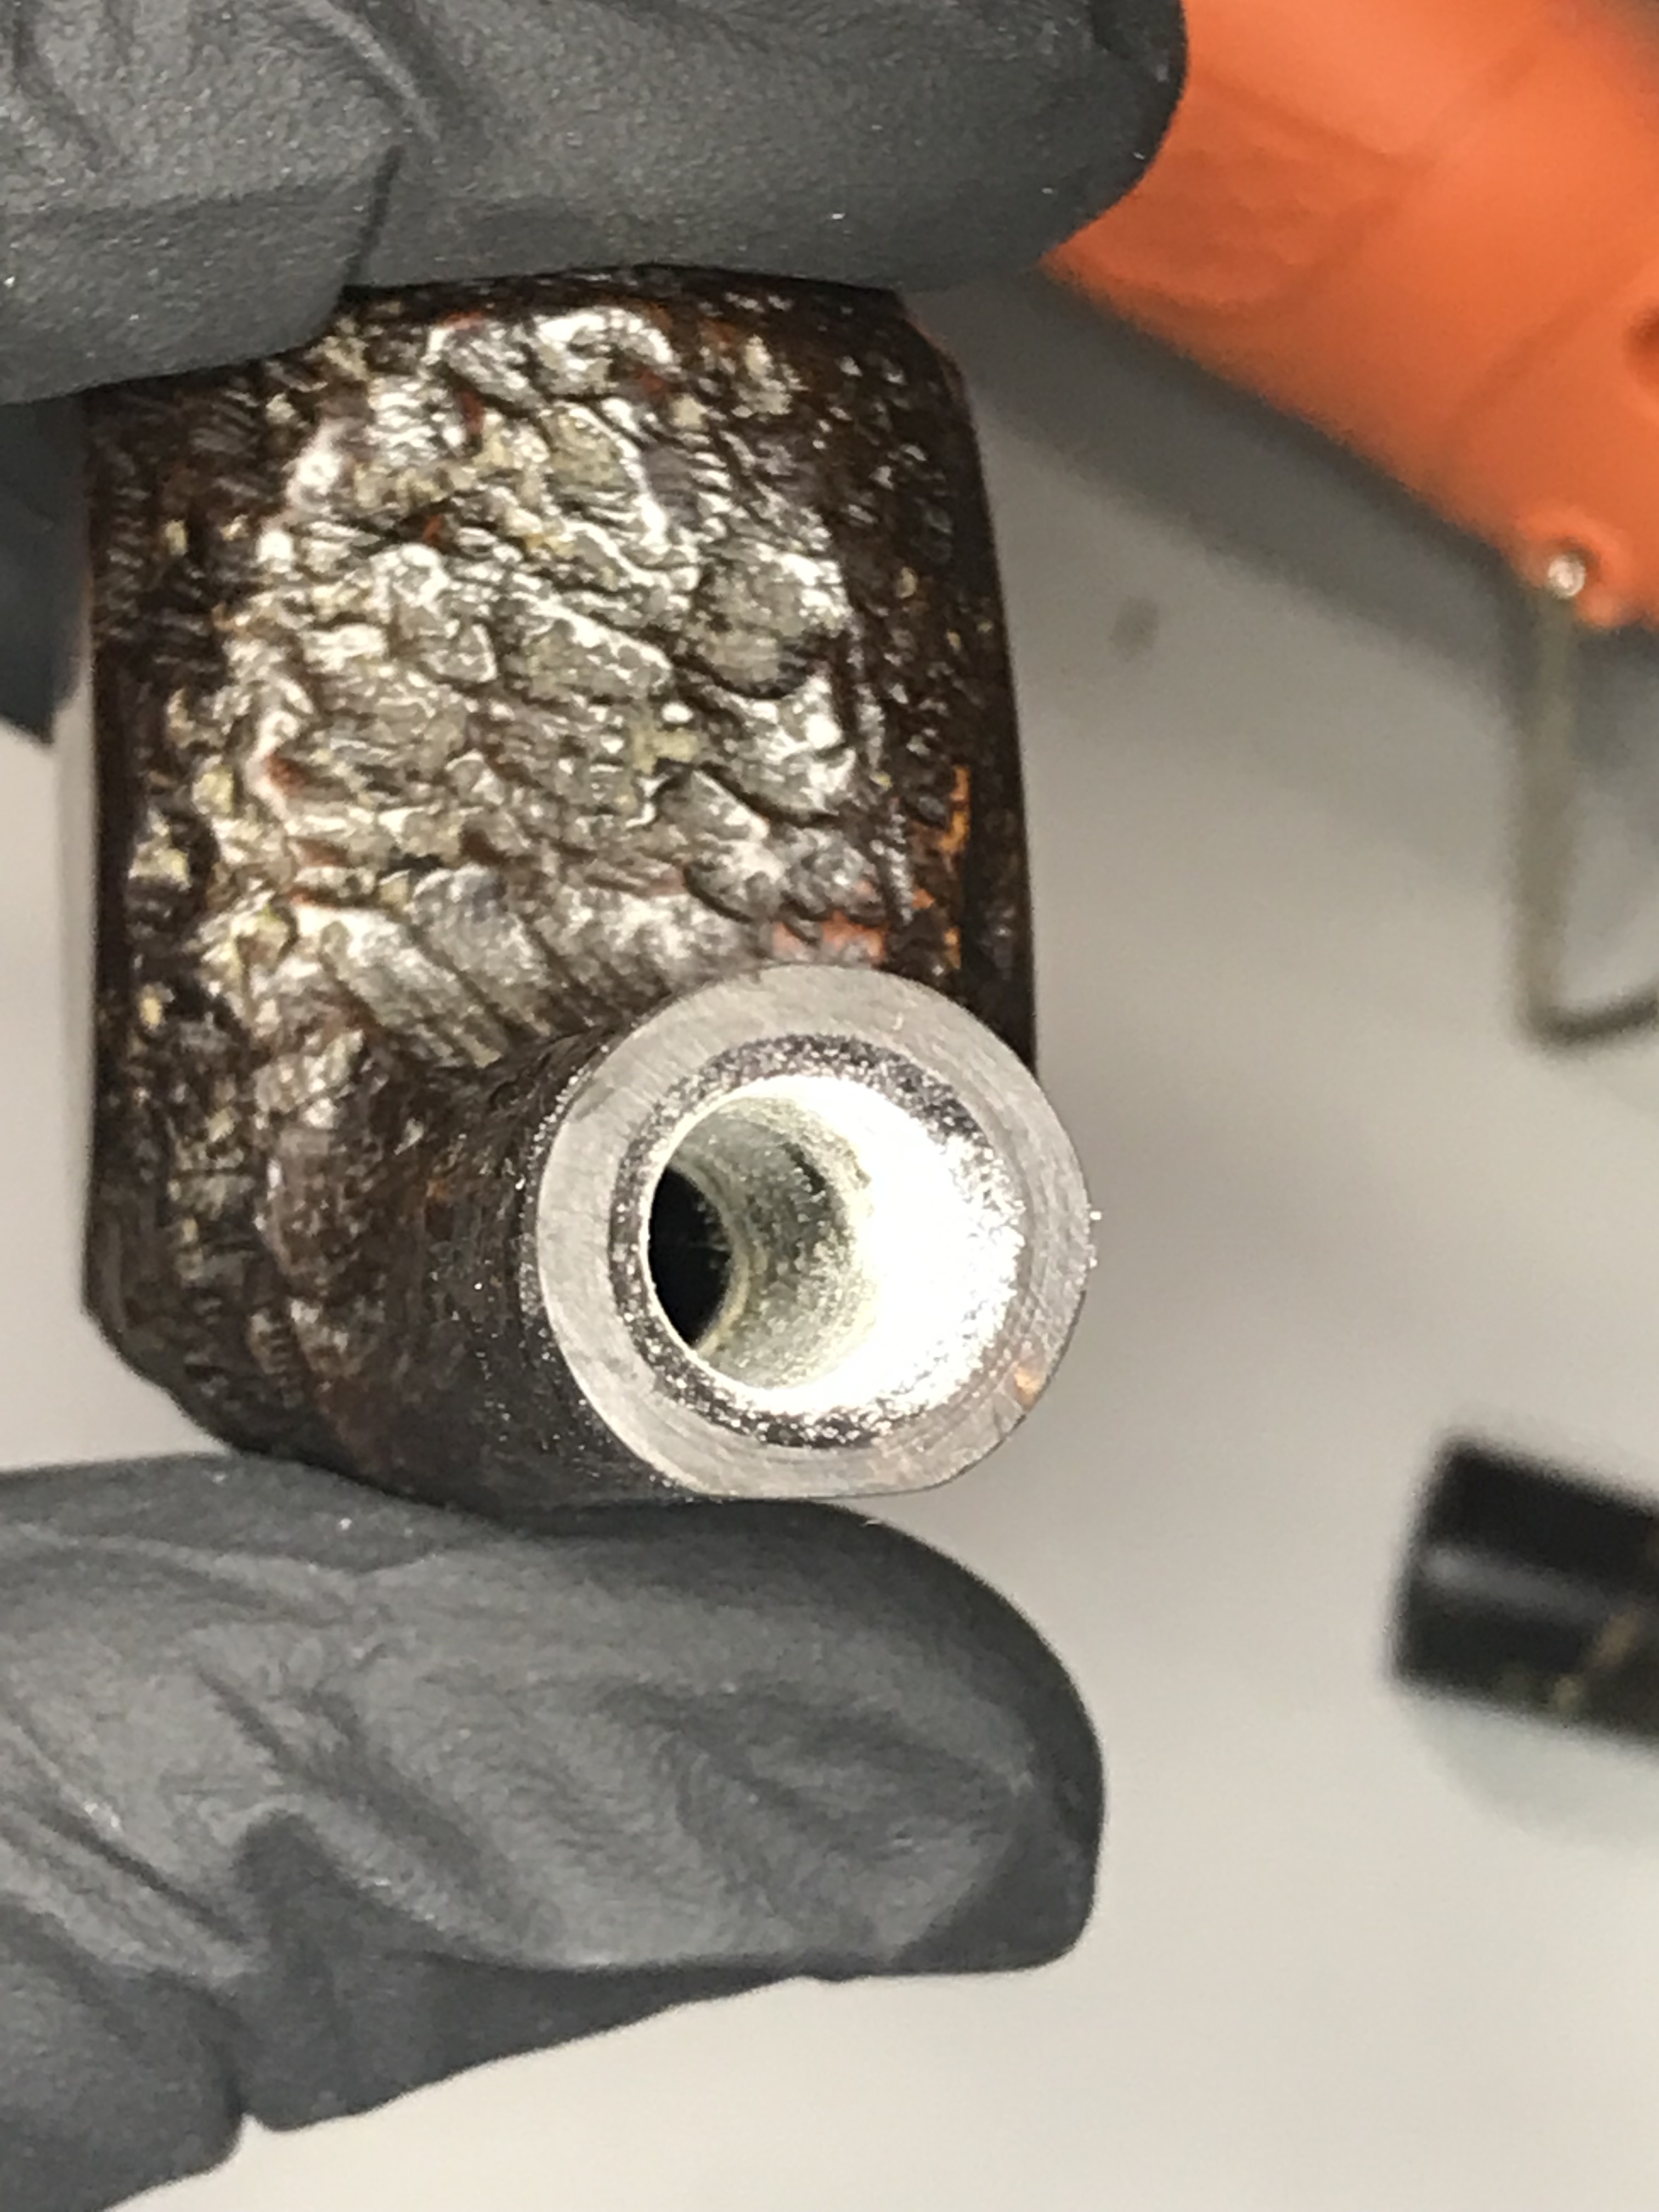
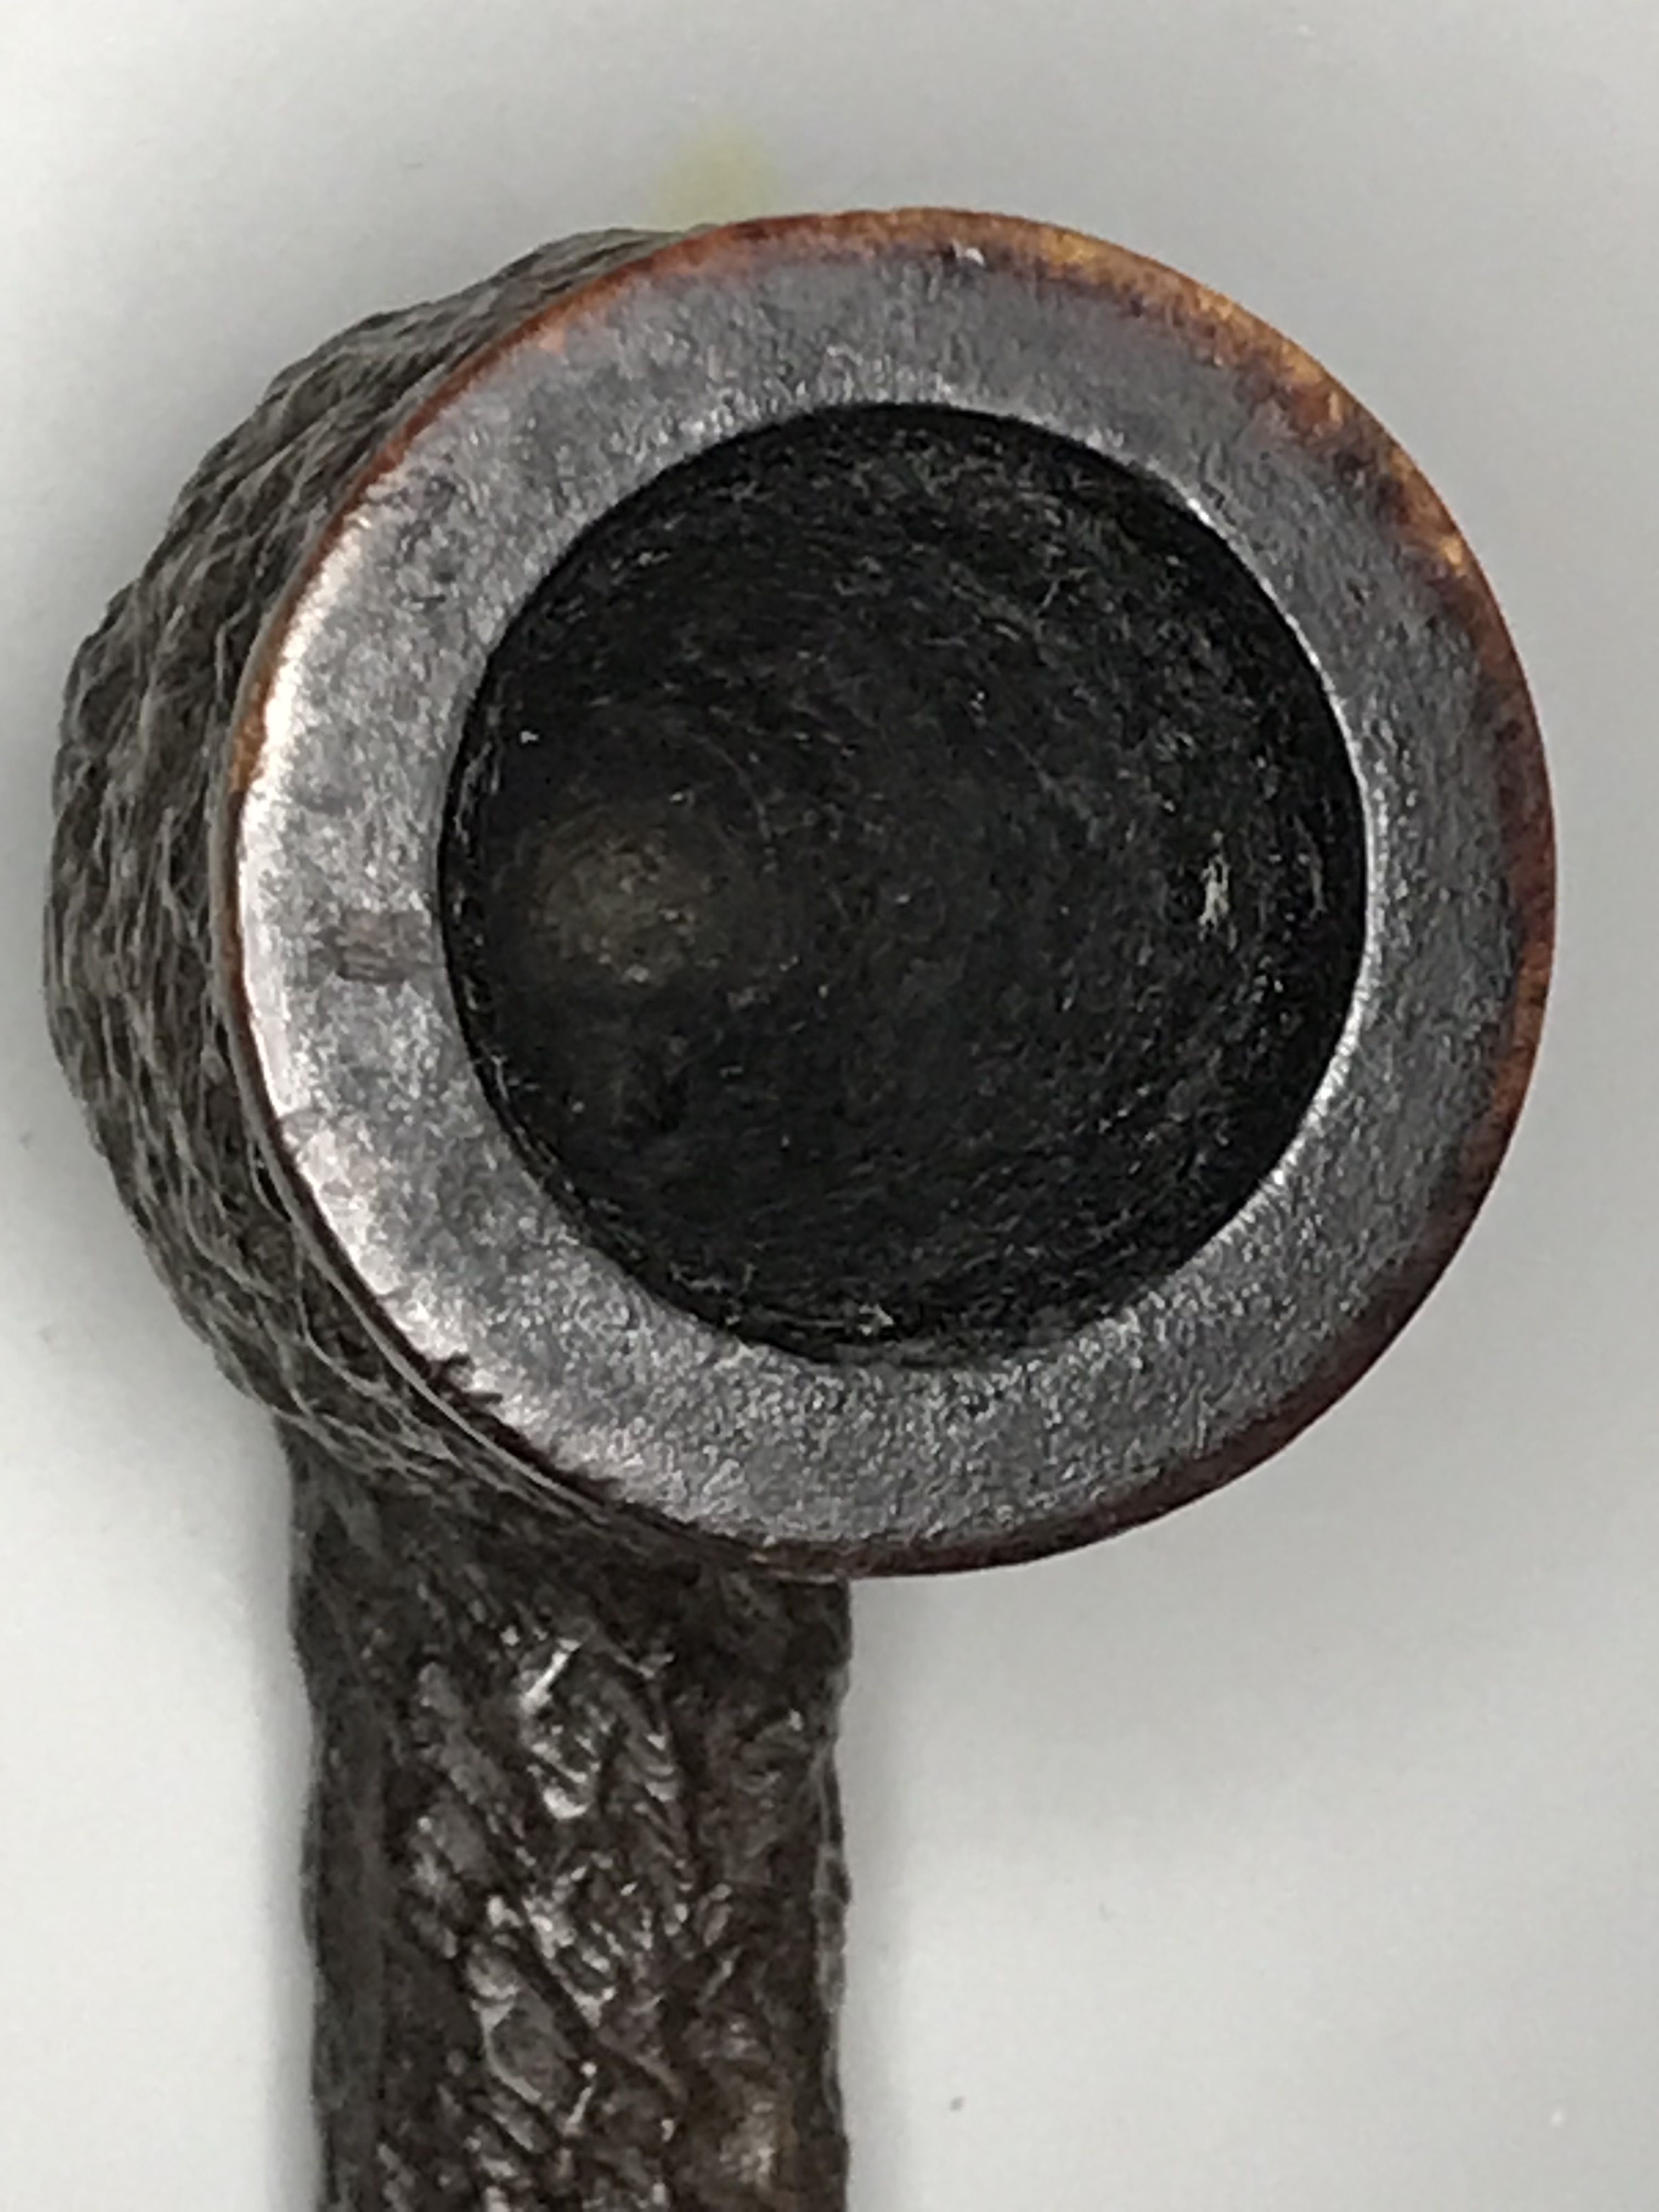
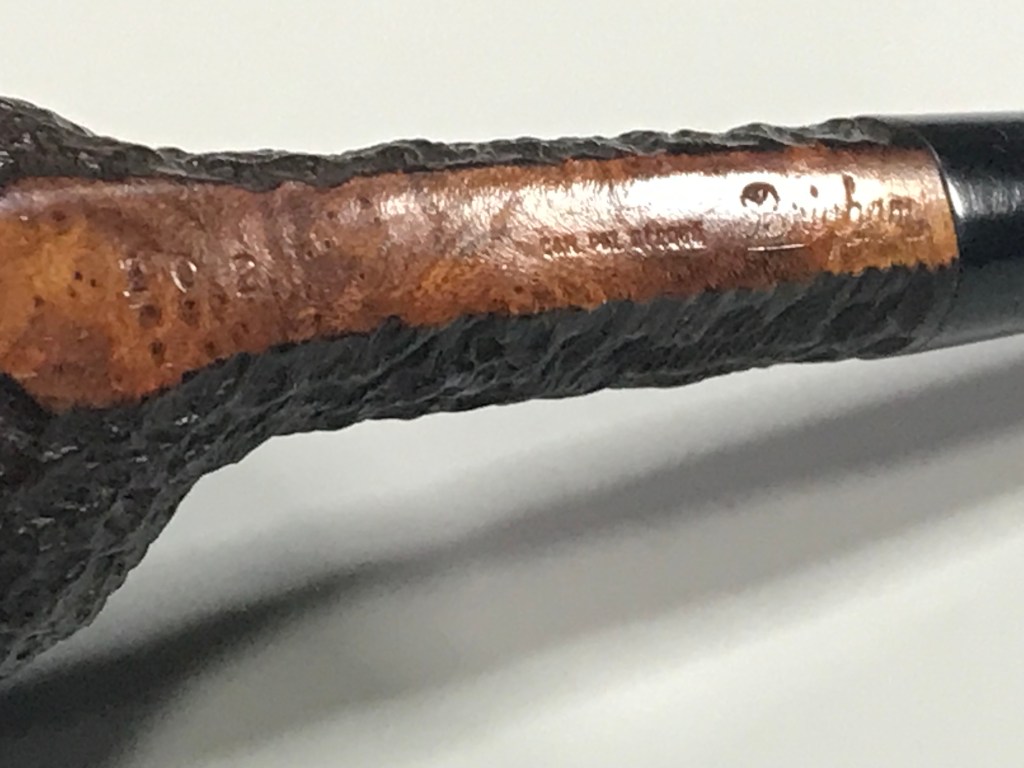
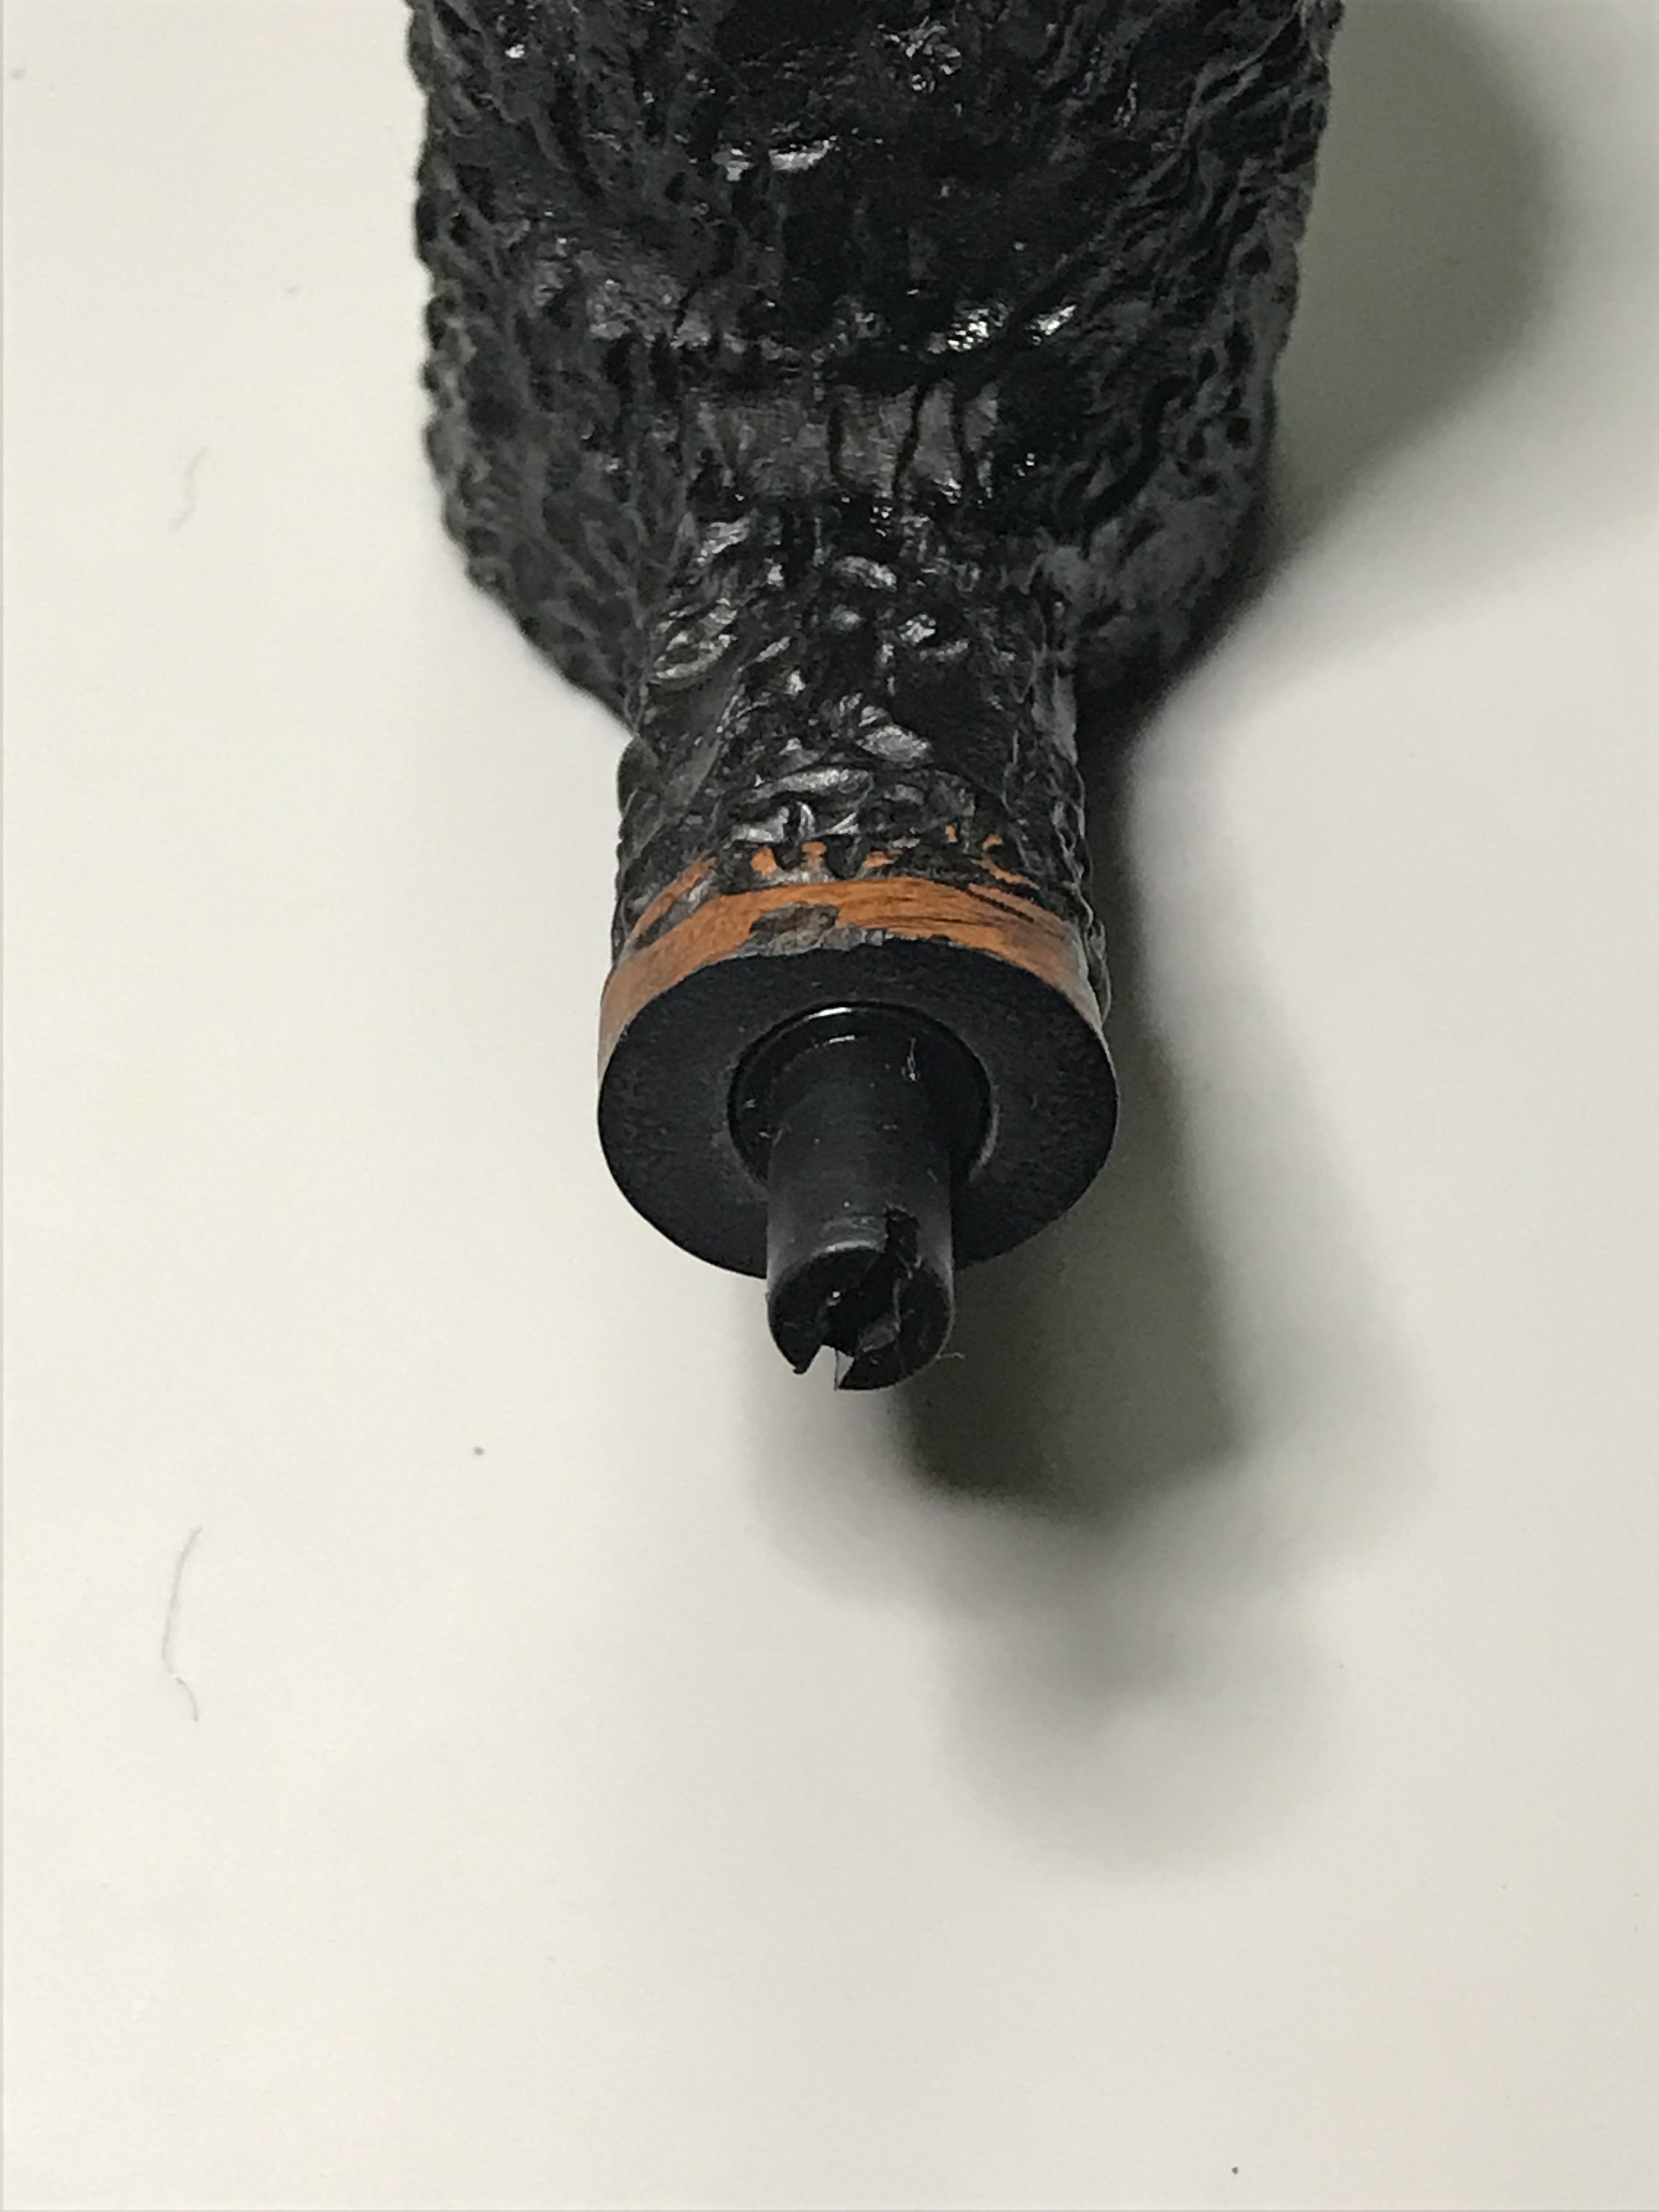
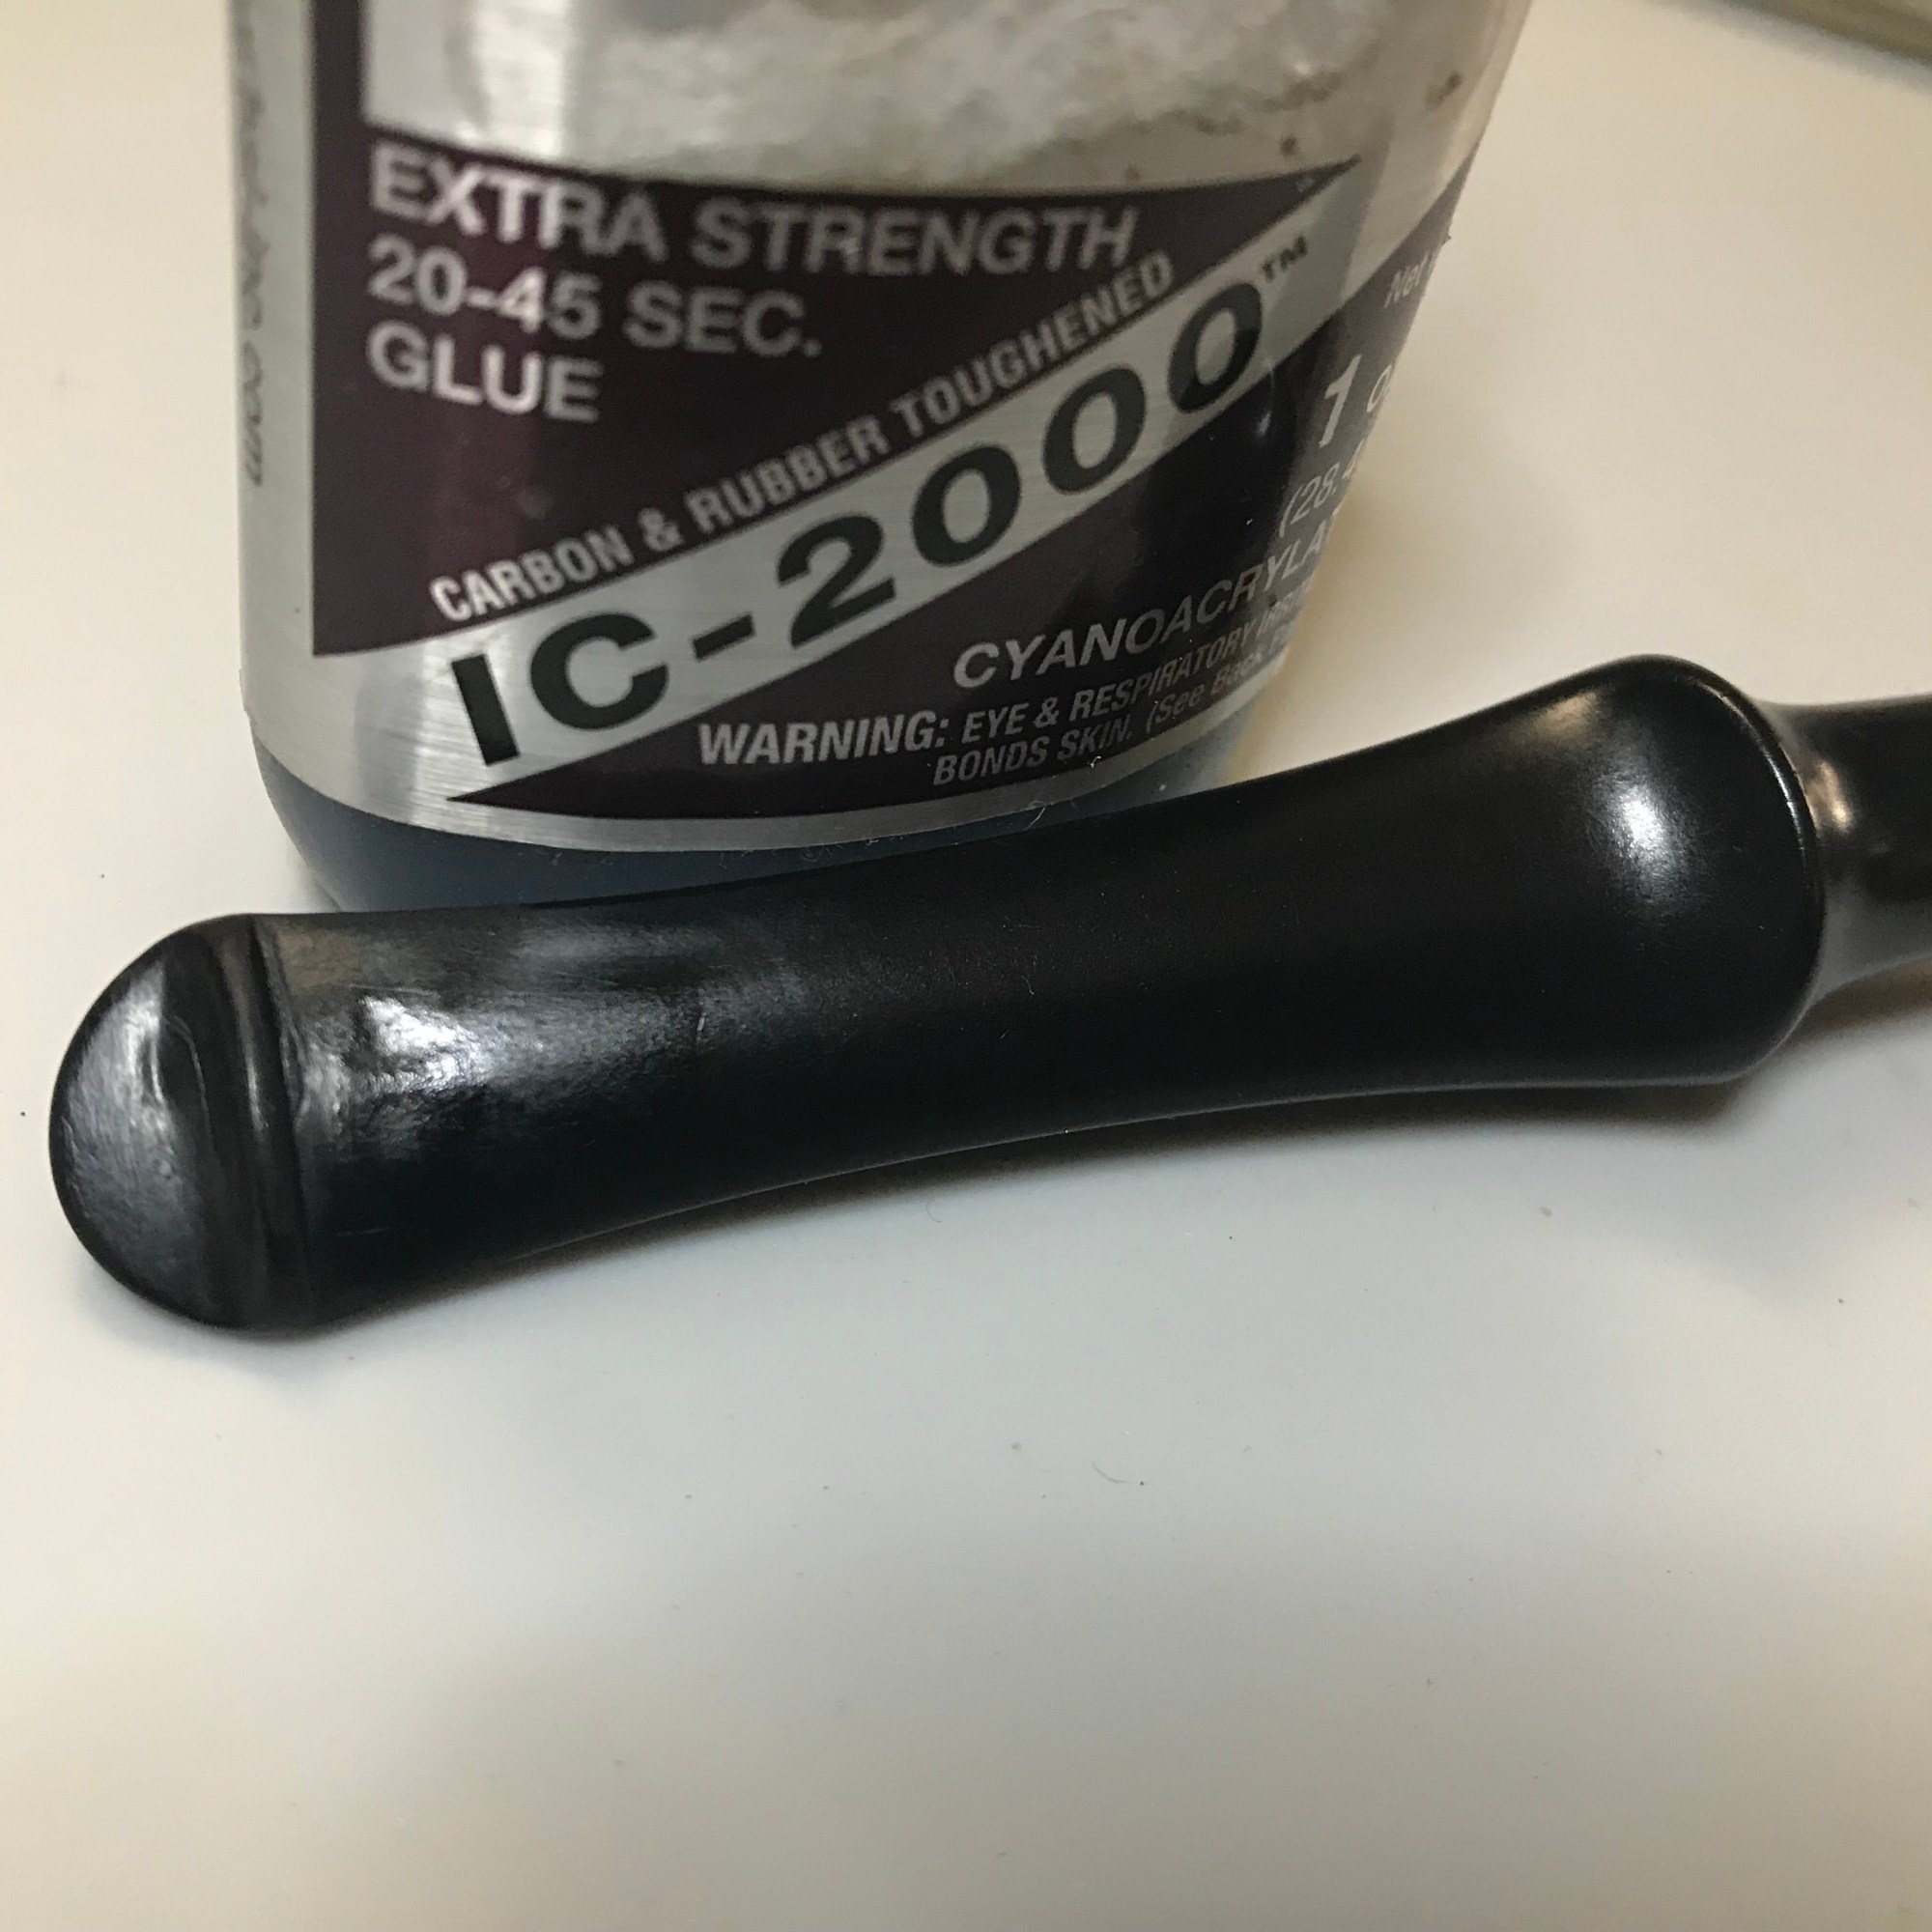
This pipe came to me with a myriad of issues to correct. Some of the obvious ones were the rim that had been damaged and rounded off. The nomenclature cannot be corrected but it can be enhanced after a good cleaning and should be visible after buffing. The sterling silver band was very tarnished but completely salvageable. The internals had some very thick tar buildup in the cooling chamber of the mortise, very common I have found with well loved Petersons. I will ream the mortise as well as the draught hole and tobacco chamber before sanitizing.
The old that is strong does not wither, Deep roots are not reach by the frost.
J.R.R. Tolkien, The Fellowship of the Ring
Dating
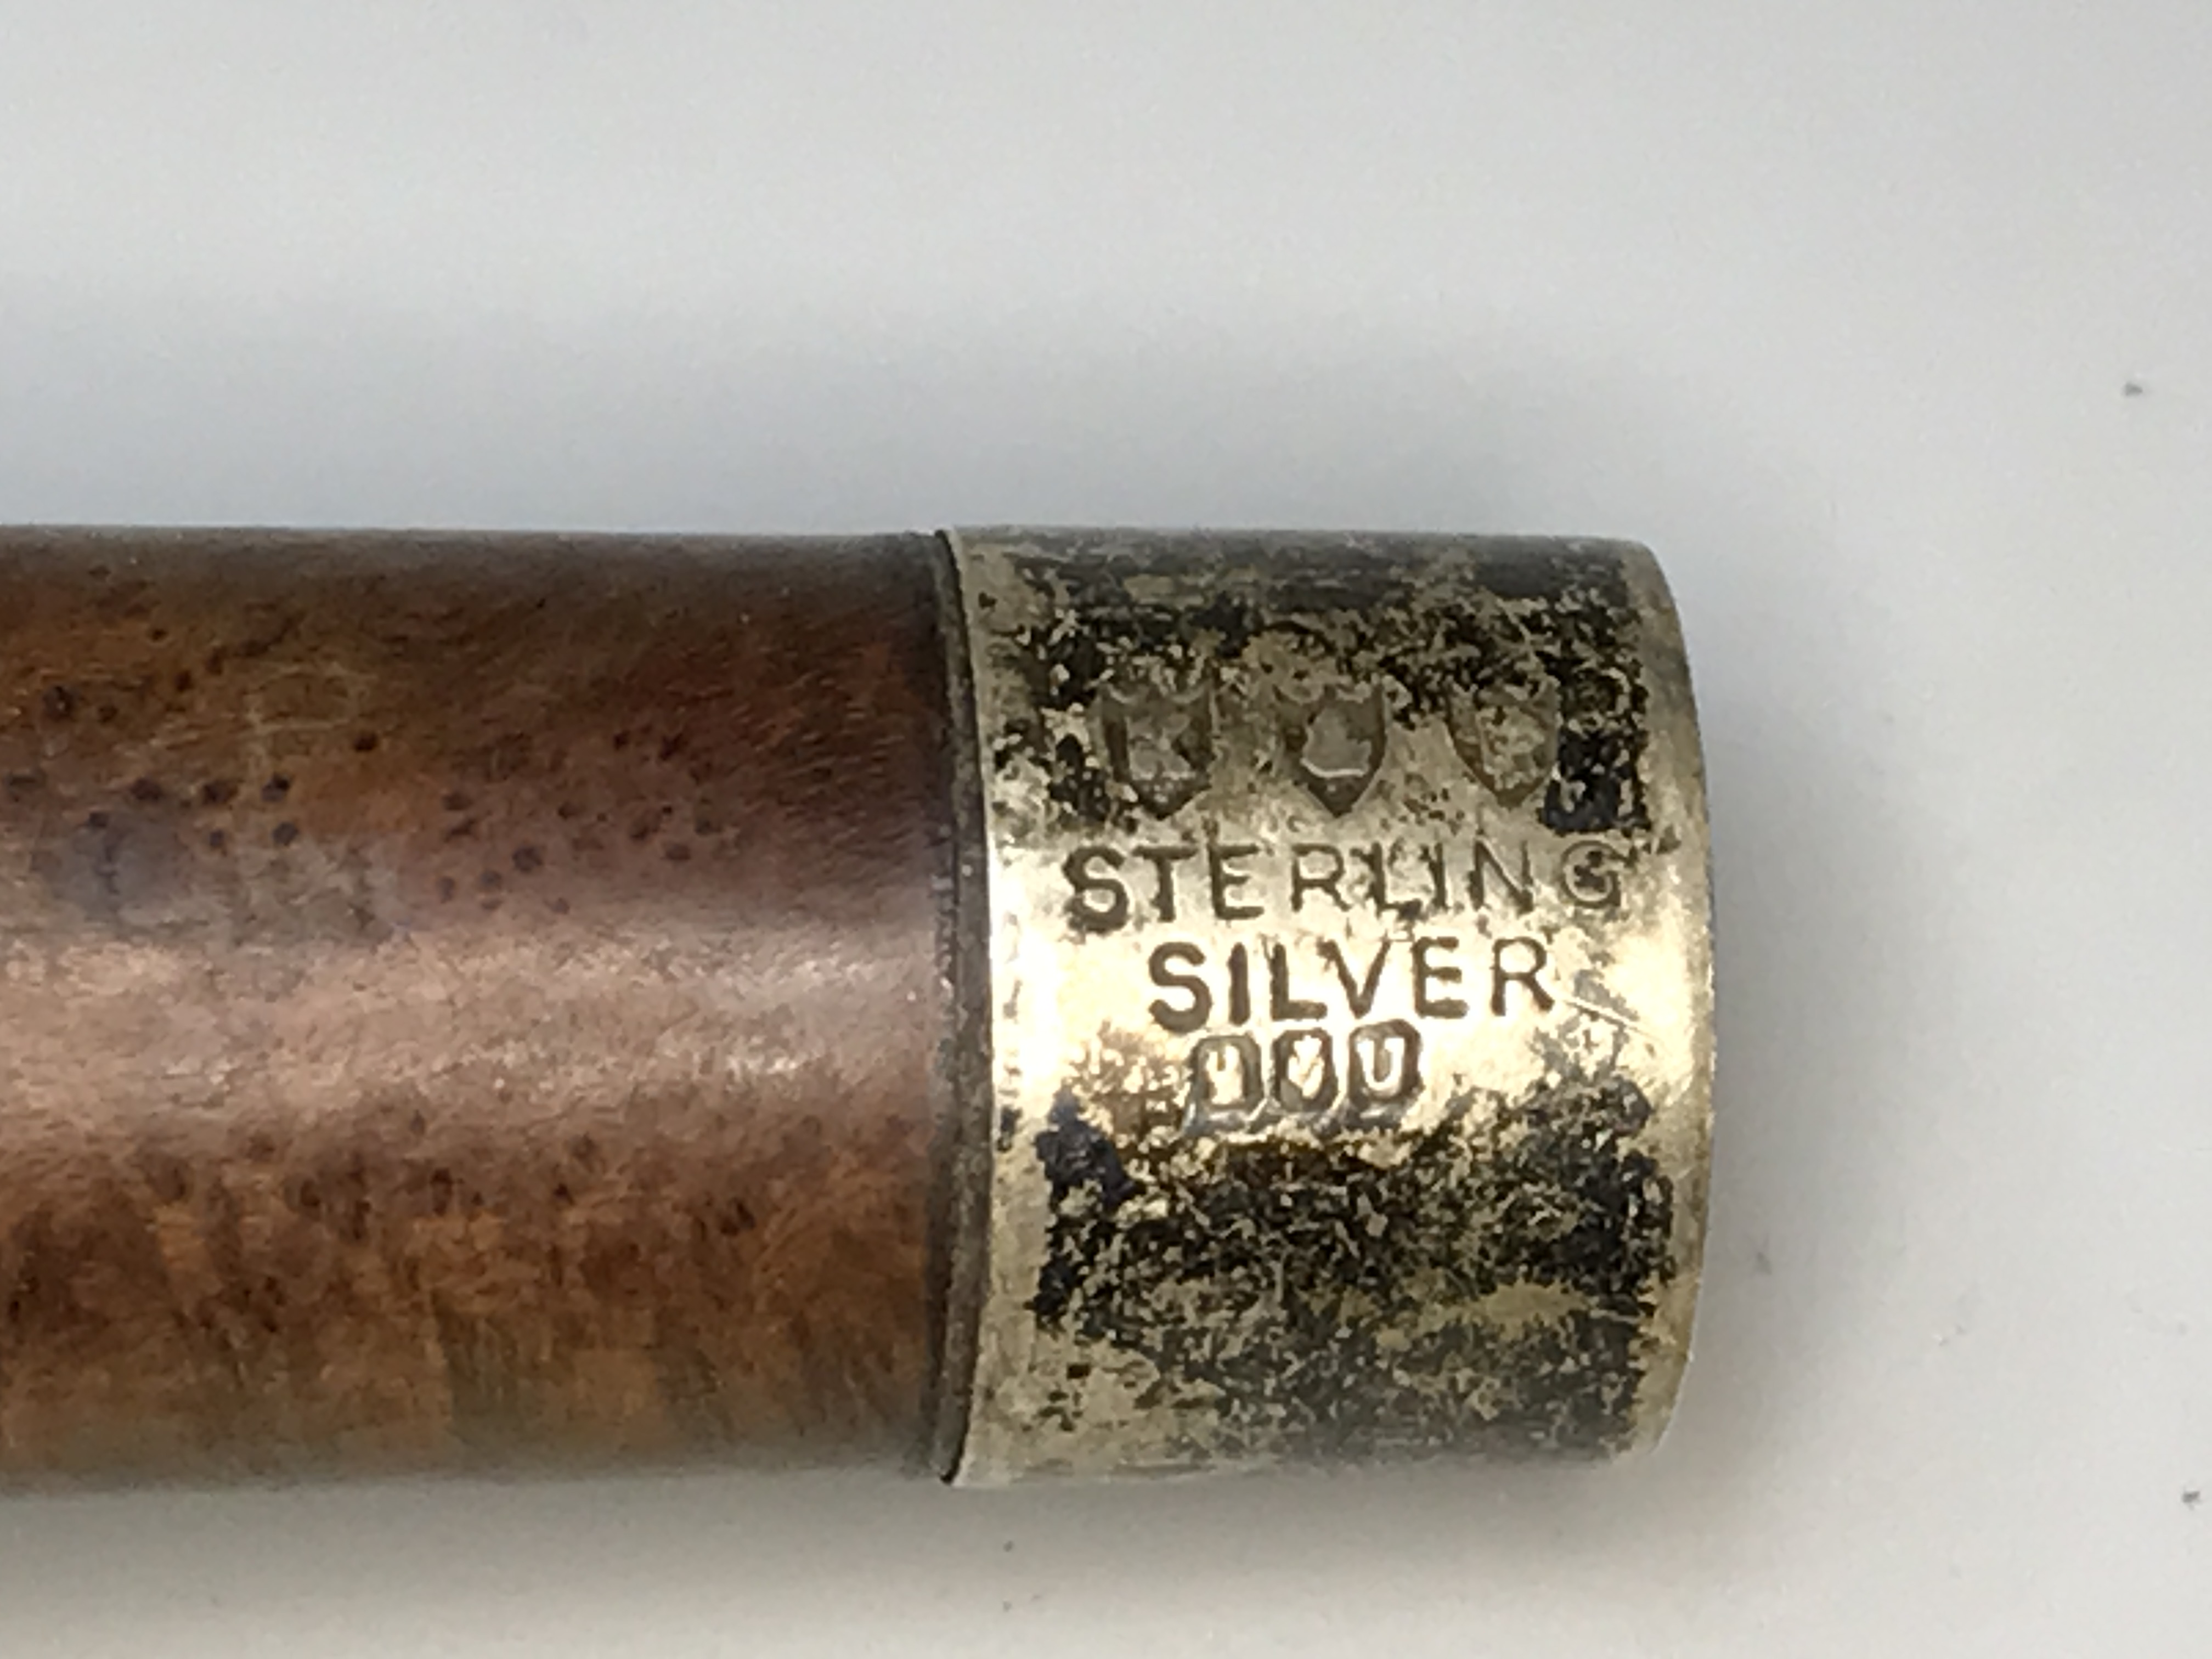
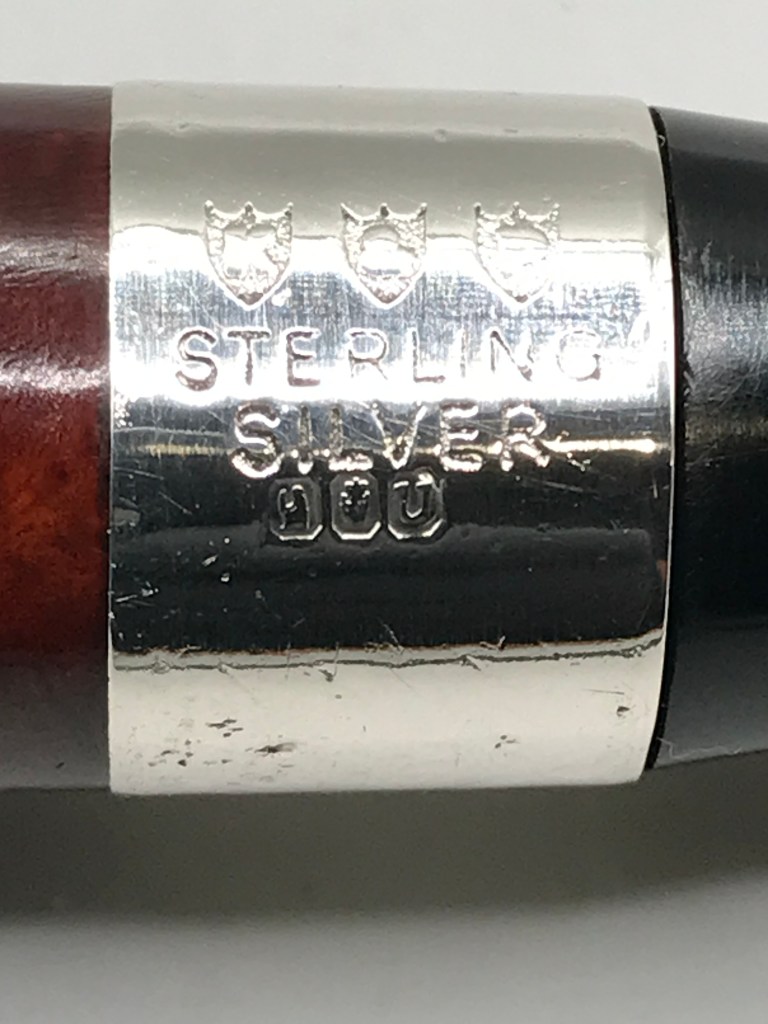
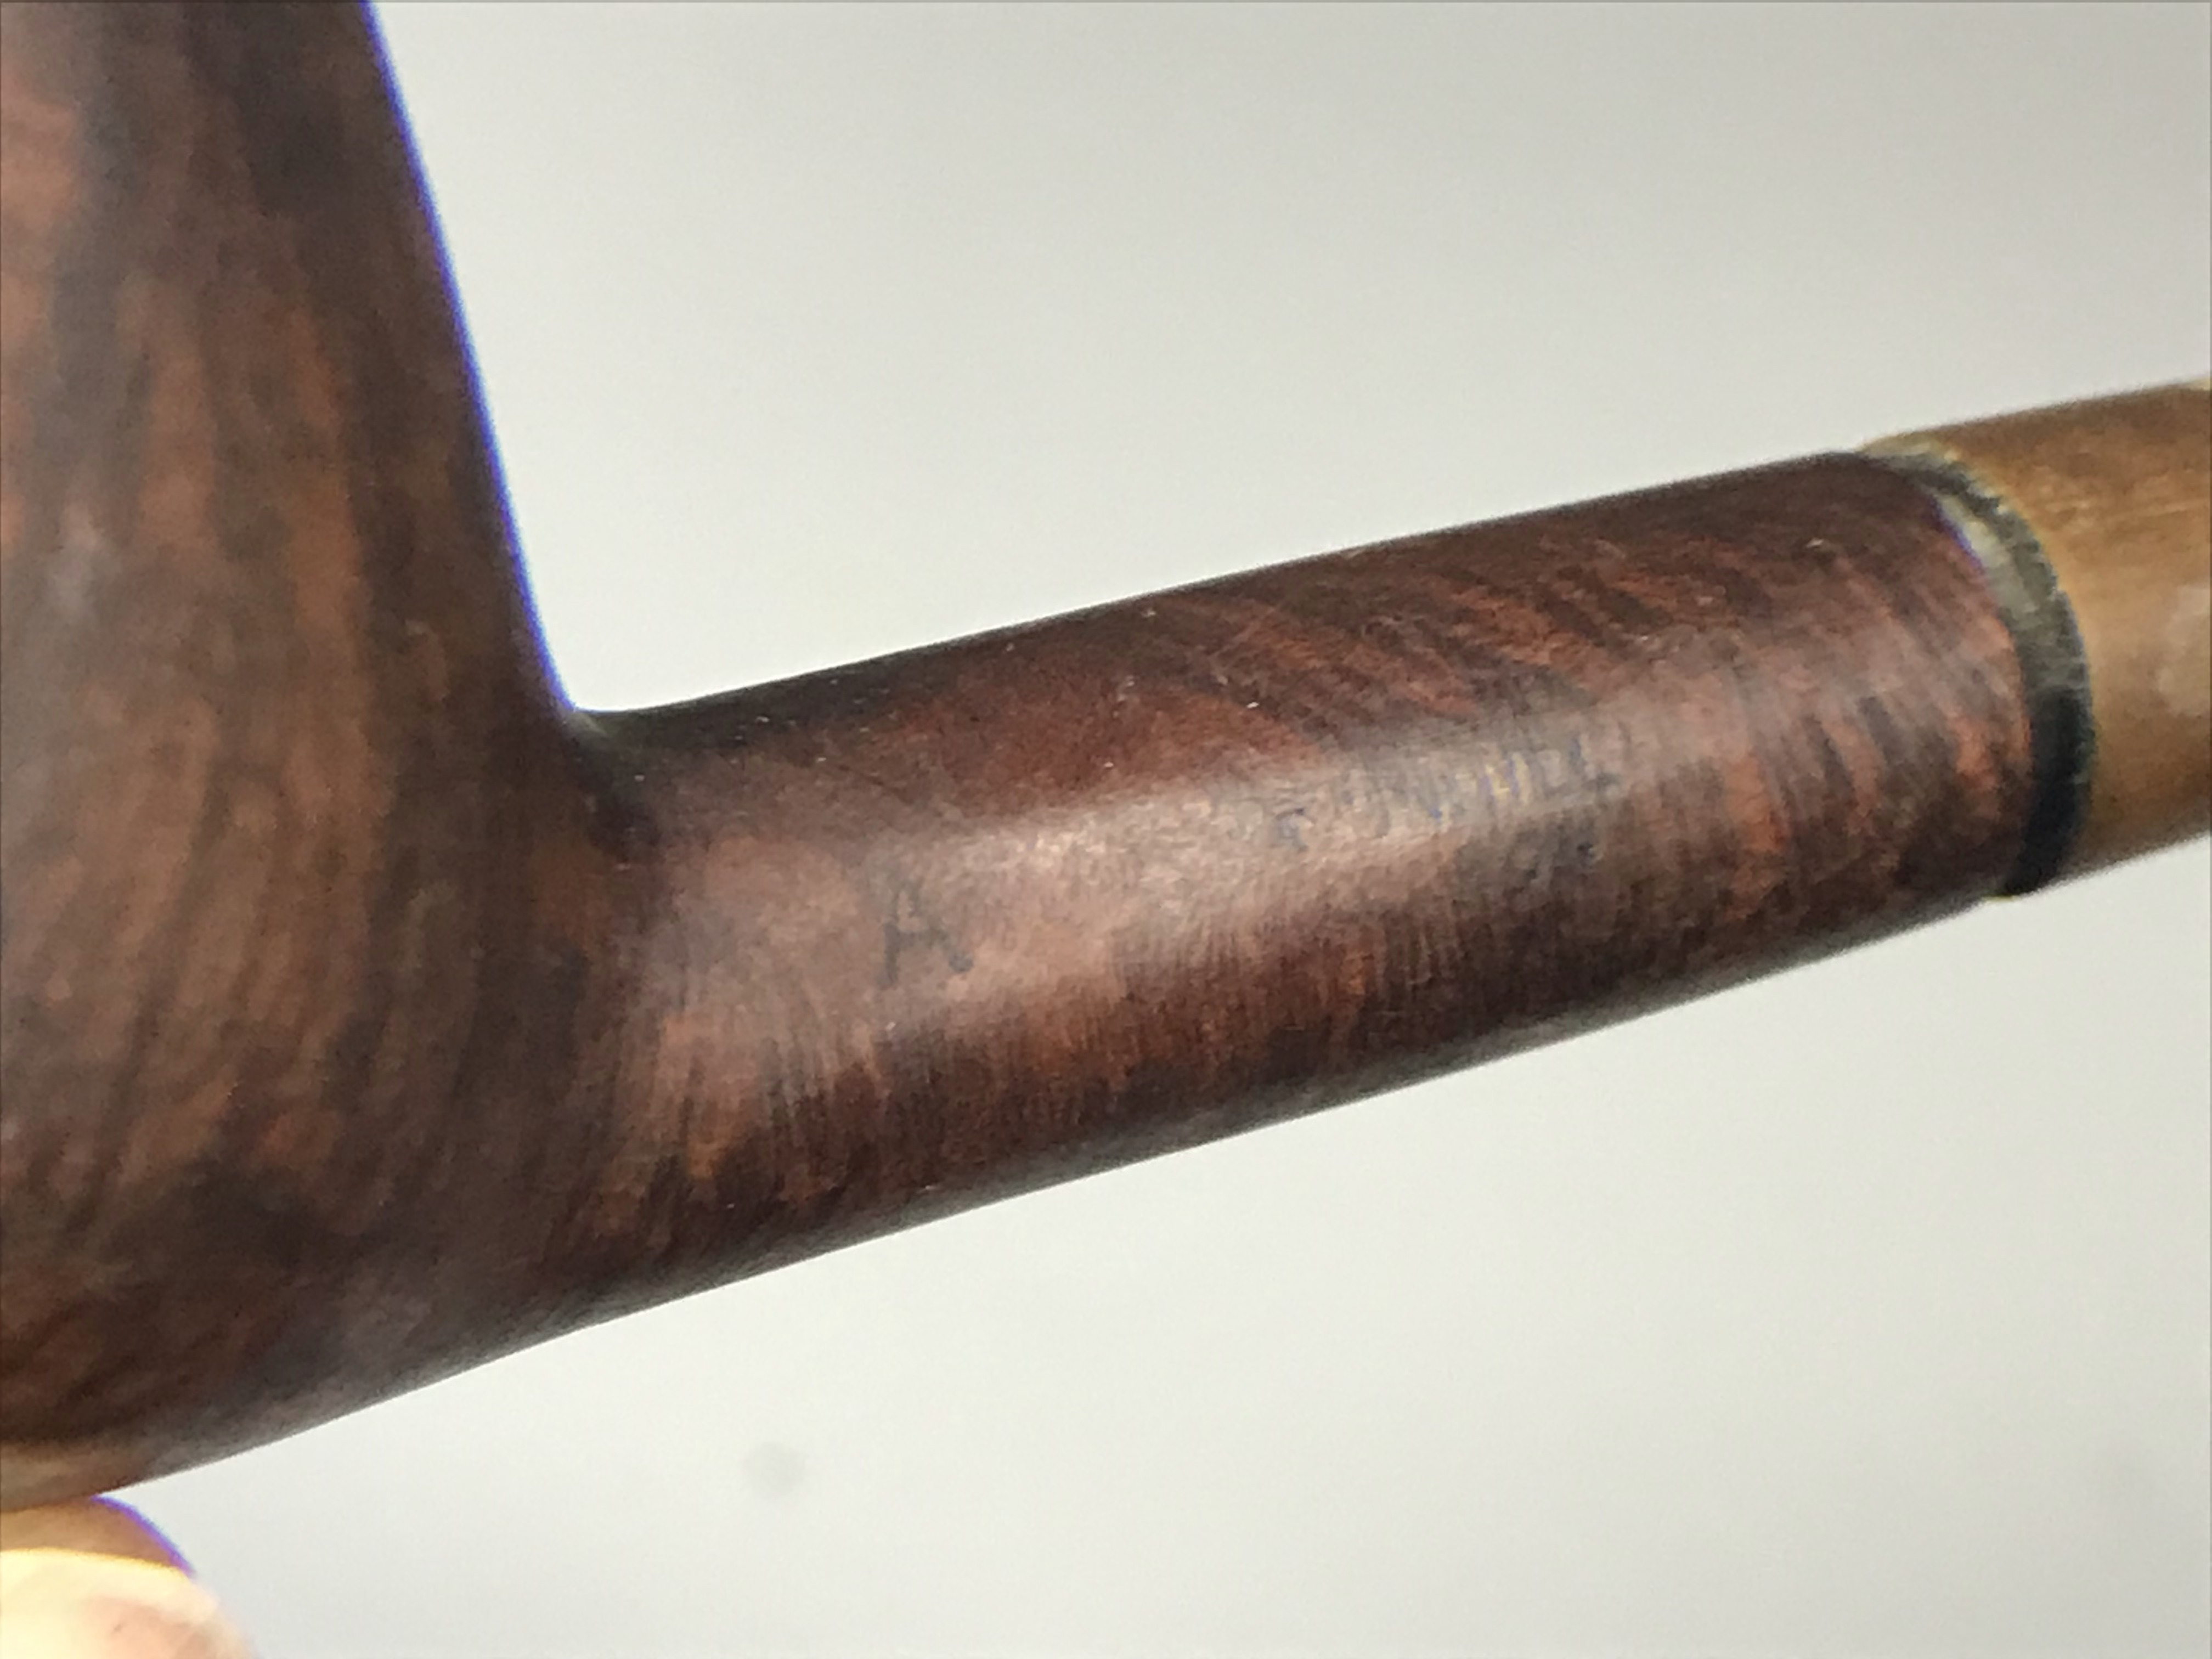
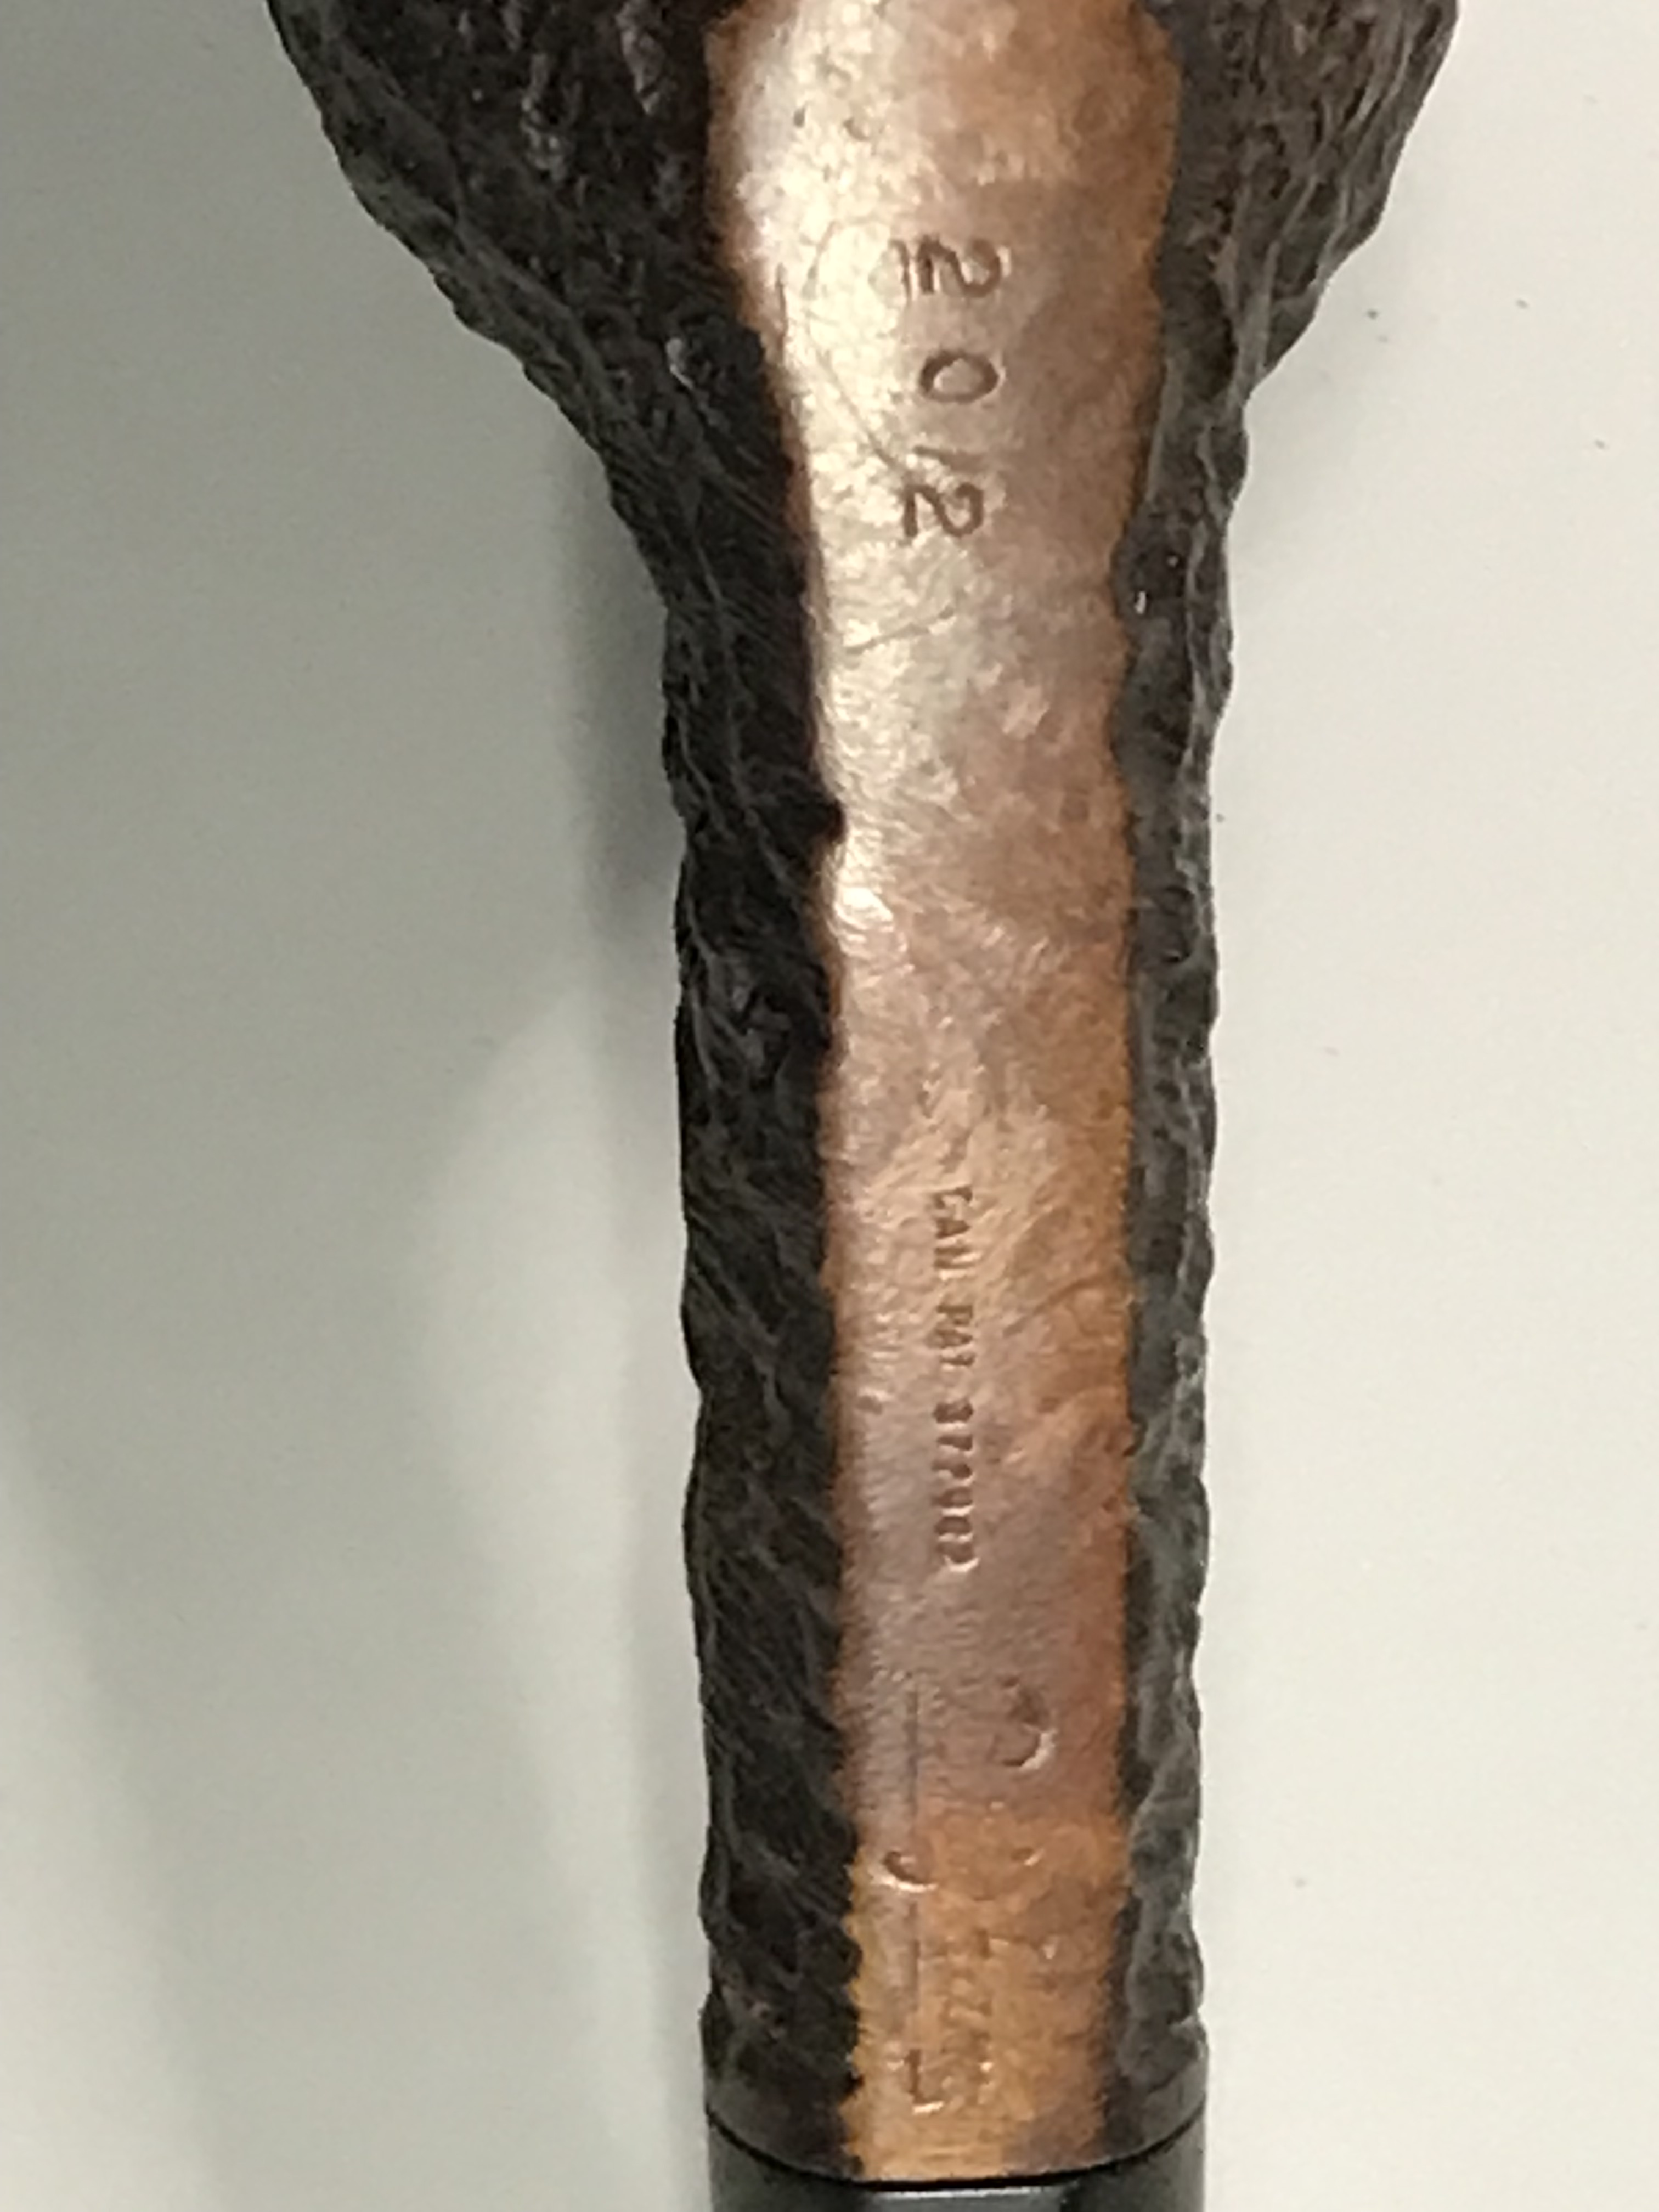
Visible on the sterling silver band are the hallmarks to determine when the silver band was made and therefore you can assume the pipe was made within that same year. Based on the lower case “u” and the shape of the shield, this pipe was manufactured in 1985.
Rim Repair
In this restoration, I wanted to focus on my method for restoring the rim of a pipe that has been damaged.
First I place the bowl rim down on some sandpaper and sand the rim of the bowl removing any charring so I can see where the primary repair areas are.
Next I laminate some scrap sandpaper with packing tape to create a non stick surface for the wood filler I’m going to make. I’m using the laminated sandpaper to act as a form to follow the lines of the bowl to get the correct profile. Once I have the form in place I use zip ties to ensure the form is tight to side of the pipe.
I use a mixture of thin CA Glue and briar dust to create a high viscosity wood filler and apply it to the damaged area. Once completed I apply vibration to the stummel to encourage the wood filler to settle into the form.
Once the CA Glue has cured, its very simple to peel the form away as the glue doesn’t stick to the tape I laminated the paper with. Afterwards I’m left with a repair that follows the profile of the pipe exactly. The only remaining task is to sand away the excess repair
From the ashes a fire shall be woken, A light from the shadows shall spring;
J.R.R. Tolkien, The Fellowship of the Ring
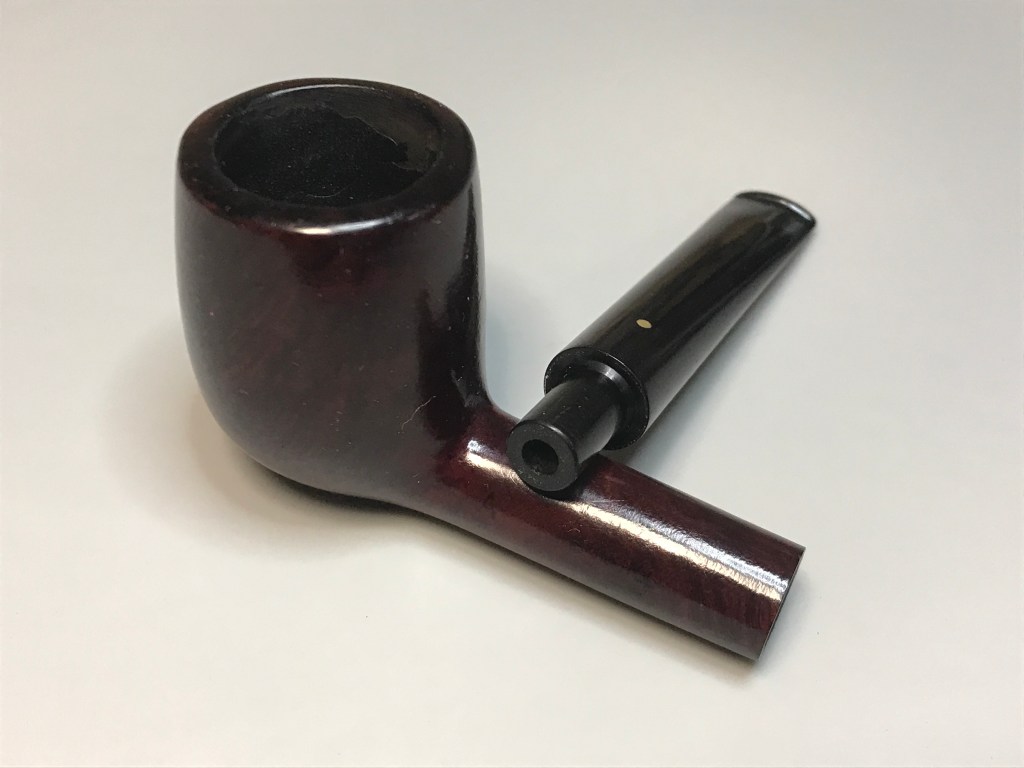
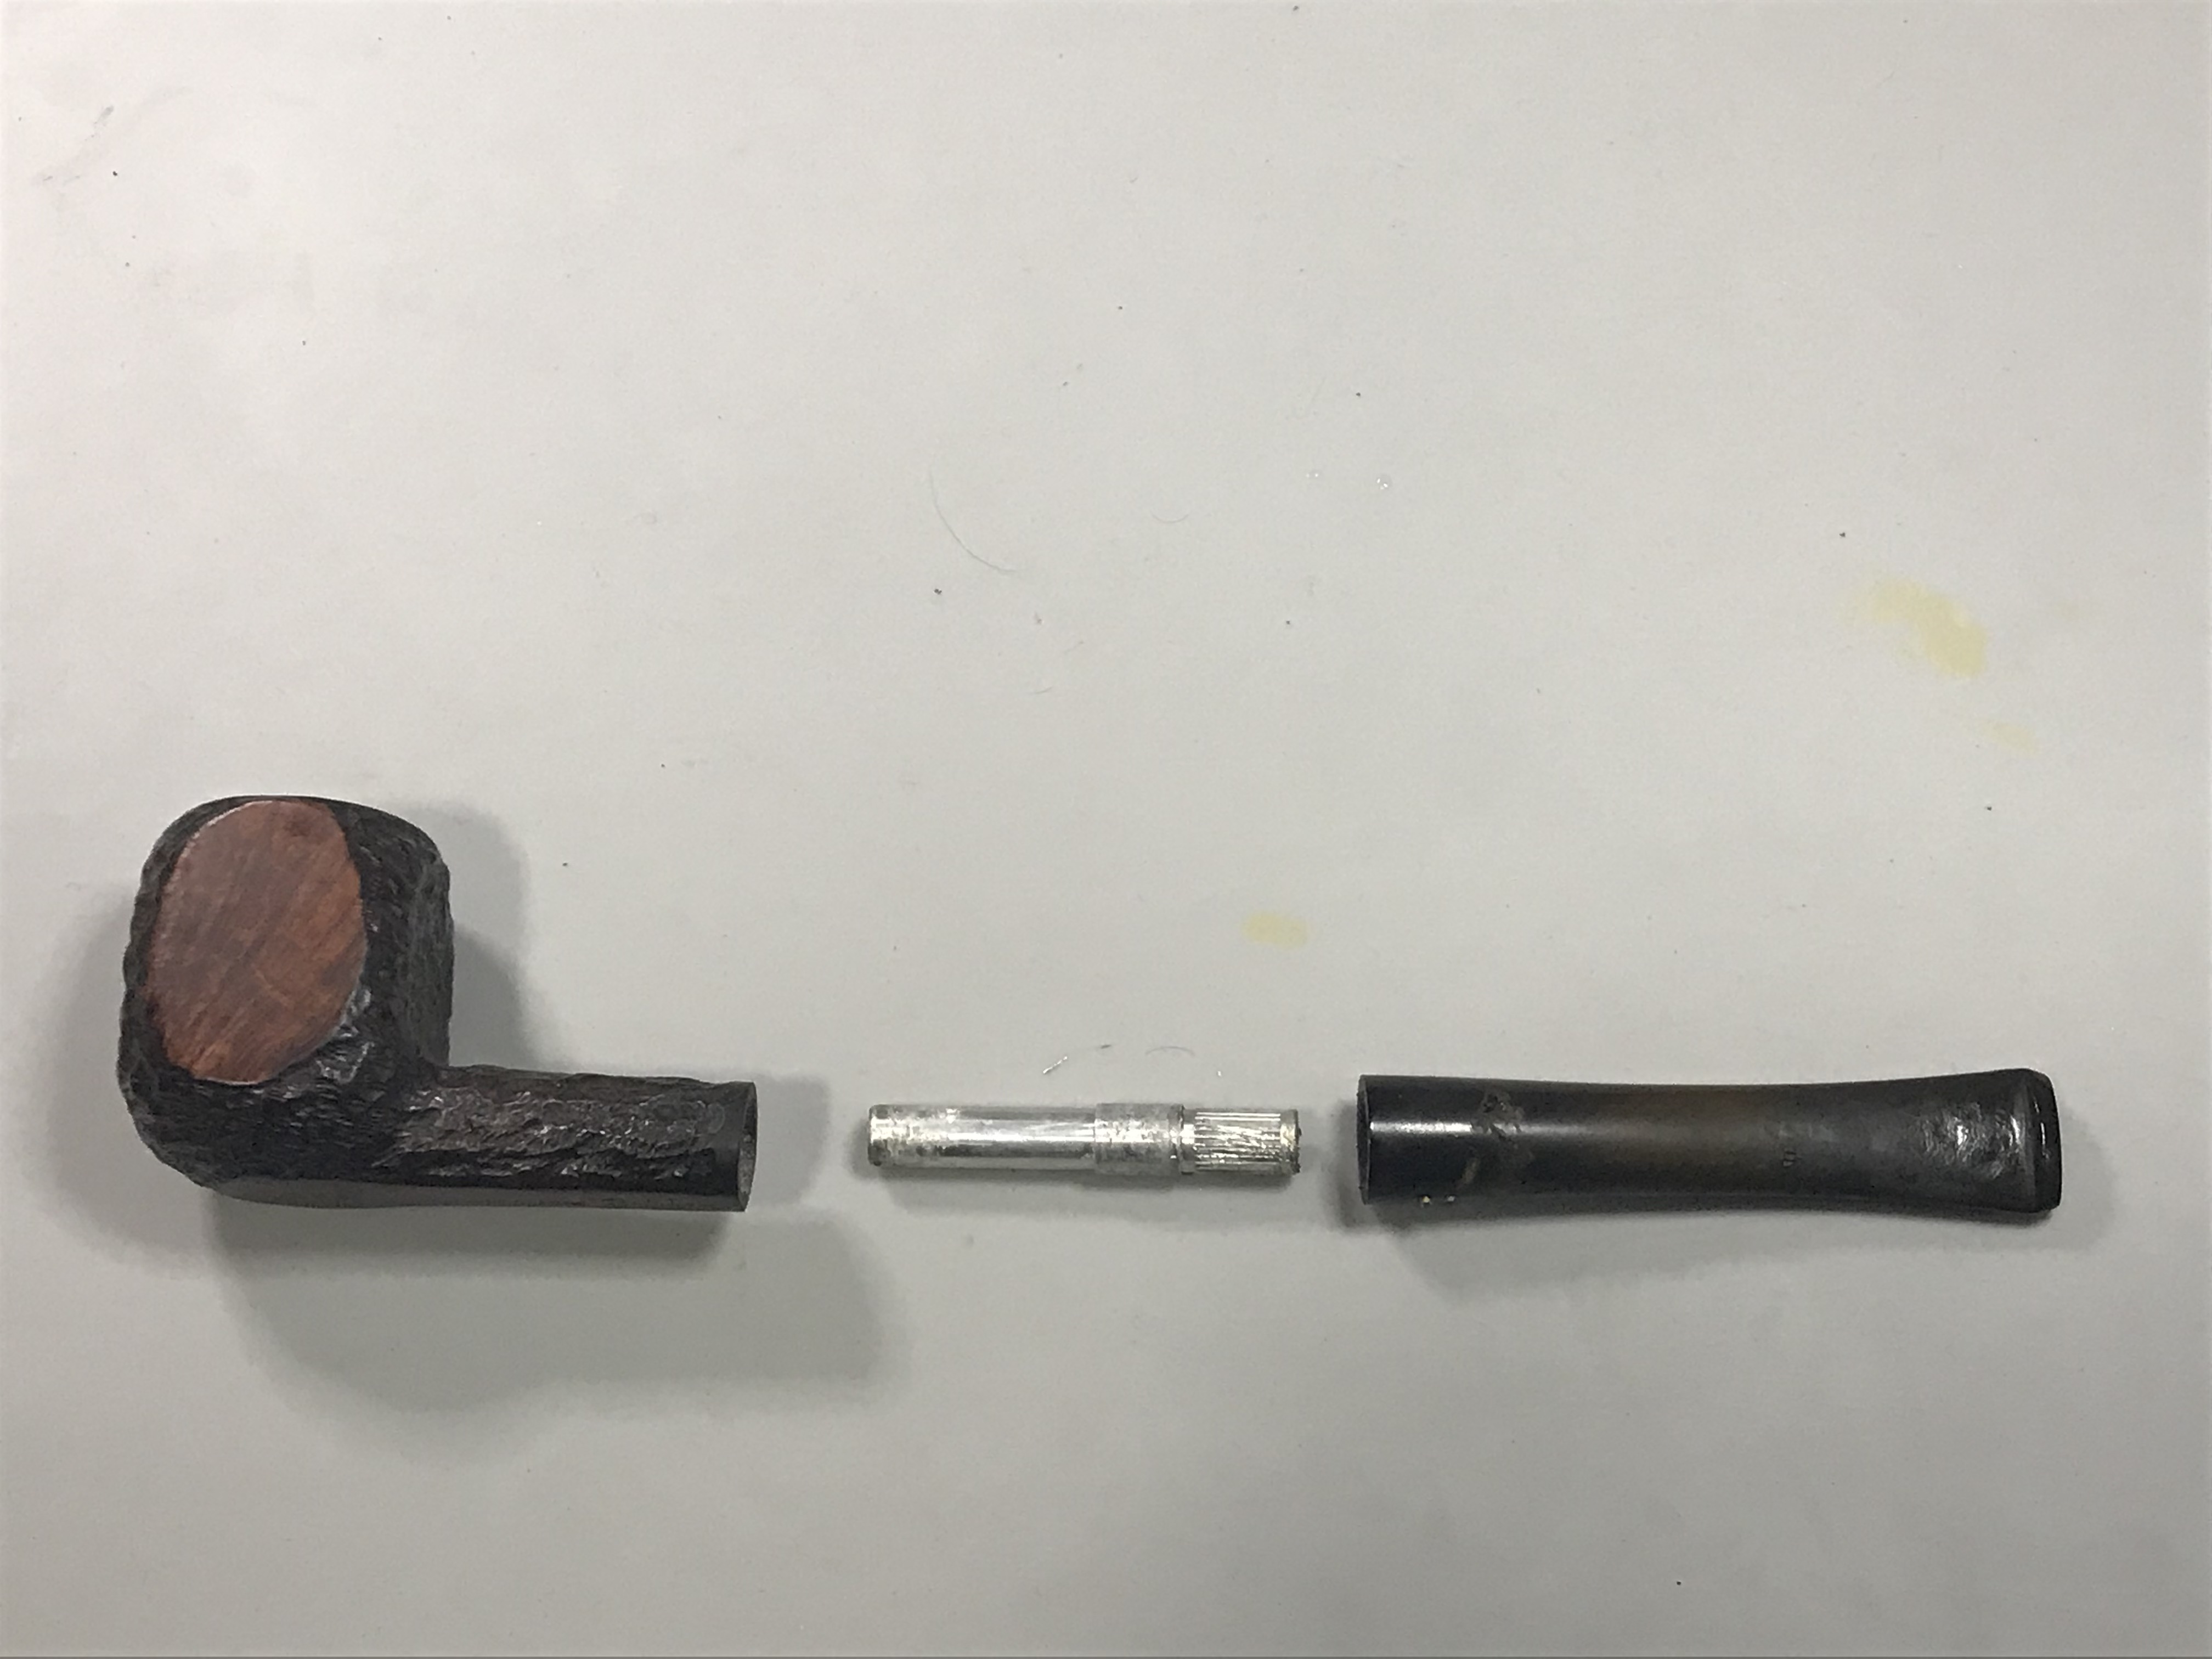
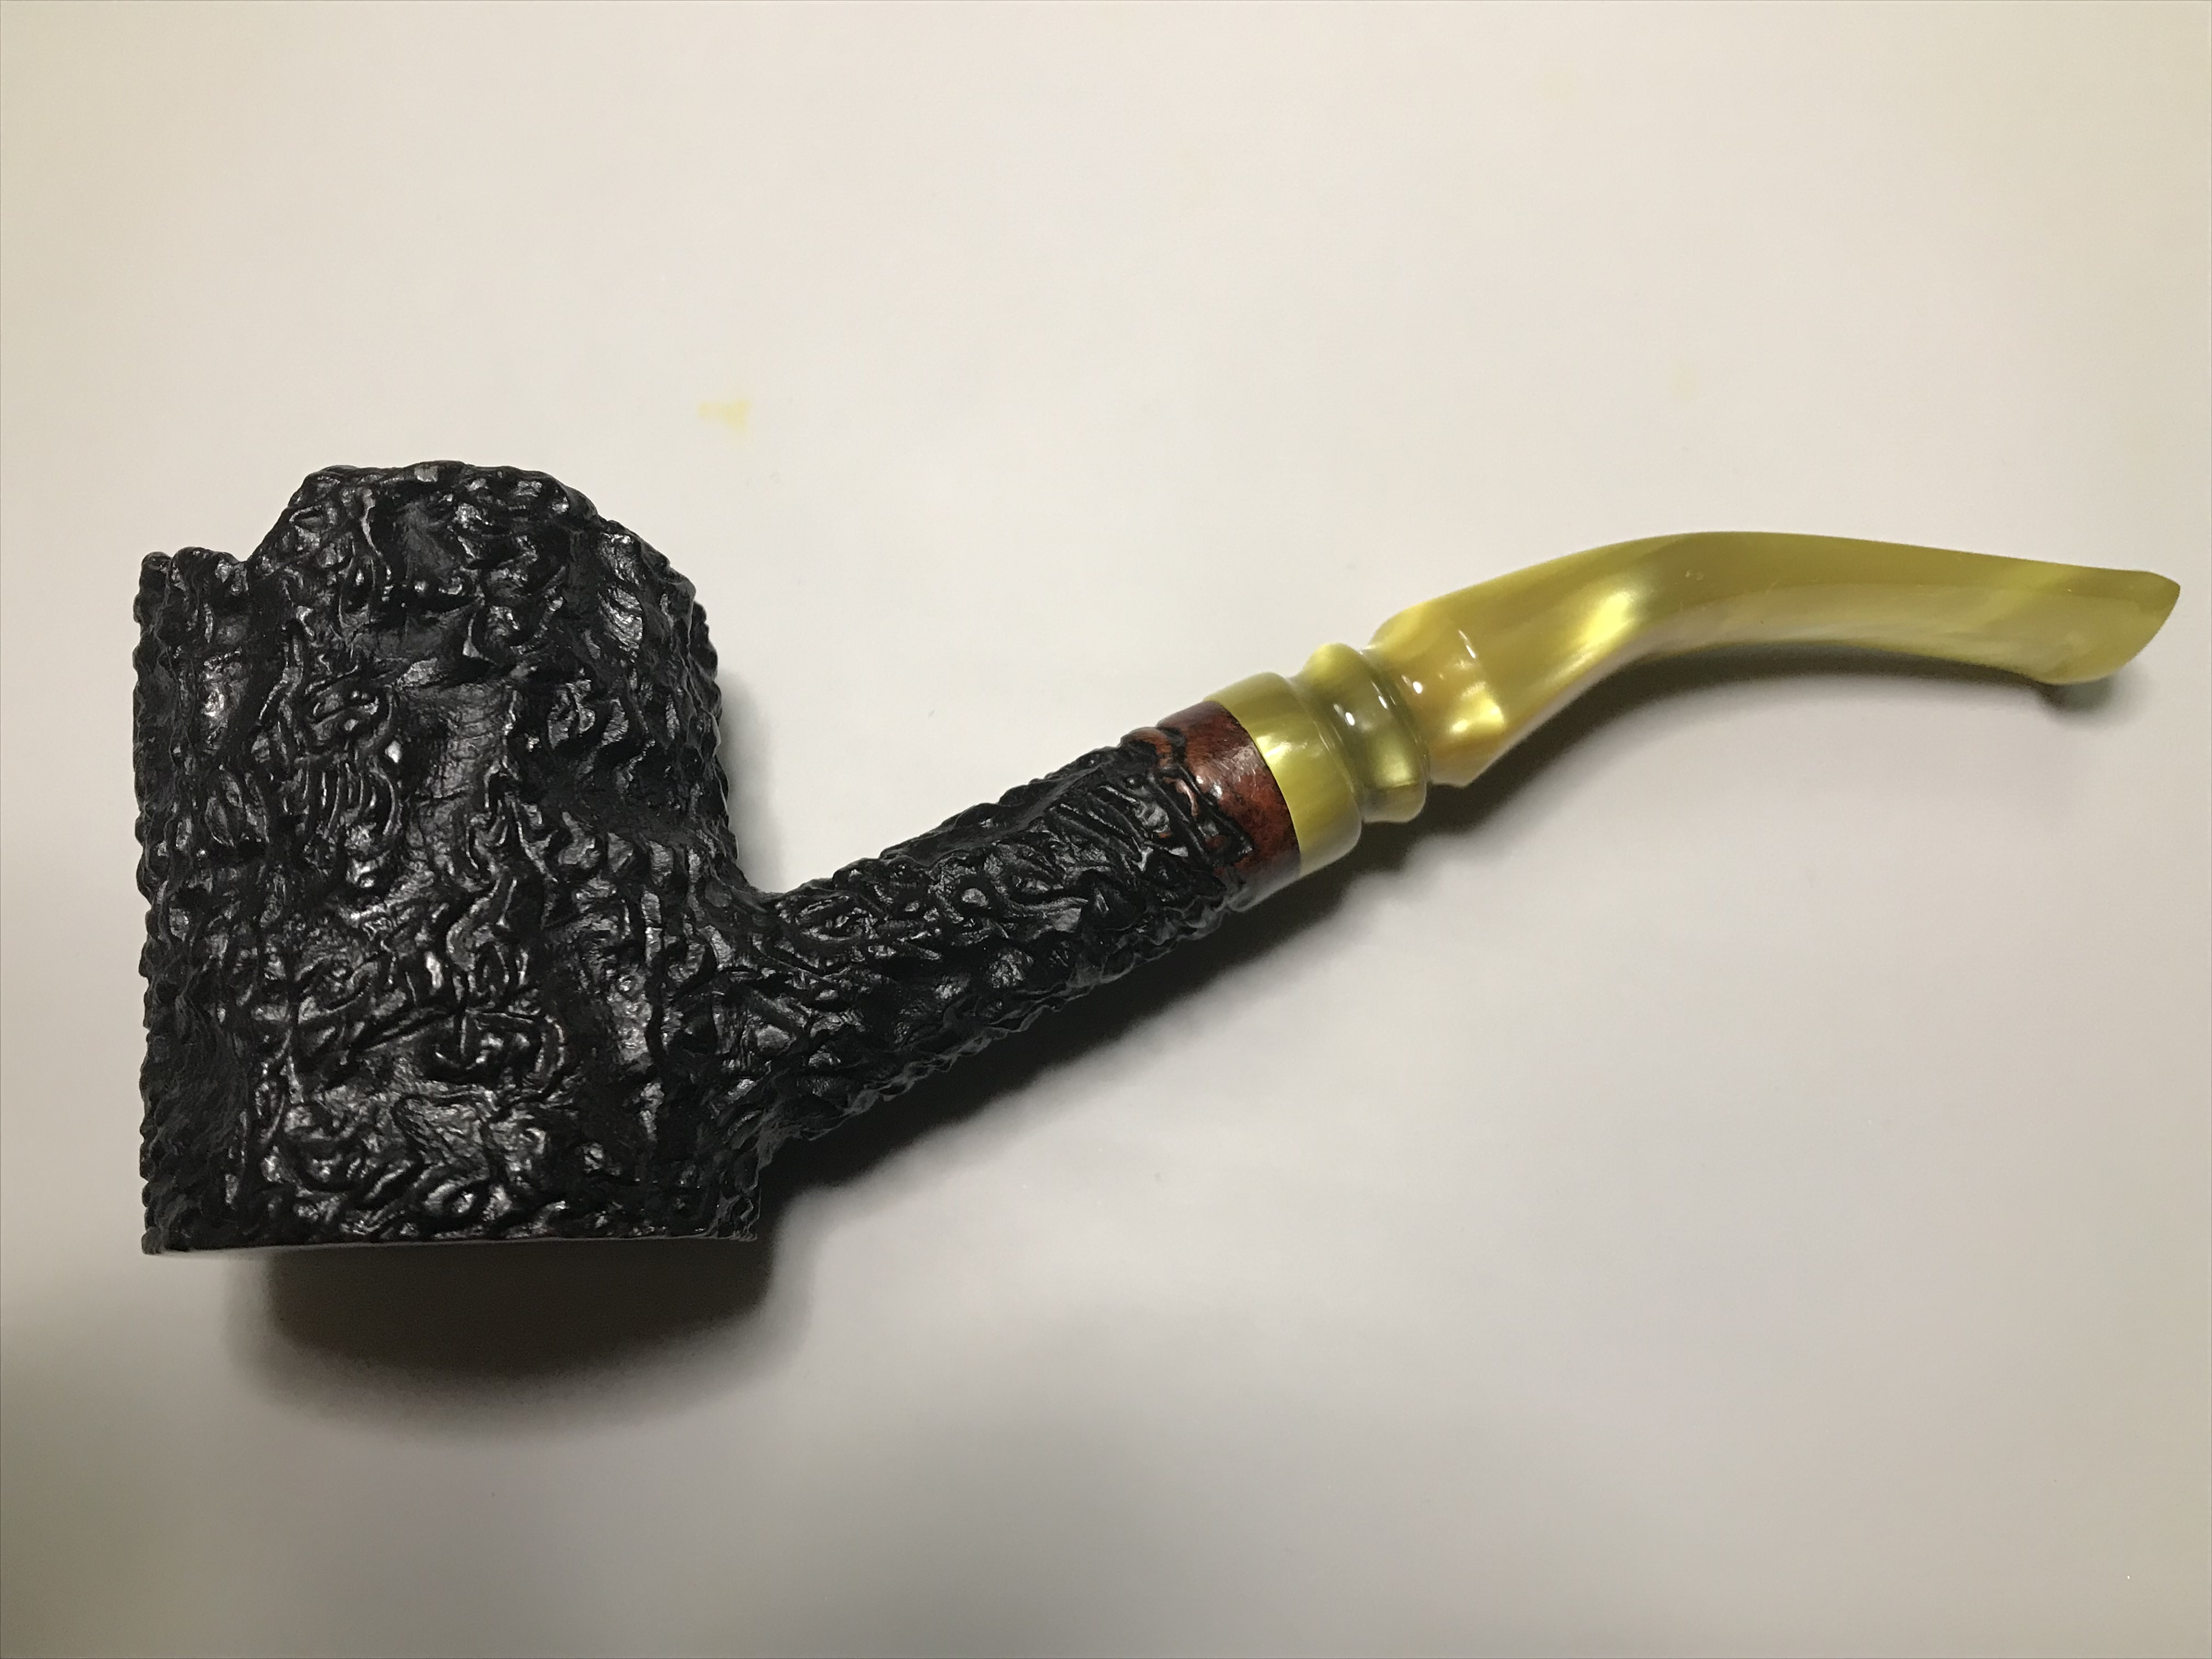
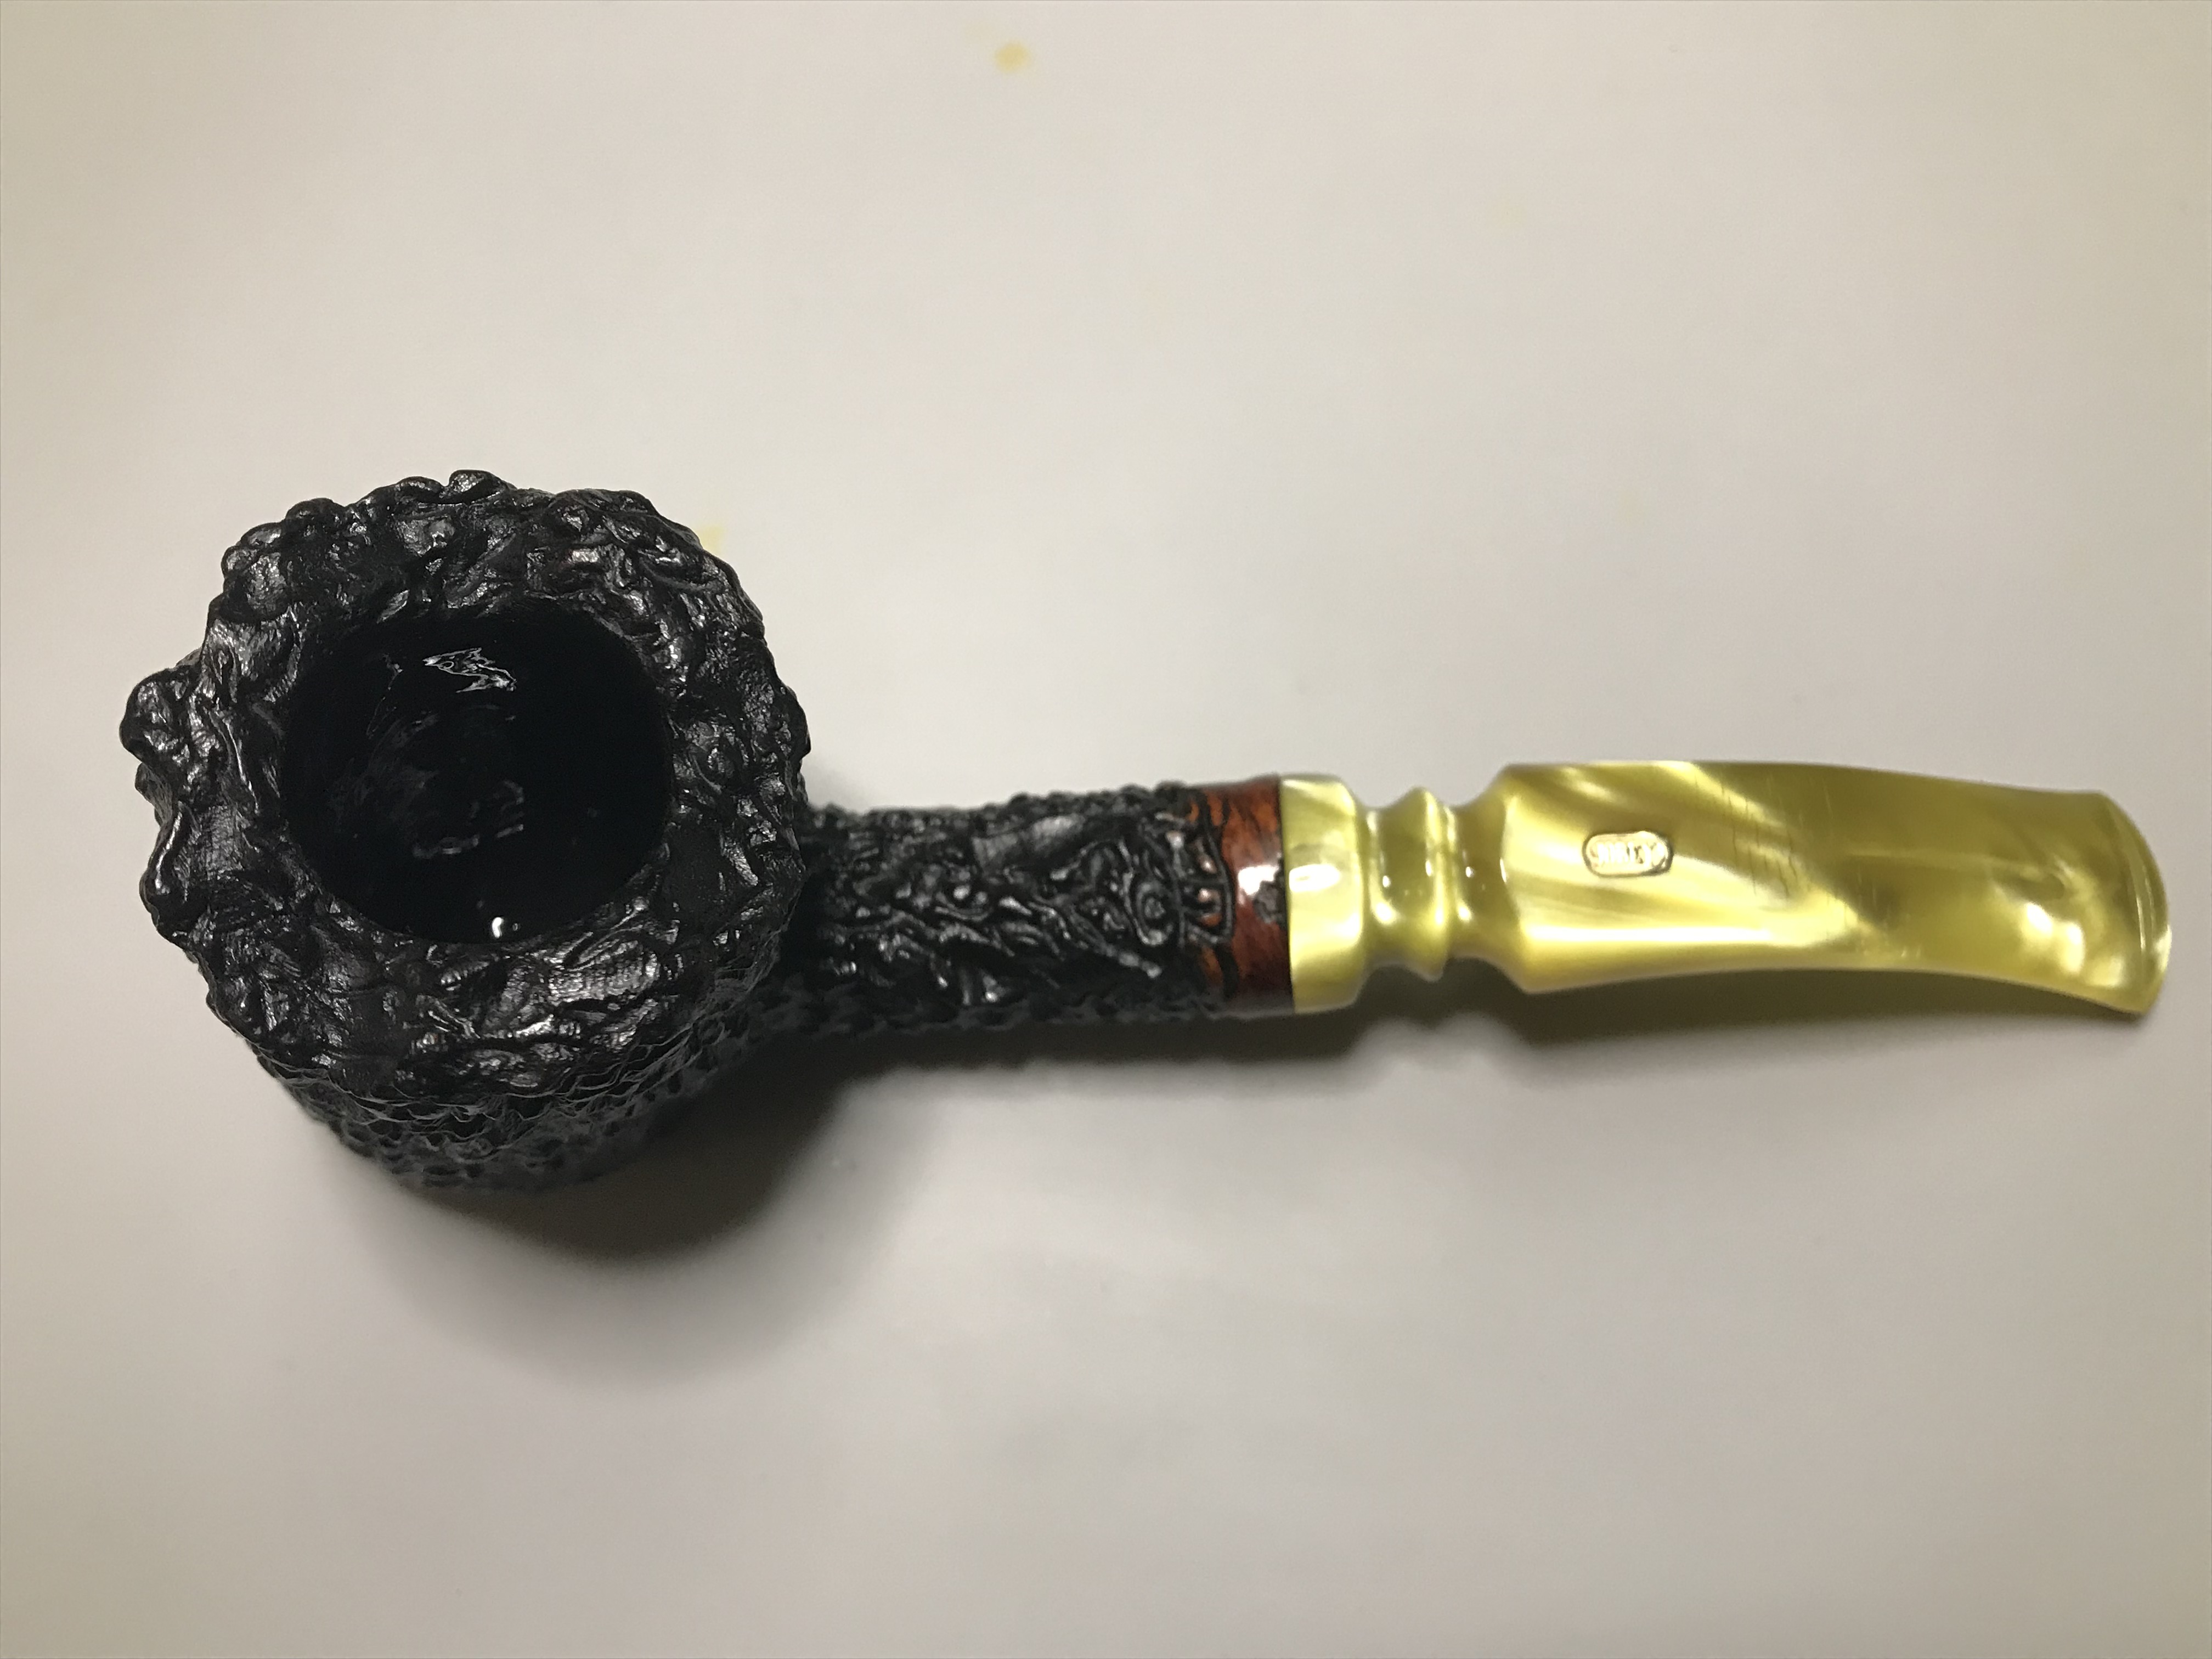
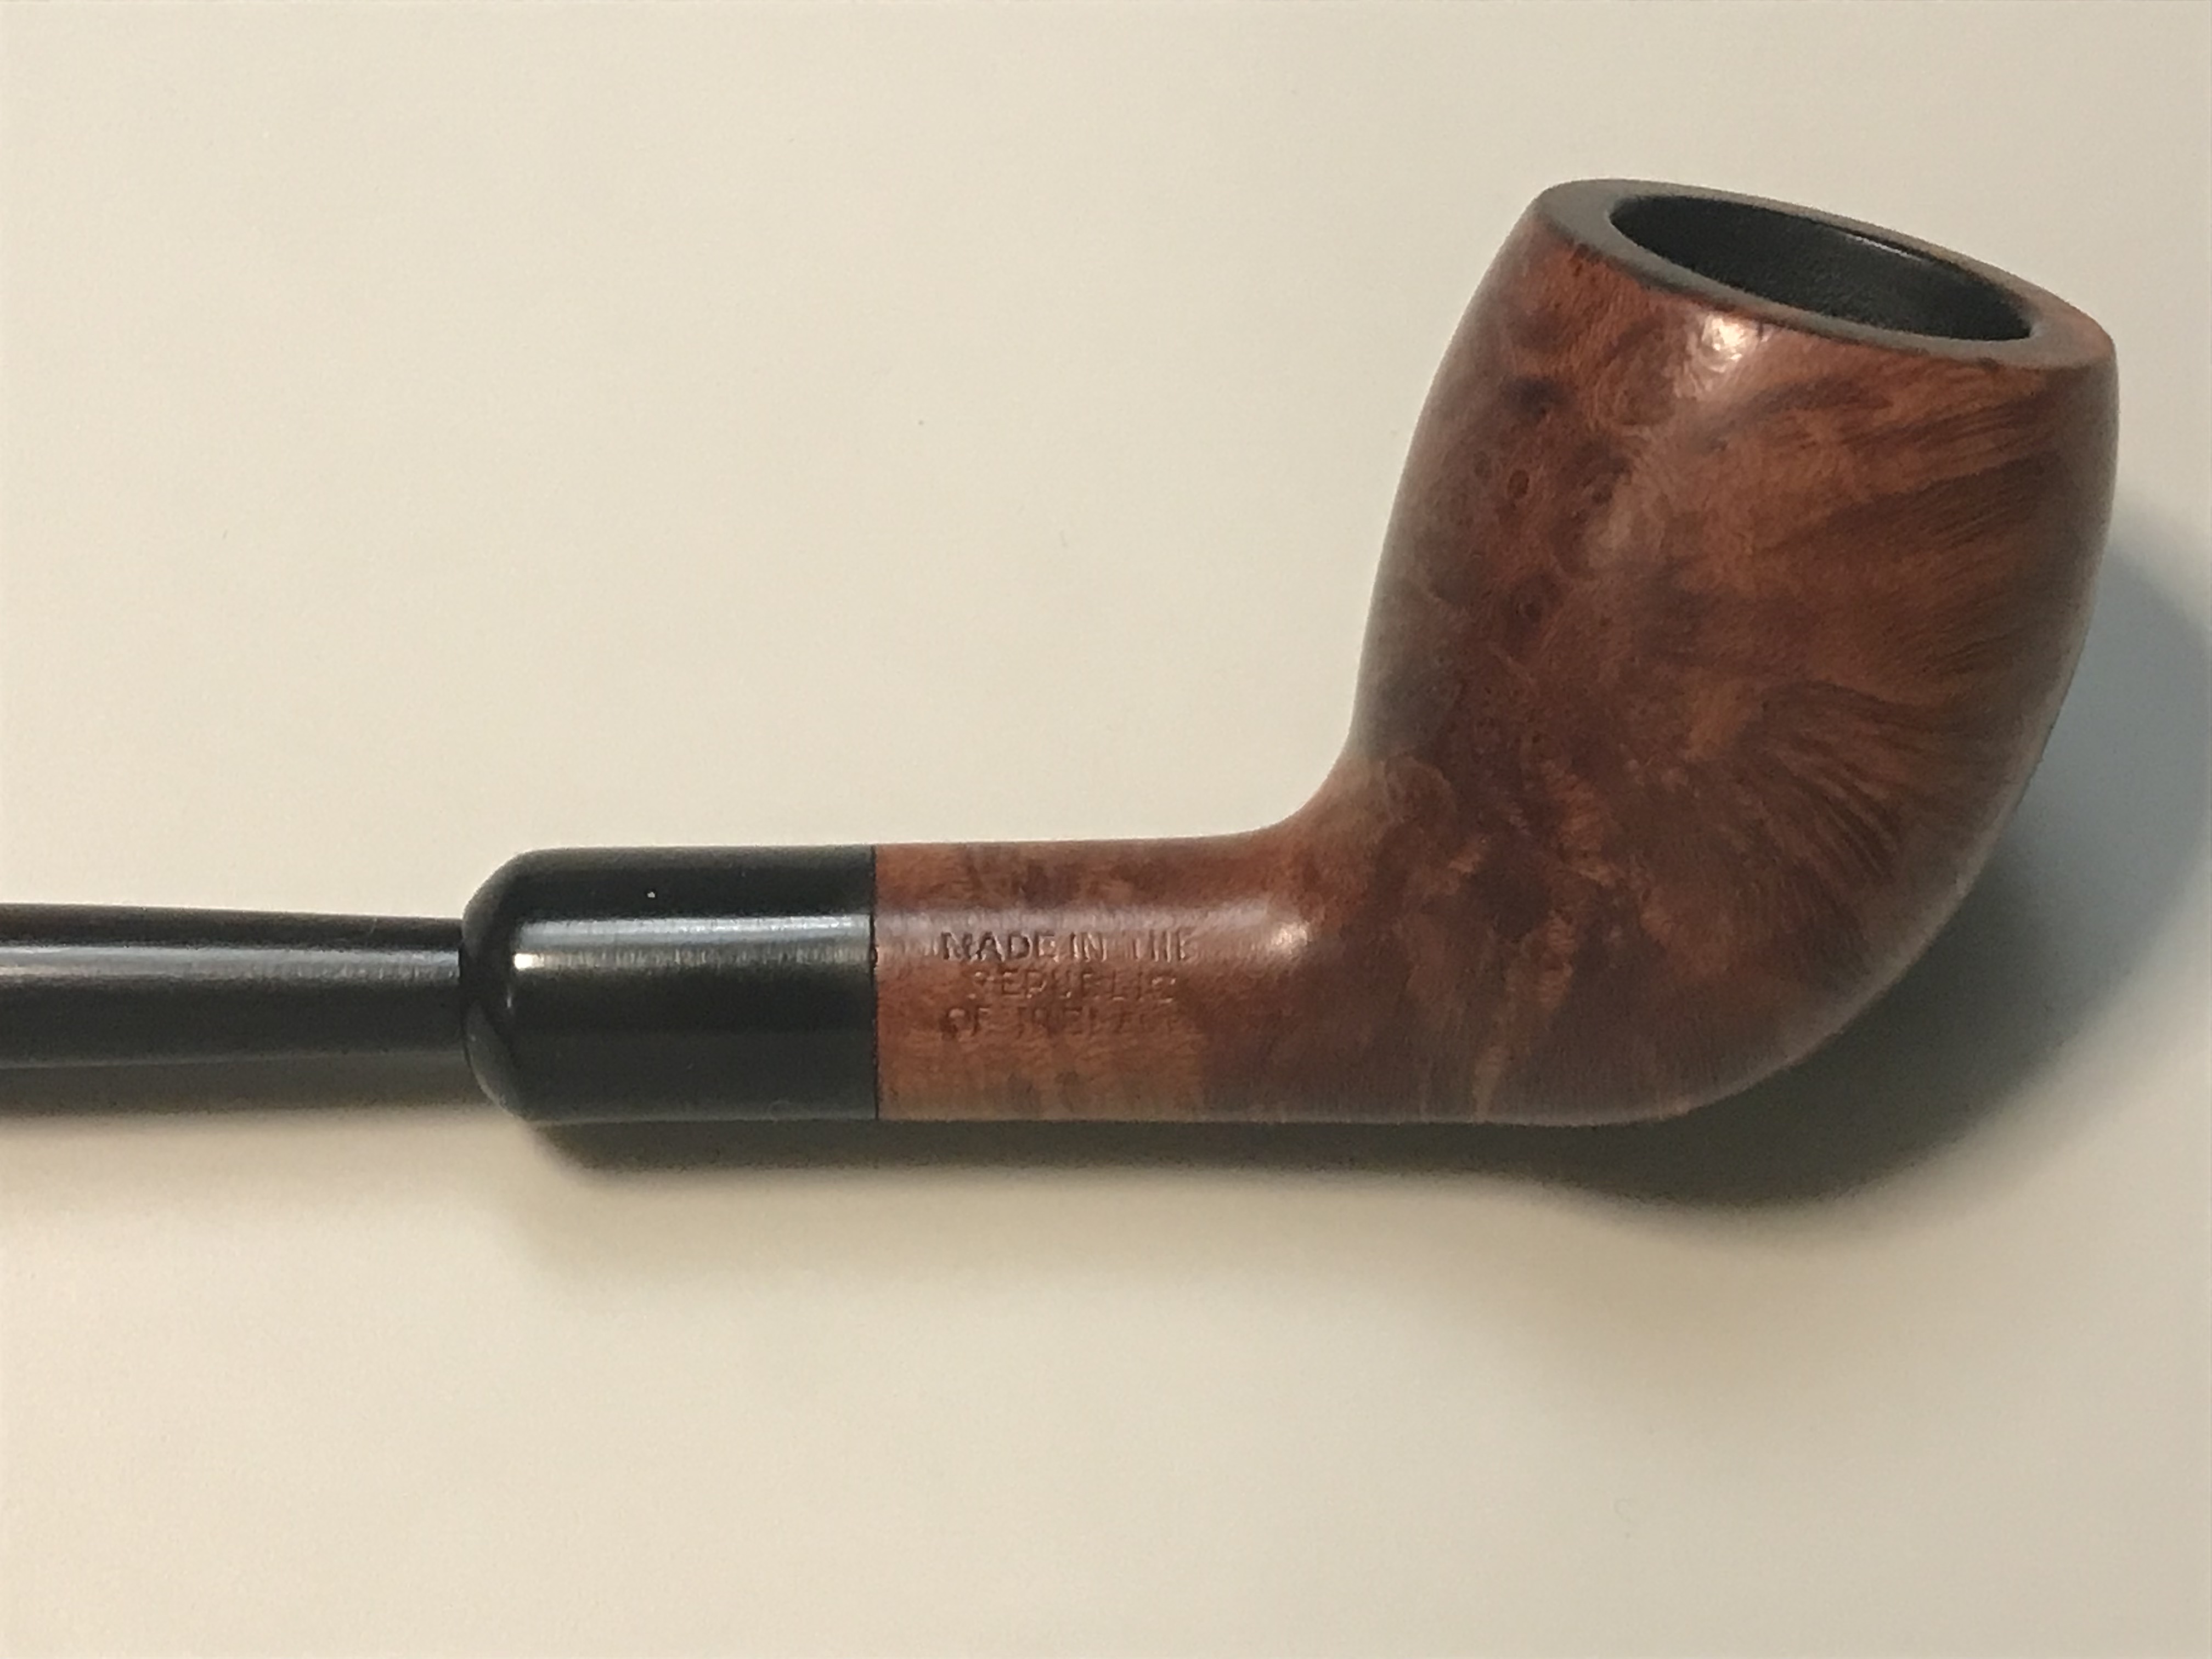
Replacement Stem
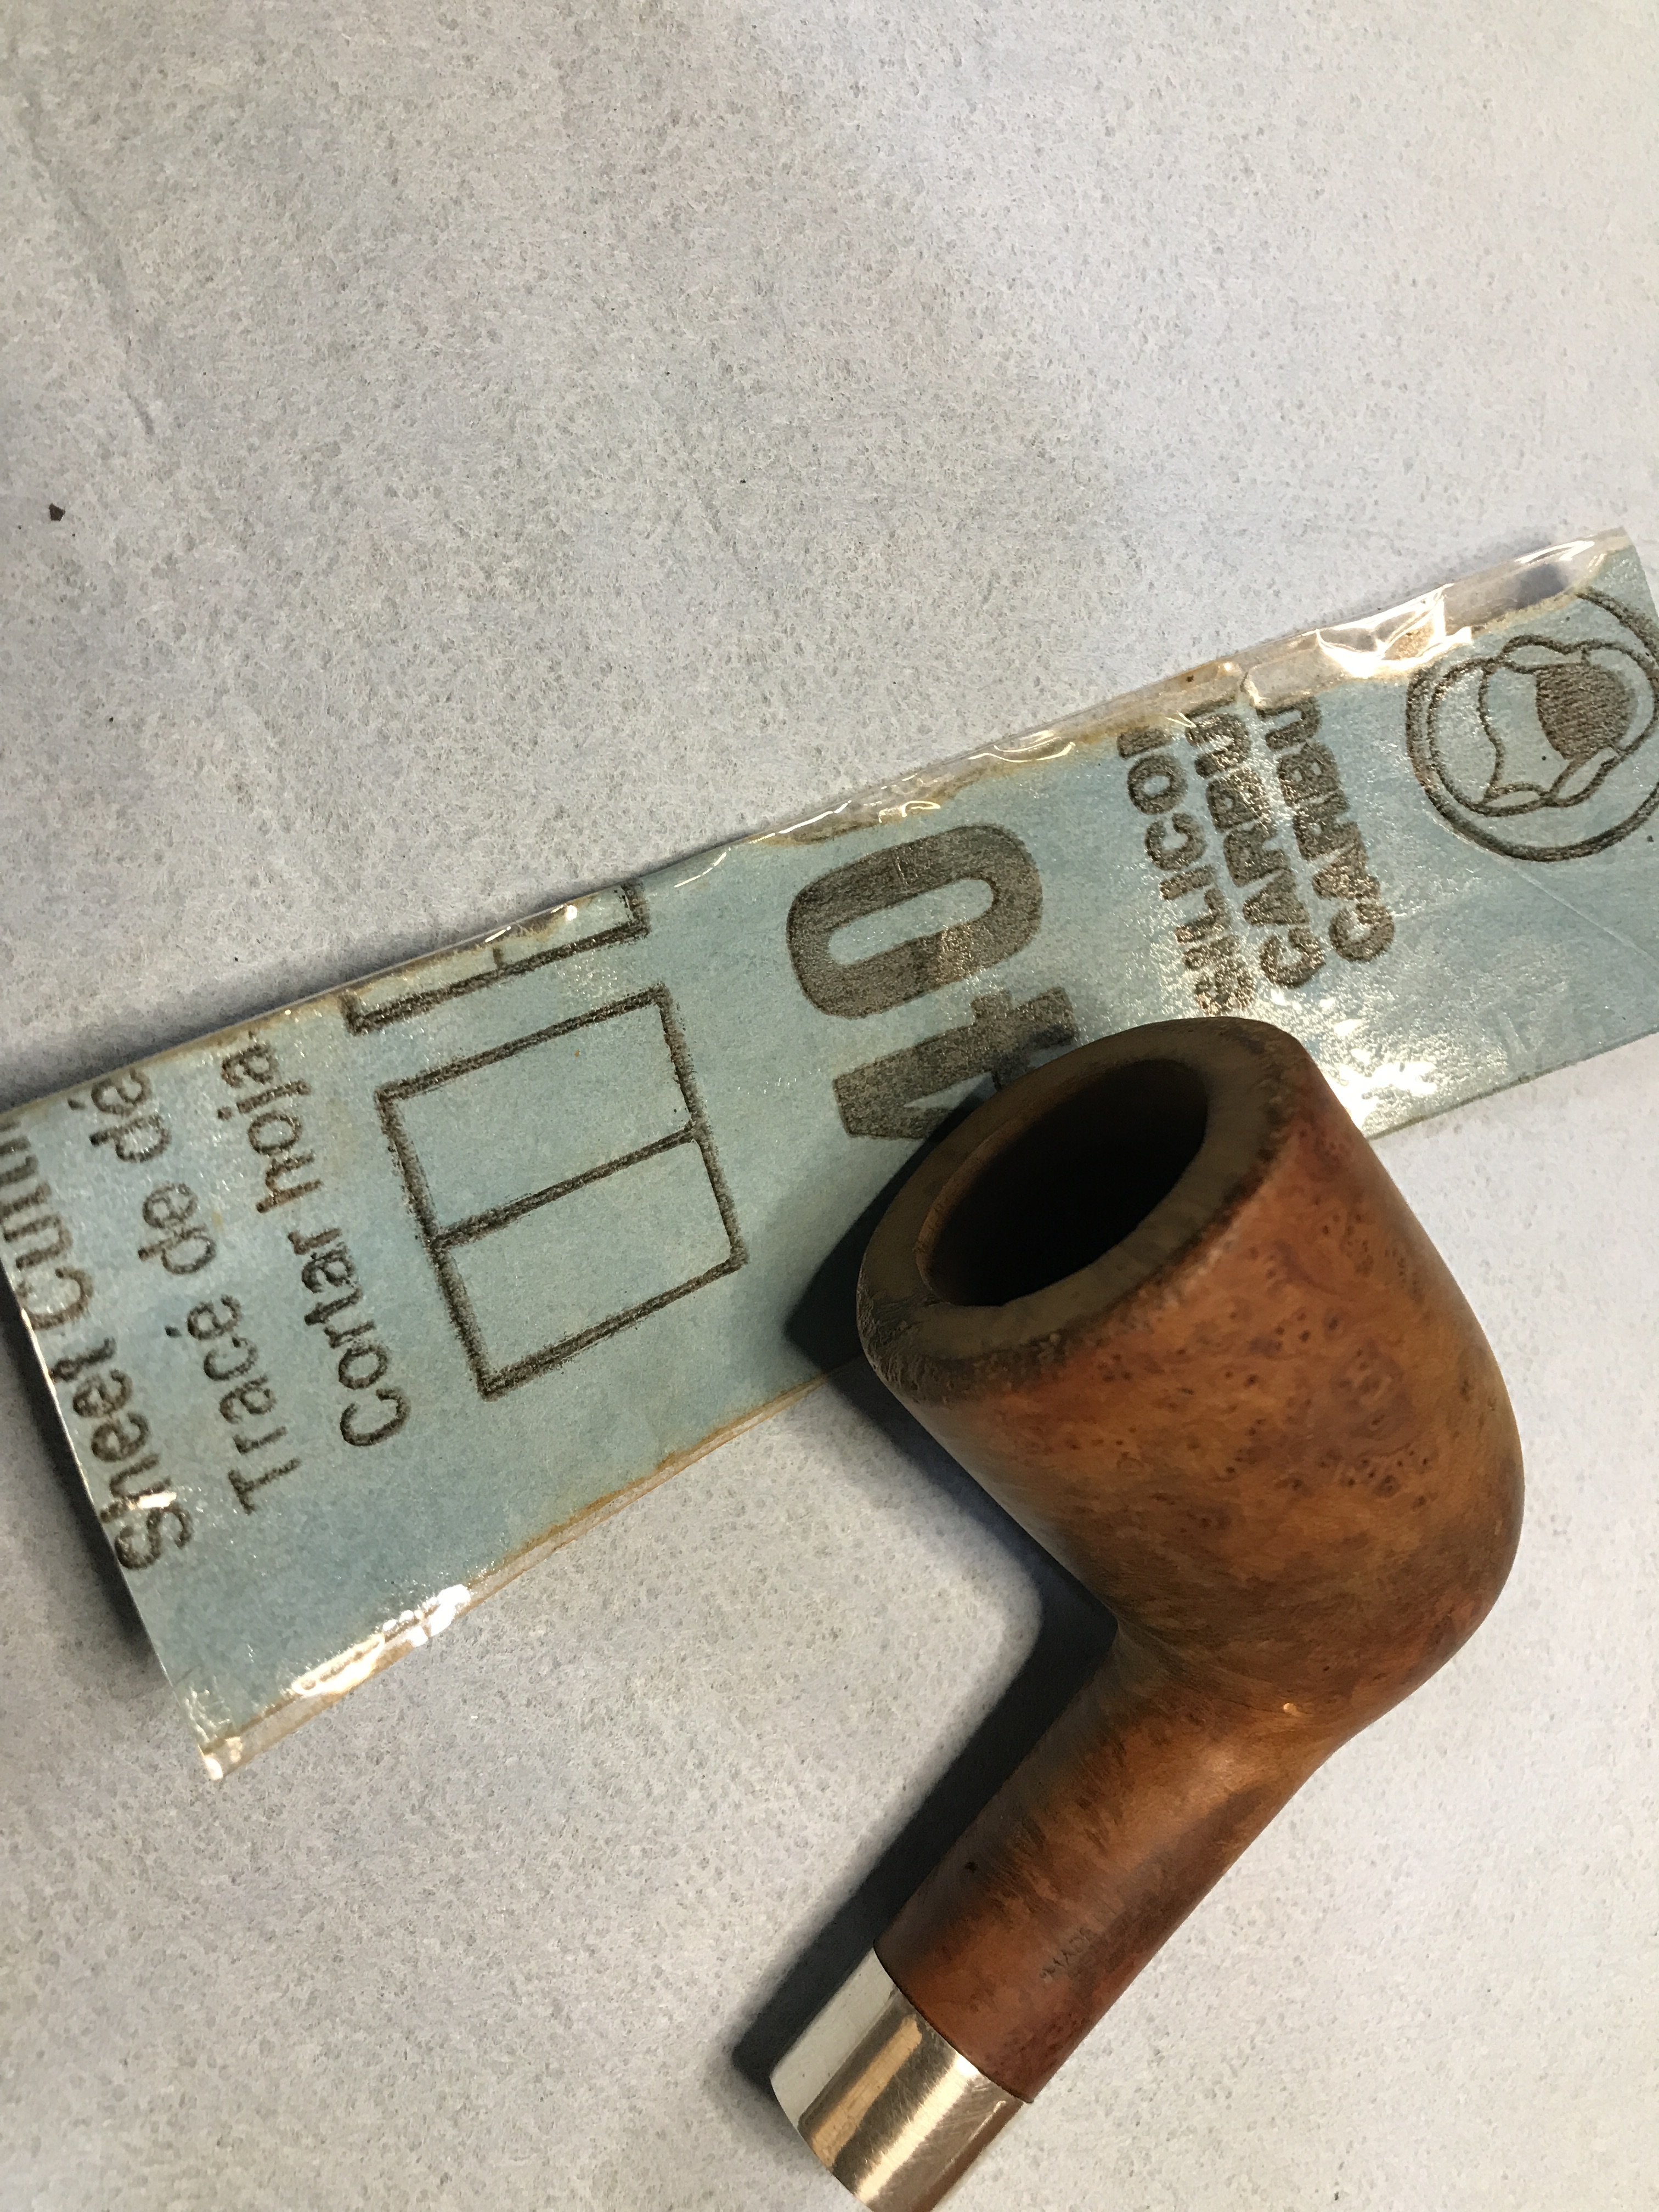
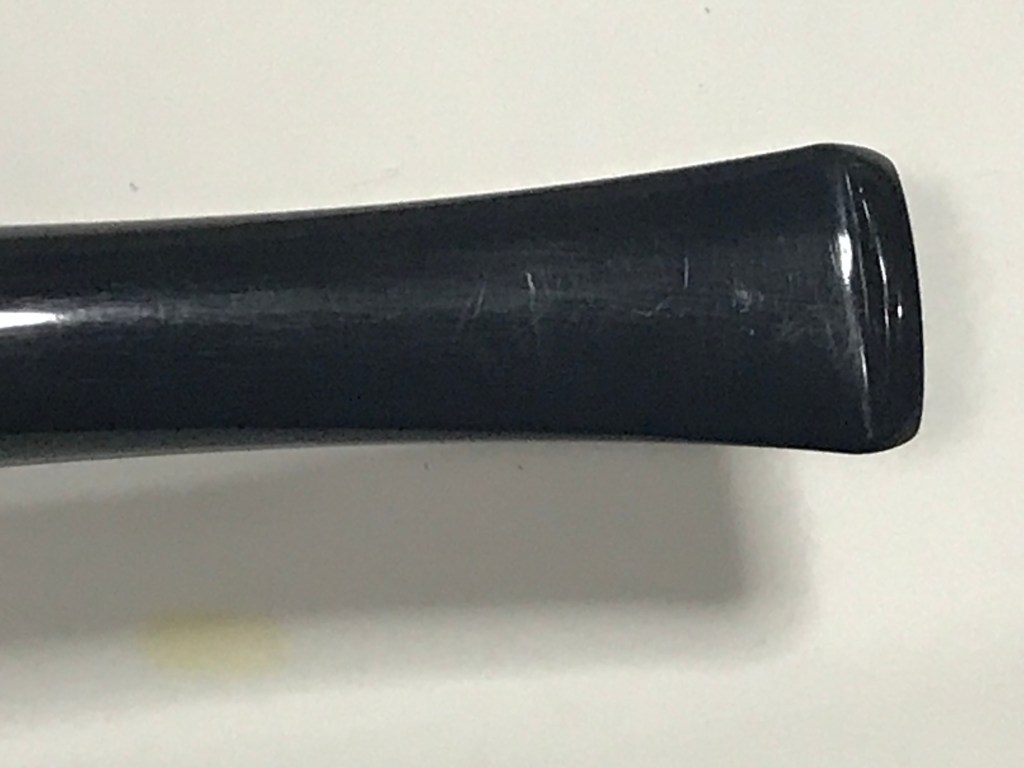
A new flush mount p-lip stem was fitted to the repaired stummel and fresh stain applied to match the original stain (visible under the silver band).
Dunhill pipes are the most recognized pipe brand in the world. Highly regarded for their commitment to quality standards and design. Of course my opinion is biased based on my own love affair with the brand.
It must be useful. It must work dependably. It must be beautiful. It must last. It must be the best of its kind.
Alfred Dunhill
This Dunhill pipe came to me in a lot with several other pipes at an estate auction. When I entered the home to collect my items I realized that this was likely a situation where “Mom & Dad” had been put into a home after no longer being able to care for themselves. Looking around I could see a lifetime of curated objects. Imagine the stories they could tell! Unfortunately the home had fallen into disrepair and neglect. My lot resided in the office of the patriarch of the household upstairs. As I entered, again I observed a lifetime of objects curated to the tastes and passions of the owners.
My lot of pipes resided on a shelf in the fellas office, however upon inspection one of the pipes in the lot was missing. I spoke with the Estate seller and they commented that the elderly couple were “taking” items back from the house that were put in auction. They apologized and offered my money back. I contemplated it for a moment then remarked “if my kids put me in a home and tried to sell my pipe collection, I’d steal my favourite pipe back too”! We both had a chuckle and I collected my remaining items.
To my surprise there was a filthy little billiard with a telltale white spot on the stem. I couldn’t see much else under all the years of dirt and carbon buildup but it appeared that a Dunhill was in the lot.
First Impressions:
This pipe certainly served its master well. This pipe was HEAVILY smoked and despite the previous owners best efforts, I was shocked that it did not have a catastrophic crack, split or burnout anywhere on the pipe. Structurally this pipe was in fair condition. Clearly the title of this restoration has spoilers, but it was during this initial inspection that I was trying to determine what it was I had in my hand. Thus far that only distinguishable Dunhill feature was the white spot. Fortunately I have a magnifying lamp which came in handy for identification.
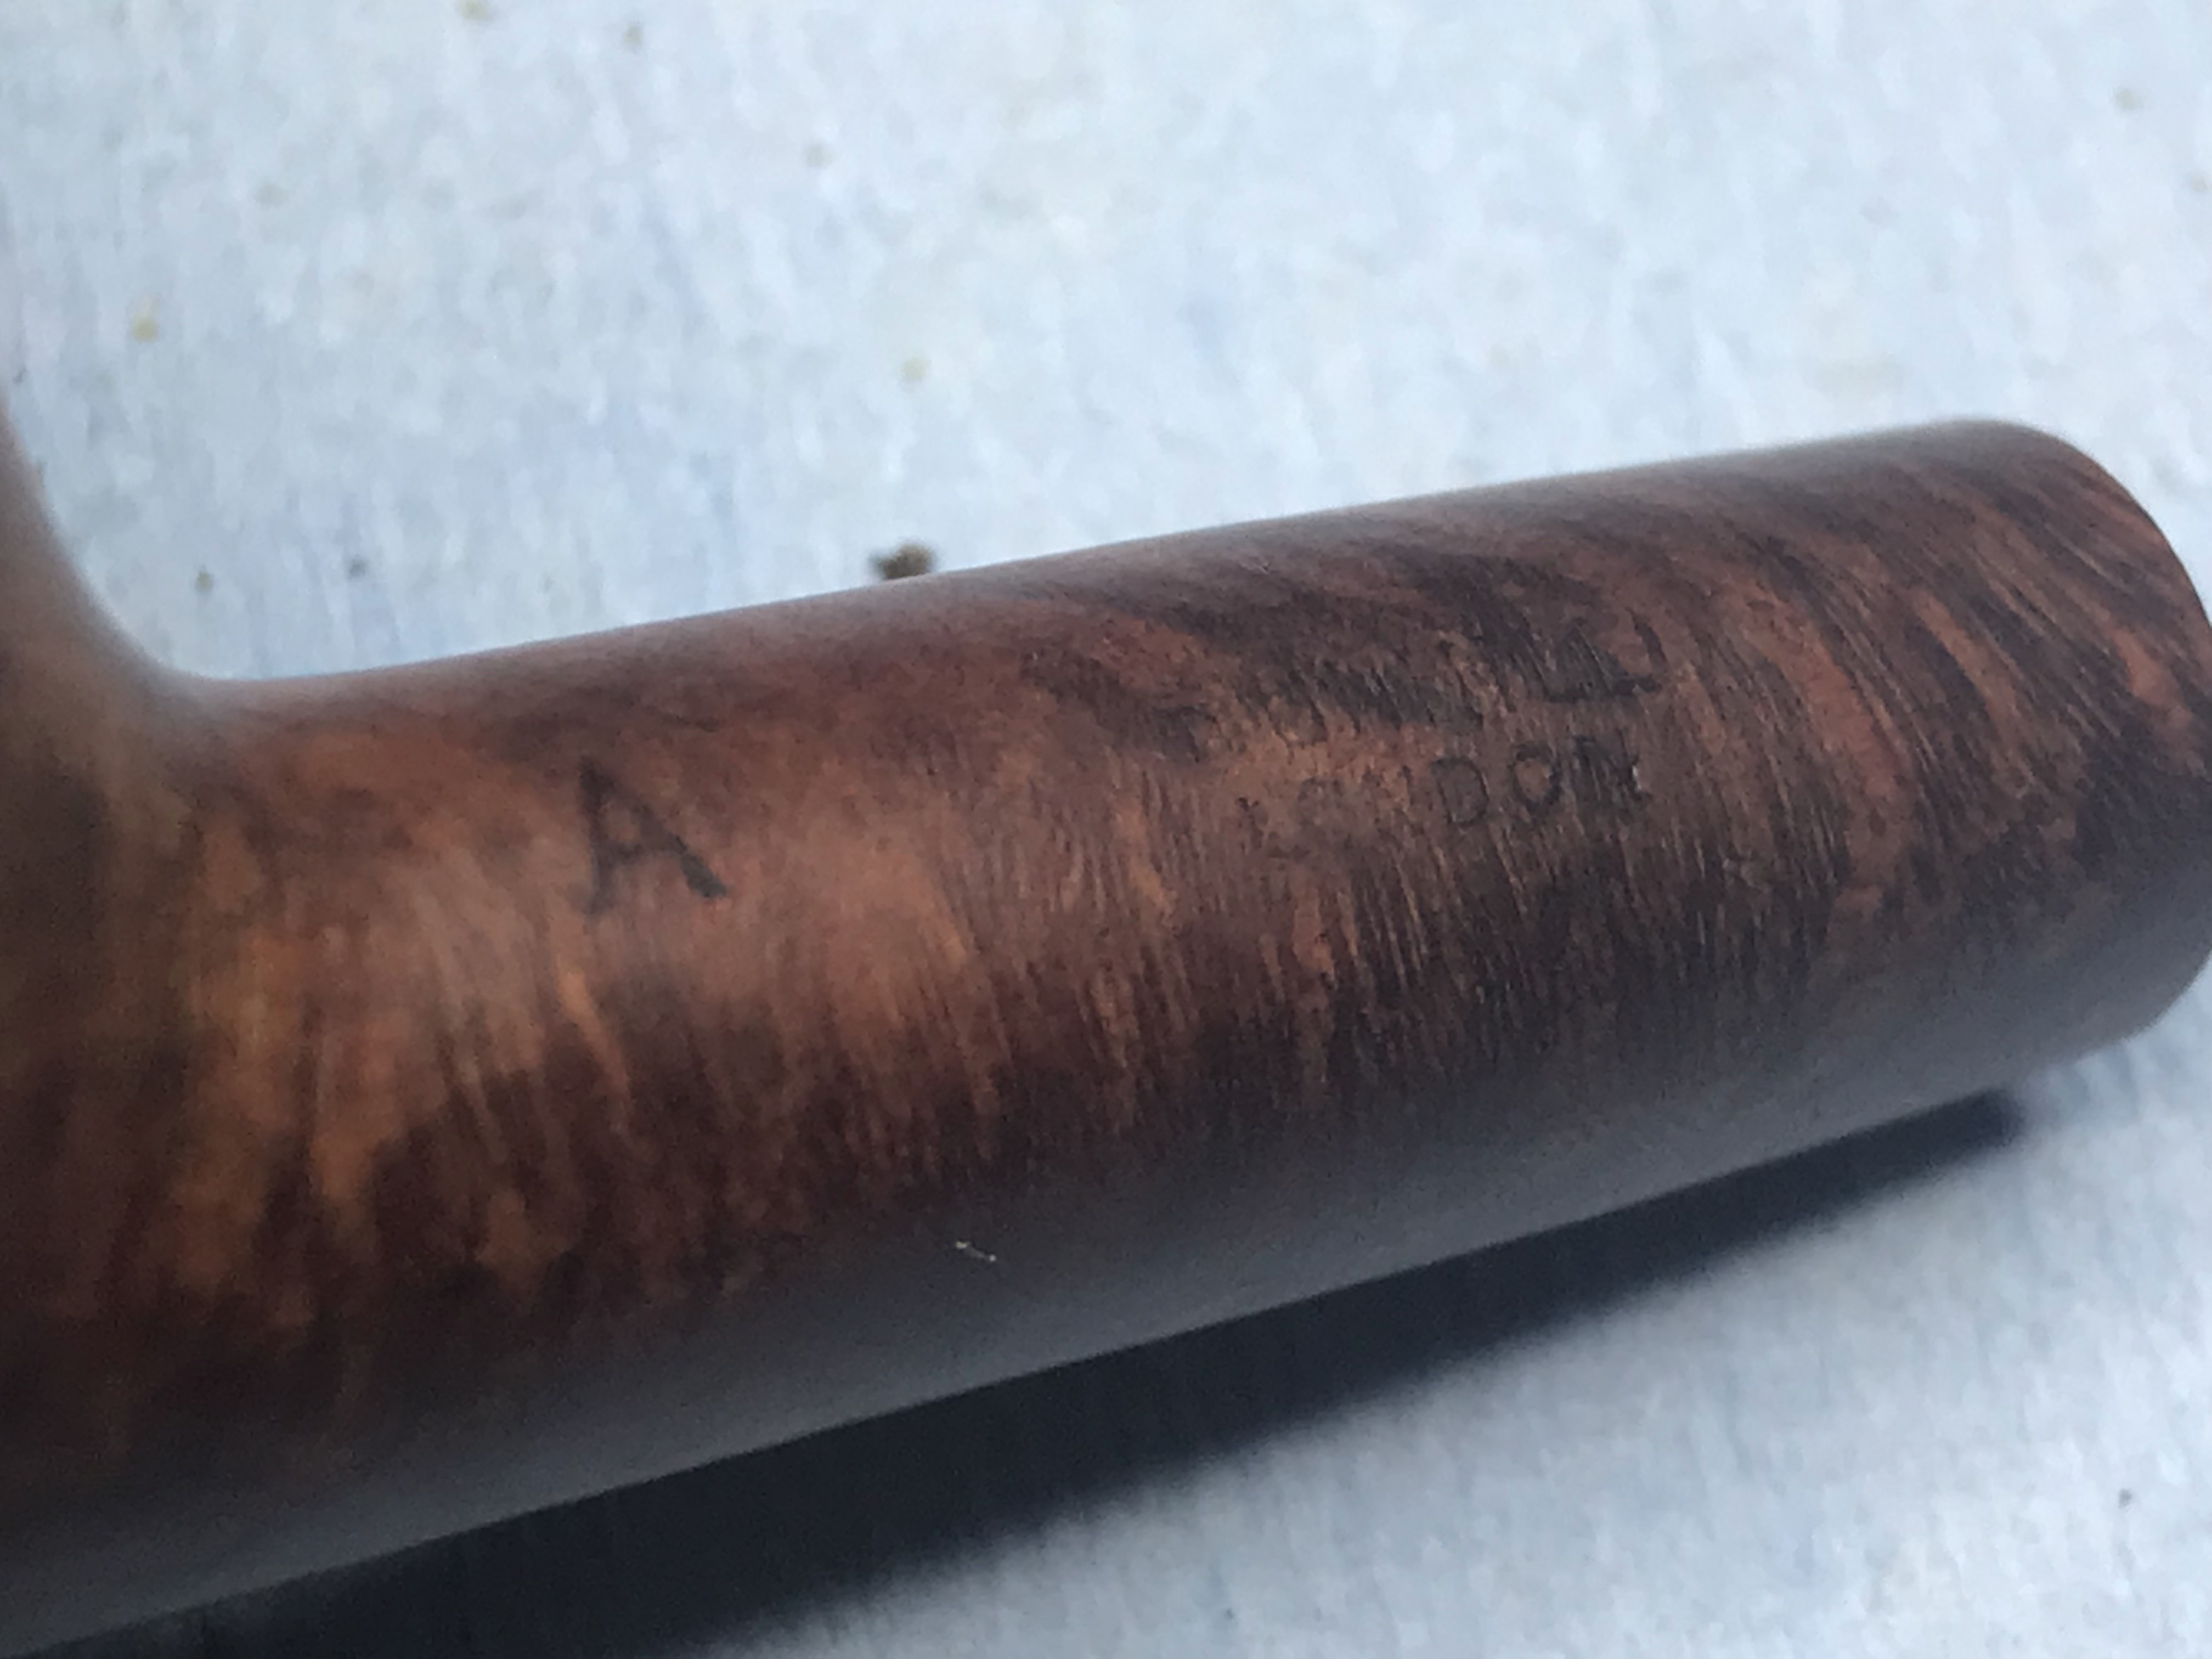
In the figure above you can clearly see the letter “A”. This represents the finish, in this case A = Bruyere. Initially, made from over century-old briar burls, classified by a “B” (denoted highest quality pipe); “DR” (denoted straight-grained) and an “A” (denoted first quality). Further down the shank towards the stem you can faintly see the makers mark “DUNHILL” over “LONDON“
On the opposite side of the pipe you can clearly see a “35” close to the bowl, which indicates the shape number. The makers mark further down the shank was more difficult to decipher, however; a faint “365” could be seen. Above that I could see a “D” and a underscored “0”.
I referred to the Dunhill Dating Guide on Pipedia to see if I could determine the age of this Dunhill based on the information I was able to glean from its initial inspection. I searched for a patent number that ended in “365” and found one, see below.
Dunhill had several patents, one of the patents made for the Canadian market was Patent No. 197365/20. Now to find the date code so I can determine the exact age of the pipe. As you can see below, the mark beside the “D” in ENGLAND is an underscored “0”. This indicates that this pipe was manufactured in 1930 making it 92 years old.
The other information that is important here that I’ve indicated with an arrow above is that this pipe used “Inner tubes with flange”. I’ve highlighted in yellow below how the inner tube would be positioned in the pipe. This will be important further into the restoration.
Step 1: Remove carbon buildup
There was quite a bit of carbon buildup inside the tobacco chamber, however; it was not as problematic as it appears in the picture. It crumbled away relatively easily when I reamed the bowl. It wasn’t long before I was back to the briar wall. Next step will be to ream the draught hole and the mortise.
I insert a drill bit into the chuck from my lathe and turn the bit manually to ream the mortise and the draught hole. I start with smaller drill bits and work up to the original size that the pipe would have been drilled with. I do this before I clean with alcohol and pipe cleaners.
As you can see below I removed quite a bit of matter from the mortise and draught hole. I was able to ream and reface the end of the mortise along with removing and tar or matter that builds up in this area between the tenon and the mortise walls.
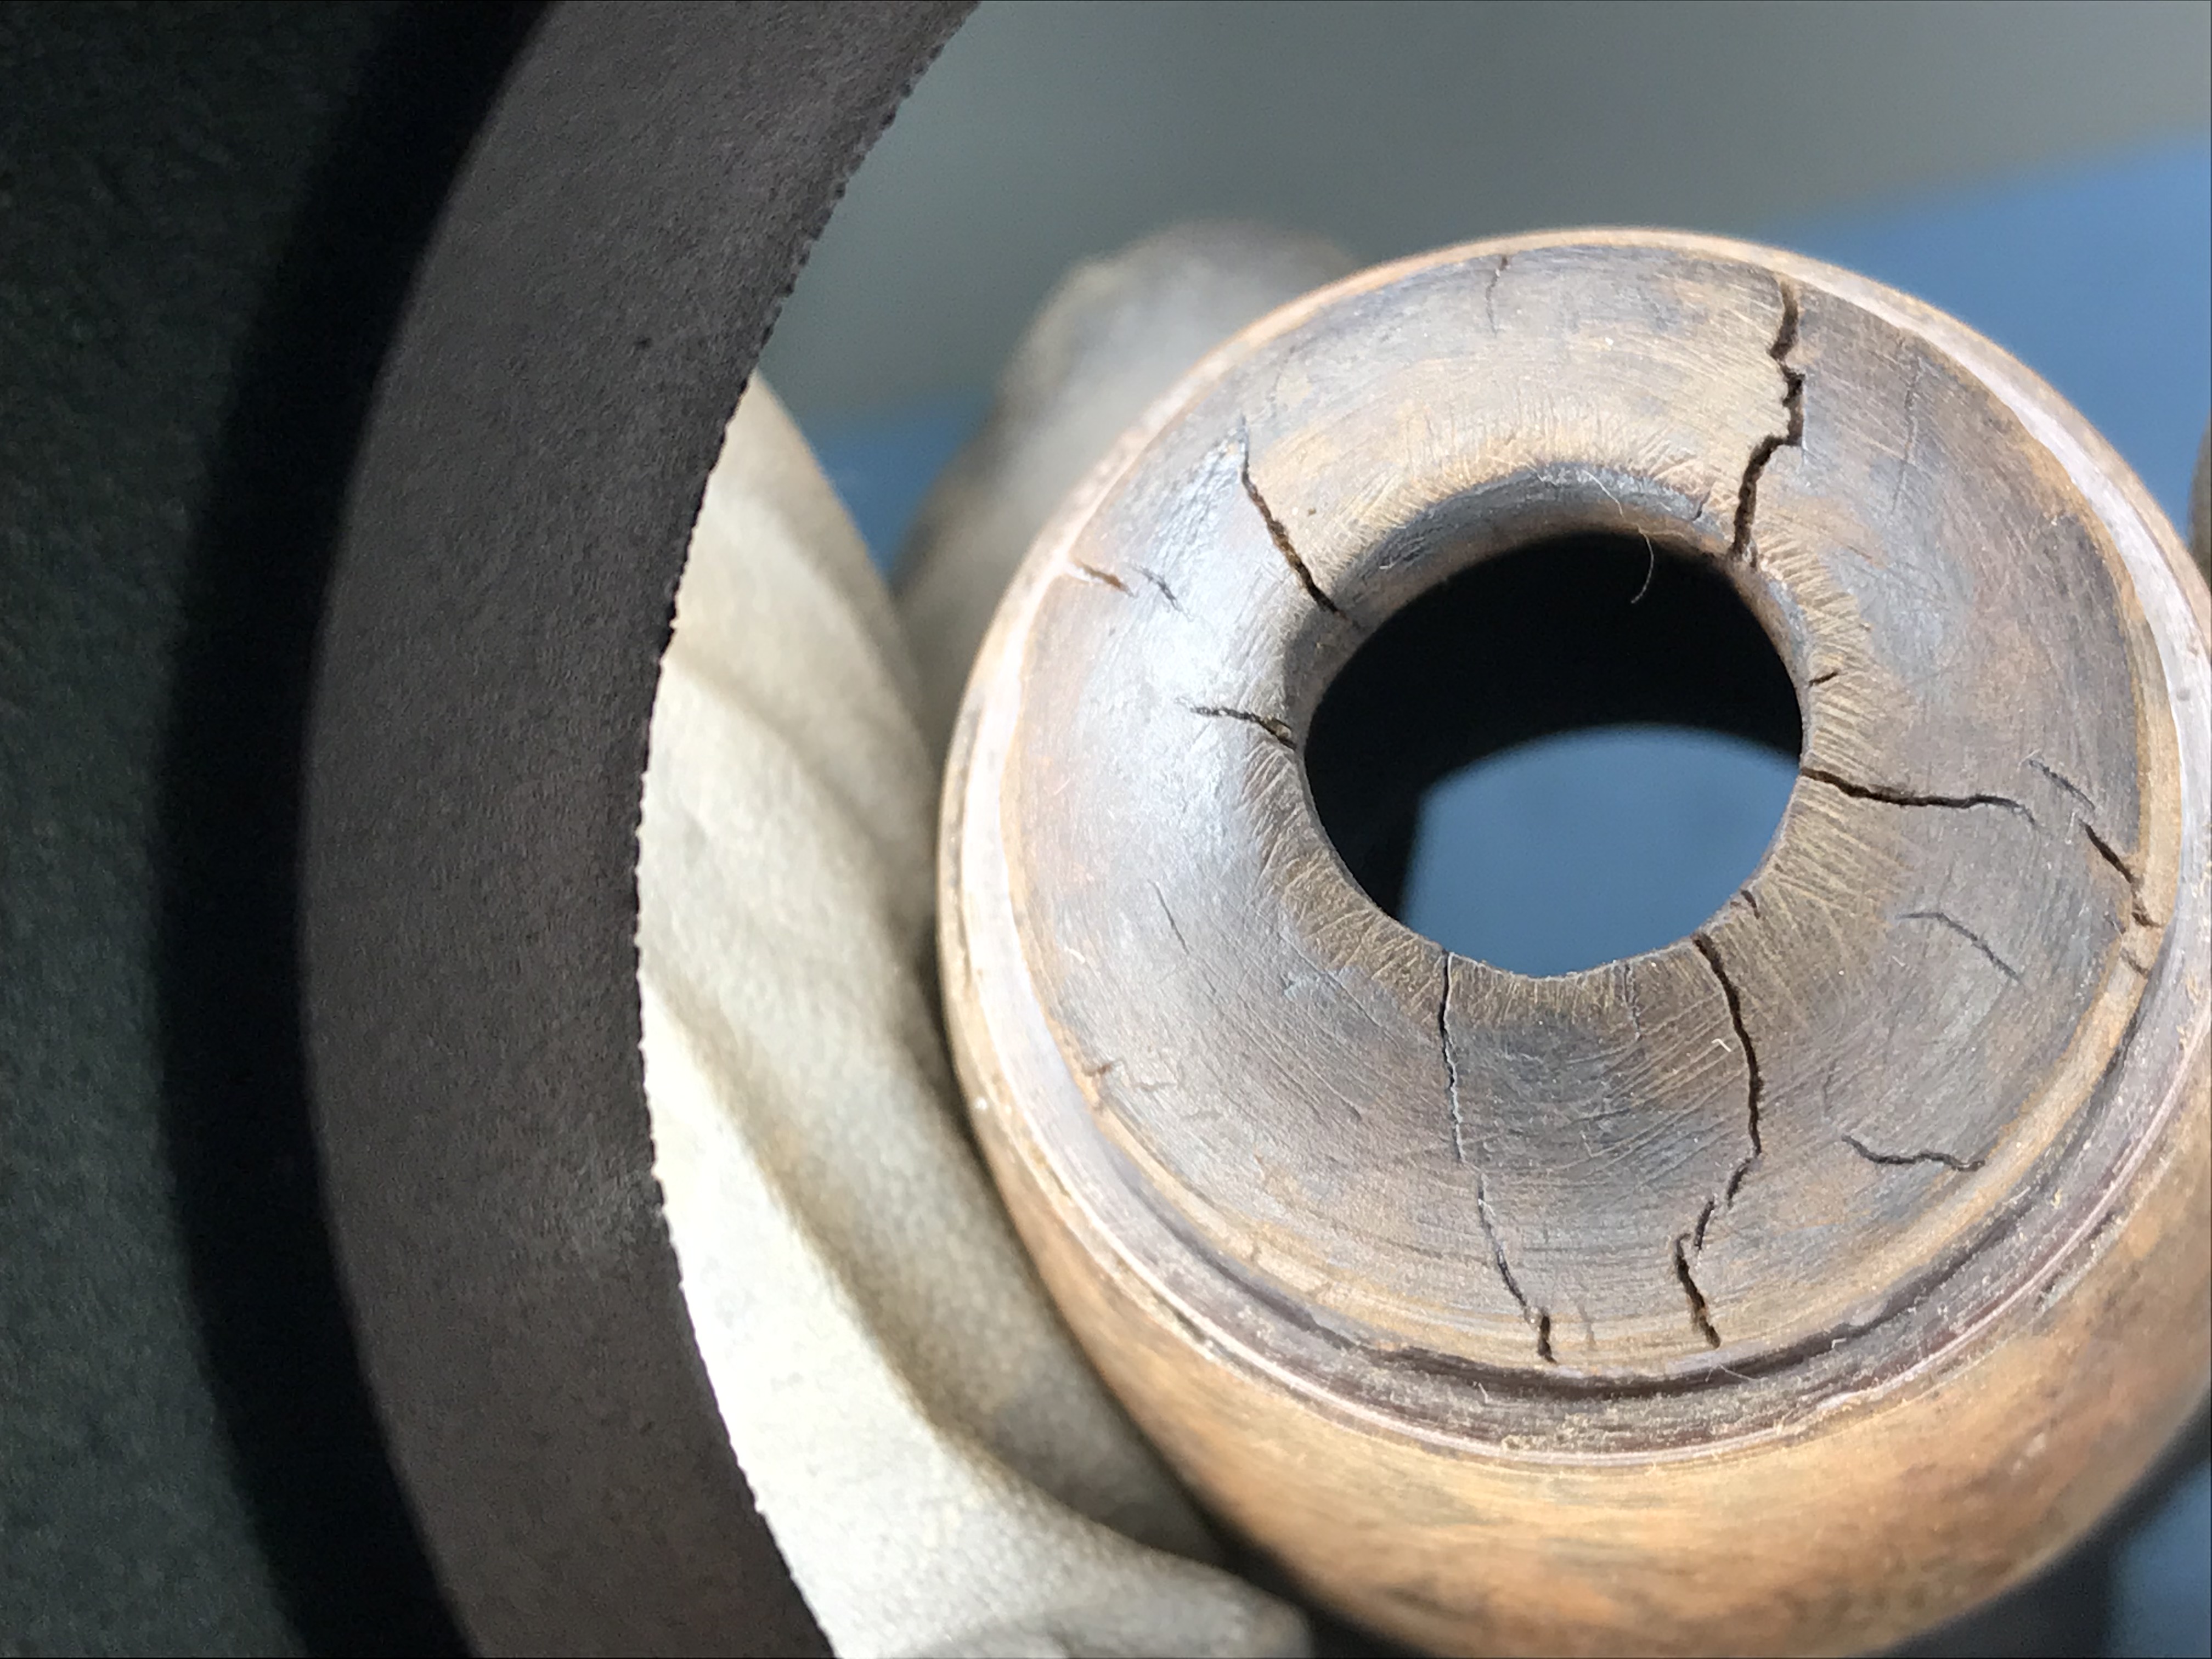
When I inspected the condition afterwards, it was clear that the mortise was much deeper than the tenon itself. I used my calipers to measure the difference which you can see below.
There could be a variety of reasons that could have caused this. This Dunhill used the flanged inner tubes, that would mean that the mortise would need to be drilled to accommodate both the flange and tenon in the mortise. Secondly I’m make an assumption that the pipe was intended to be smoked with the inner tube in place, as such a gap between the tenon and the end of the mortise would be inconsequential. This may be a common occurrence with some of these older Dunhills. But I’m making some assumptions here. Reader, if you have some knowledge on this feel free to share!
Step 2: Clean & Deoxidize the stem
The stem was equally as clogged as the stummel. I used a combination of methods including using a drill bit to ream the accumulated tars from the stem. With every turn of the drill bit, more and more matter came out. I couldn’t even bother trying to clean with alcohol until I pulled out all the crusty internal buildup.
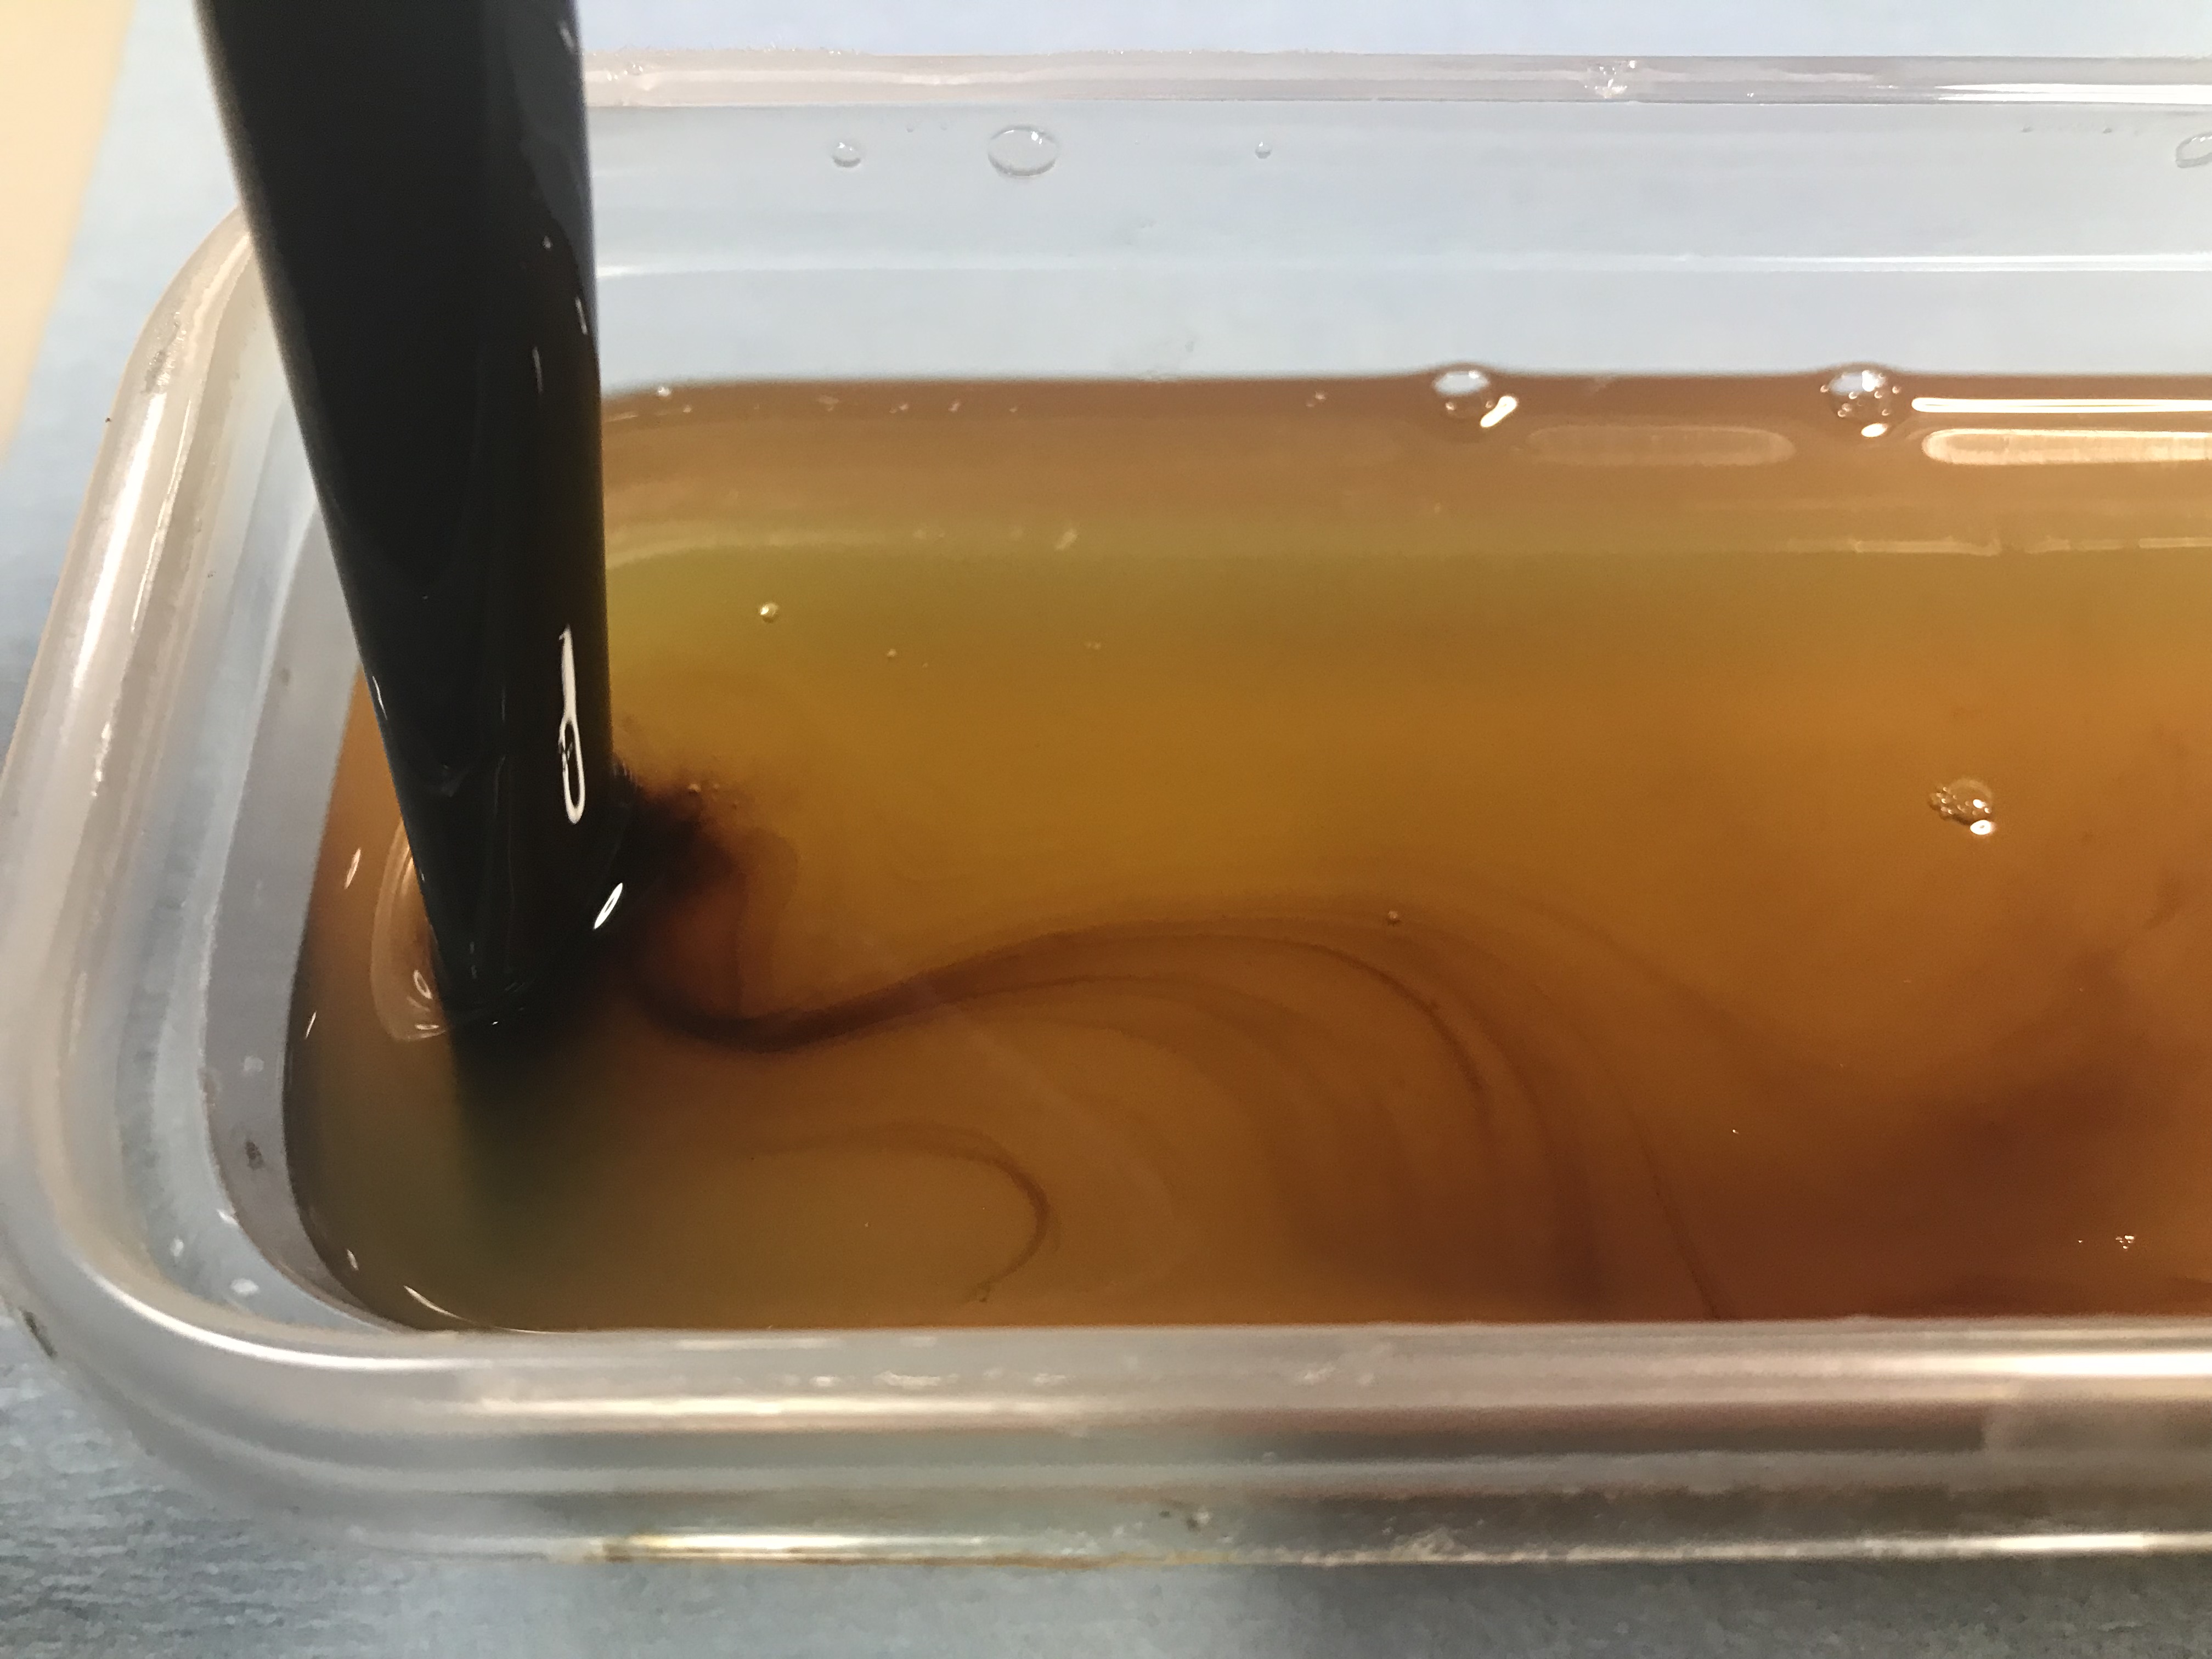
Once the internals of the stem were clean, I soaked it for 24 hrs in Mark Hoover’s Deoxidizer, available at lbpen. The results are ideal. You can see the brown oxidation has been completely removed.
Step 3: Clean & Recondition the stummel
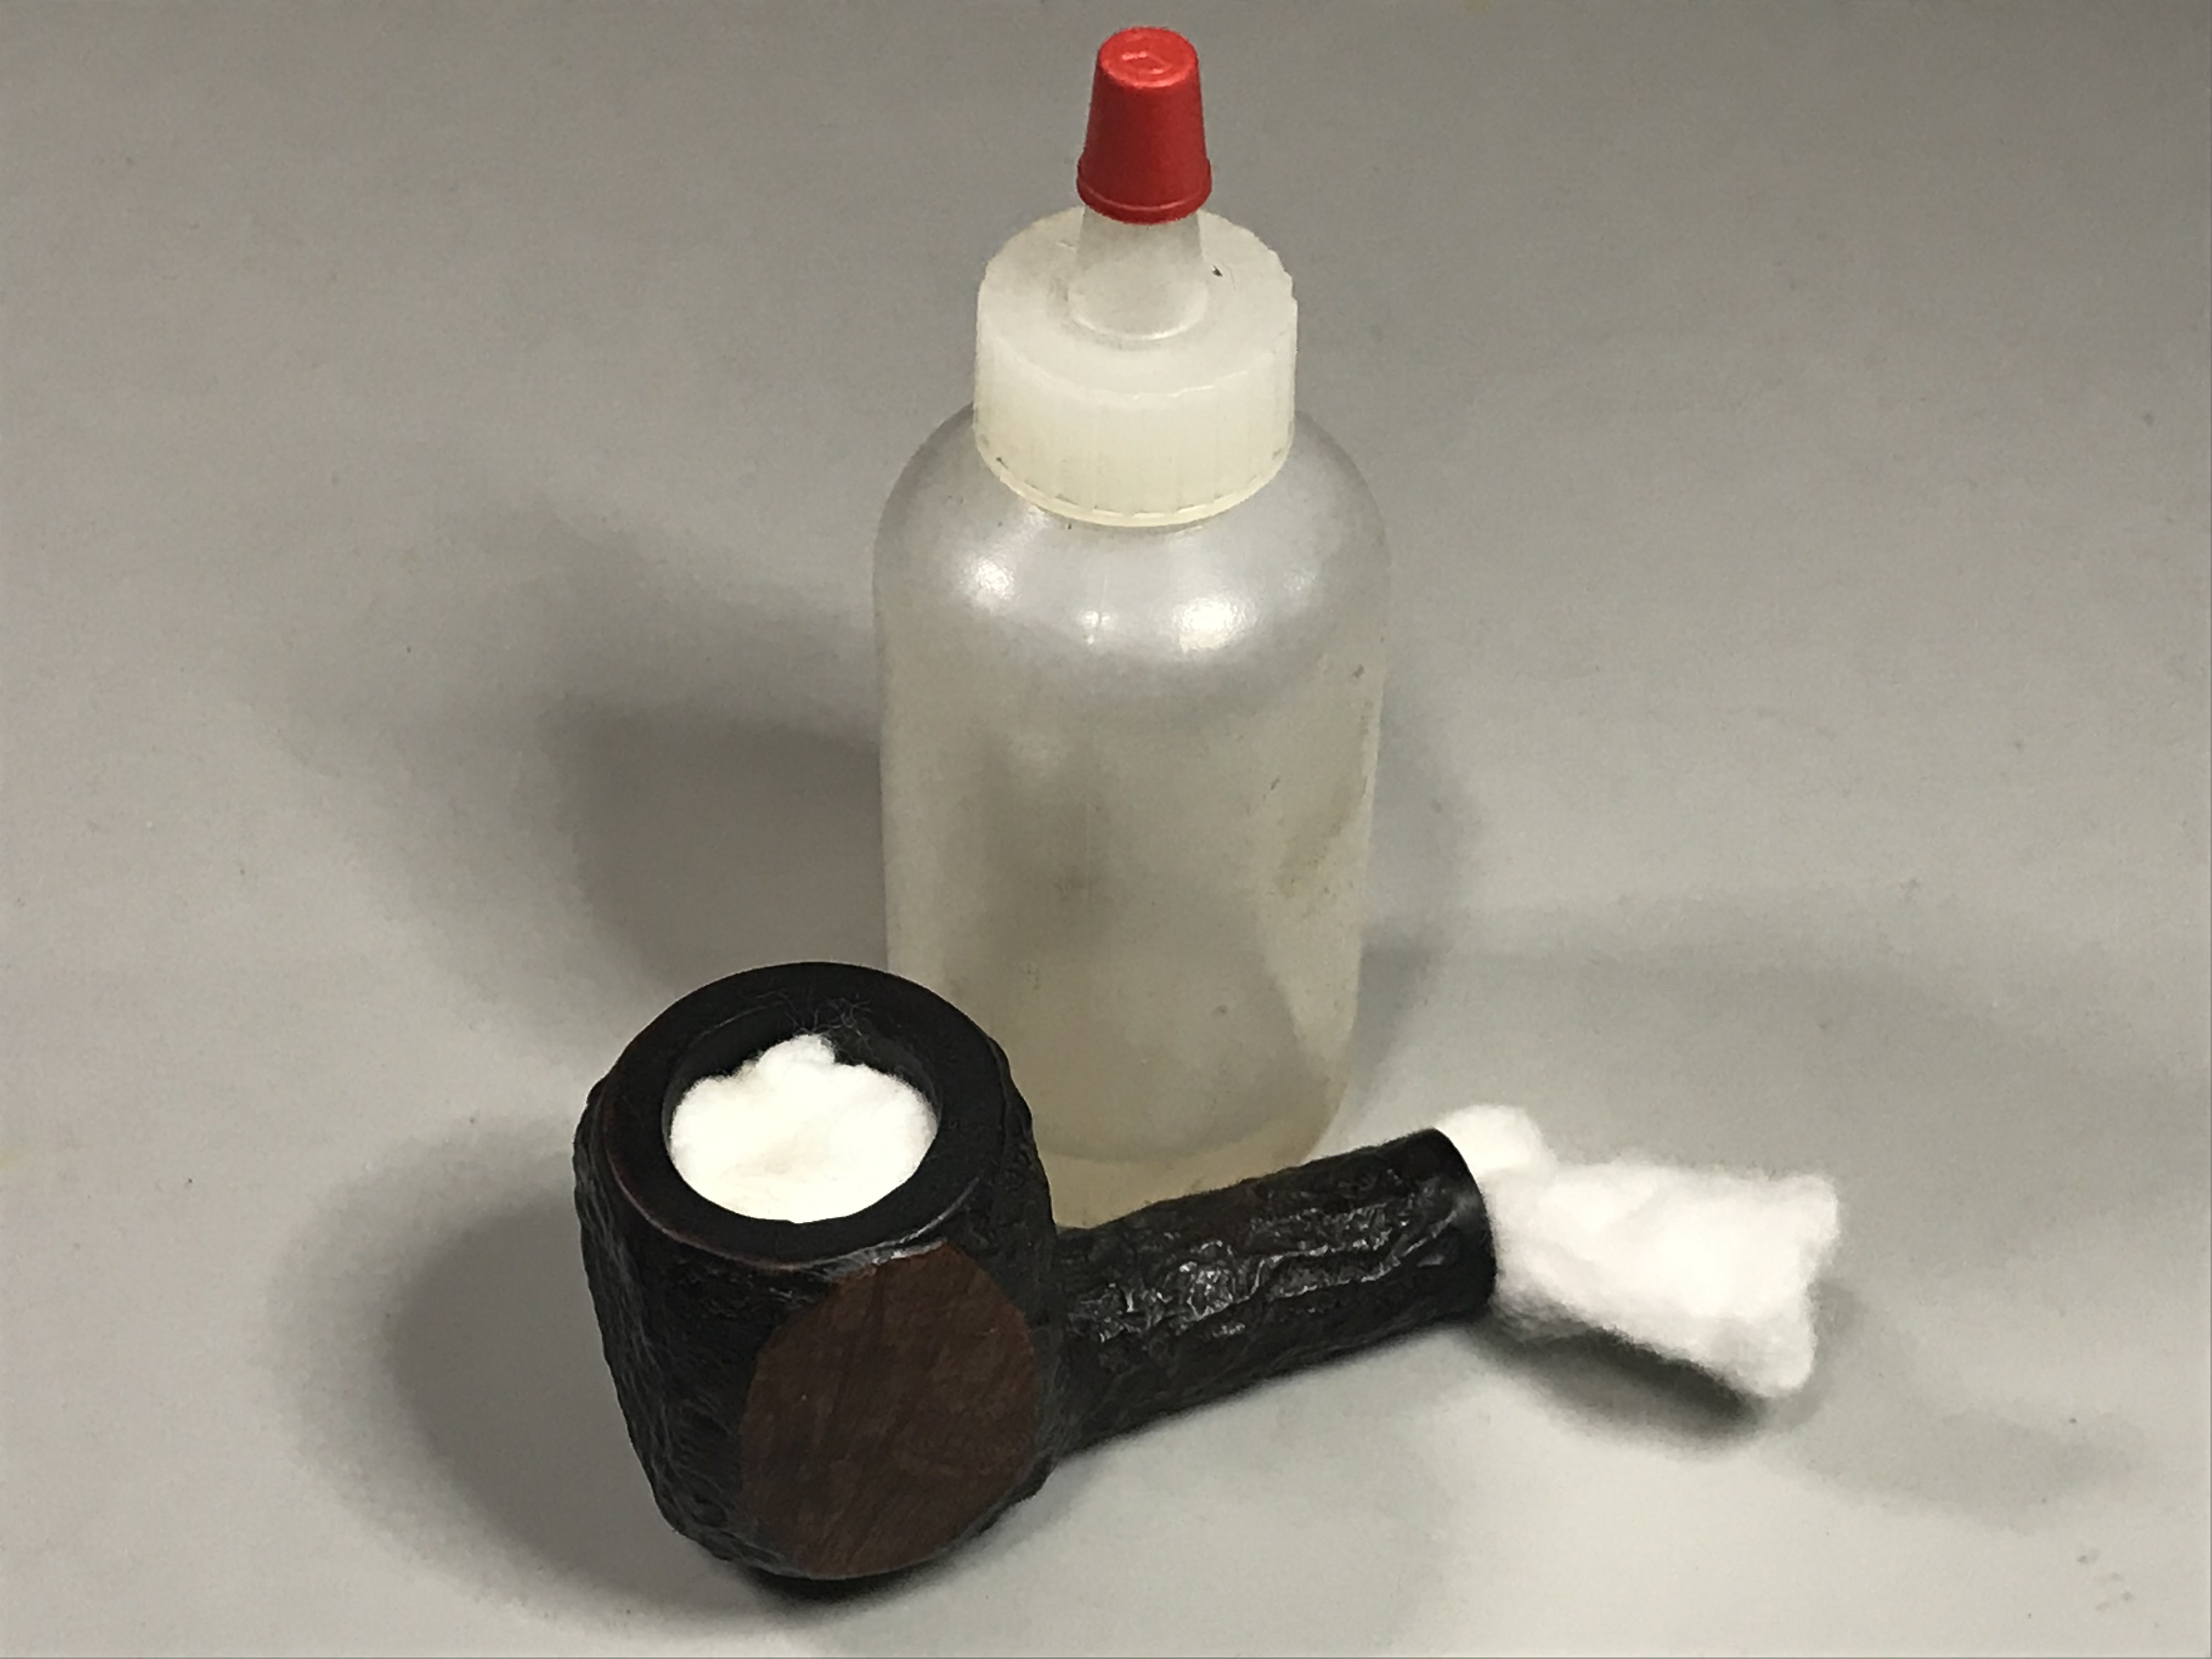
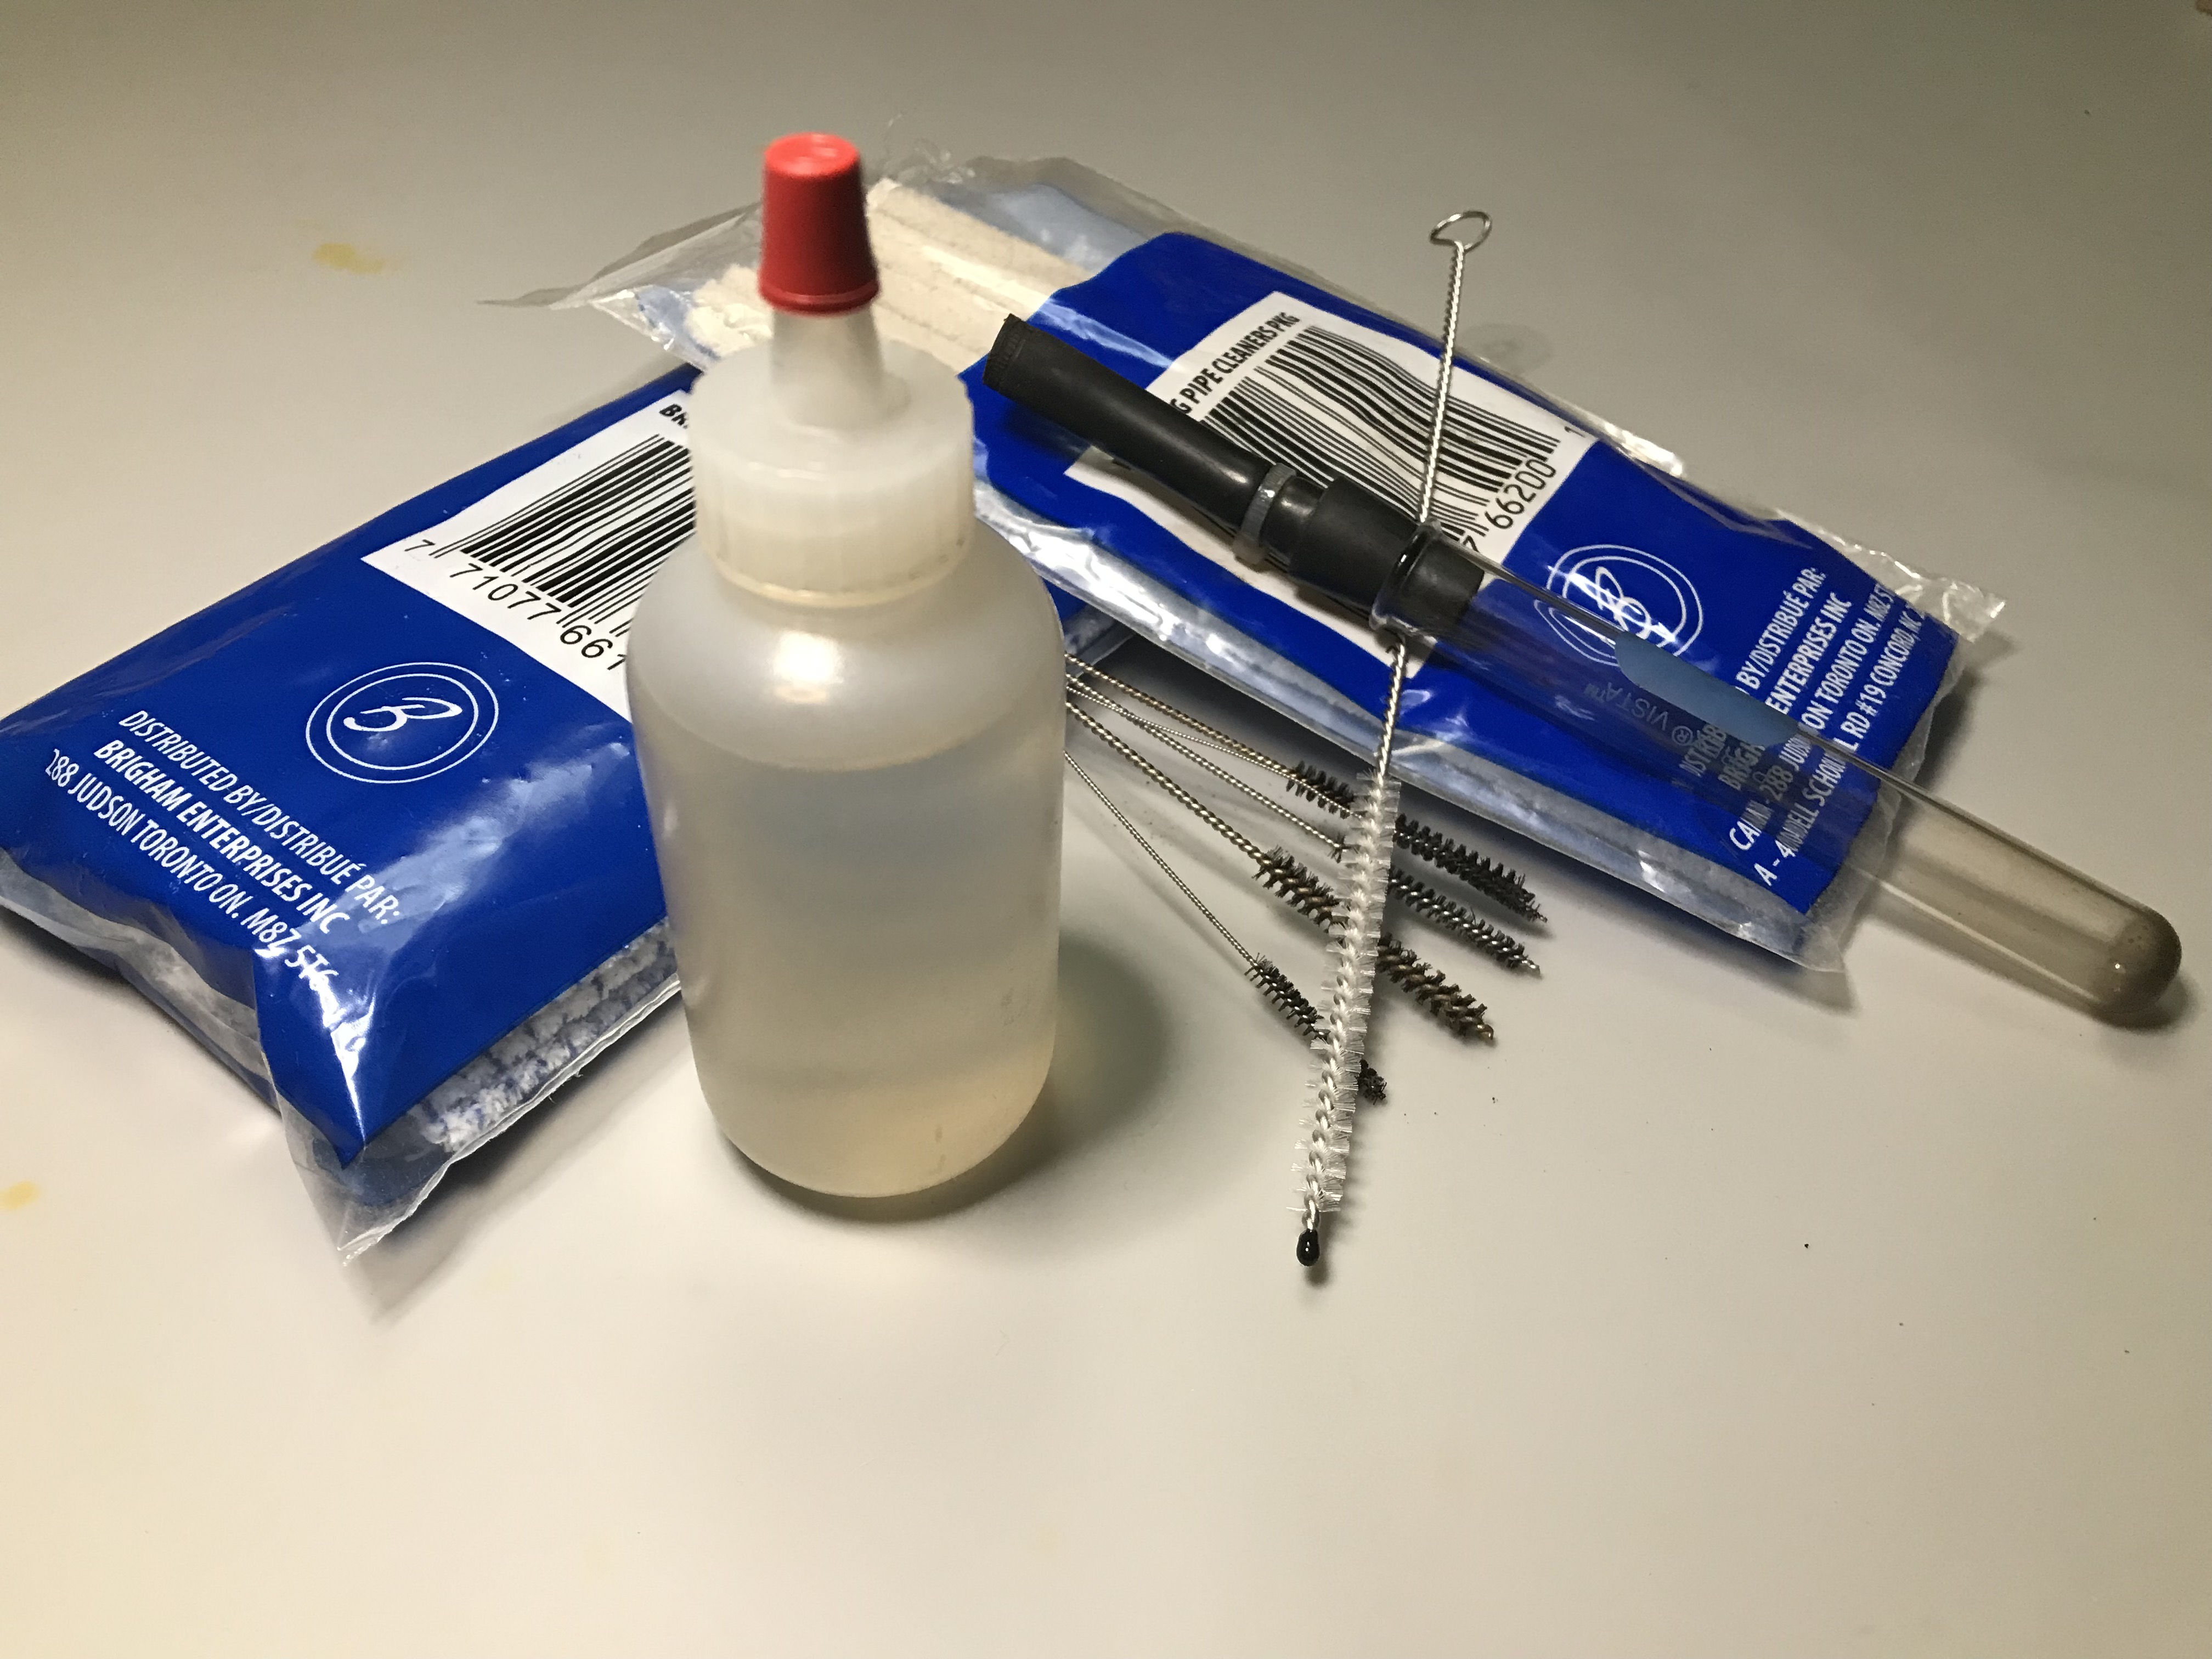
While the stem was soaking, I used this opportunity to thoroughly clean and recondition the stummel. Thankfully due to all the prep work with reaming, I didn’t need to use many pipe cleaners to clean the draught hole. I inserted some cotton balls into the tobacco chamber and the mortise then soaked them in Isopropyl alcohol for 24 hrs.
As the alcohol evaporates it draws tars and nicotine from the briar and deposits them in the cotton ball. This process removes any odours and foul tastes left behind by the previous smoker.
With the stummel cleaned and reconditioned, it was time to scrub 92 years worth of filth off the pipe. For this I use a toothbrush and scrub the pipe with Murphy’s Oil Soap.
With the stummel cleaned, you can see the markers mark much clearer on the shank, verifying my initial inspection.
Step 4: Stem Repair
I turned my attention back to the stem to remove the tooth dents and chatter. The button was deformed and almost nonexistent from years of the smoker clenching the stem in their teeth.
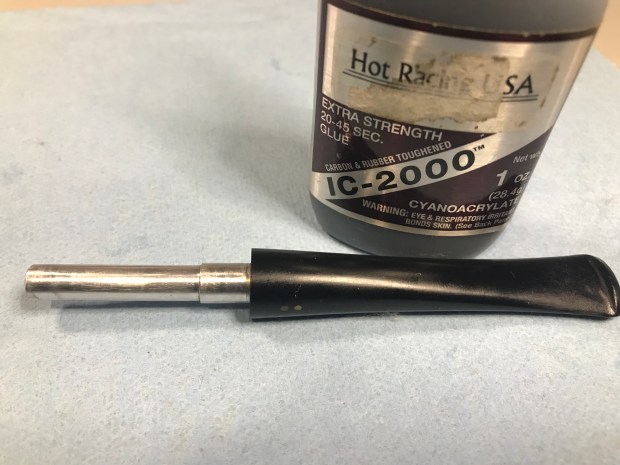
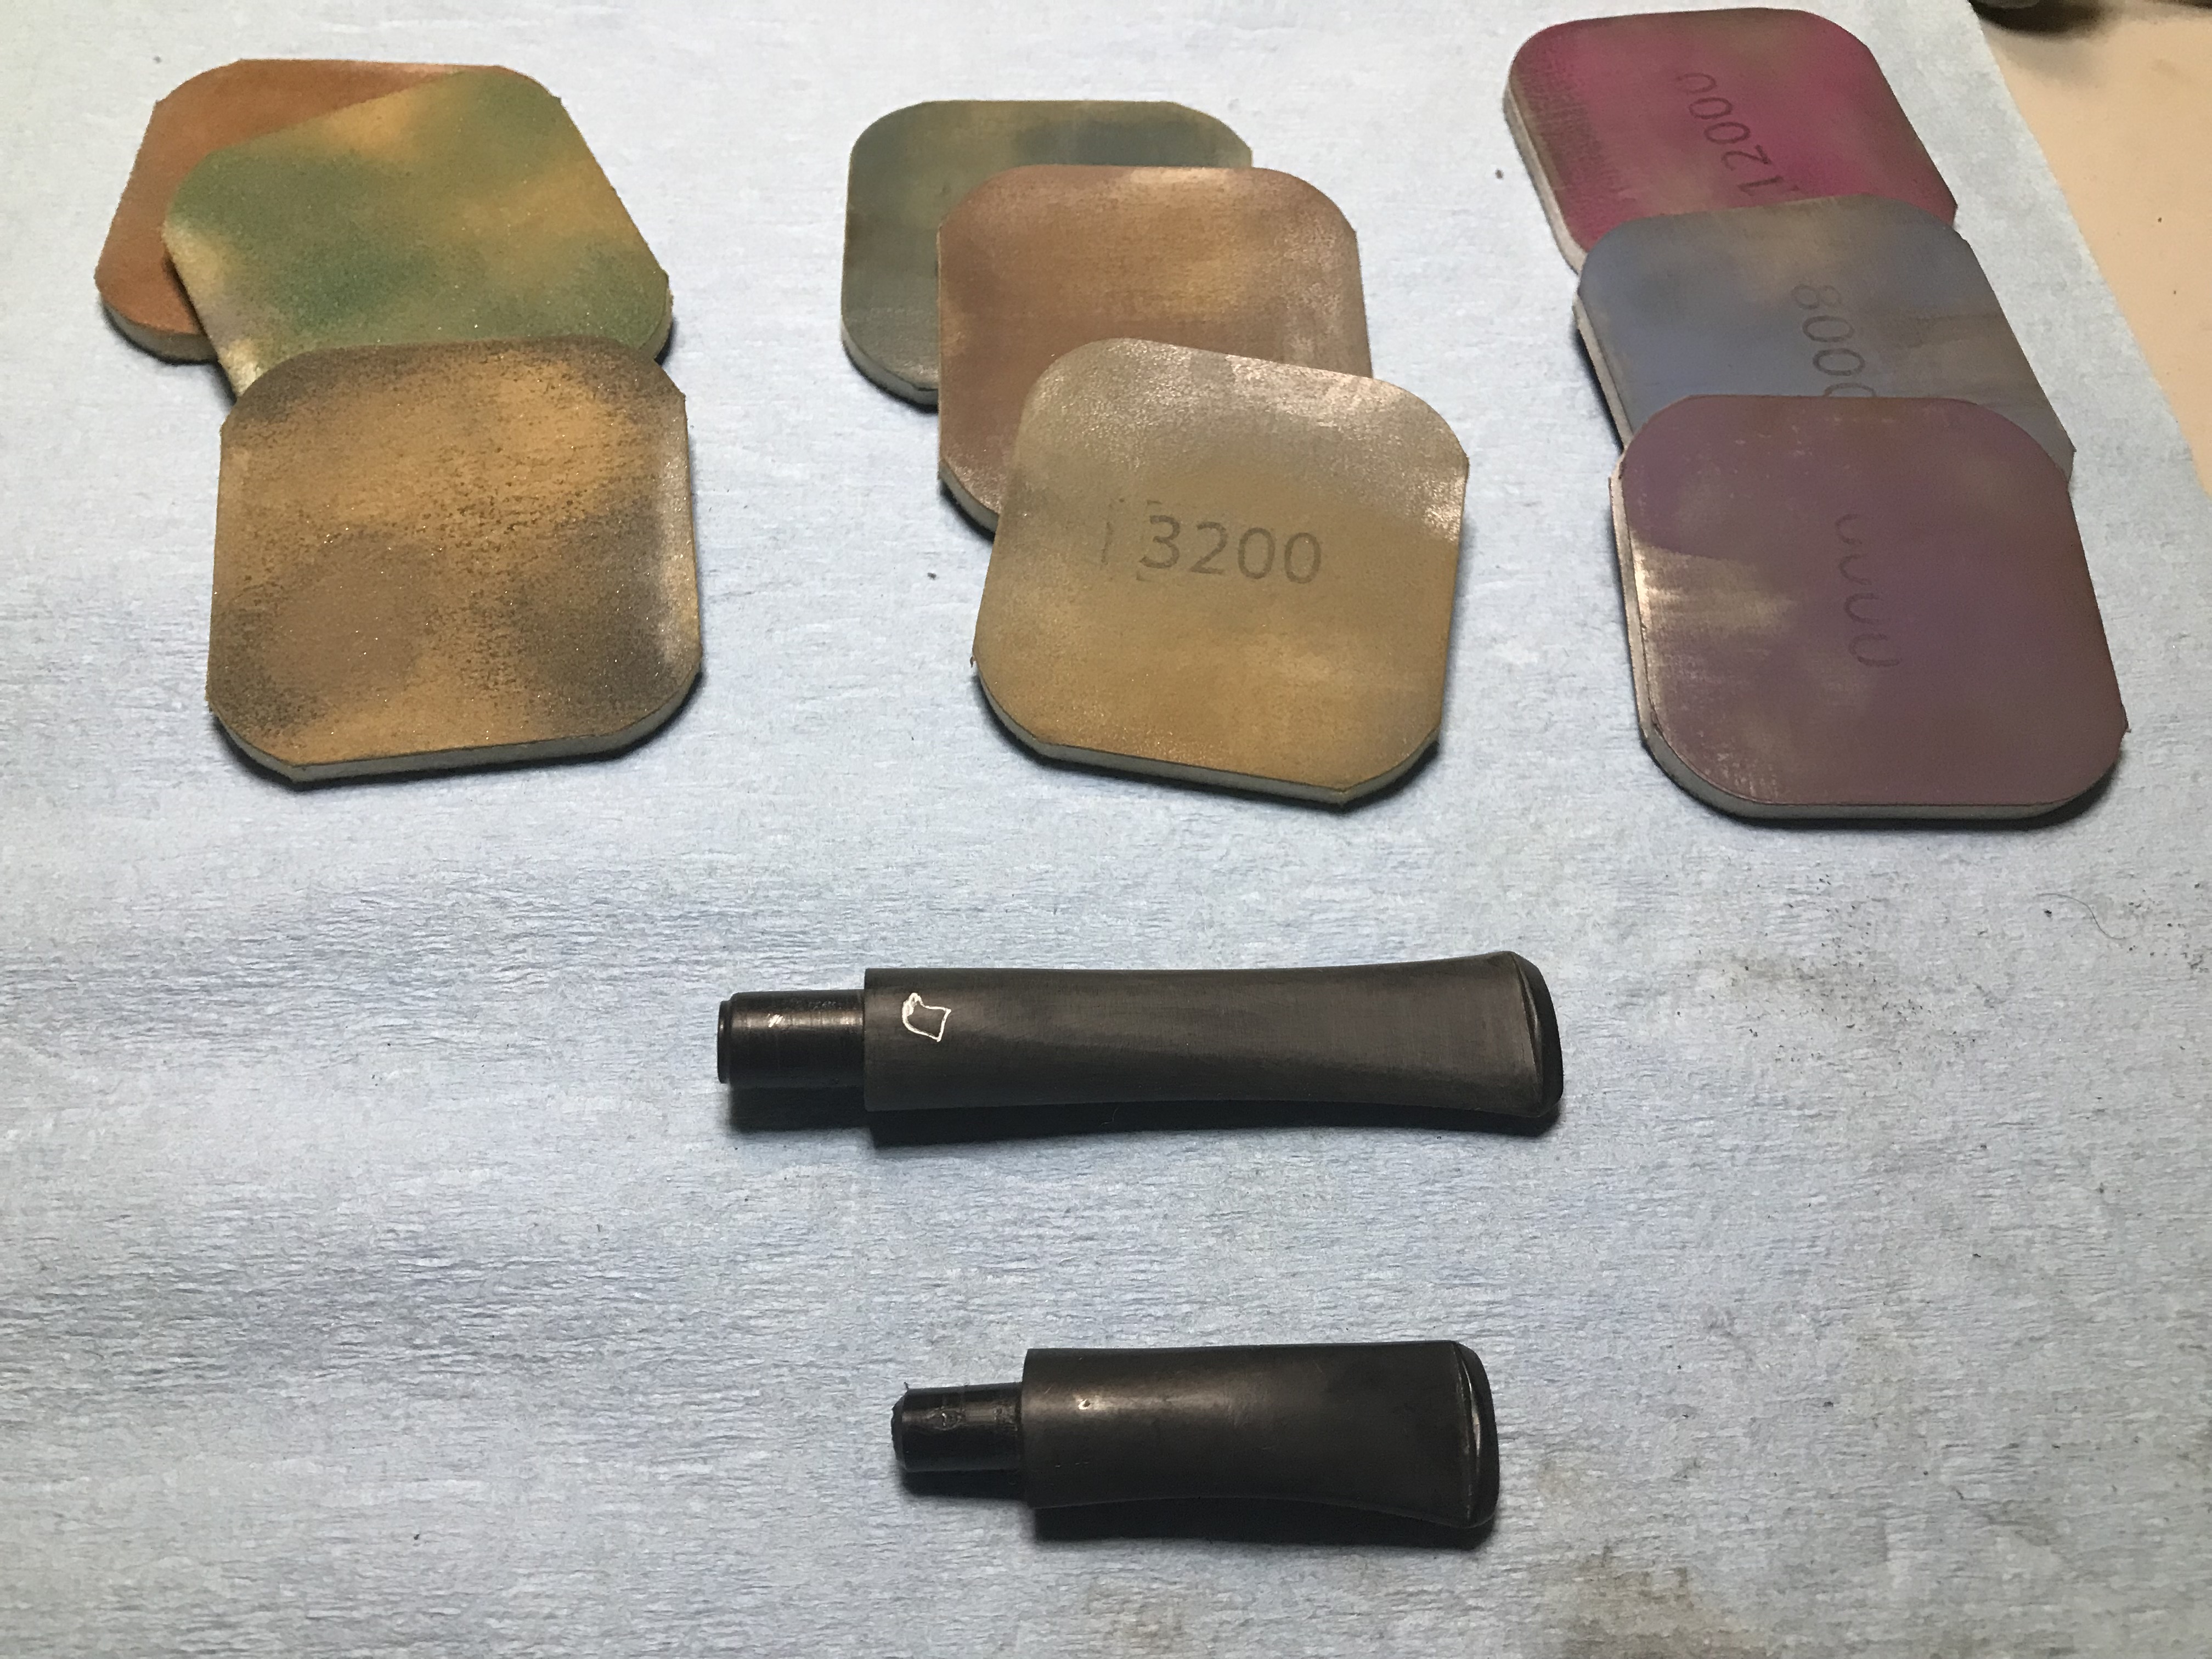
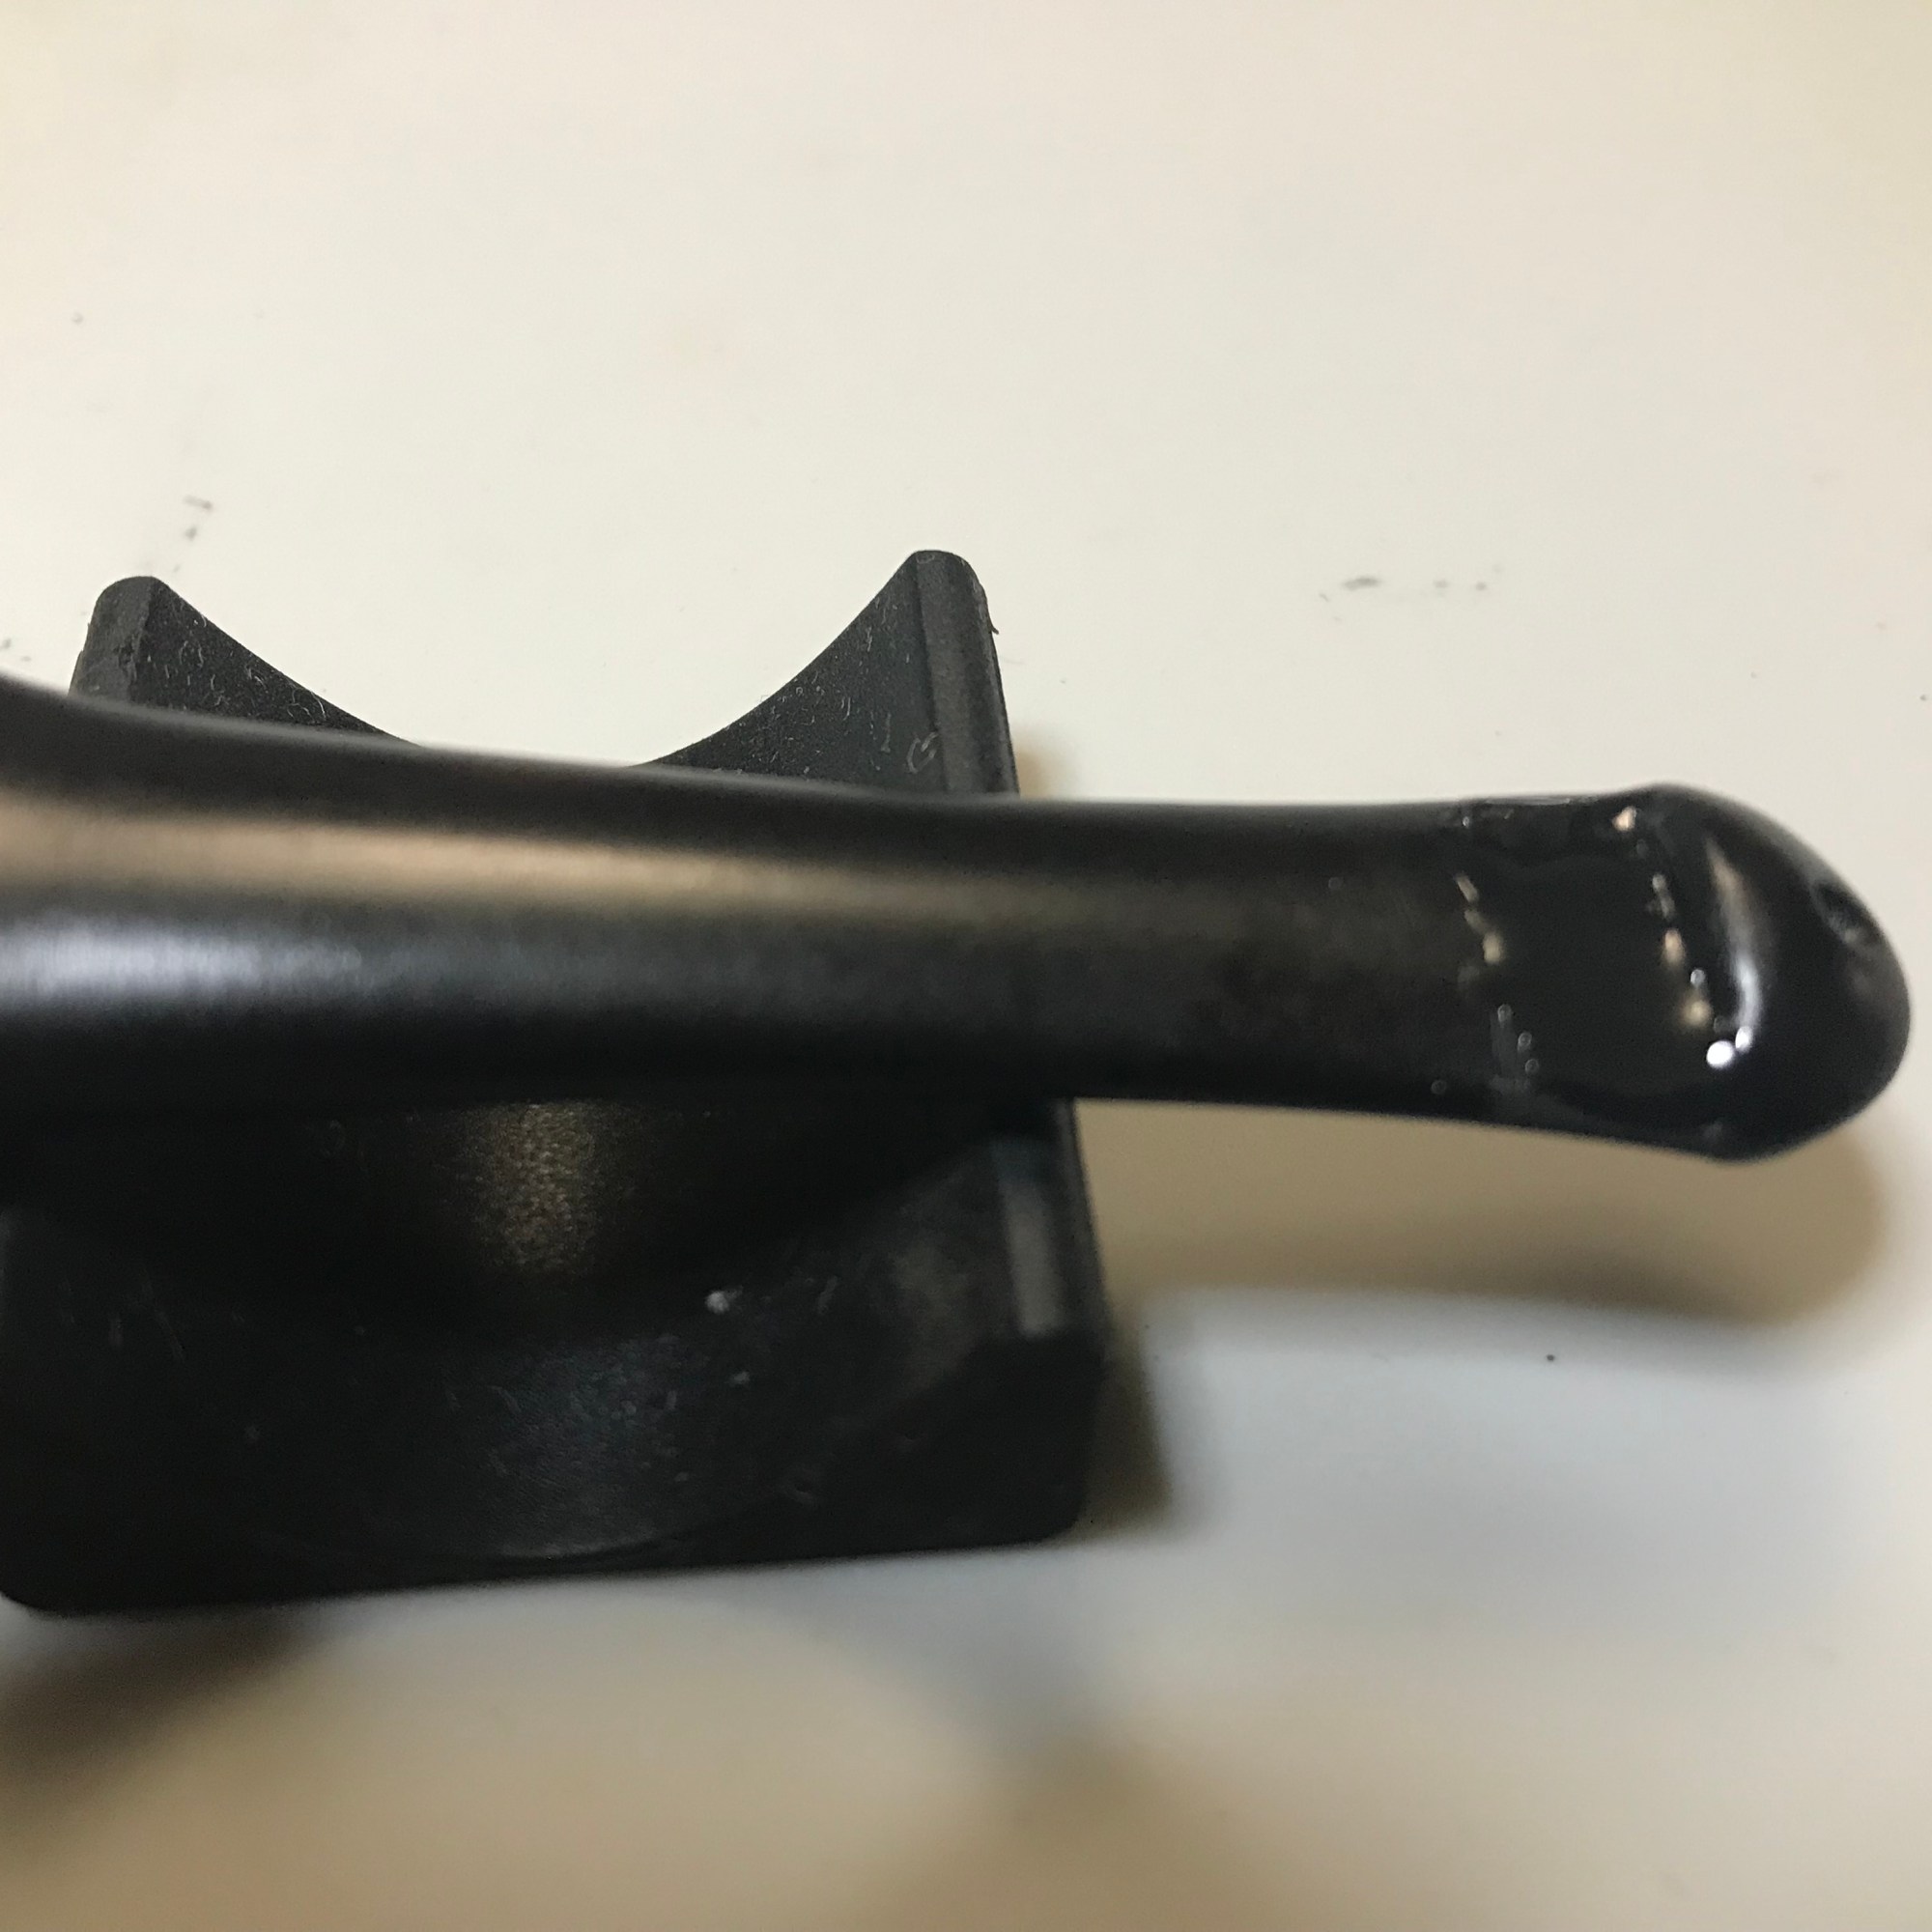
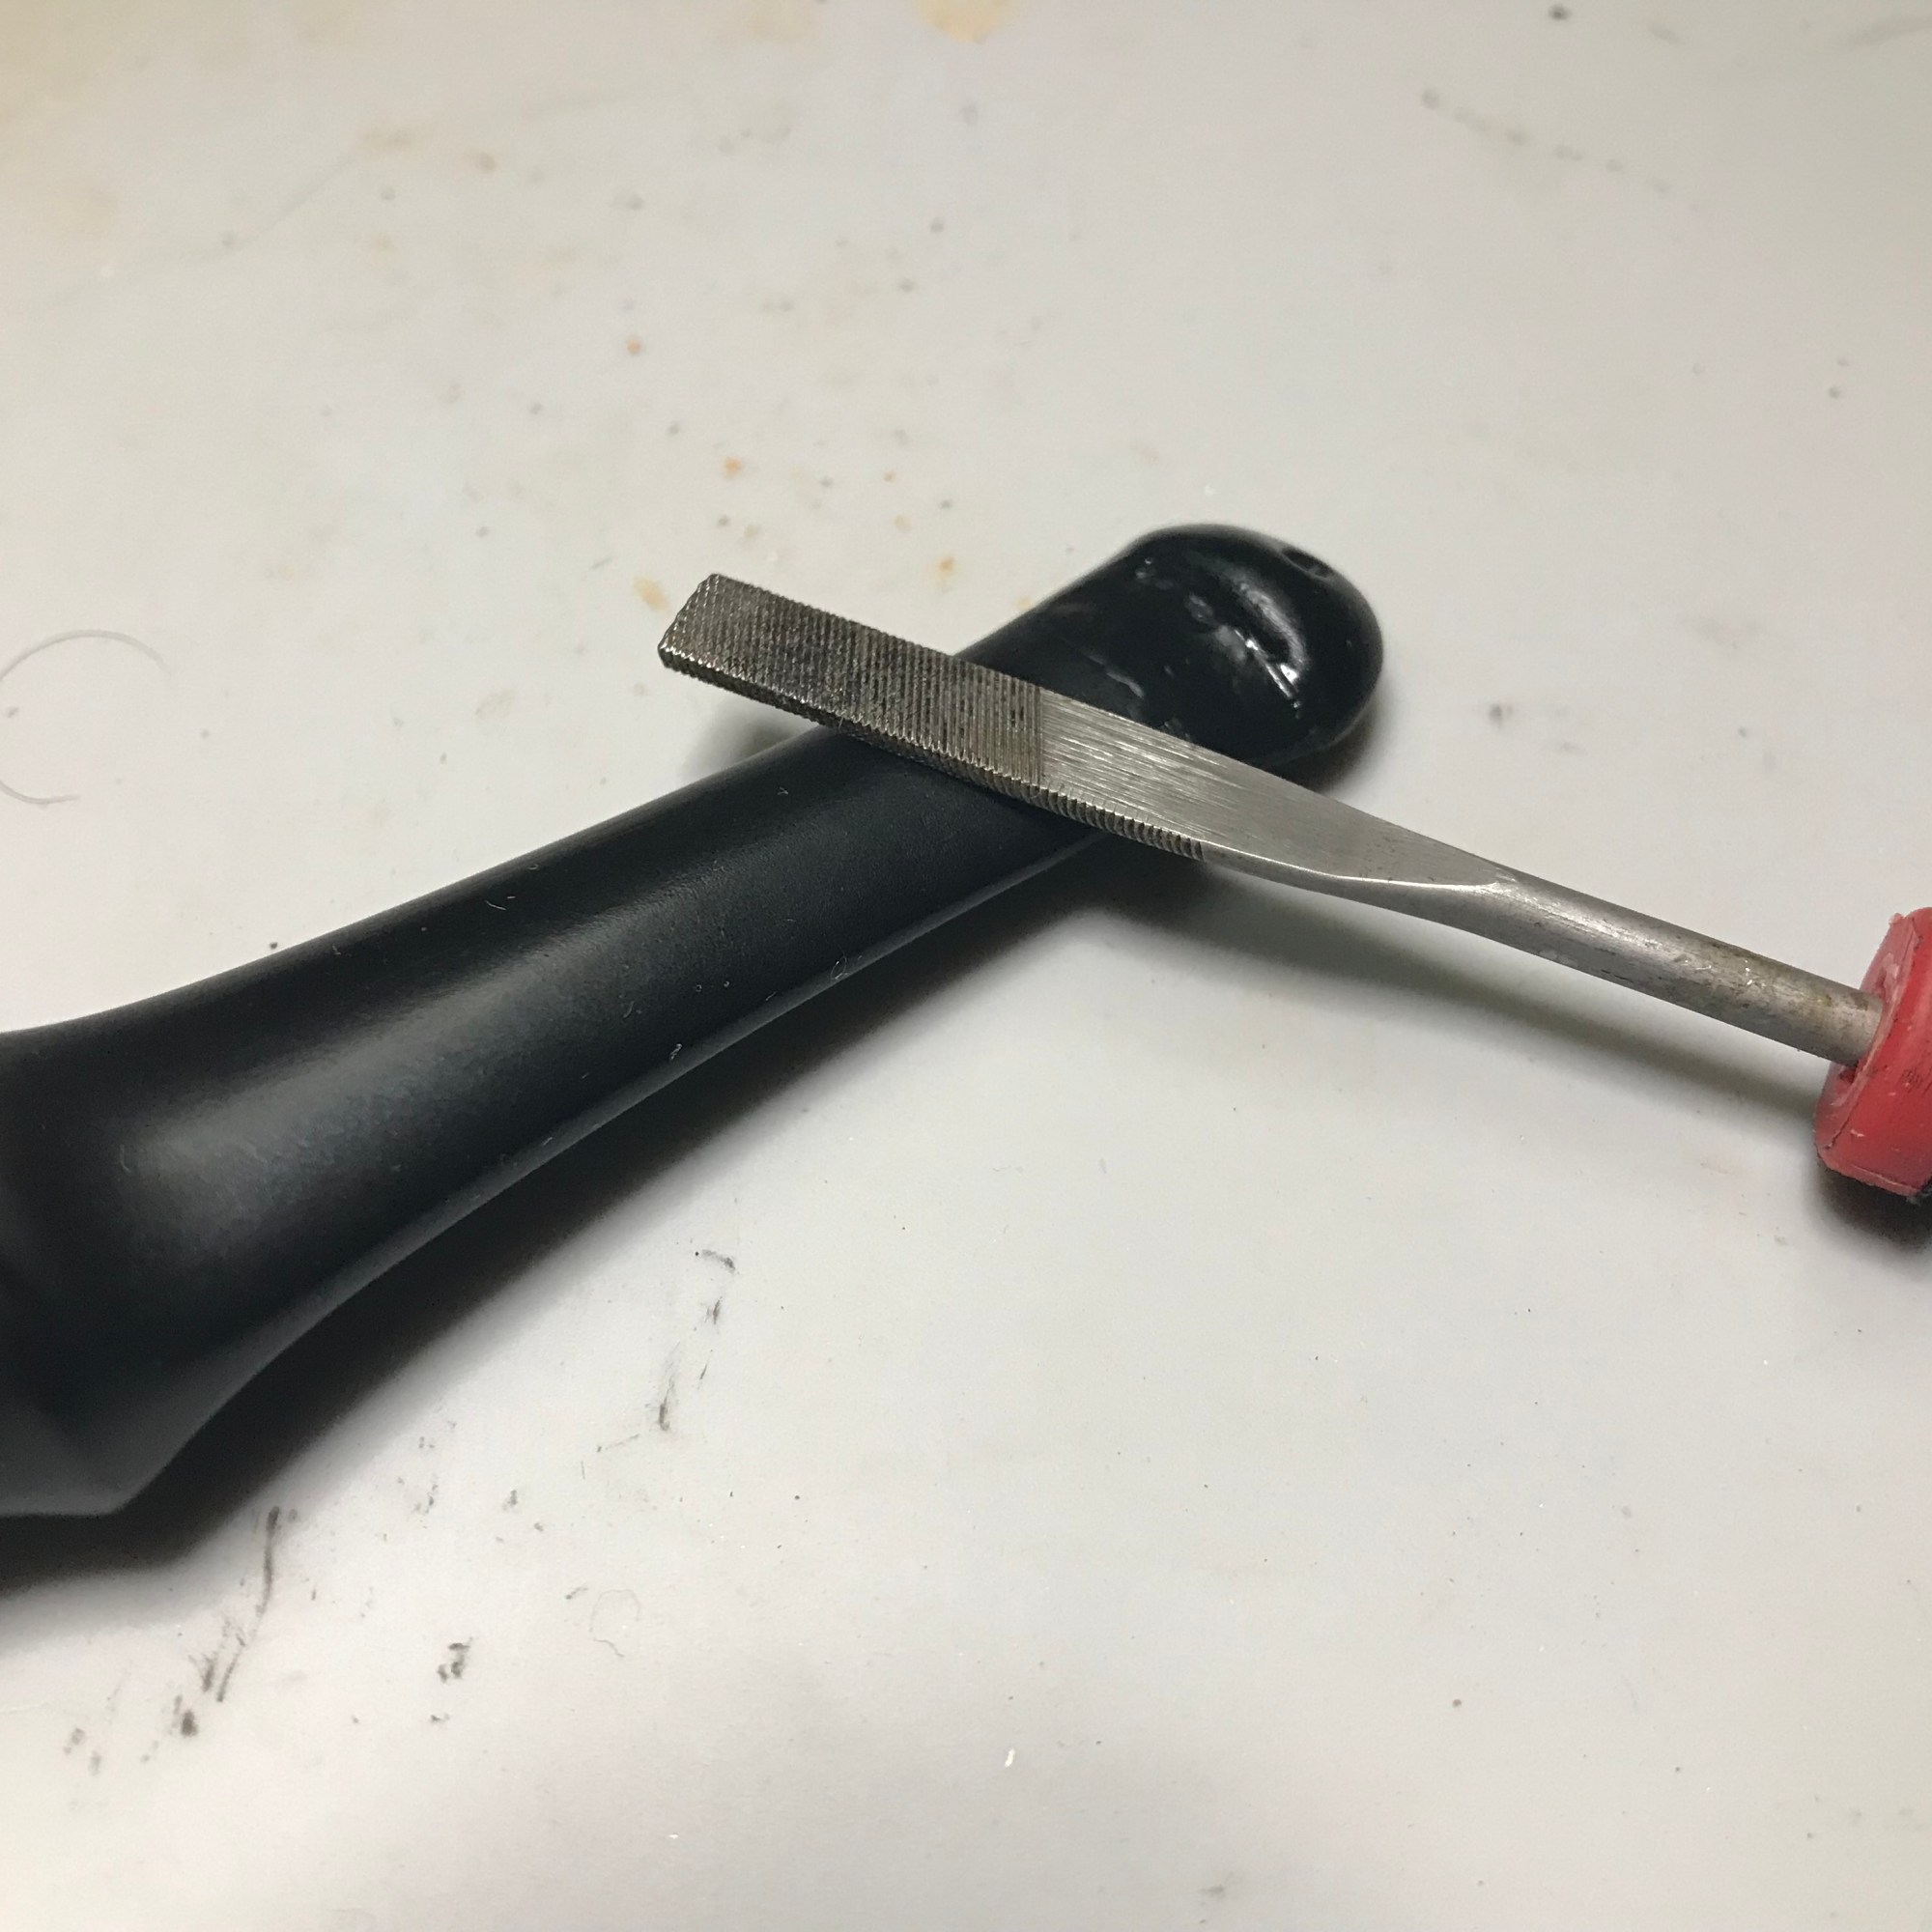
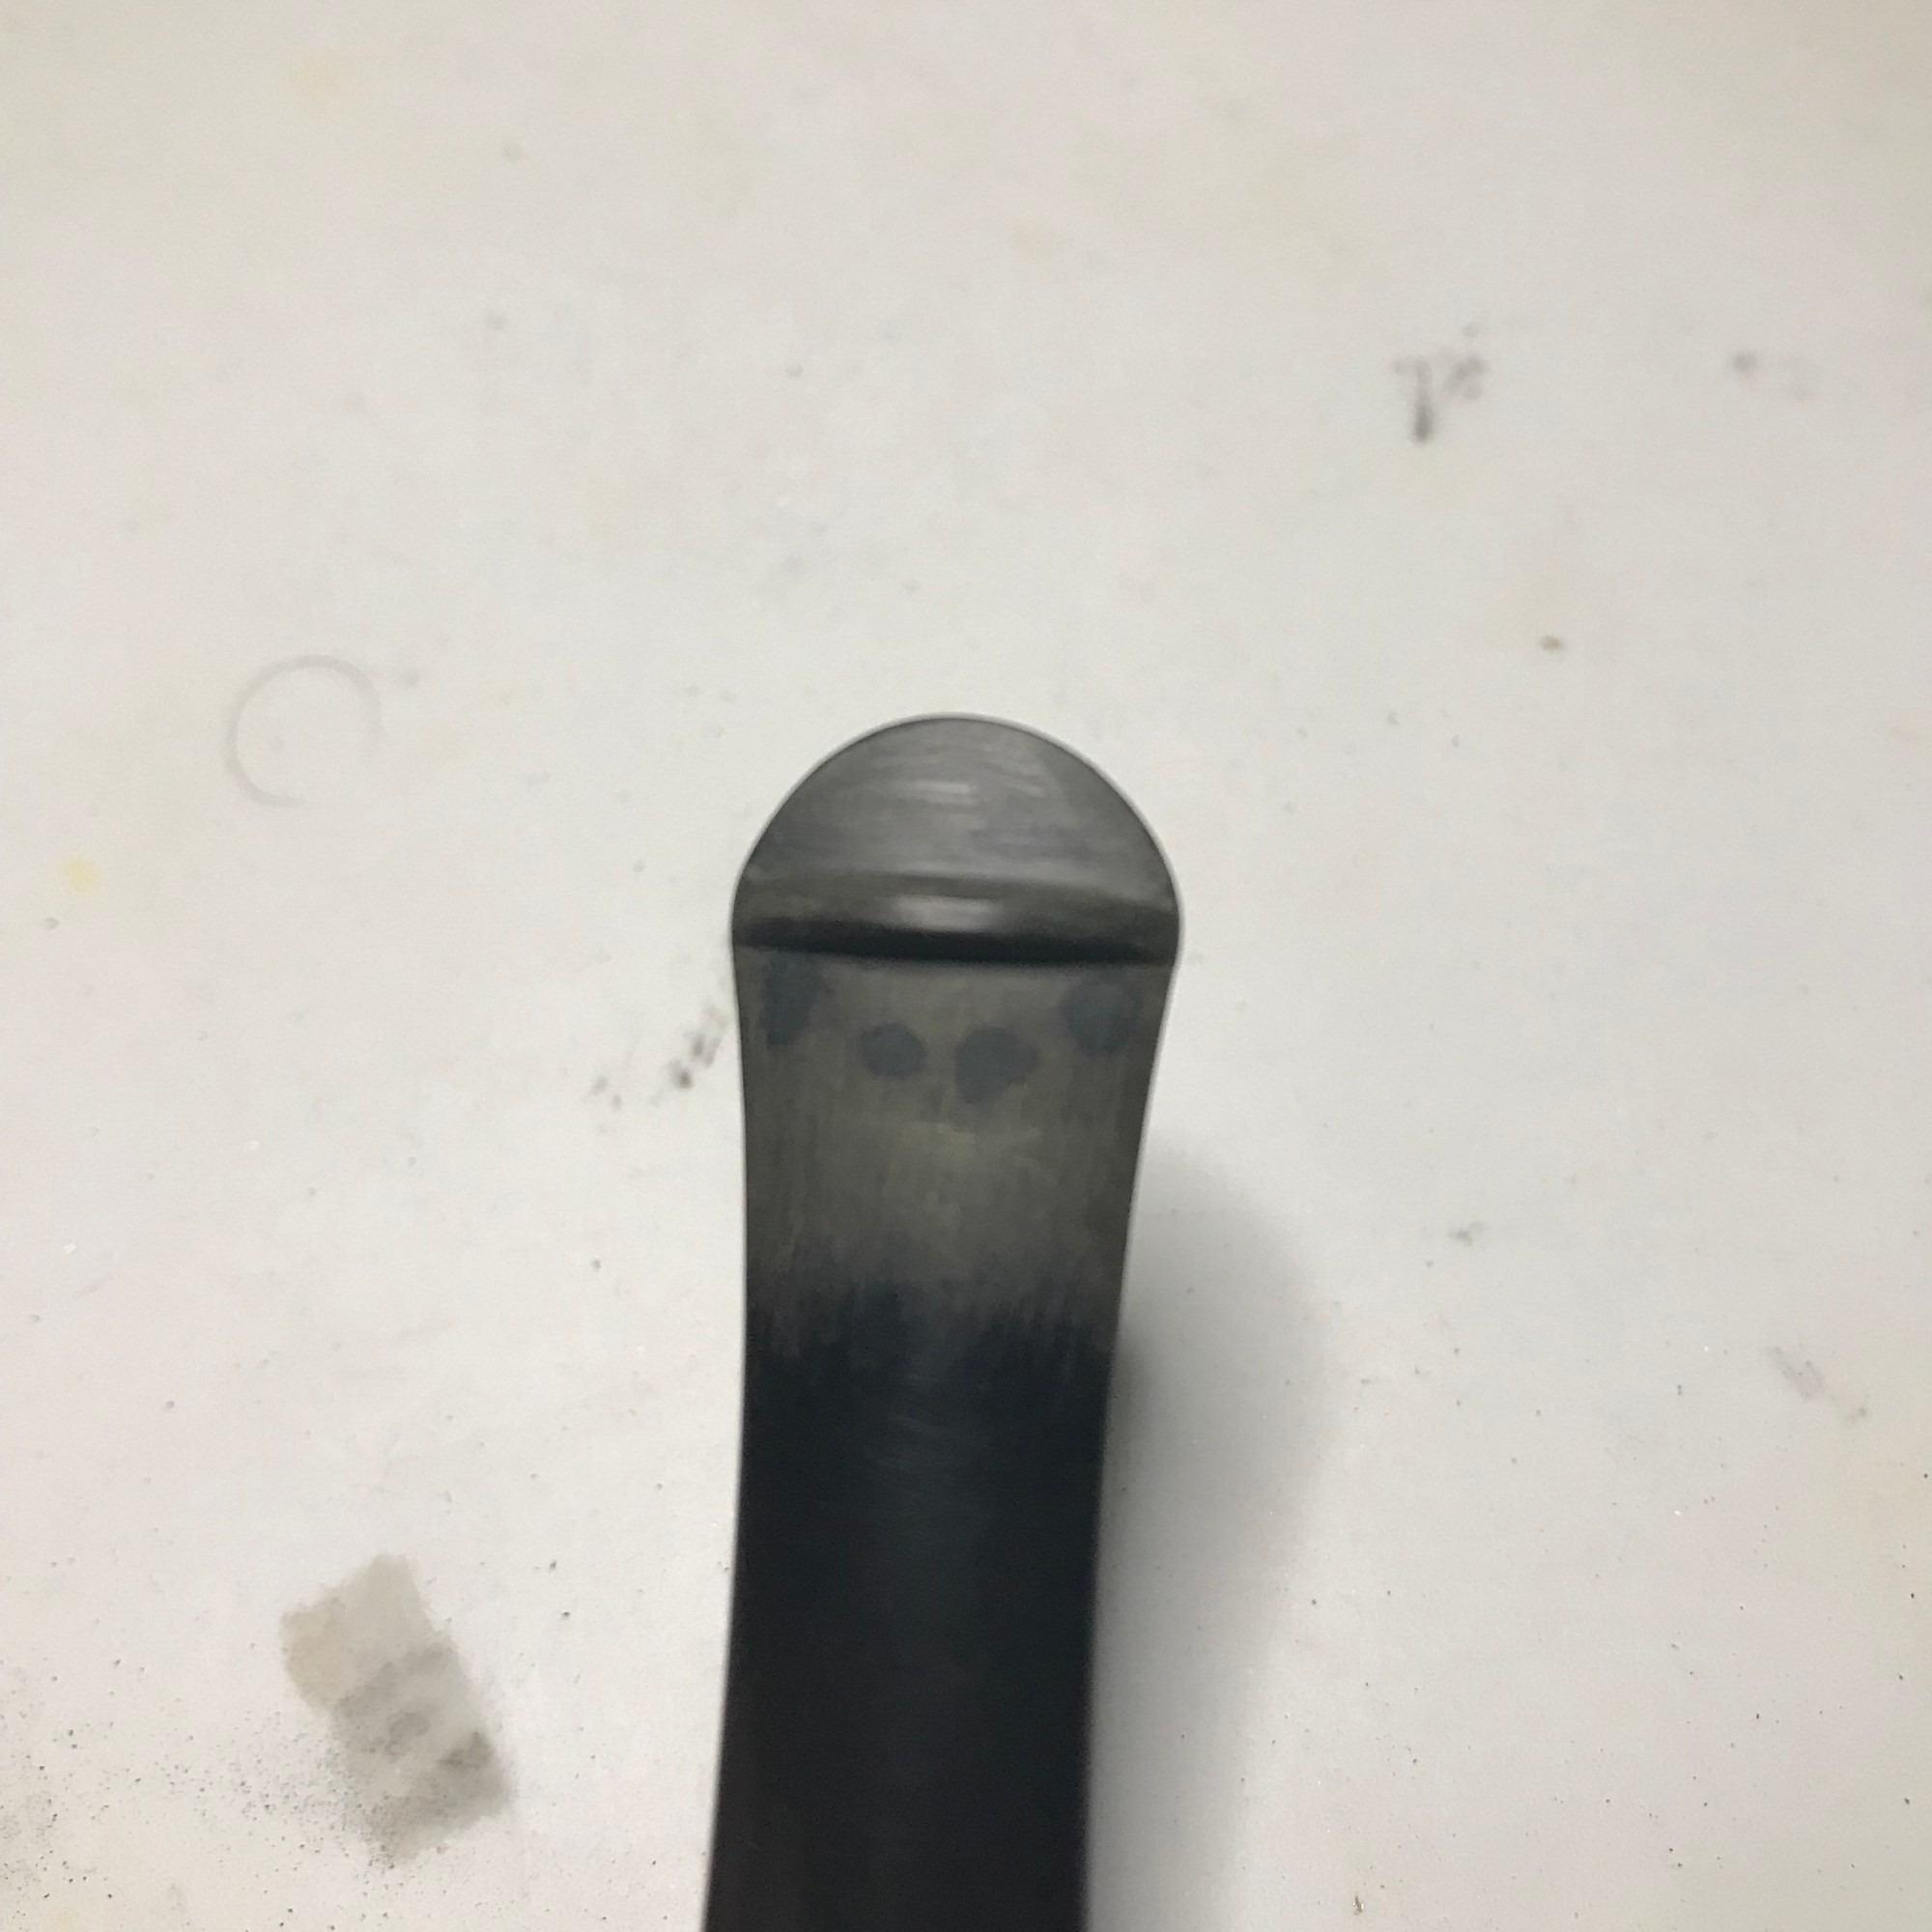
I attempted to lift the tooth dents out using my heat gun. I was able to lift some of the tooth dents out, what remained would have to be repaired. I used Rubber Toughened CA glue to rebuild the button and the bite area. I used hobby files to shape the end of the stem, afterwards I sanded the stem from 320-1000 grit, then switched to micro mesh sanding pads from 1500-12,000 grit.
Step 5: Refinish the stummel
The finish on the pipe was all but gone with just the brown undercoat visible. I again turned to the Dunhill guide to determine what the original finish would be for the Bruyere series. I found the following:
I used Dark Red Feibings Leather dye to apply the top coat on the pipe and restore the original finish of this Dunhill Bruyere.
Step 6: Buff and Polish
With the finish restored and the stem repaired, it was time for the last step to buff and polish this Dunhill back to a standard worthy of the royal warrant given to Alfred Dunhill. Here is the finished pipe.
Part II of this post is another Patent Era Brigham that was in the same lot as the first. This one peiked my curiosity as well as it was accompanied by a Company Brochure as well.
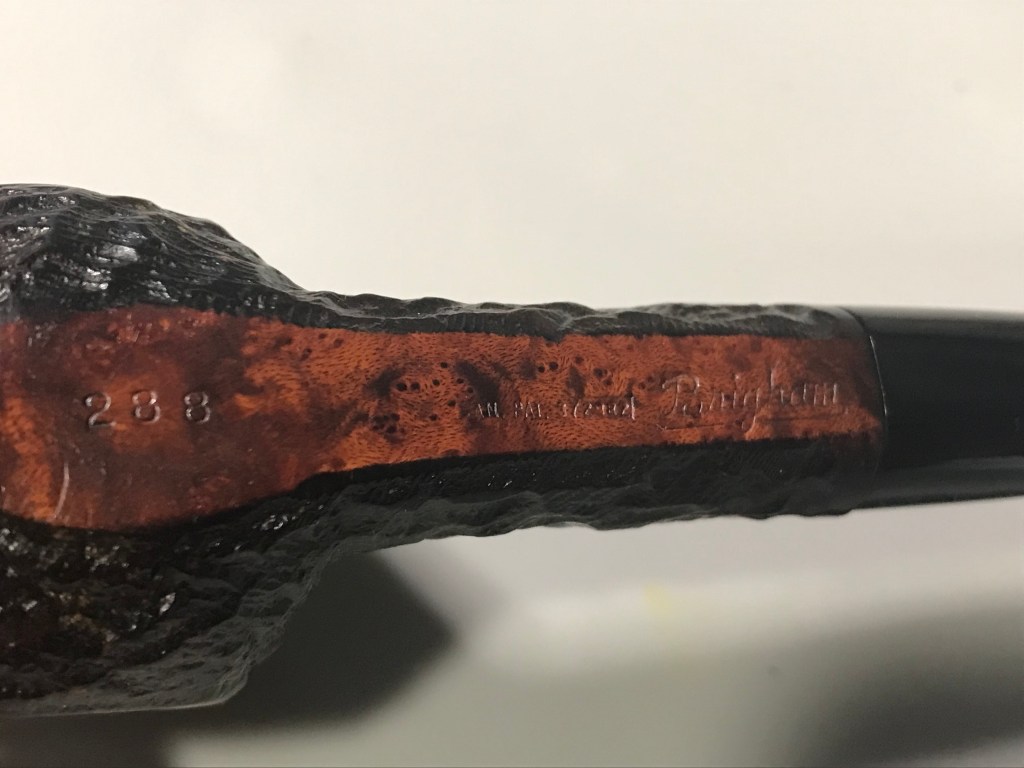
We established that Brigham didn’t move to 121 King St until 1954. This second pipe I’m going to estimate is from 1955, the last of the patent era pipes. The other curious matter is the shape. Stamped as shape (288), however; there is no reference to this a panelled billiard being available in either Brochure, and in the 1950’s how else would you know you could get one unless you shopped in person. Perhaps this was a shape only available “in store”.
Another noticeable difference is the addition of more pipe grades. Brigham reportedly added grades from the 40’s -60’s. The previous Patent Era Brochure only offered 1-5 Pin grade options. In this brochure we can see the addition of an “Executive” and “Director” grade.
Pipes now came in grades 1-6 Pin with the “Executive” grade, a vertical 3 pin, now a total of 7 grades for Brigham. The patent era “Special Grain”, previously the 4 dot pipe, is now the 5 Dot pipe and the “Straight Grain’ is now a 6 dot, their highest grade. You can find more about Brigham Pipes history and grading here—-> Brigham Pipes – A Closer Look at Dots, Dates and Markings. Now on to the restoration.
First Impressions
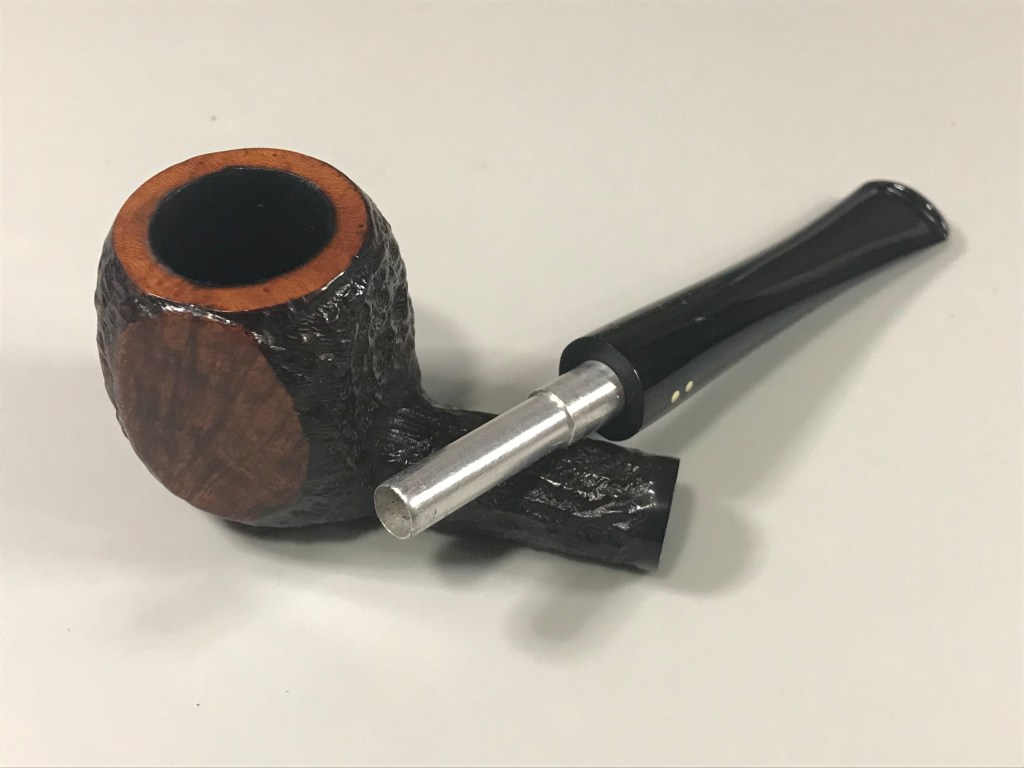
This pipe is a Patent Era Panelled Billiard, it’s a modest sized pipe stamped (288) CAN PAT 372982 with the thin script Brigham stamp. There was not a lot of carbon buildup in the tobacco chamber, but there was some carbon buildup on the rim. Both issues would be simple to remedy. The stem was oxidized but that too would be a routine cleanup with a bath in the deoxidizer.
The big issue that this pipe had was only discovered when I attempted to inspect the Brigham tenon and found the stem was seized in the mortise. Any torque I put on the stem was too much stress on the shank of the pipe and would have broken it. I suspected that the aluminum tenon had begun to corrode which is why it wouldn’t budge. This will be a little more complicated to troubleshoot. I’m going to skip over some of the early steps as you can see the carbon removal process in the previous post. I’m going to skip ahead to the stem issue.
Stem Removal and Repair
I tried several methods to coax the stem free with no success (heat, cold, alcohol), nothing worked. My last strategy is to heat the vulcanite, remove the pin securing the tenon in place and pulling the vulcanite away from the aluminum tenon. If successful, I’m hoping the tenon is intact and not decomposed in the vulcanite stem.
I used a heat gun on its lowest setting and warmed up the stem until it was pliable. That gave me enough play in the stem that I was able to wiggle first pin out and pull the stem off. The tenon was completely intact.
I used a set of needle nose pliers to put some direct torque on the tenon to see if that would convince it to release but it was not going anywhere. I turned my attention online to find options to dissolve aluminum corrosion. I found a solution consisting of Distilled water, lemon juice and white vinegar. I didn’t have the first two ingredients at the time but I had some Allens White Cleaning Vinegar on hand. Using a glue syringe, I applied droplets of the white vinegar as best I could between the mortise and the tenon. Nothing seemed to happen, so I heated up the tenon directly this time over the heat gun. The combination of the vinegar and the heat did the trick and the tenon came free. Left behind was the evidence of aluminum corrosion that locked it in place.
A little steel wool cleaned up the tenon nicely. Afterwards I applied heat to the stem again to soften it, then re-installed the aluminum tenon and secured it in place with the brass pin.
Some of the tooth dents were erased from the stem using the heat gun as the rubber warmed up. The ones that I couldn’t raise with heat I filled using Rubber toughened CA Glue.
Reconditioning and refinishing the stummel
While I worked on the stem, I reconditioned the tobacco chamber with cotton balls and isopropyl alcohol. The isopropyl has more alcohol concentration than the Alcool. I tend to use the stronger stuff on the older pipes to ensure they are thoroughly reconditioned.
Afterwards the whole stummel gets scrubbed down with Murphy’s Oil Soap to remove any grime and dust accumulated over time.
I topped the bowl using 320 grit sandpaper to remove the carbon buildup on the rim and restore the smooth rim beneath. I used subsequent grits 320-1000 to refinish the rim, then used a stain marker to match the rim to the rest of the finish.
The pipe was reassembled, buffed and polished with Tripoli, White Diamond and Carnauba wax.
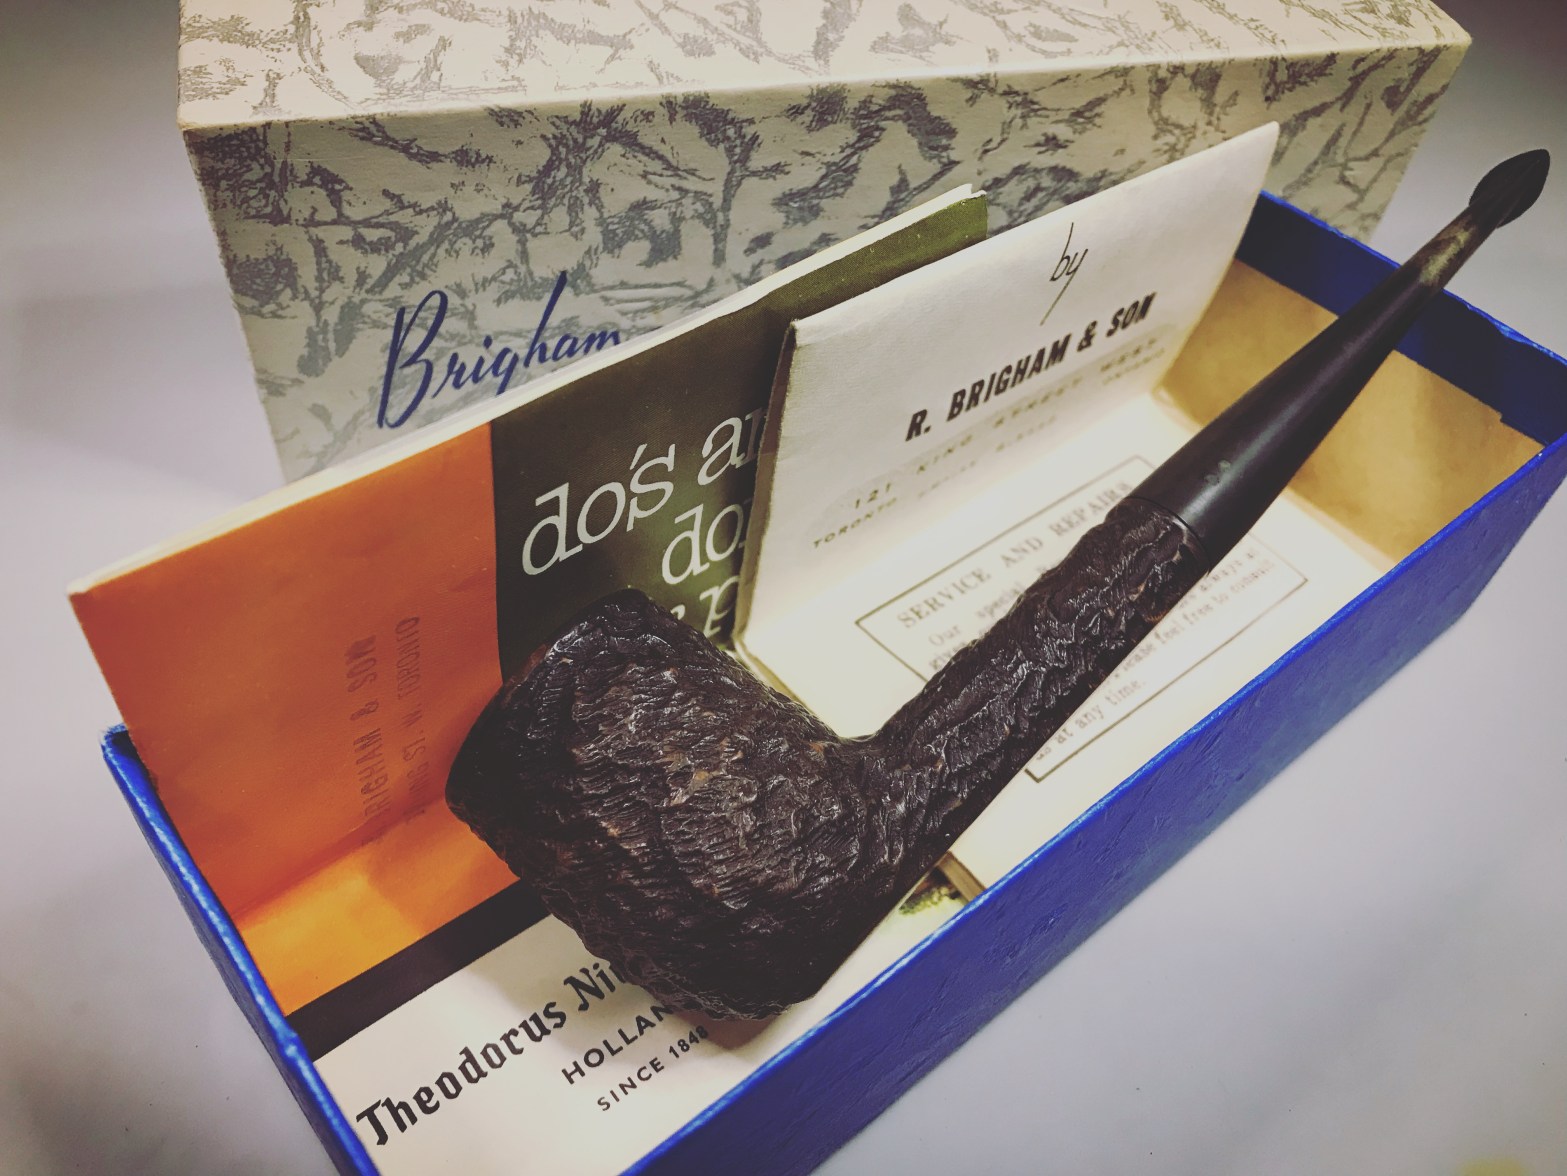
Here’s the finished pipe! You can curate this pipe for your own collection by visiting the Lunting Bear Store. The original box, pipe sock and brochures are all included with this pipe.
This is a wonderfully preserved Patent Era Brigham. This pipe was acquired with another patent era pipe, also preserved in the original box (Part II).
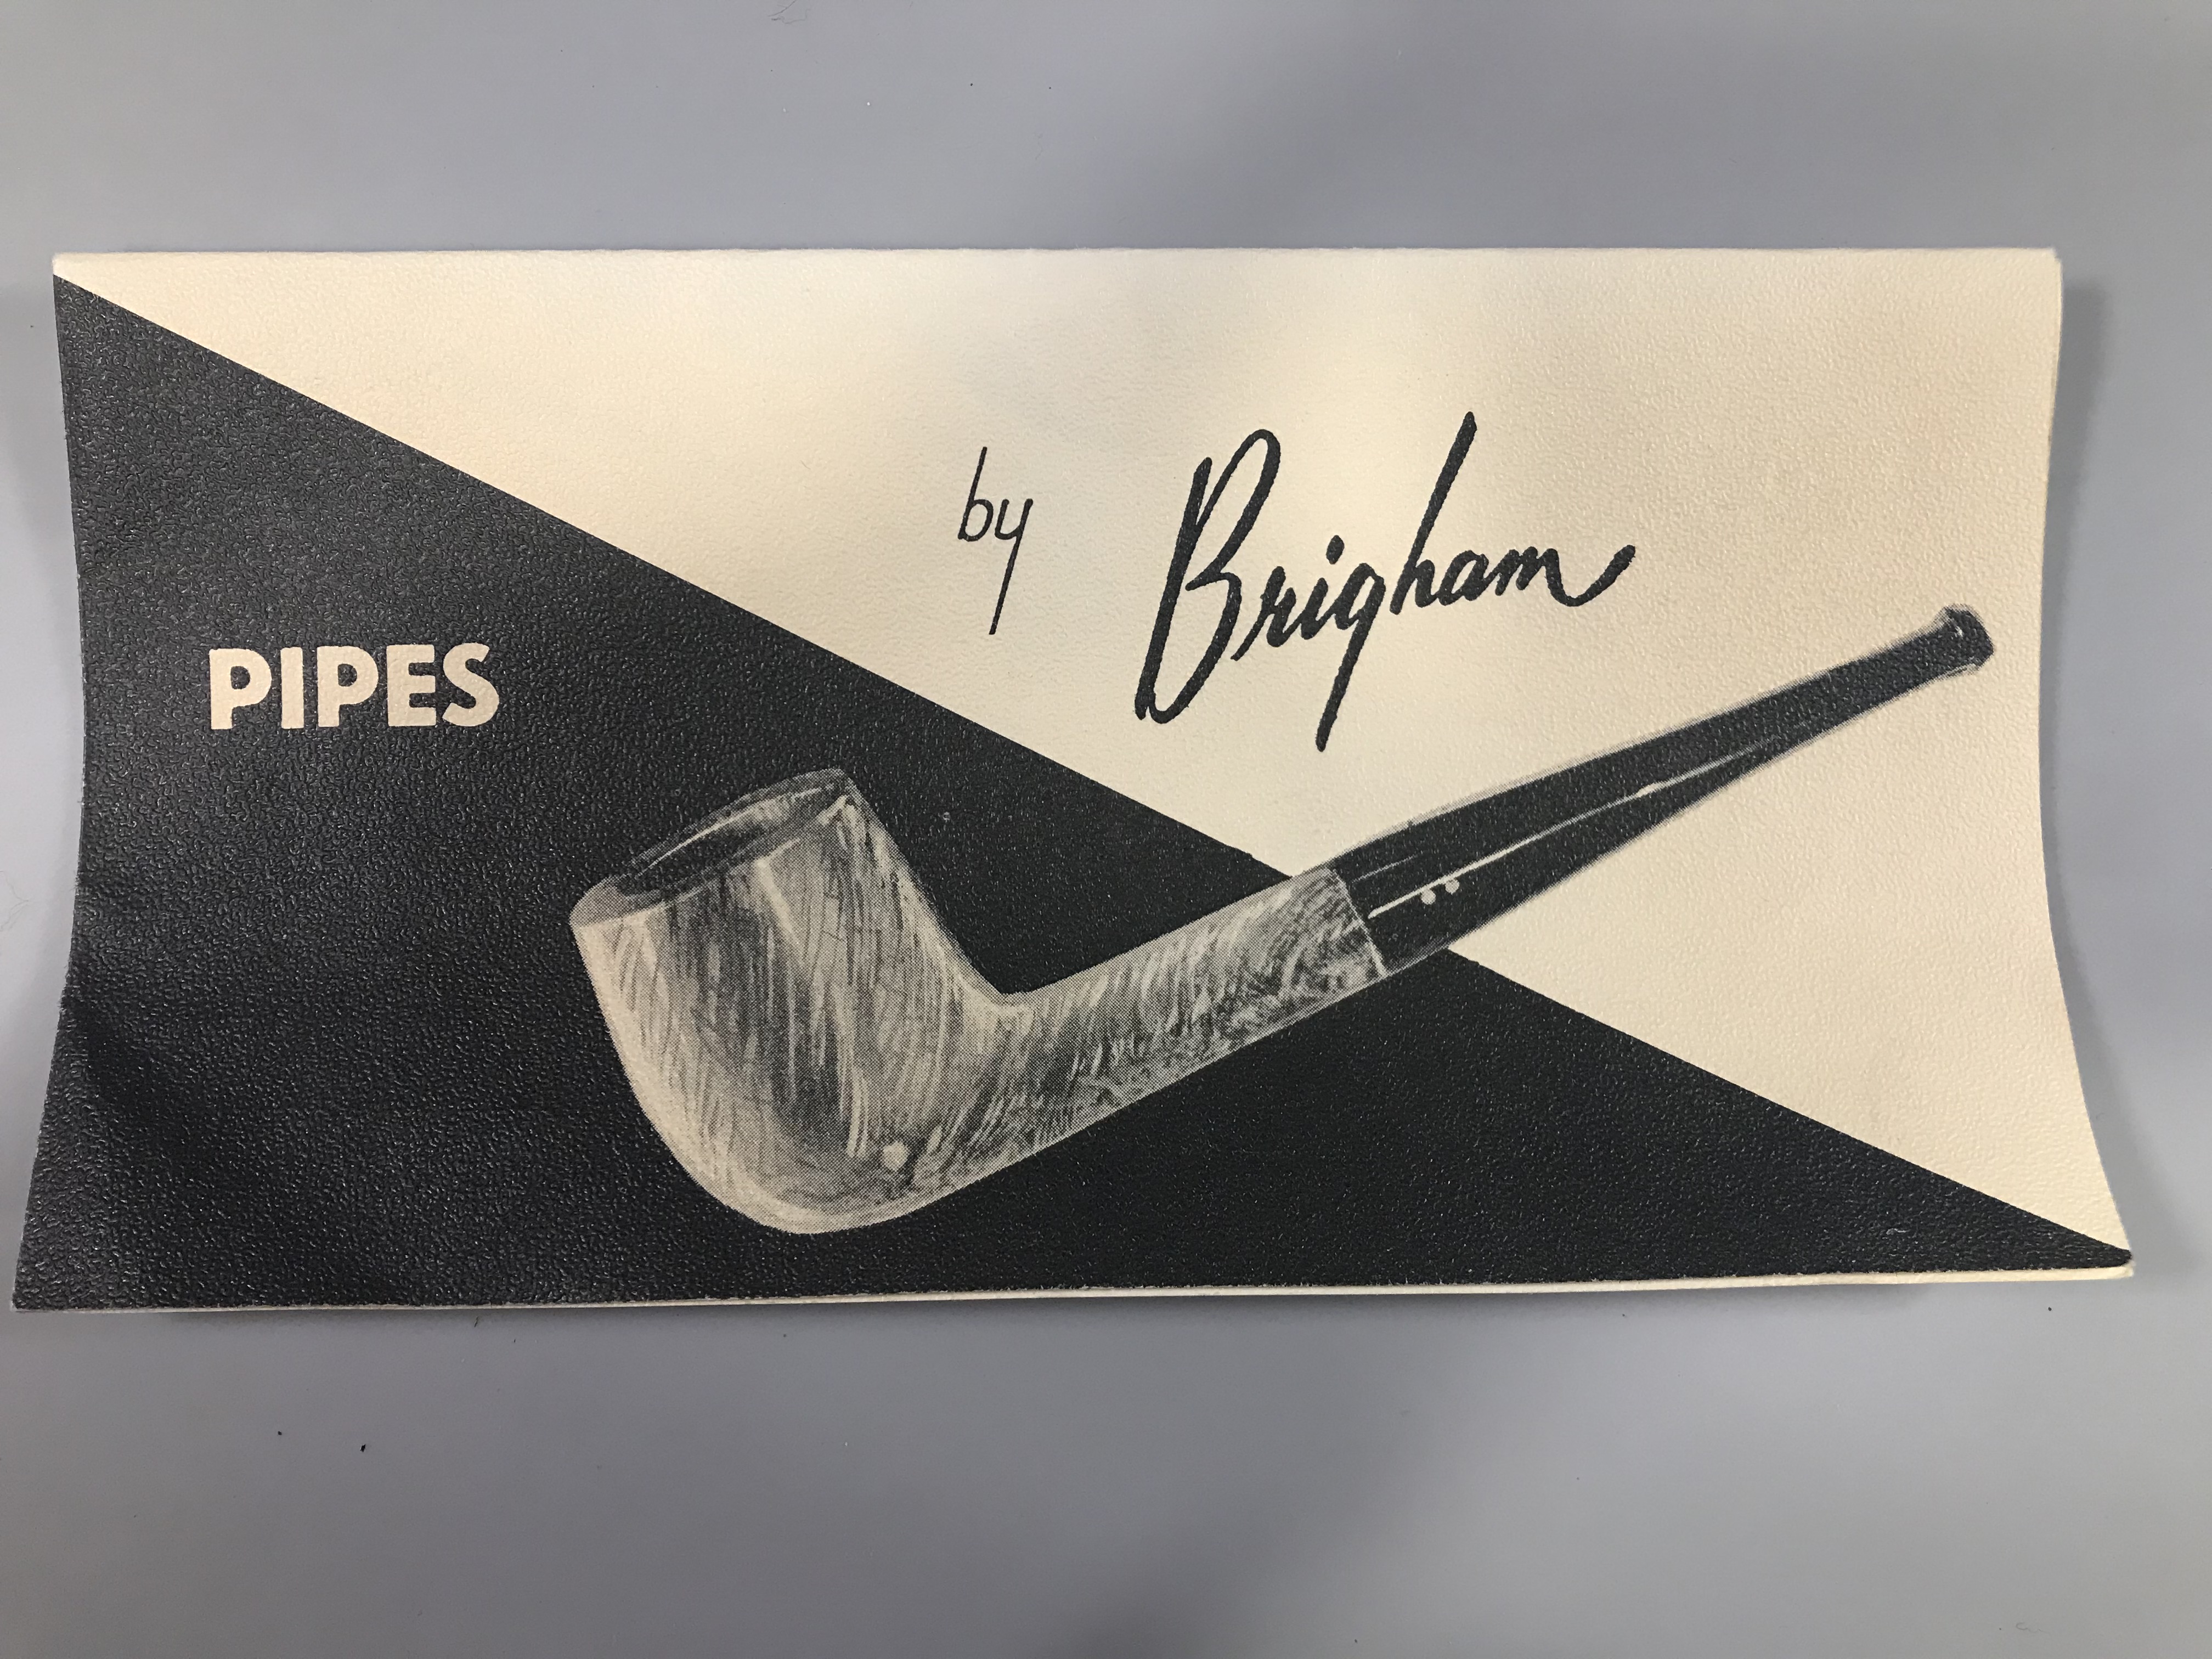
It is always a “fist pump” moment for me when I can find a pipe in the original box but this was a special treat for me as this one (and its companion) both came with the original brochures from their respective eras.
The R.Brigham & Son Brochure pinpoints the age of this pipe to the latter end of the patent era, 1954-1955.
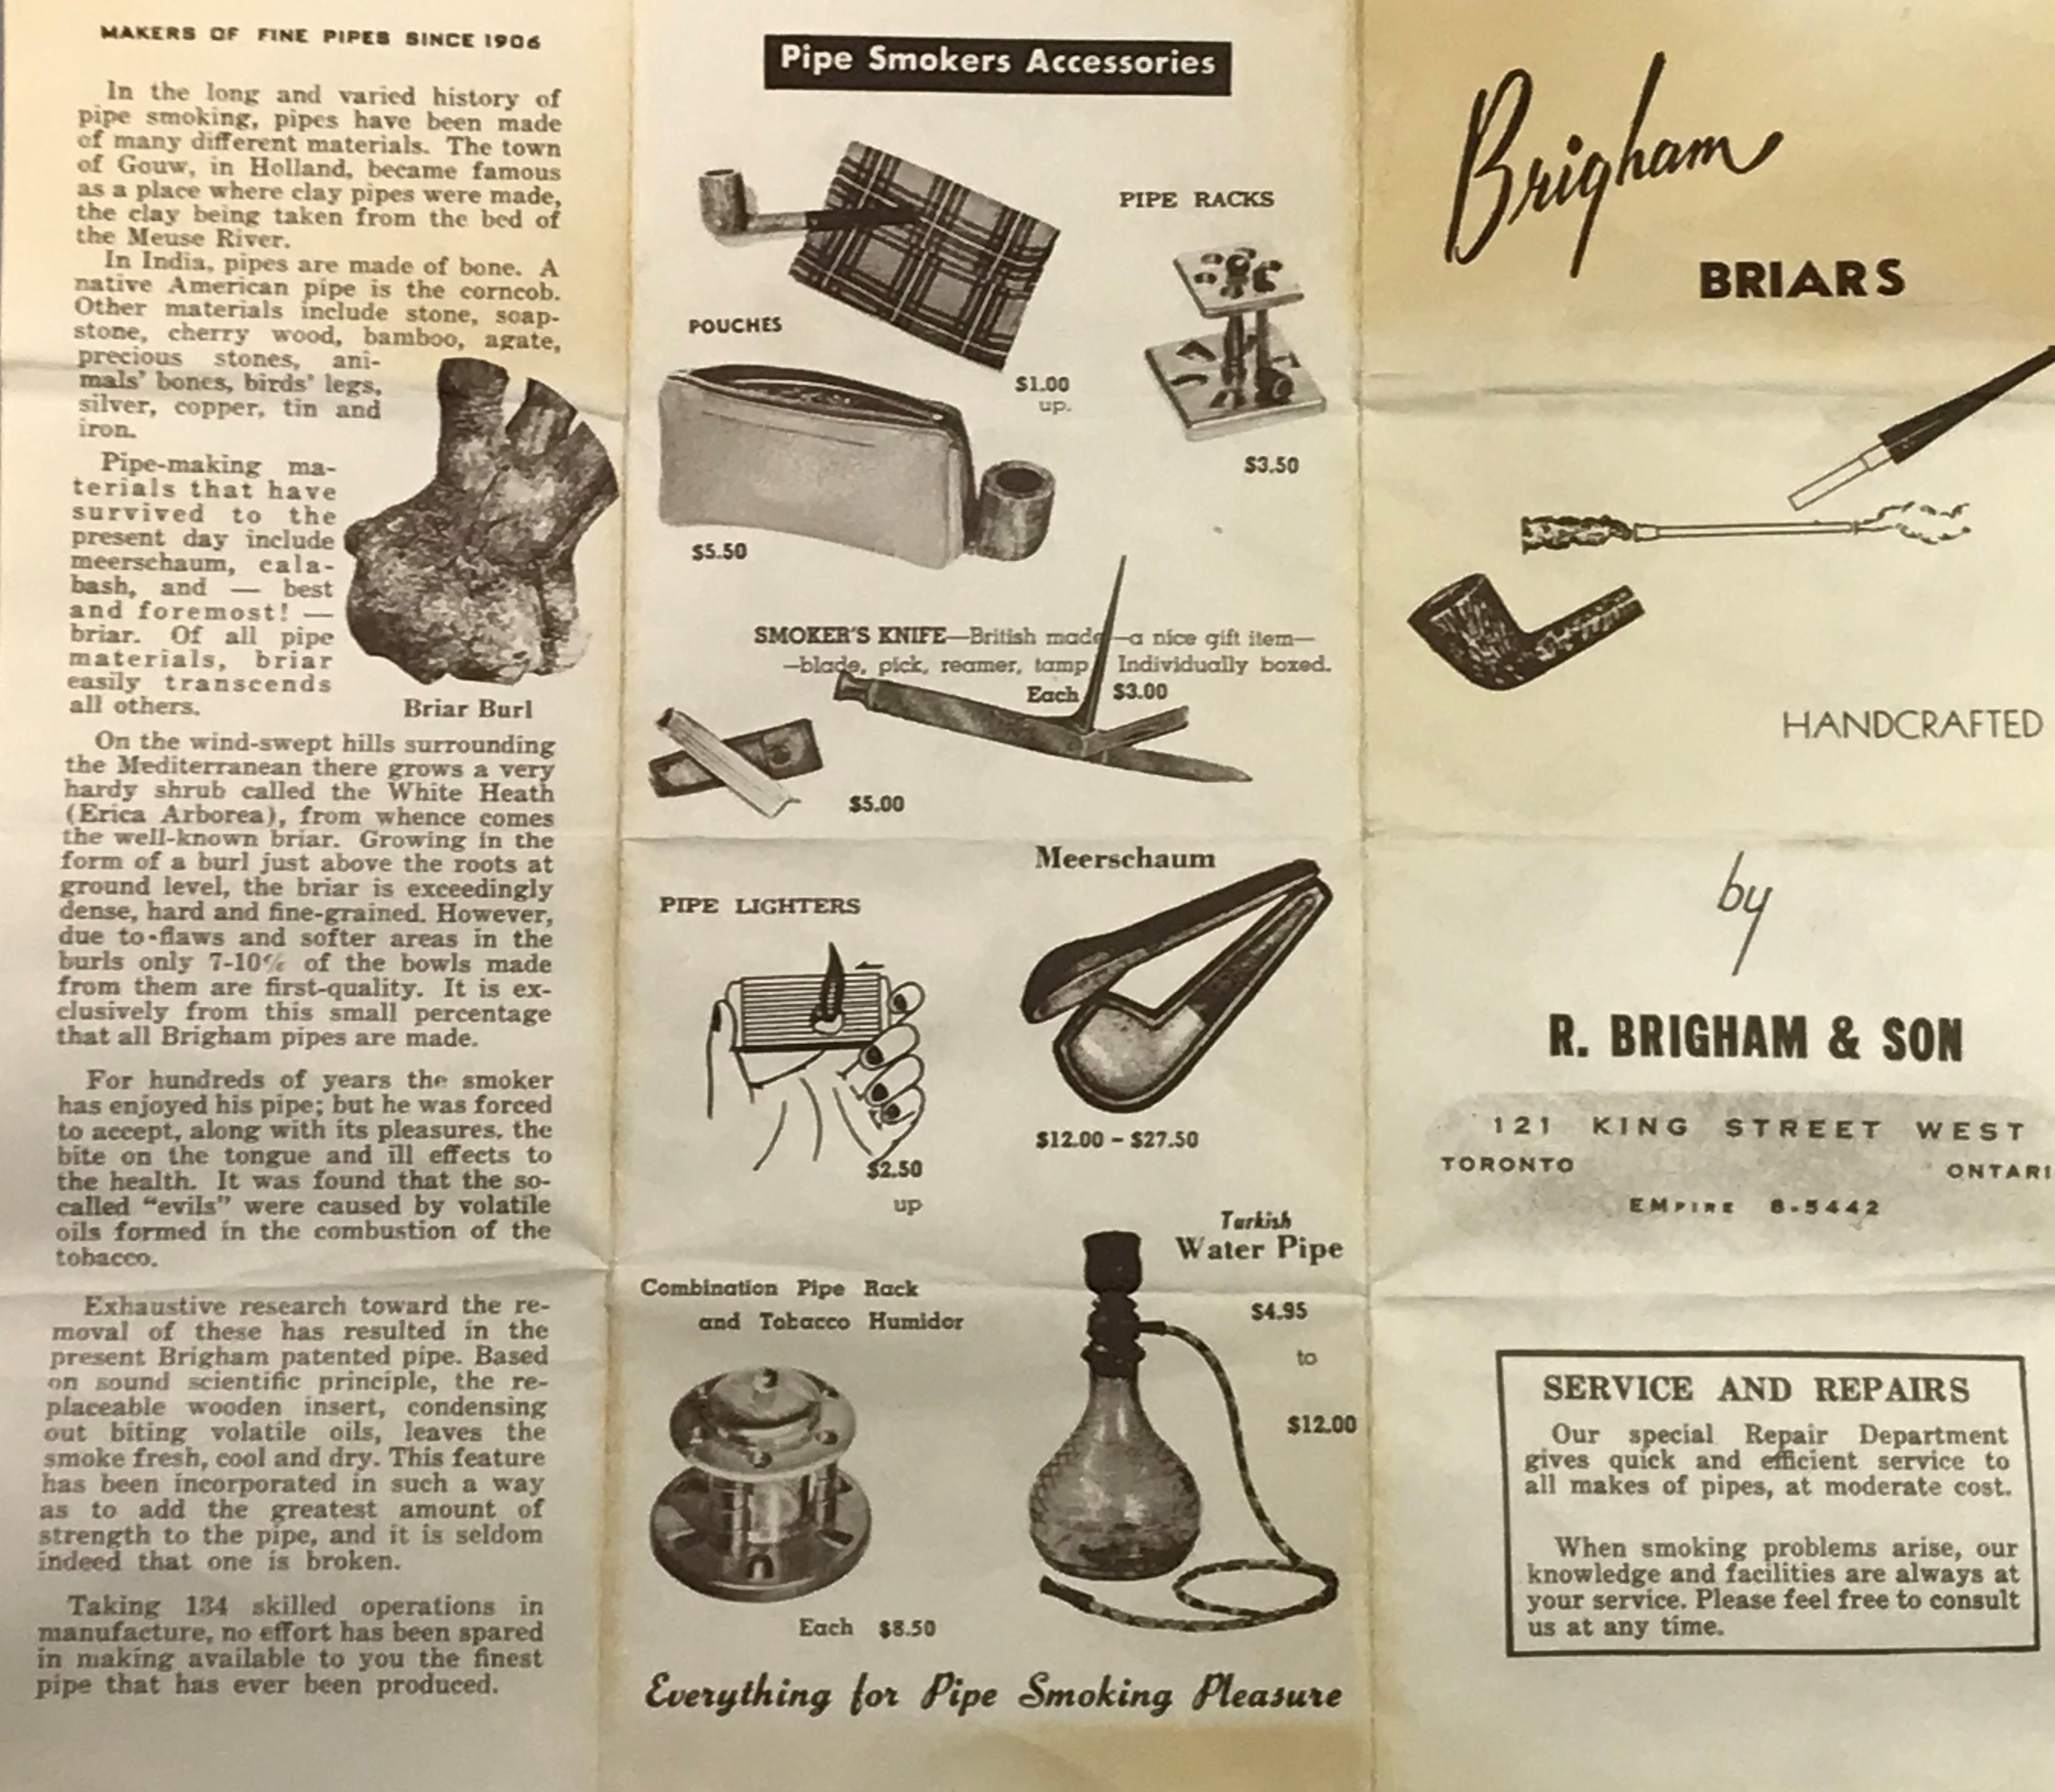
What is particularly striking to me is the production of the brochure. As I gleaned over the brochure, taking in the age of the paper and chuckling at the retail prices, I shared the find with my lovely lady who has a soft spot for nostalgia and a true appreciation for talent and things that were made well. She stated quite quickly “Darling, that is all hand illustrated”. It gave me pause, and I turned my attention back to the brochure again. She was correct! The pipes were all hand illustrated!
It is quite amazing to consider that a Brochure Company or a “Graphic Design Company”, as we’d refer to them today, would have illustrators whose job it would be to provide sketches and drawings of products and even fonts. Just pause and reflect on that as we compare that to lightning speed at which we would produce a similar brochure today. I did some searching online to explore the evolution of brochure making and found some interesting information.
So how did brochures look a long time ago? Here’s a brief glimpse:
In the 1940s, digital photography wasn’t born yet so there was heavy reliance on hand-drawn illustrations. If one or two photographs are included in a brochure, it’s black and white and the resolution is not that great. Also, coloured printing was expensive during this decade so most printed materials are black and white.
In the 1950s, photography techniques and capabilities had improved, making it easier to include photos. These brochure designs still rely heavily upon hand-drawn elements and fonts. You can see a transition to photography in other designs (not shown), making the 1950s one of the transitional periods for brochures.
In the 1960s, it was pretty common to see coloured brochures although old school hand-drawn illustrations and fonts were still used.
A decade later, brochure print has gone full-colour because of the improvement in photography techniques. It has also become easier to layout printed materials and the costs of printing coloured brochures have significantly gone down.
Provenance comes in many forms and it was fun to explore the provenance of this pipe through the merchandising and brochure advertising of its day. But, I almost forgot, we were here to recondition the pipe itself, so lets go!
First Impressions
The pipe is a billiard shape, stamped 202 with the Patent stamp ( Can. Pat. 372982) and Brigham. Stamping is quite clear and crisp. The stummel is in great shape with some expected carbon buildup and rim darkening from a well loved pipe. The stem had some deep tooth chatter and some hardened sulphur oxidation at the mouth piece. I think some that crusty stuff is a bi-product of saliva from the previous smokers mouth. Based on the indents in the stem, I’d conclude they were a clencher. Overall, the stem is in good condition, no issues that cannot be remedied.
Step 1: Carbon Removal
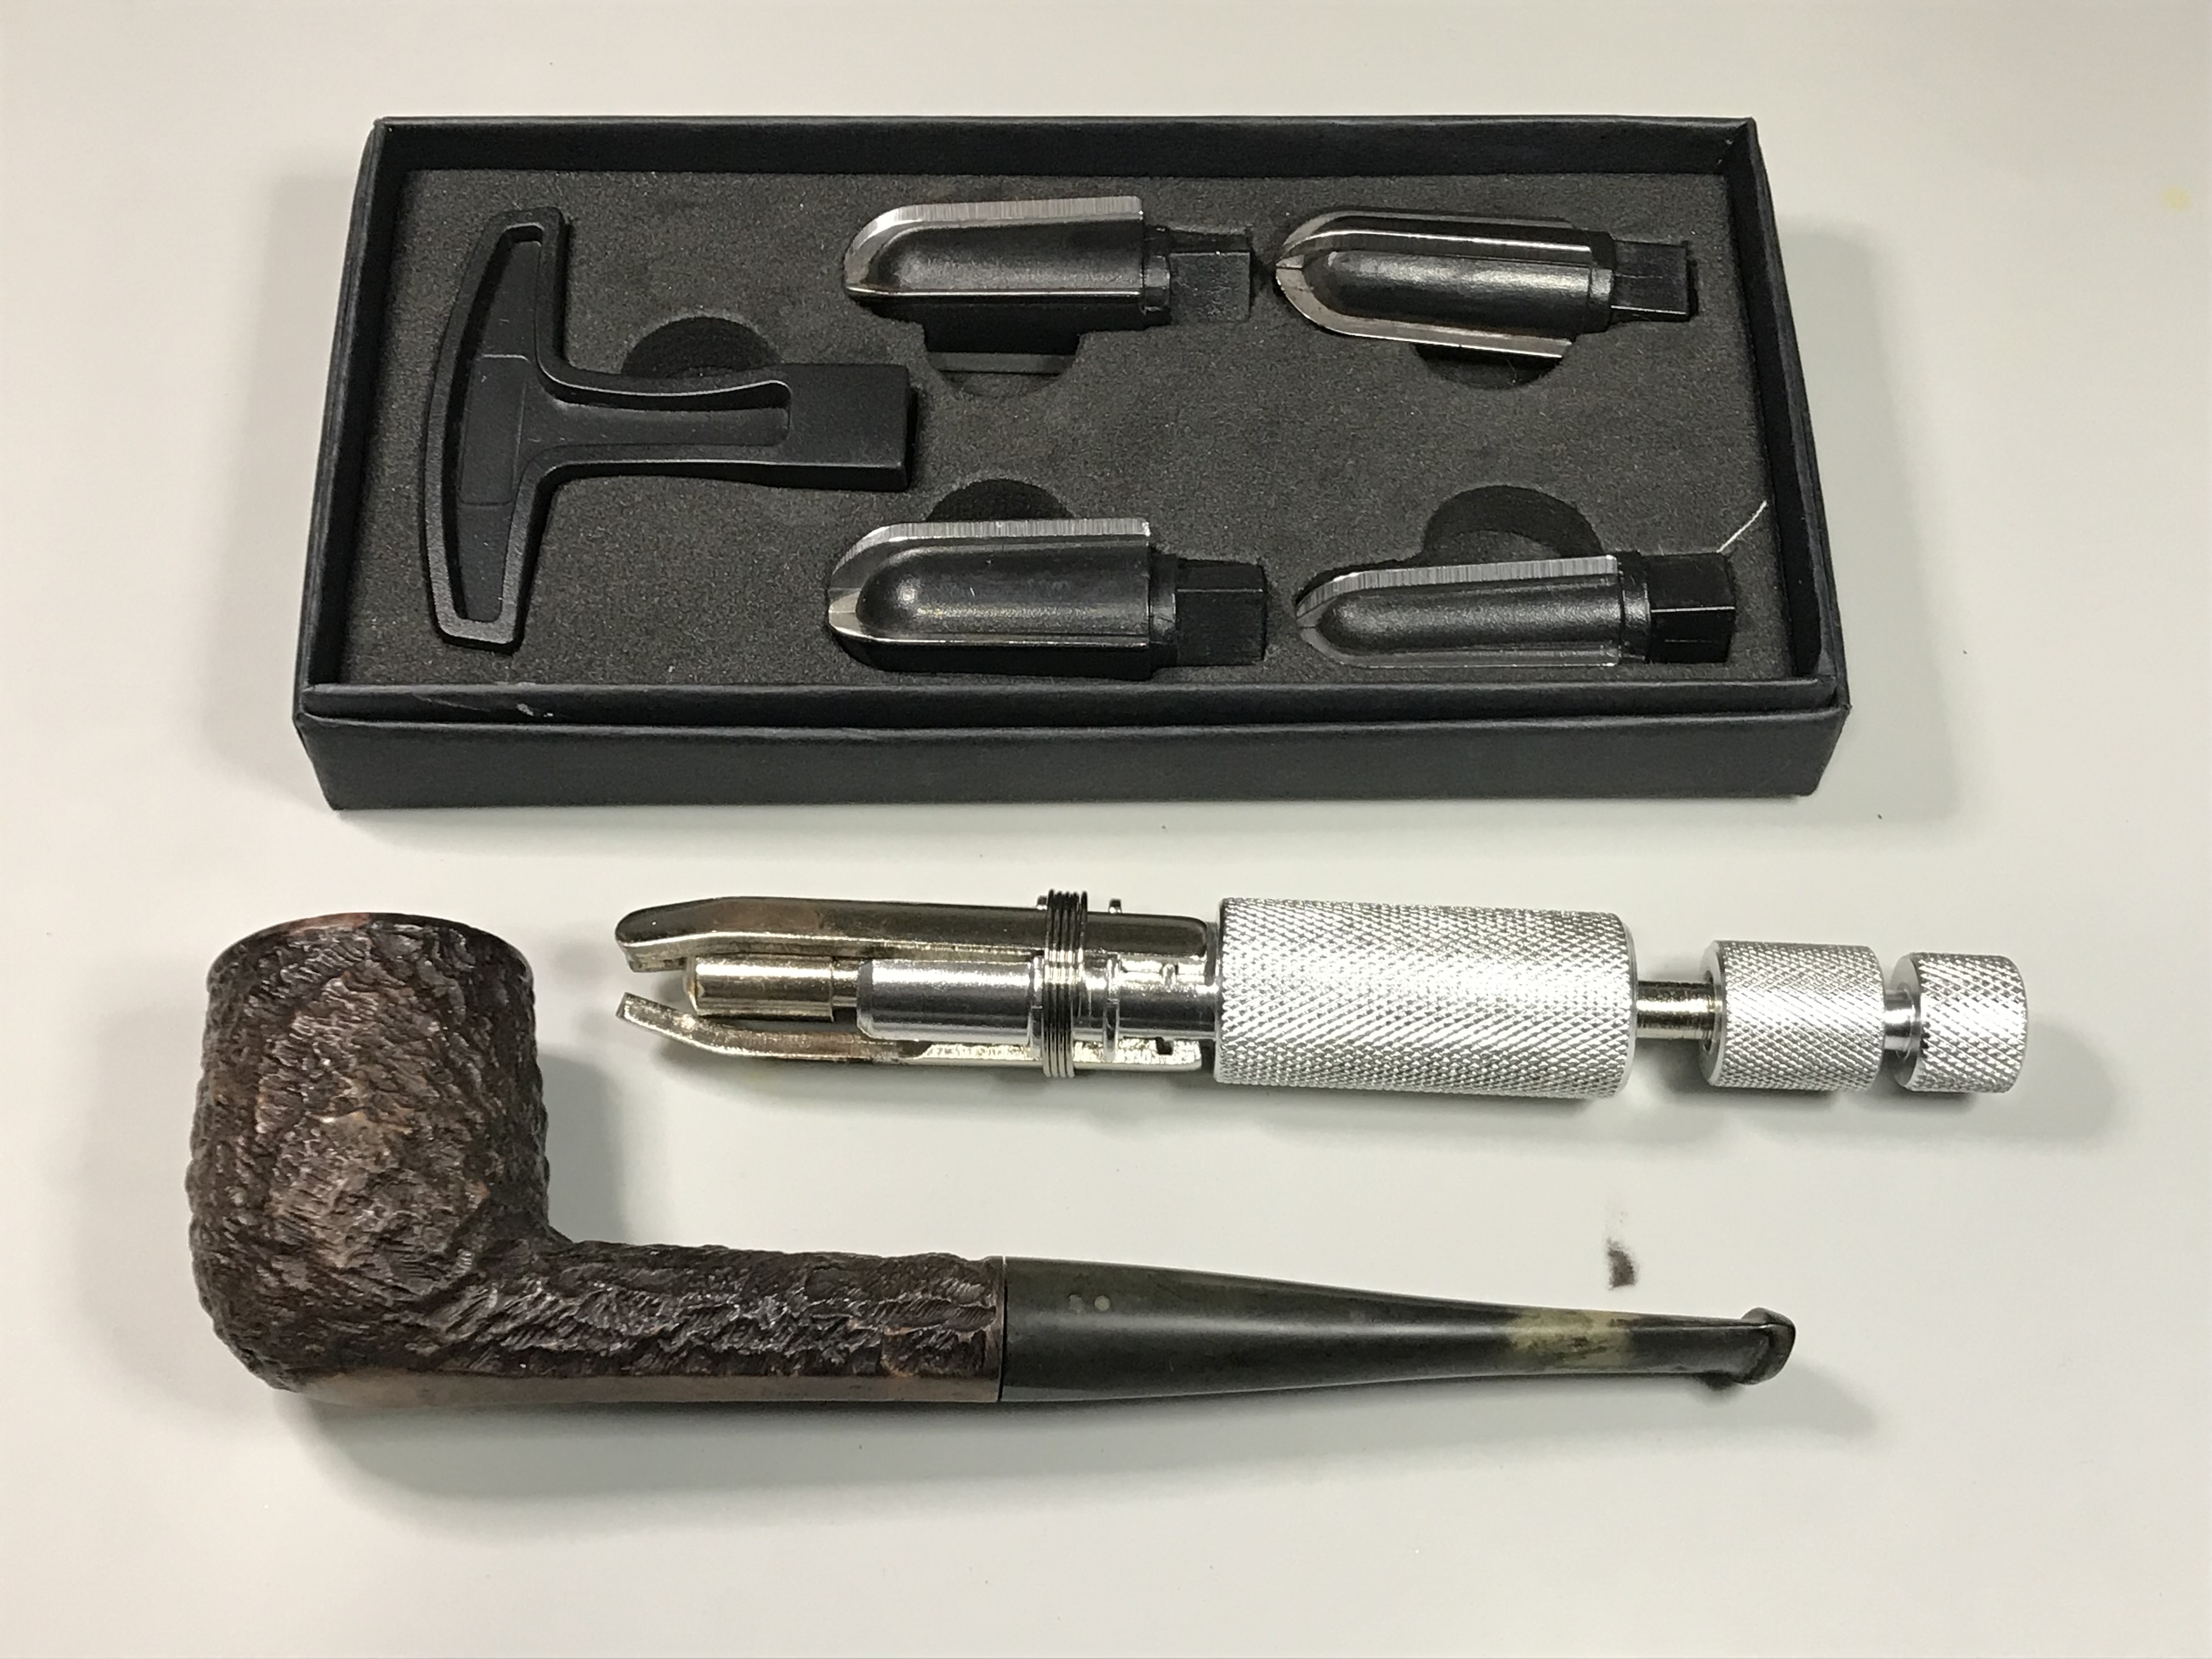
For reaming the tobacco chamber I typically use a few tools, a pipe reaming set with the four bits, a mechanical reaming tool and 220 grit sand paper. The mechanical reaming tool I tend to find rather useless for this task.
Step: Clean and Recondition
I used Isopropyl Alcohol soaked cotton balls to recondition the tobacco chamber overnight. As the alcohol evaporates the cotton ball absorbs matter from the tobacco chamber, evident by the brown cotton ball.
Afterwards I scrubbed the internals with pipe cleaners. Other than the carbon buildup on the rim, the pipe was kept quite clean inside. It didn’t take long to have it clean. Lastly I scrubbed the whole stummel with Murphy’s Oil soap to scrub away any build up dirt or grime.
Step 3: Stem repairs & reconditioning.
I submerged the stem in Mark Hoover’s Before & After deoxidizer available at lbepen.com. I have found where the oxidation is from age and not sun damage, this product is ideal for stripping away the oxidation from the surface. As you can see by the colourful swirl in the second picture, that is the oxidation left behind in the solution after a 24 hr bath. Some paper towel and mineral oil removes the residue from the stem revealing the untarnished vulcanite underneath. Unfortunately, stems that have been bleached or sustained heavy sun damage will require a lot of sanding at lower grits to get rid of the oxidation, sometimes the stem is a lost cause and needs to be replaced. Thus far I haven’t had a “lost cause” stem but I have had one or two that were close to it. I would highly recommend Mark’s product for routine restoration of vulcanite stems. Saves a lot of sanding!
After I cleaned up the stem, I used a CA glue containing rubber to fill the tooth dents on the stem. Bob Smith Industries carries this glue and is ideal for seamless stem repairs.
Step 4: Rim restoration
With the stem repairs complete, I turned my attention back to the stummel and removed the remaining carbon adhered to the bowl using 320 grit sandpaper. I placed the bowl, rim down, on the sandpaper and moved the bowl in a circular motion to sand the rim back to bare briar. This pipe had a smooth rim, so this was an easy decision to quickly bring it back. Afterwards I worked through progressive sandpaper grits 400, 600, 800 then 1000.
I utilized one of my stain markers to match the pigment of the stain on the bottom of the pipe where the stamping was located. These stain applicators are a great way to apply pigment without the mess. They are not useful or efficient over larger areas, but does a great job on the rim of a pipe.
Step 5: Buff and Polish
Using my newly acquired Foredom Buffing lathe, I polished the pipe using Tripoli, White Diamond, then Carnauba Wax.
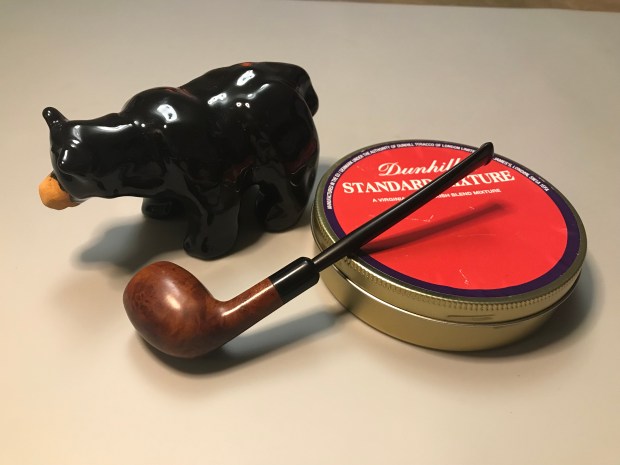
Here is the finished pipe! You can purchase this pipe for your own collection exclusively at the Lunting Bear store! Thanks for stopping by!
One look at a Falcon pipe and you are transported back in time to the mid-century modern period of design that was characterized by a contemporary, seemingly futuristic aesthetic and an emphasis on function.
“The Mid-century Modern design movement spanned from about 1933 to 1965 and included architecture as well as industrial, interior, and graphic design.”
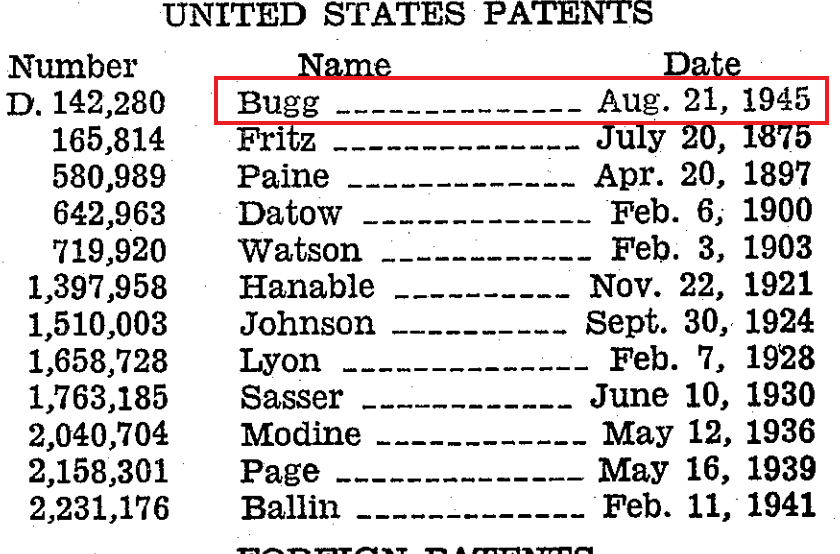
At the stepping off point of this movement, American engineer Kenly C. Bugg invented an alternative tobacco pipe in 1936 combining metal and briar. Kenly Bugg later patented his pipe invention in 1945. The Falcon pipe is a metal pipe with a threaded dish at the end of a metal shank. The pipe has interchangeable Briar bowls of different shapes and finishes that thread into the metal dish of the pipe.
Kenly Bugg claimed that the Falcon Pipe provided the pipe smoker a cooler, dryer smoke. The briar bowls could be cleaned like any other briar pipe, while the metal stem and could be cleaned easily with a pipe cleaner. In fact you could wash it with soap and water if you wanted to.
Falcon Pipes were produced in the United States until the 1960’s, after which production was moved to England.
First Impressions
The first Falcon Pipe is the original design, with a bent stem, and marked “Made in England” which tells me that it was made after 1960’s. There are a couple of dents on the tube that runs down the centre of the stem, probably from getting knocked around all these years. The mouthpiece is made of nylon.
The second Falcon had a more traditional straight body, still had the versatility of the falcon system but the stem could also accommodate a 6mm filter. The metal pipe has a wrap that gives it the brown colour. The wrap had nicks and abrasions that are not going to be corrected without sanding away the coating. The nomenclature was also unreadable, it took me some time to find the “Falcon International” logo to determine that’s what it used to say. The mouthpiece is also made of nylon.
Both of the briar bowls were heavily smoked and had a heavy layer of carbon buildup. The finish of each bowl were worn off and covered with dirt and carbon buildup as well. The base of the briar bowls both had cracks in the bottom. The cracks did not breach the tobacco chamber but would need to be addressed.
Step 1: Carbon Buildup Removal
My pipe reamer set made short work of the carbon buildup located in the upper half of both bowls. I used 100 grit sandpaper to remove the buildup at the bottom portion of the bowl.
Step 2: Clean, Clean, Clean
I used some Murphy’s Oil Soap to scrub the briar bowls, then set them aside to dry while I worked on the stems and mouth pieces of the two Falcons.
The “Falcon international” mouthpiece removed quite easily. The body of the pipe was full of solids. The stem of the standard Falcon was completely clogged, I was unable to pass a pipe cleaner through it. I was able to get them both cleaned out using a combination of alcohol and soapy water.
Both mouthpieces were completely clogged. I soaked them in alcohol to loosen the solids in the stems, and used hot soapy water and a dental tool to pull the grime out of the mouthpieces. In the end I was able to get them completely clean.
I used steel wool to ream the metal bowls of the stems, then used more alcohol to clean the stems, and mouthpieces to an acceptable standard.
Step 3: Repairs
Both briar bowls had cracks in the base of the bowls. Oddly they didn’t breach the walls of the pipe at all. I filled the cracks with an adhesive product called “Chair Doctor” using a syringe. It will soak into the end grain of wood, swell the wood and then freeze the wood in the swollen state as it cures. A film of dry glue lines the wood cells, preventing contraction. It dries clear and is easy to sand and also heat resistant.
Step 4: Refinishing
Both bowls needed to be refinished. I sanded the old finish off both bowls but left the rustication alone on the one. I used Fiebings Light Brown leather dye to restore the colour to both bowls. Afterwards I applied a light coating of mineral oil to help set the stain in the bowls. The mineral oil deepened the colour of the stain including the original stain on the rusticated portion of the one bowl.
Step 5: Stem & Mouthpiece restoration
I began polishing the standard Falcon stem with 0000 Steel wool which worked really well to remove scratches in the metal and get it ready for further polishing. Next I used my microfibre pads and sanded the stem from 1500 – 12000 grit. Lastly I used my rotary tool and a buffing wheel to polish the stem with white diamond. The stem was like chrome when I finished, it looks amazing.
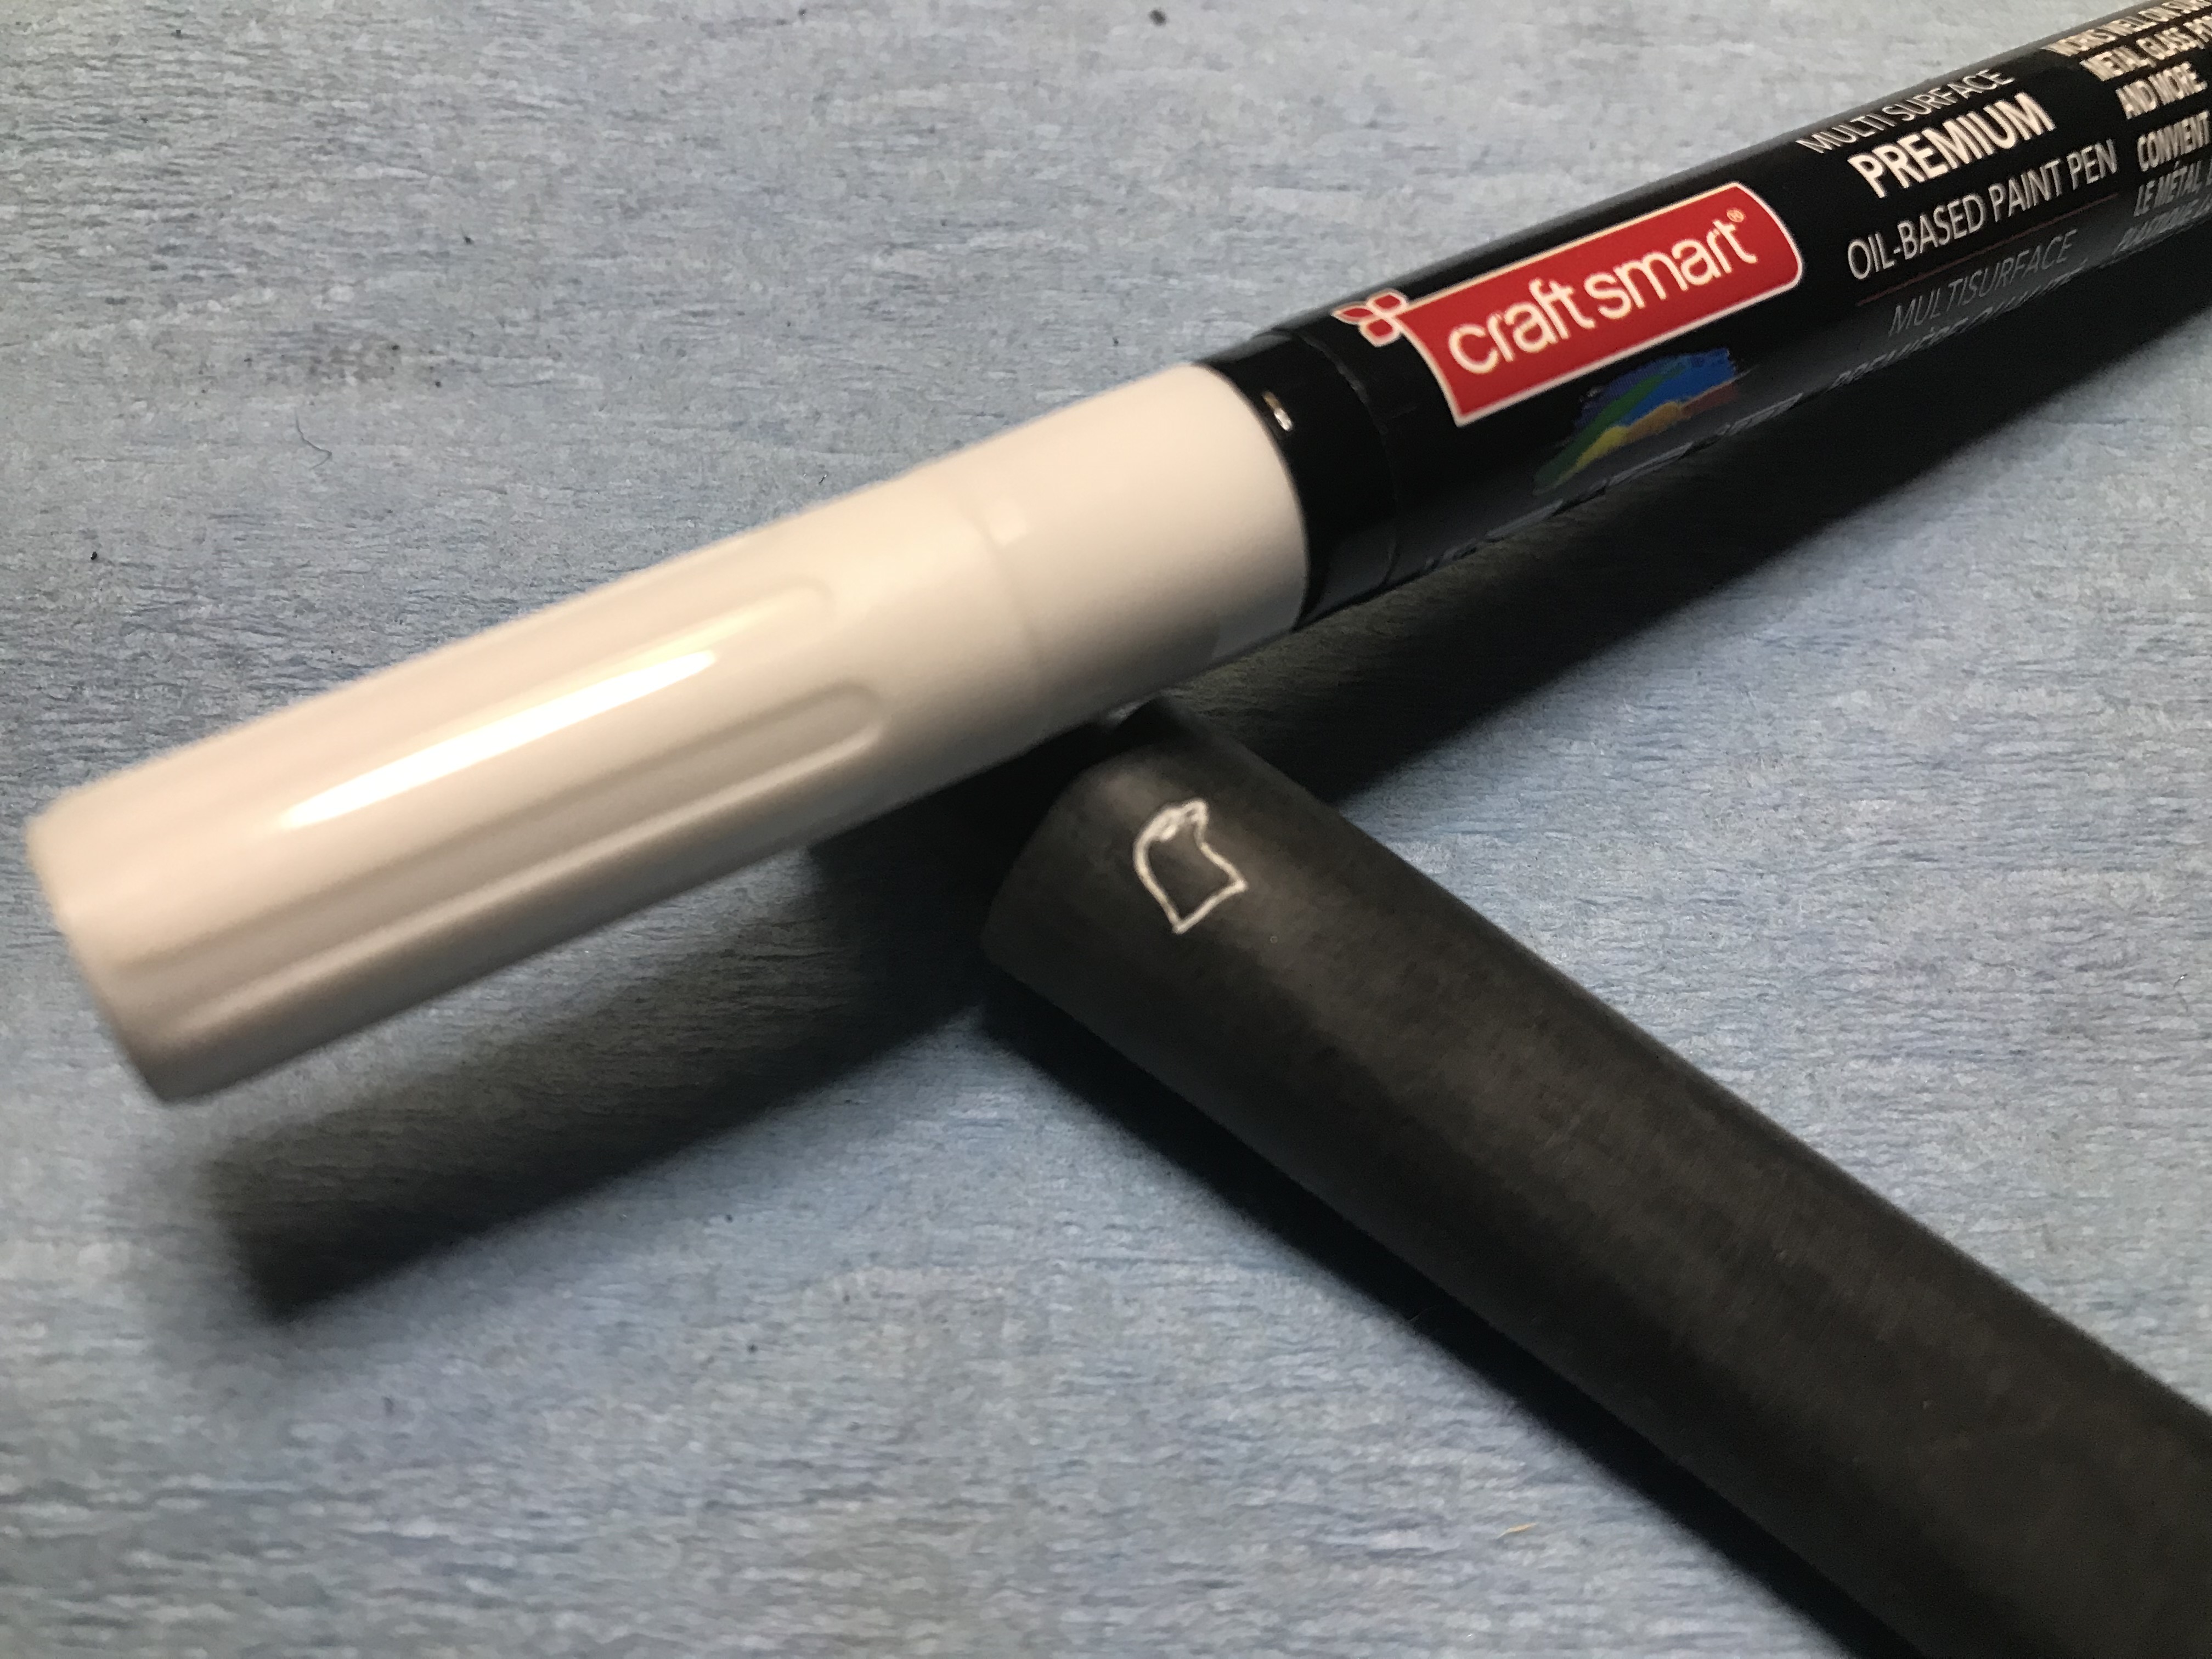
The Falcon logo on the one mouthpiece was discoloured, and despite my best efforts to scrub it white, I was unsuccessful. I decided to use one of my dental tools to remove it. I then used an oil paint pen to fill in the logo again. Once that dried I sanded both nylon mouthpieces with microfibre pads then polished them with white diamond.
Step 6: Final buffing and polishing
I buffed the briar bowls with white diamond, then buffed and polished the bowls and mouthpieces with Carnauba wax. Lastly, both bowls received a waterglass bowl coating (forgot to take pictures) using activated charcoal, white pumice and sodium silicate (waterglass). This will provide a heat shield for the briar and extend the life of the bowls.
The Reveal
Thanks for reading. These two Falcons are ready to fly again! You can purchase the pair of Falcons at the Lunting Bear Store!
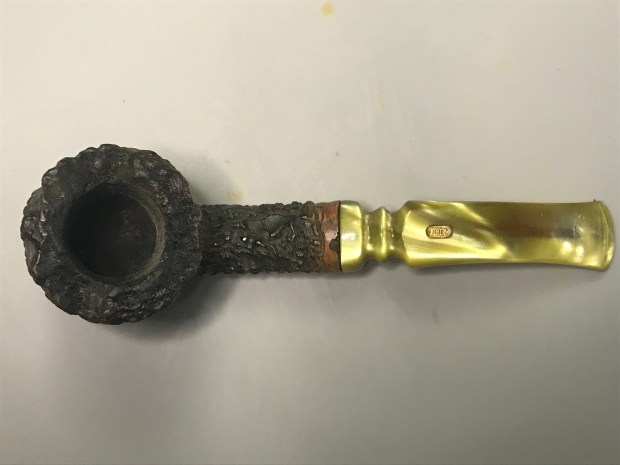
This pipe was acquired from a Goodwill auction along with several other pipes and a pipe stand. Unfortunately I don’t know who the original owner of this pipe was. Often when I’m on a pipe hunt, I’m hopeful that I not only find some interesting pieces to restore, but that I may be imparted with some information about the previous smoker.
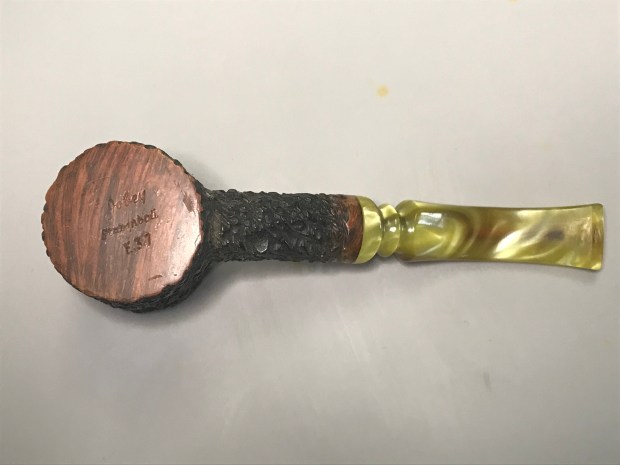
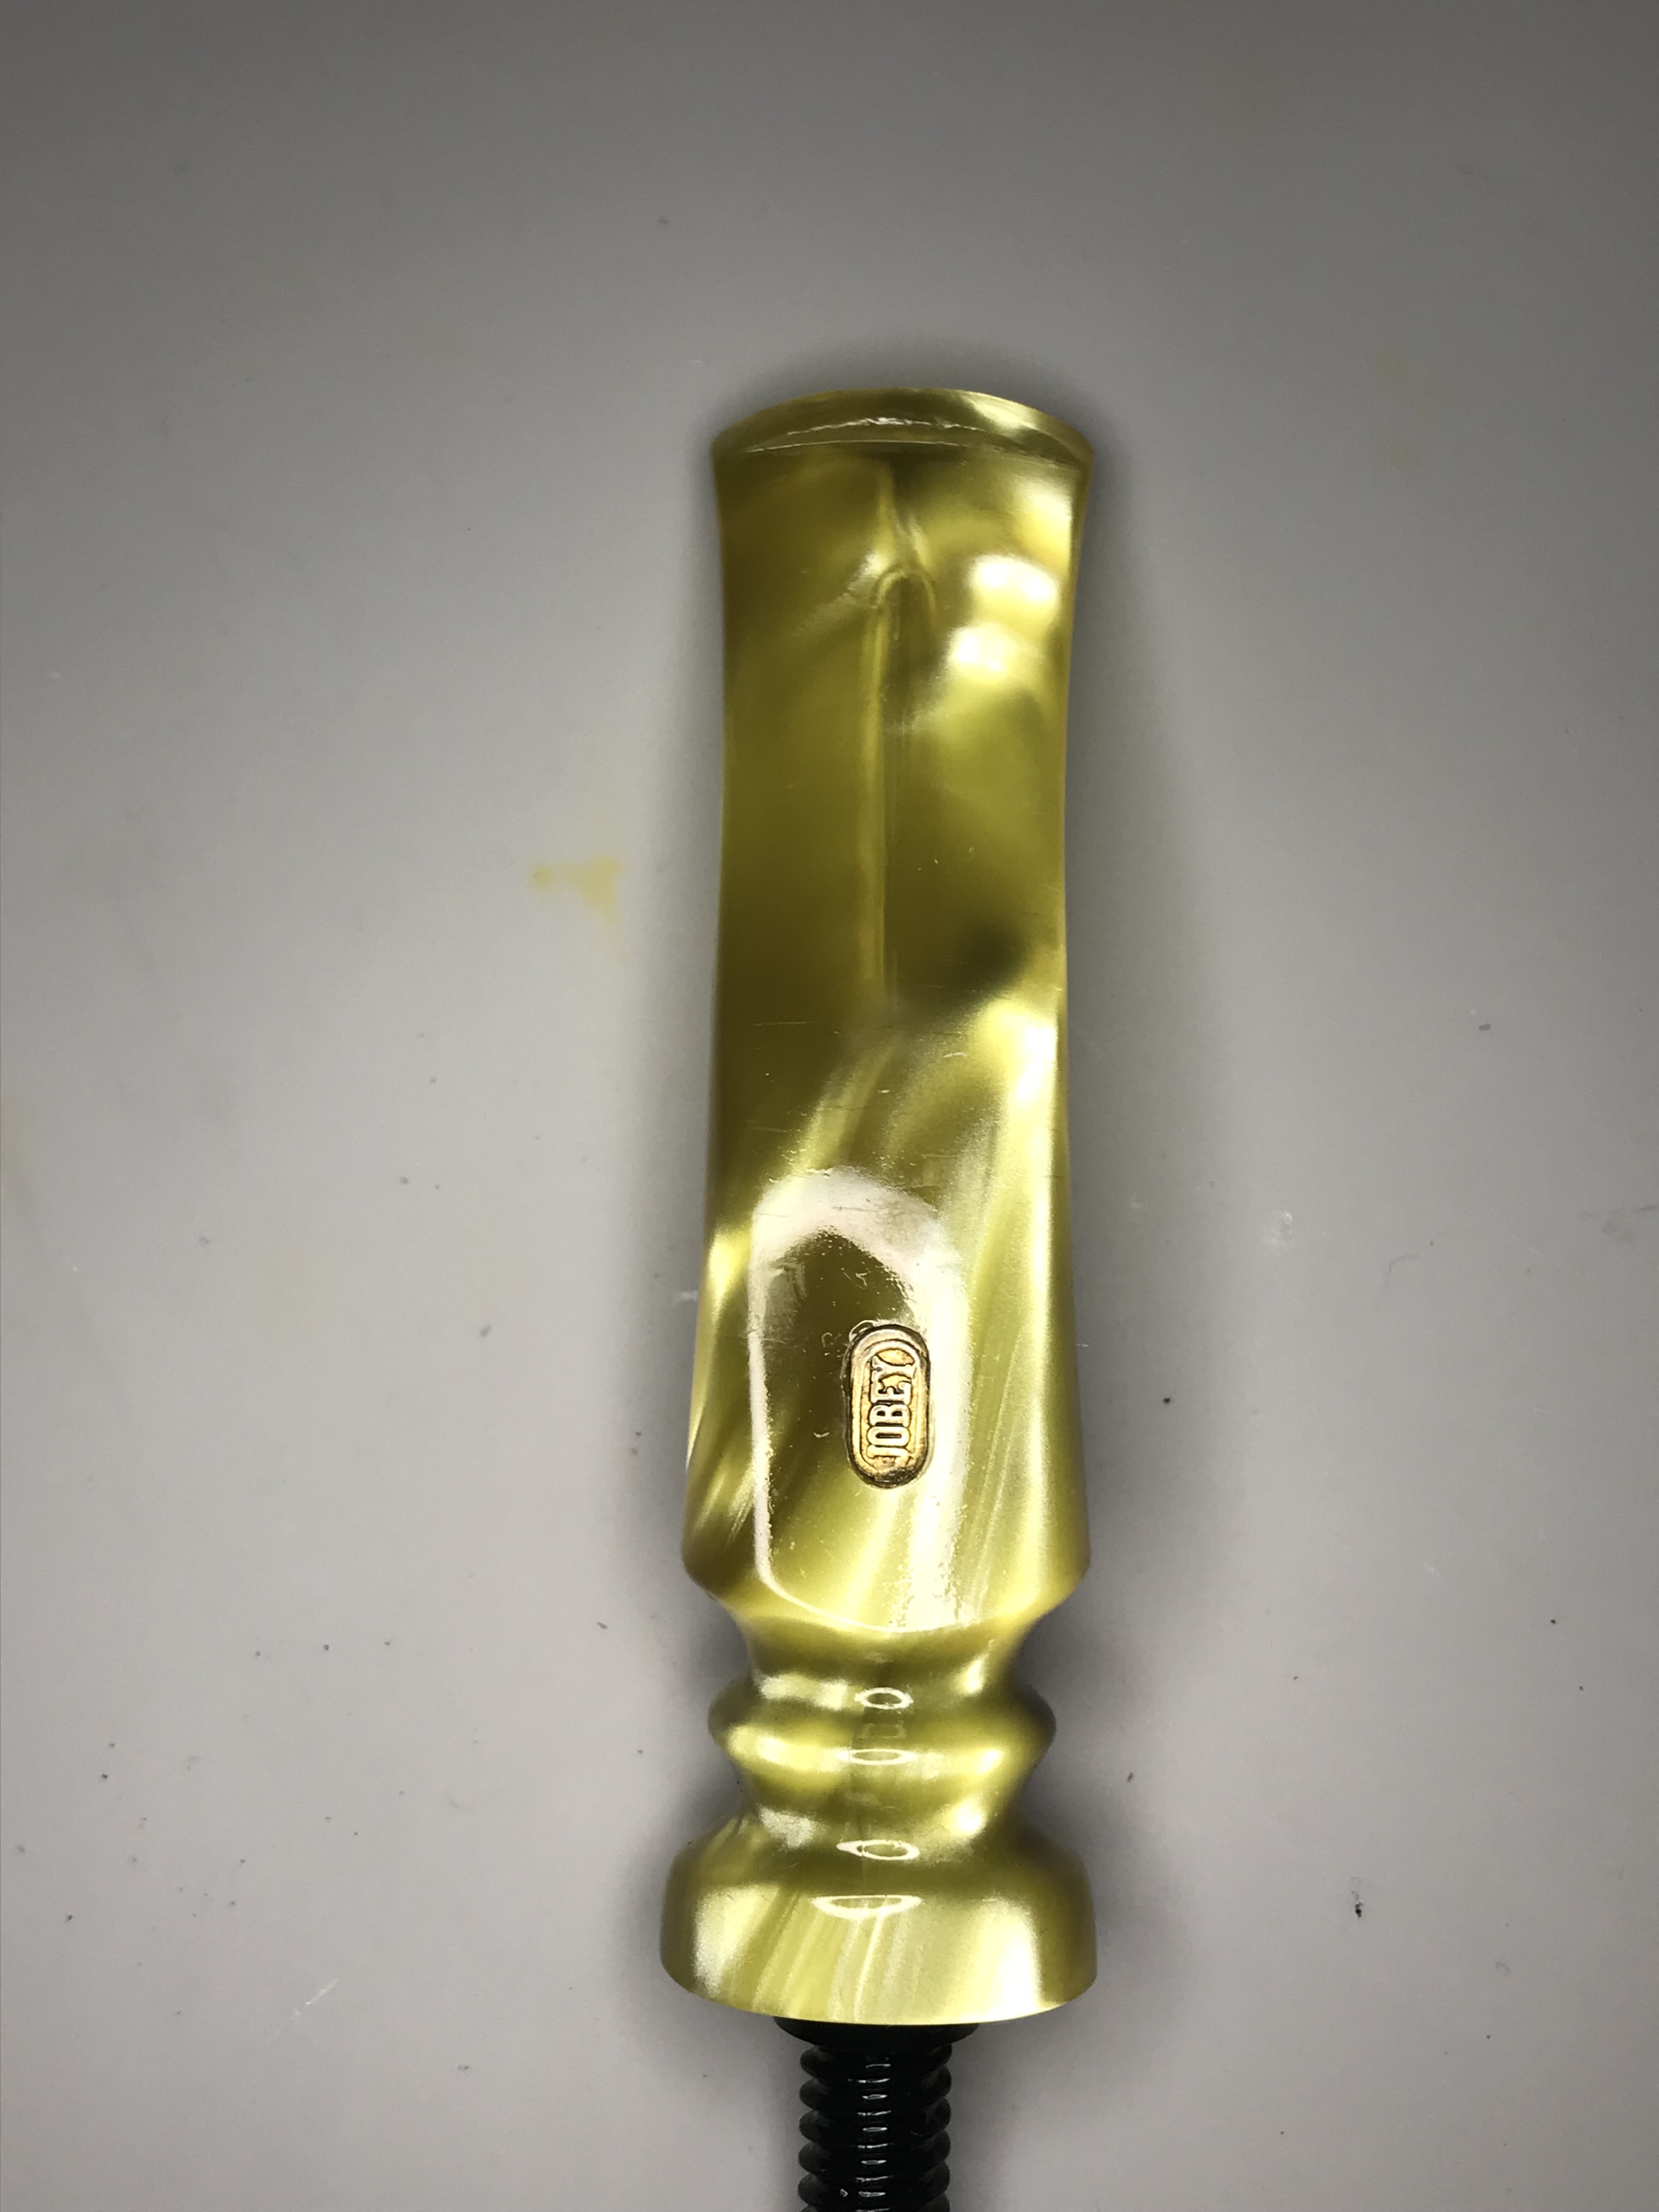
The nomenclature on the pipe reads Jobey Stomboli E37. Jobey was an American pipe manufacturer, the ownership of which changed hands throughout the years and sometimes made under the banner of another brand. I turned to pipedia to see what I can glean about Jobey. From what I could find.
“the first mention of Jobey seems to be back in 1915, when two brothers named Ulysses and Louis Jobey of Brooklyn, New York obtained a patent for an odd sort of cavalierish pipe in 1915” (Source; Pipedia).
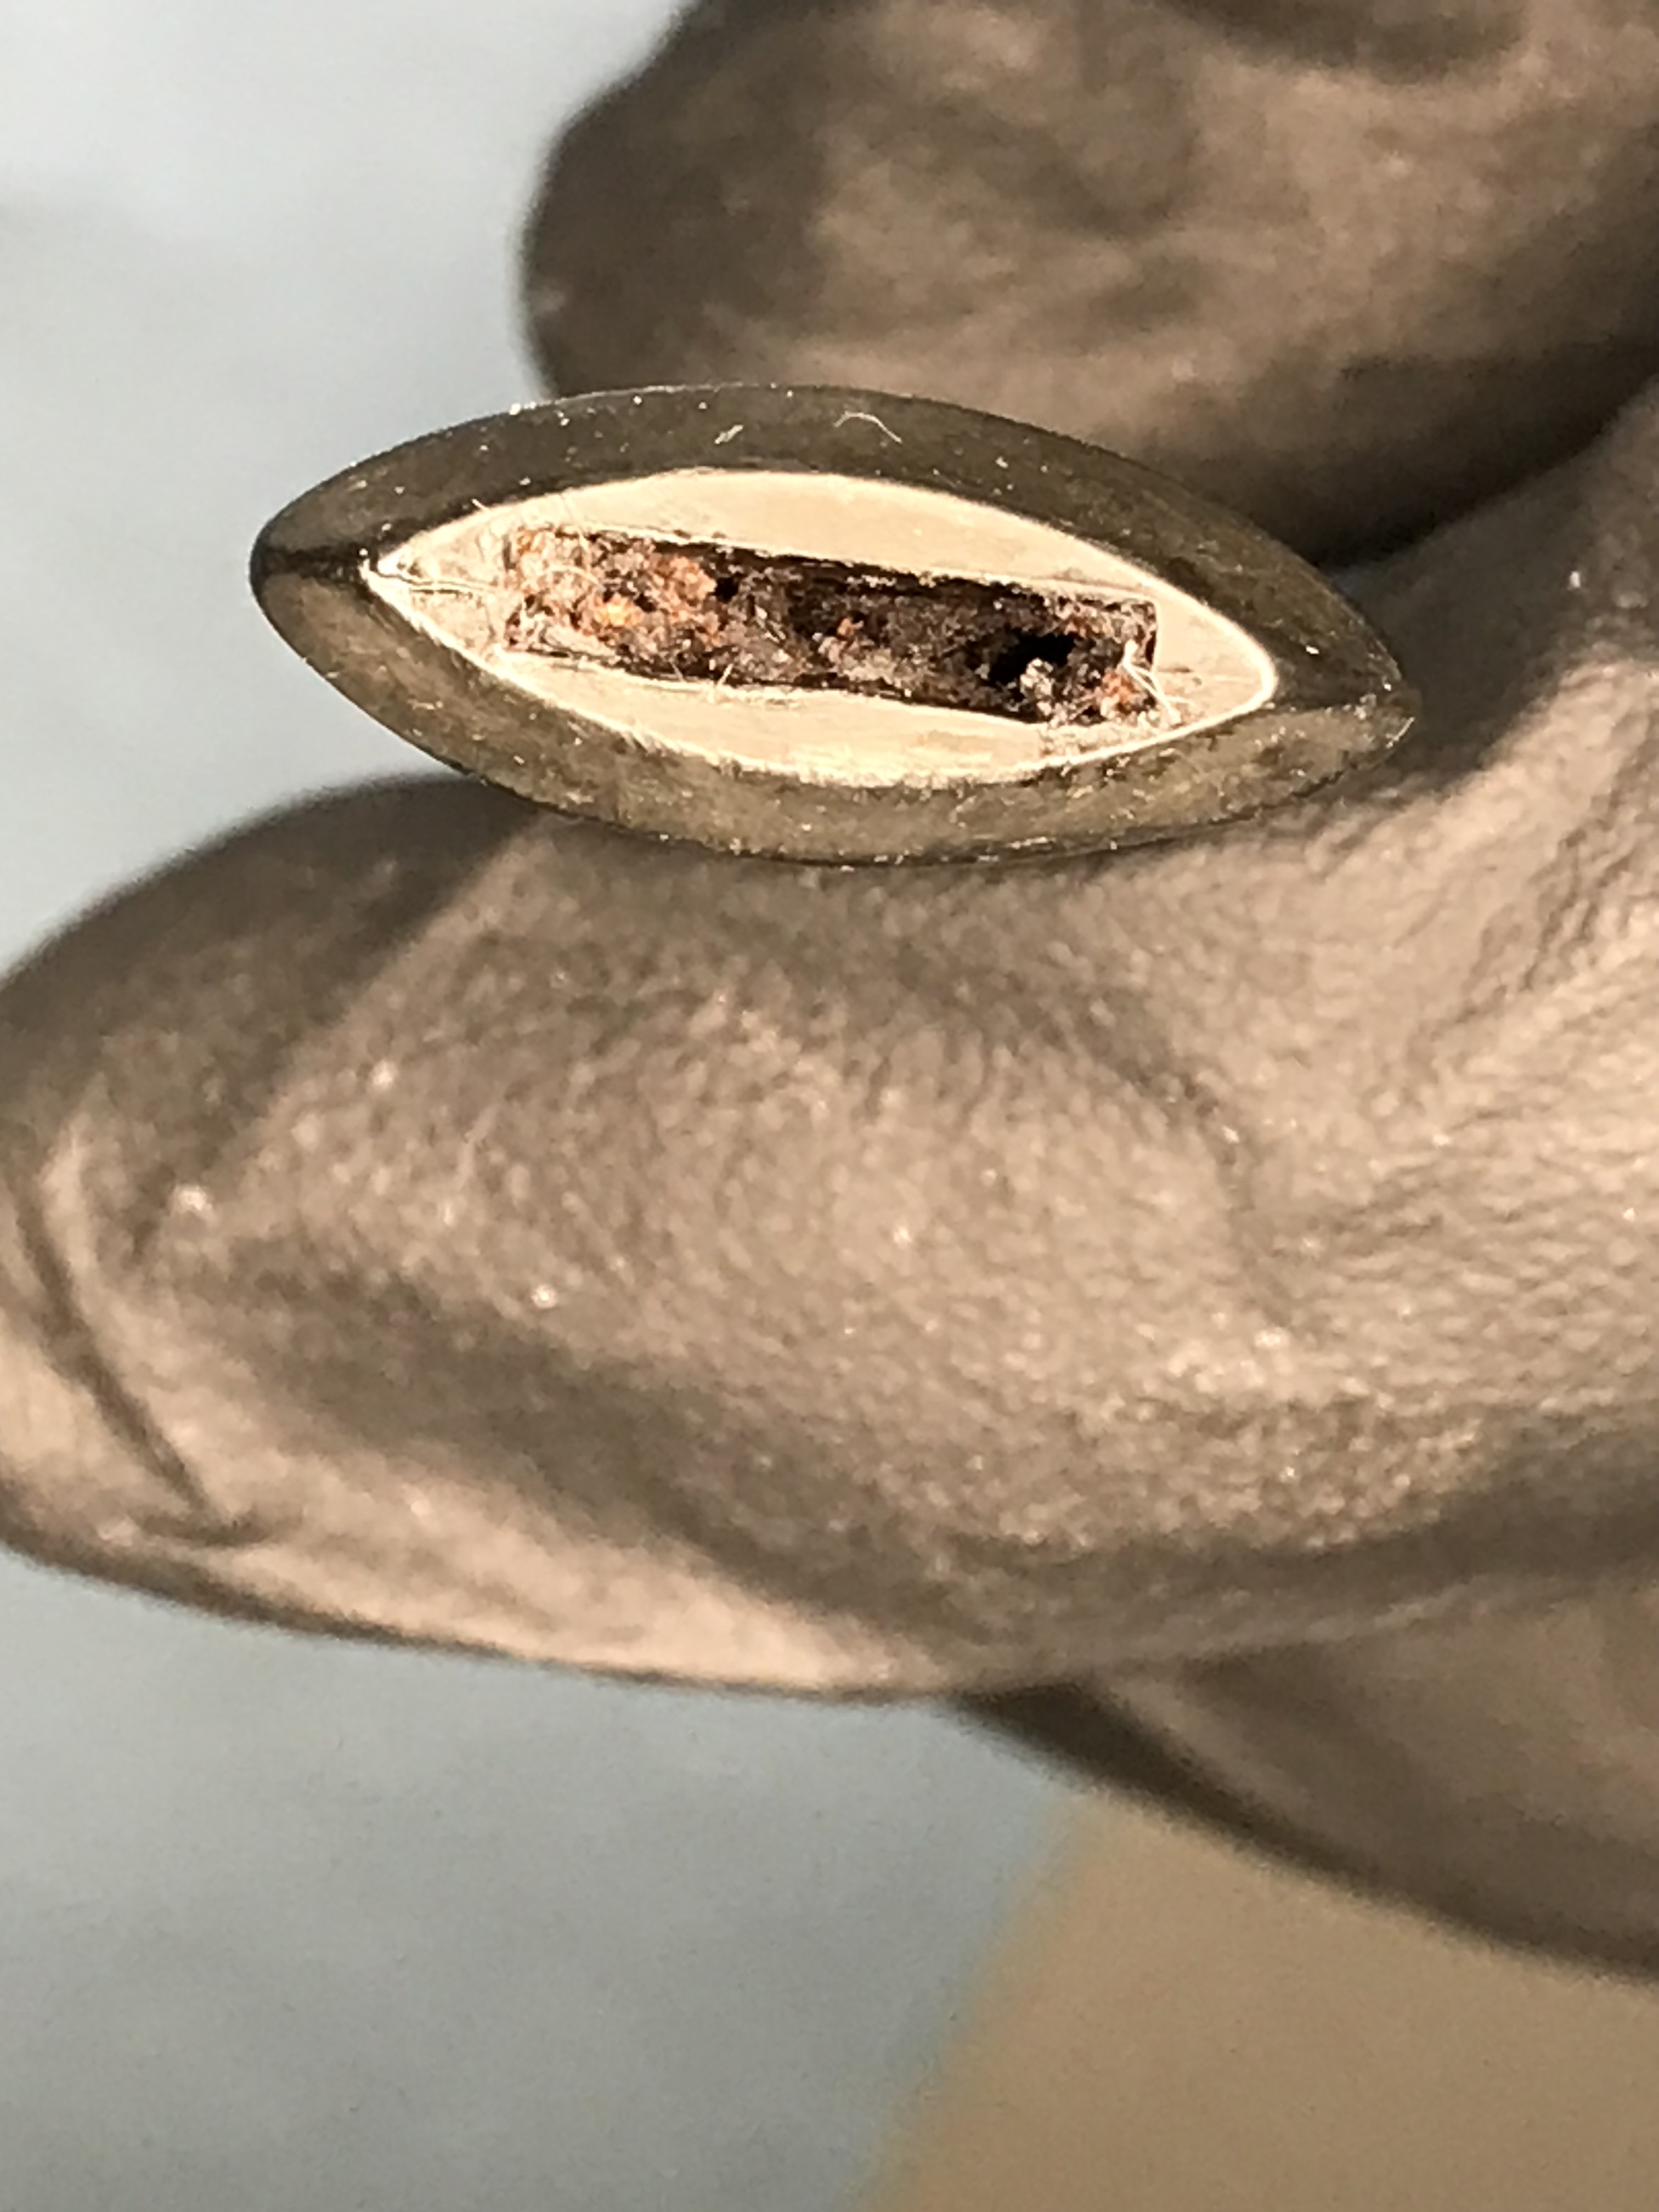
Pipedia also refers to the patent for the “Jobey Link” in 1970. The Jobey link is an alternative pipe tenon. The mortise of the pipe is threaded along with one end of the tenon itself. The tenon is threaded into the pipe, the remaining end is smooth and acts like a push-tenon to connect the stem. The stem is simply held in place by friction. This is pretty well a reverse of how most pipes are made. At least in my opinion. Here is a picture of the patent for the Jobey tenon.
First Impressions
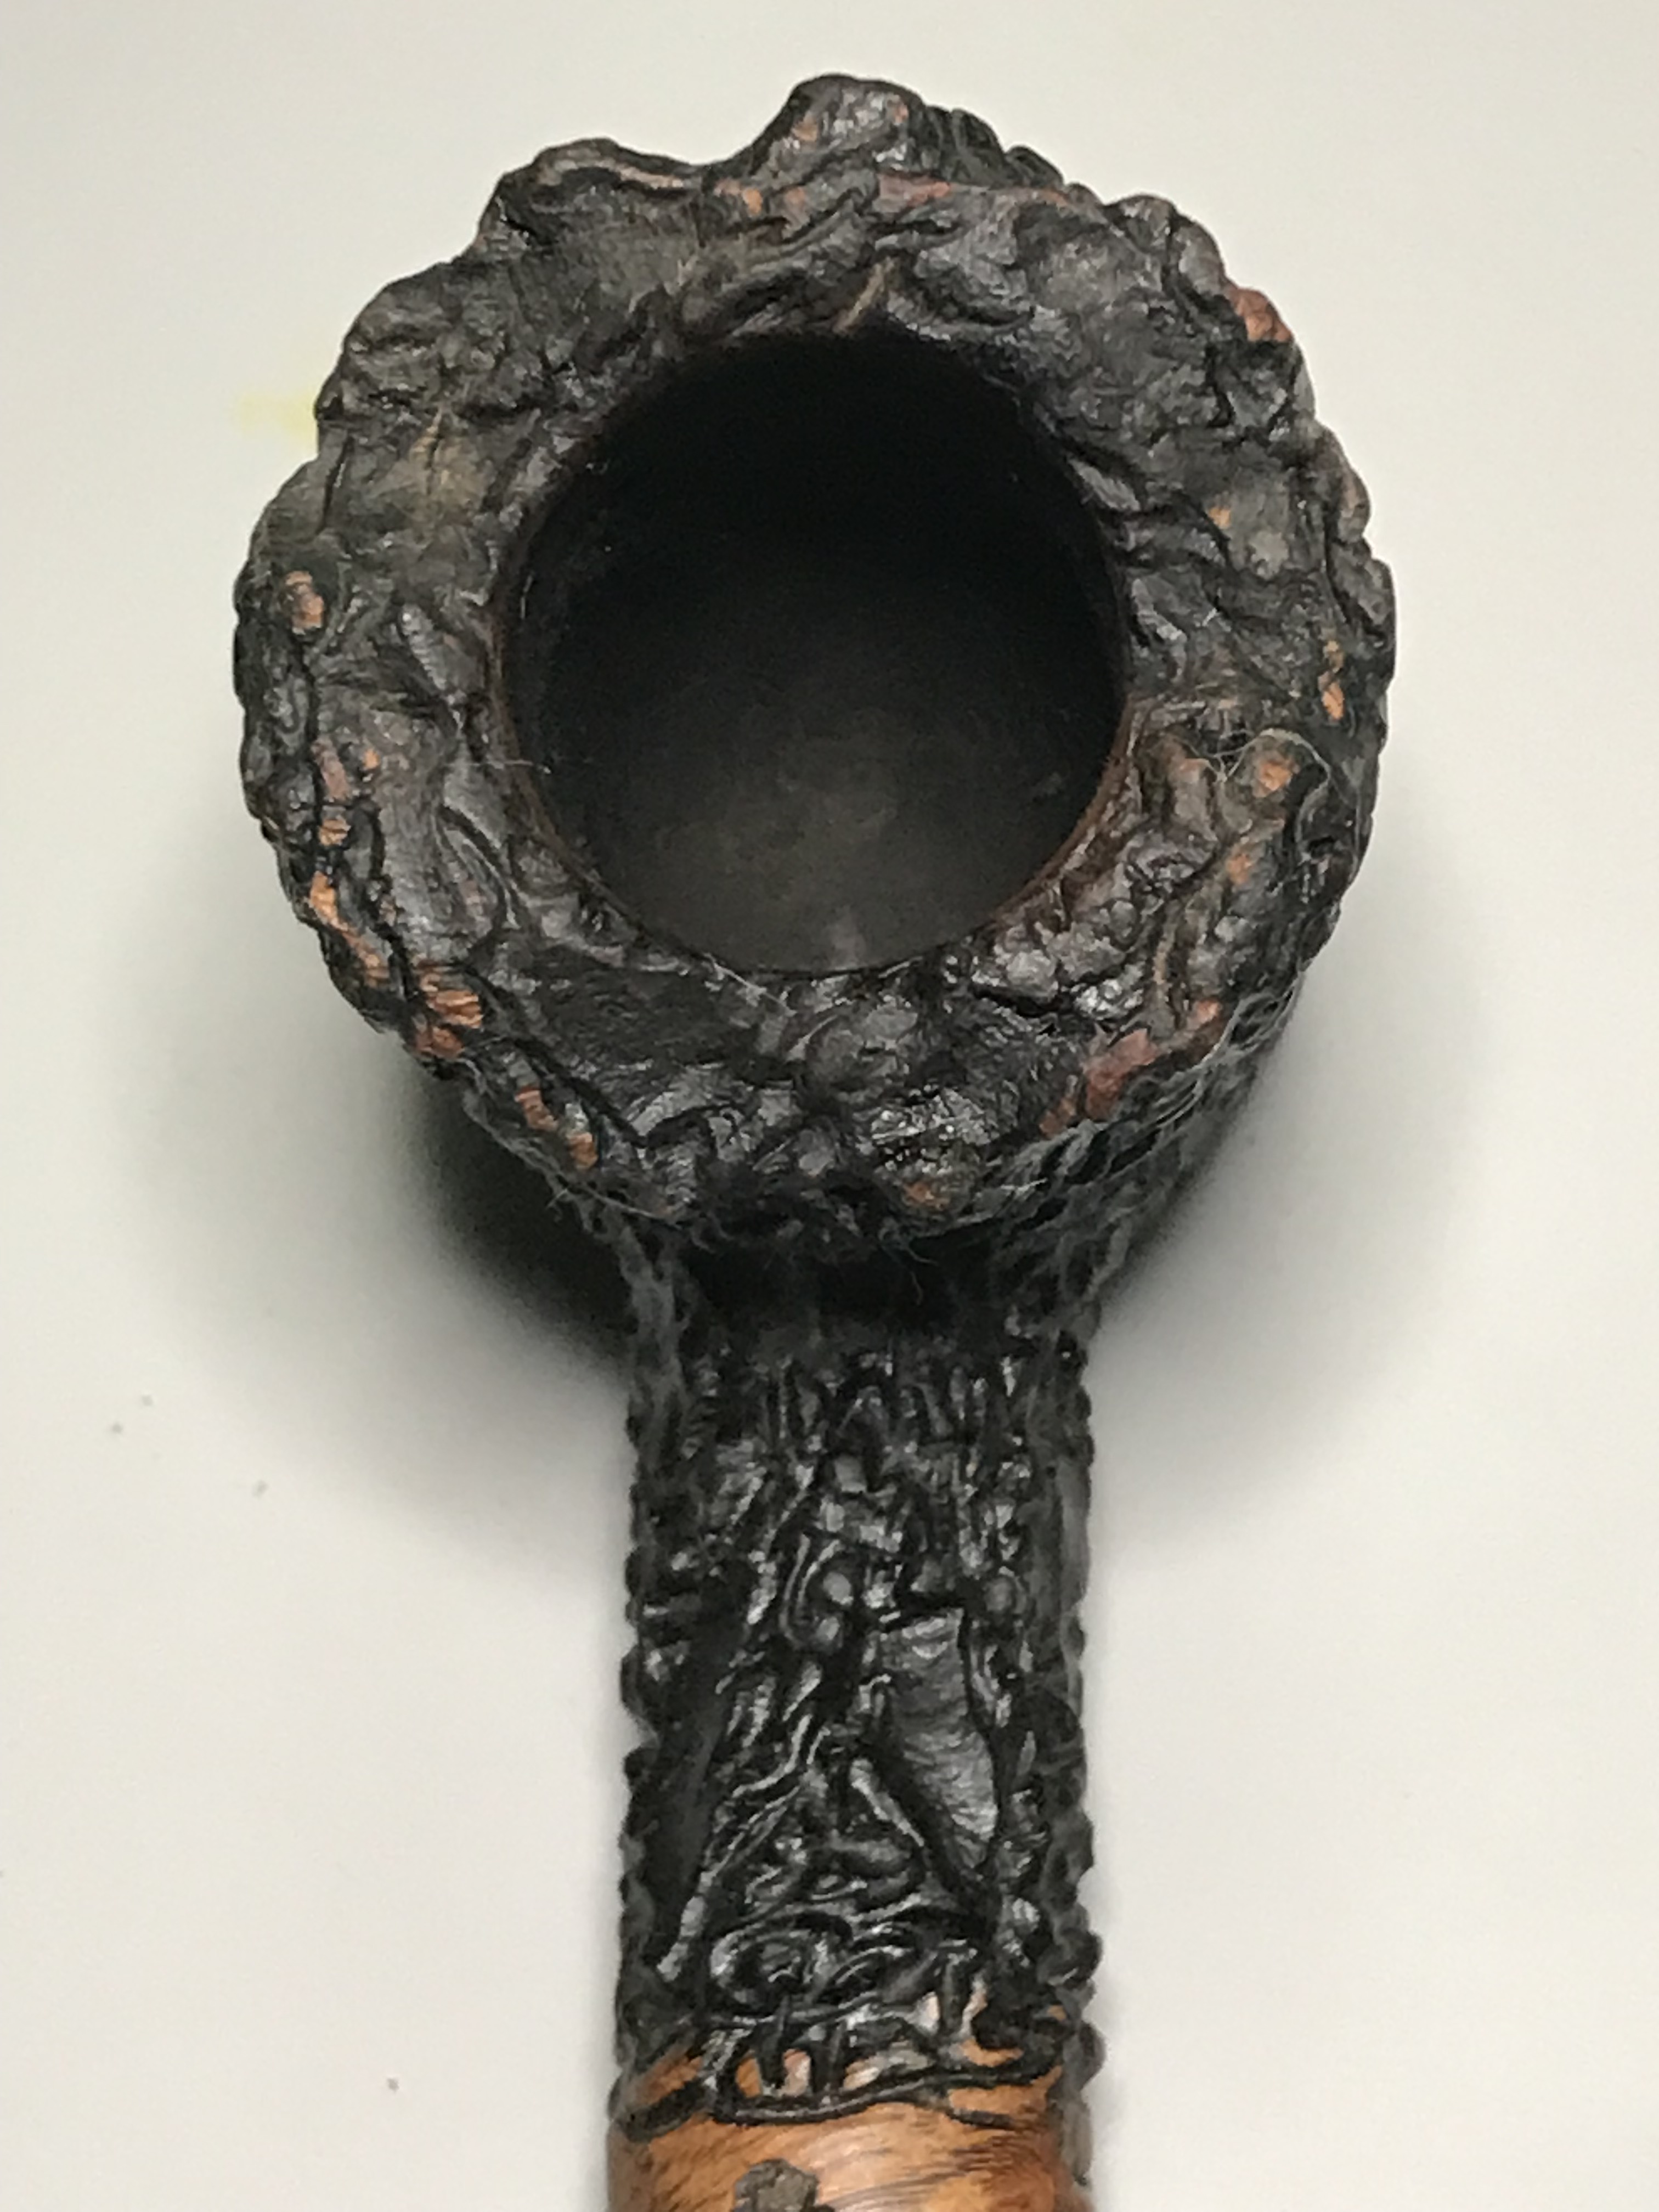
The pipe was in sound condition. There was no evidence of cracks in the shank or breaches of the airway in the stem due to harsh clenching. The finish is a very craggily deep rustication on both the rim and the body of the stummel. You can see dust or dirt had collected in these craggily areas and the finish was dull. The Jobey link was seized in the stem, fortunately it threaded out of the stummel quite easily. The stem is a acrylic, the airway was heavily soiled from smoking and was a visible brown right through the stem.
Step 1: Remove Carbon buildup
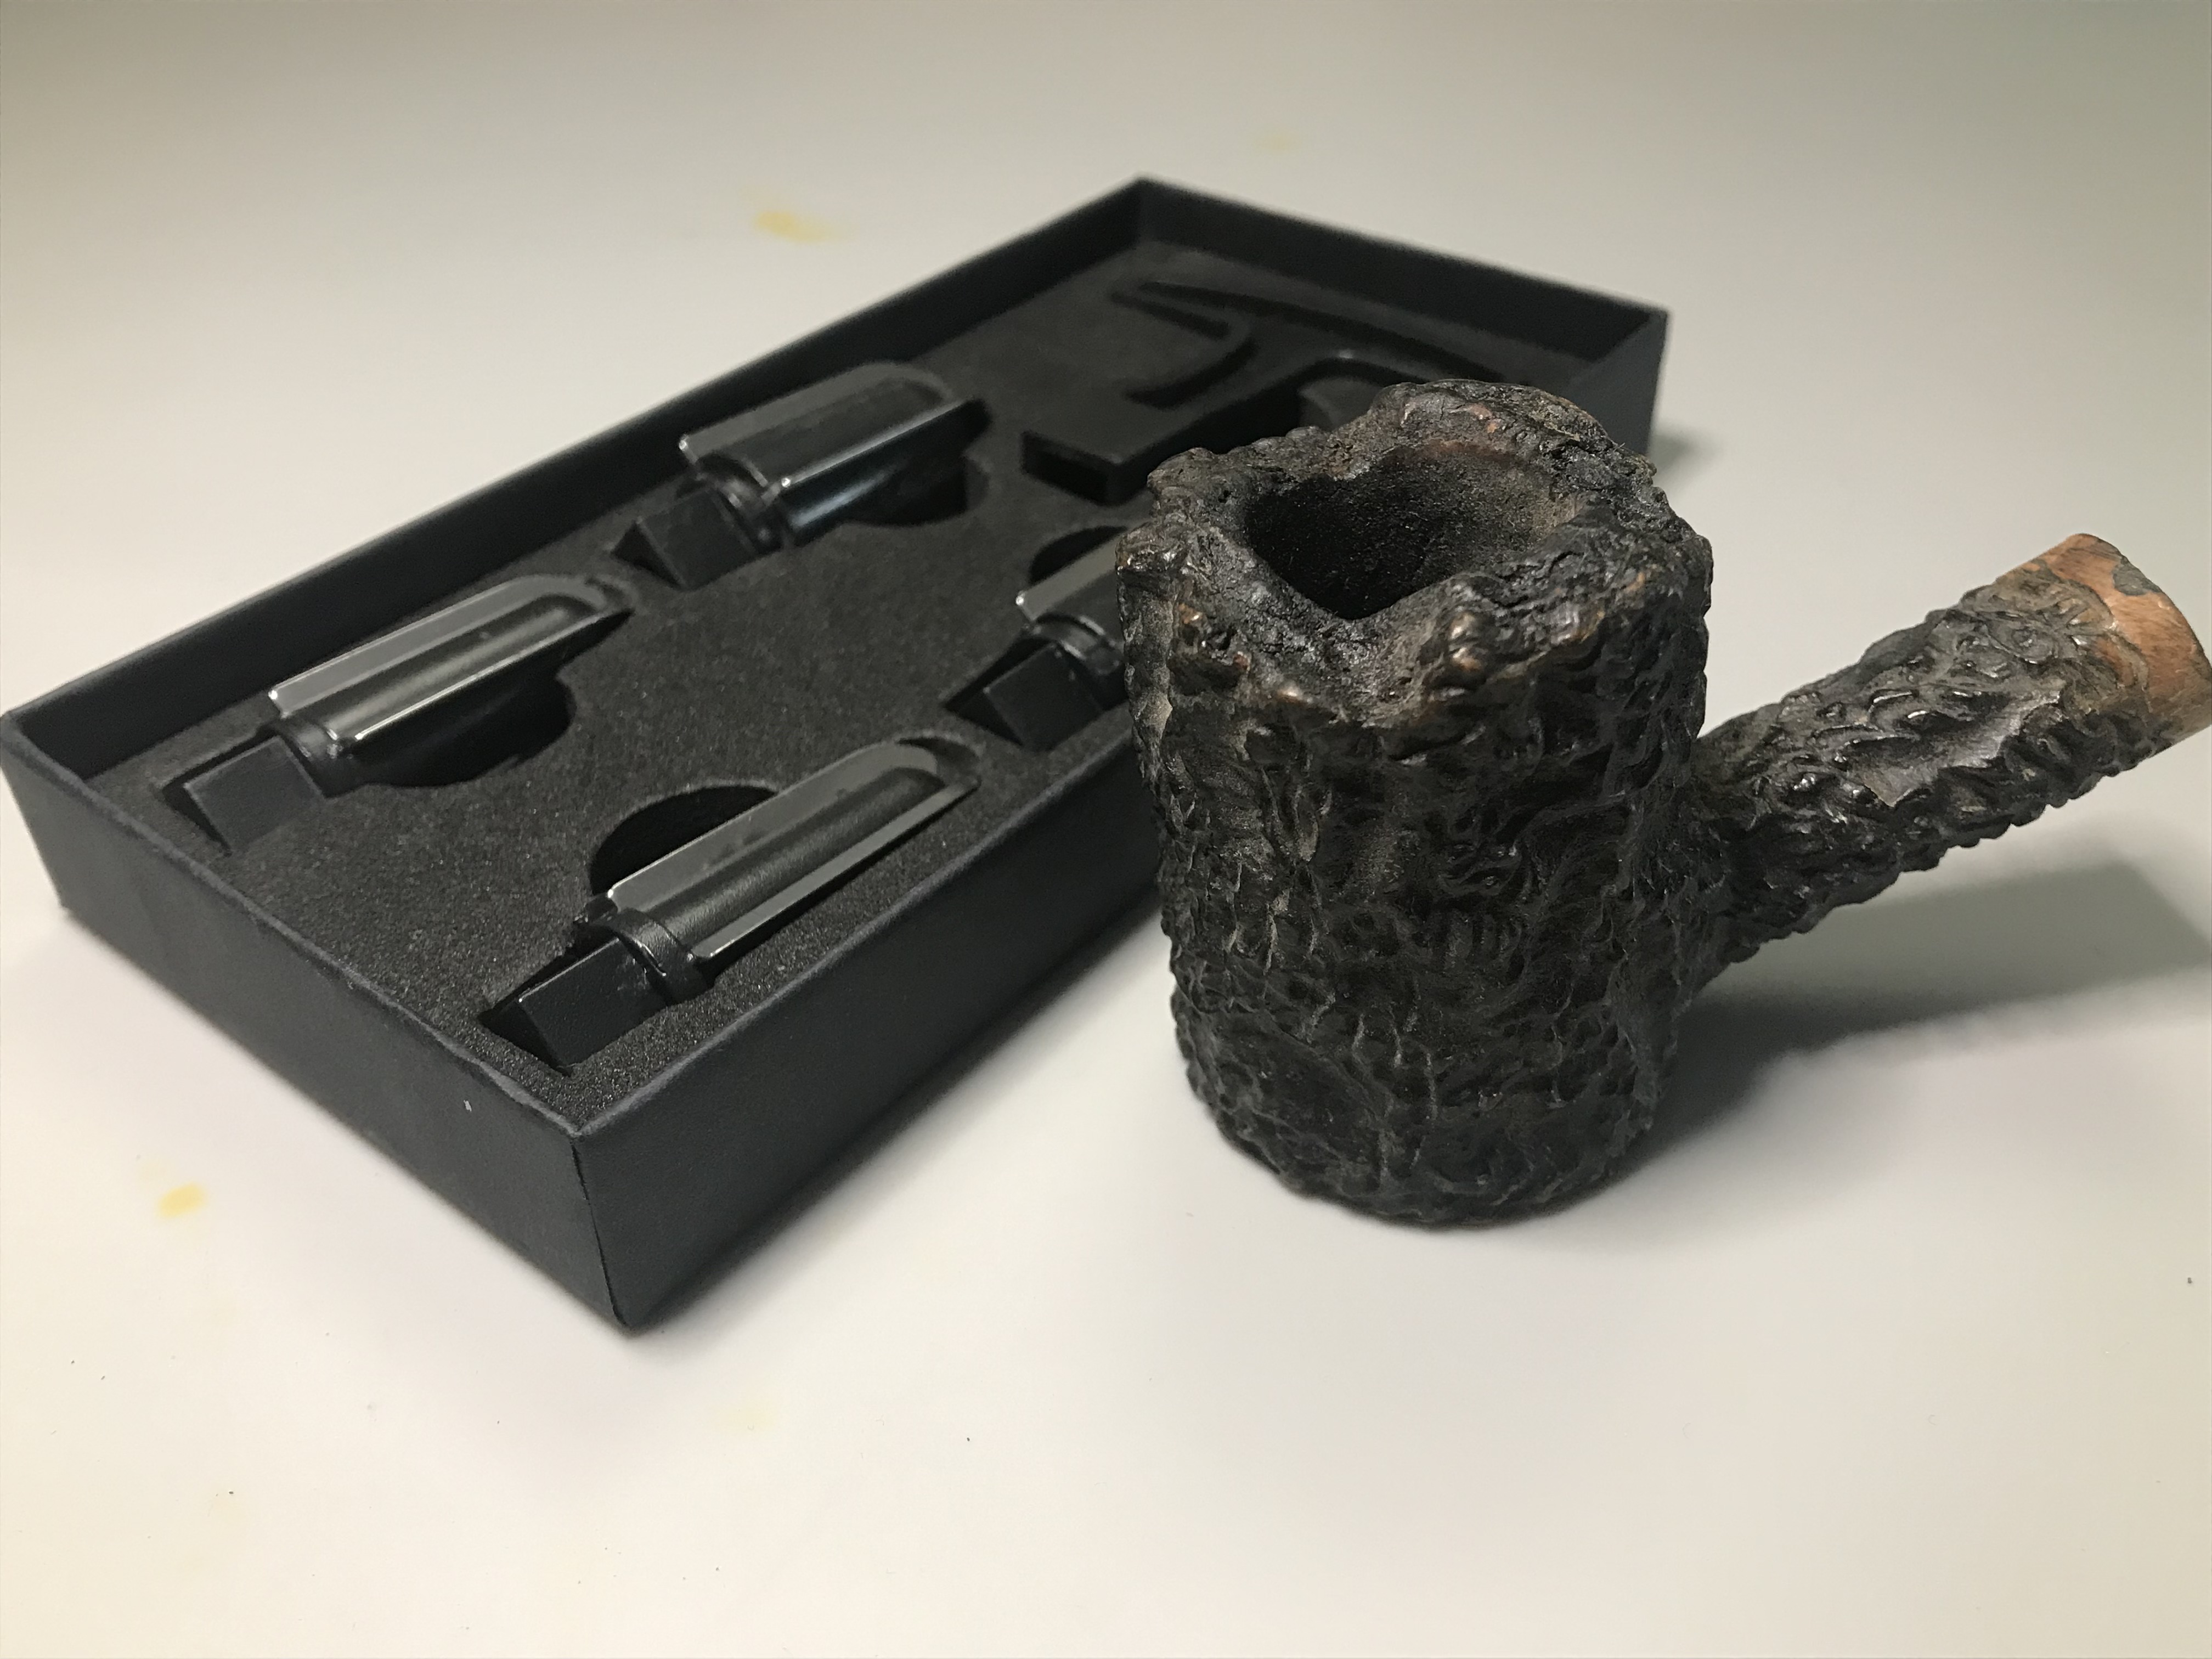
The tobacco chamber on this pipe was quite large. I was able to insert the 3rd largest reamer bit to remove the carbon buildup in the chamber. As always I will ream the pipe right back to the briar if I can. The purpose of which is so I can assess the condition of the tobacco chamber and determine if there any heat fissures or cracks in the bowl.
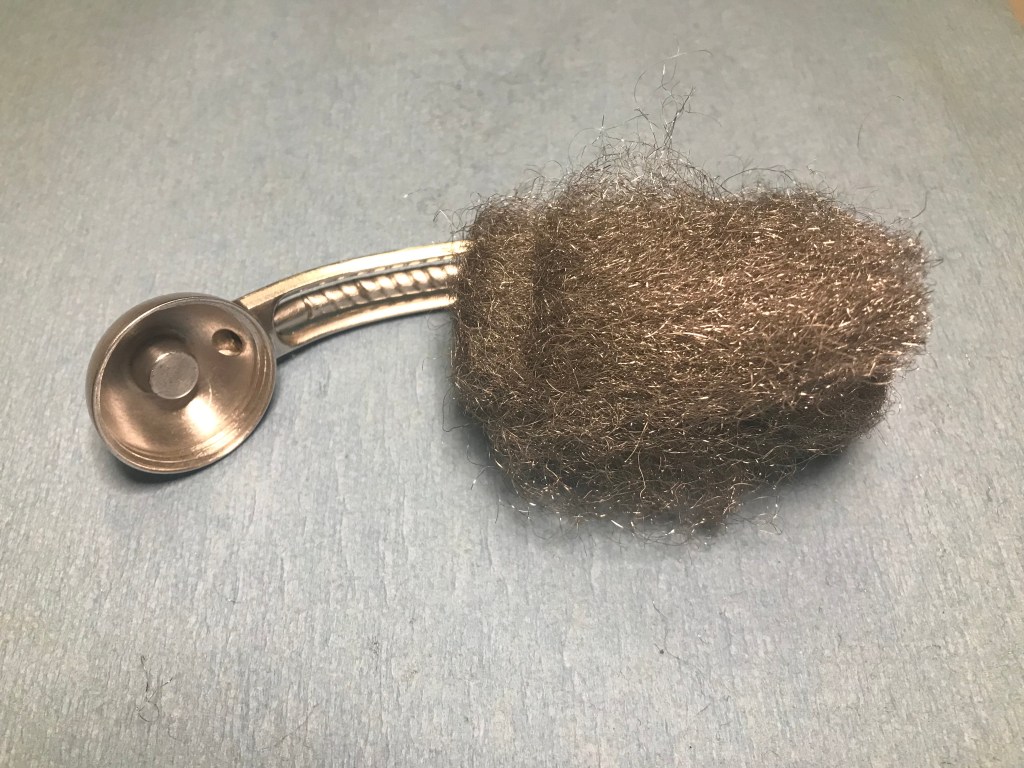
After I finished removing the carbon buildup from the tobacco chamber I used some steel wool and a wire brush (steel) to remove the carbon buildup on the rim of the pipe and within the rusticated finish. A brass brush is much softer that the steel brush, however; in my experience, you will discover that the brass will leave a metal sheen on the pipe as some of the brass will transfer right onto the pipe itself creating more work. Here’s the before and after:
Step 2: Clean & Deoderize
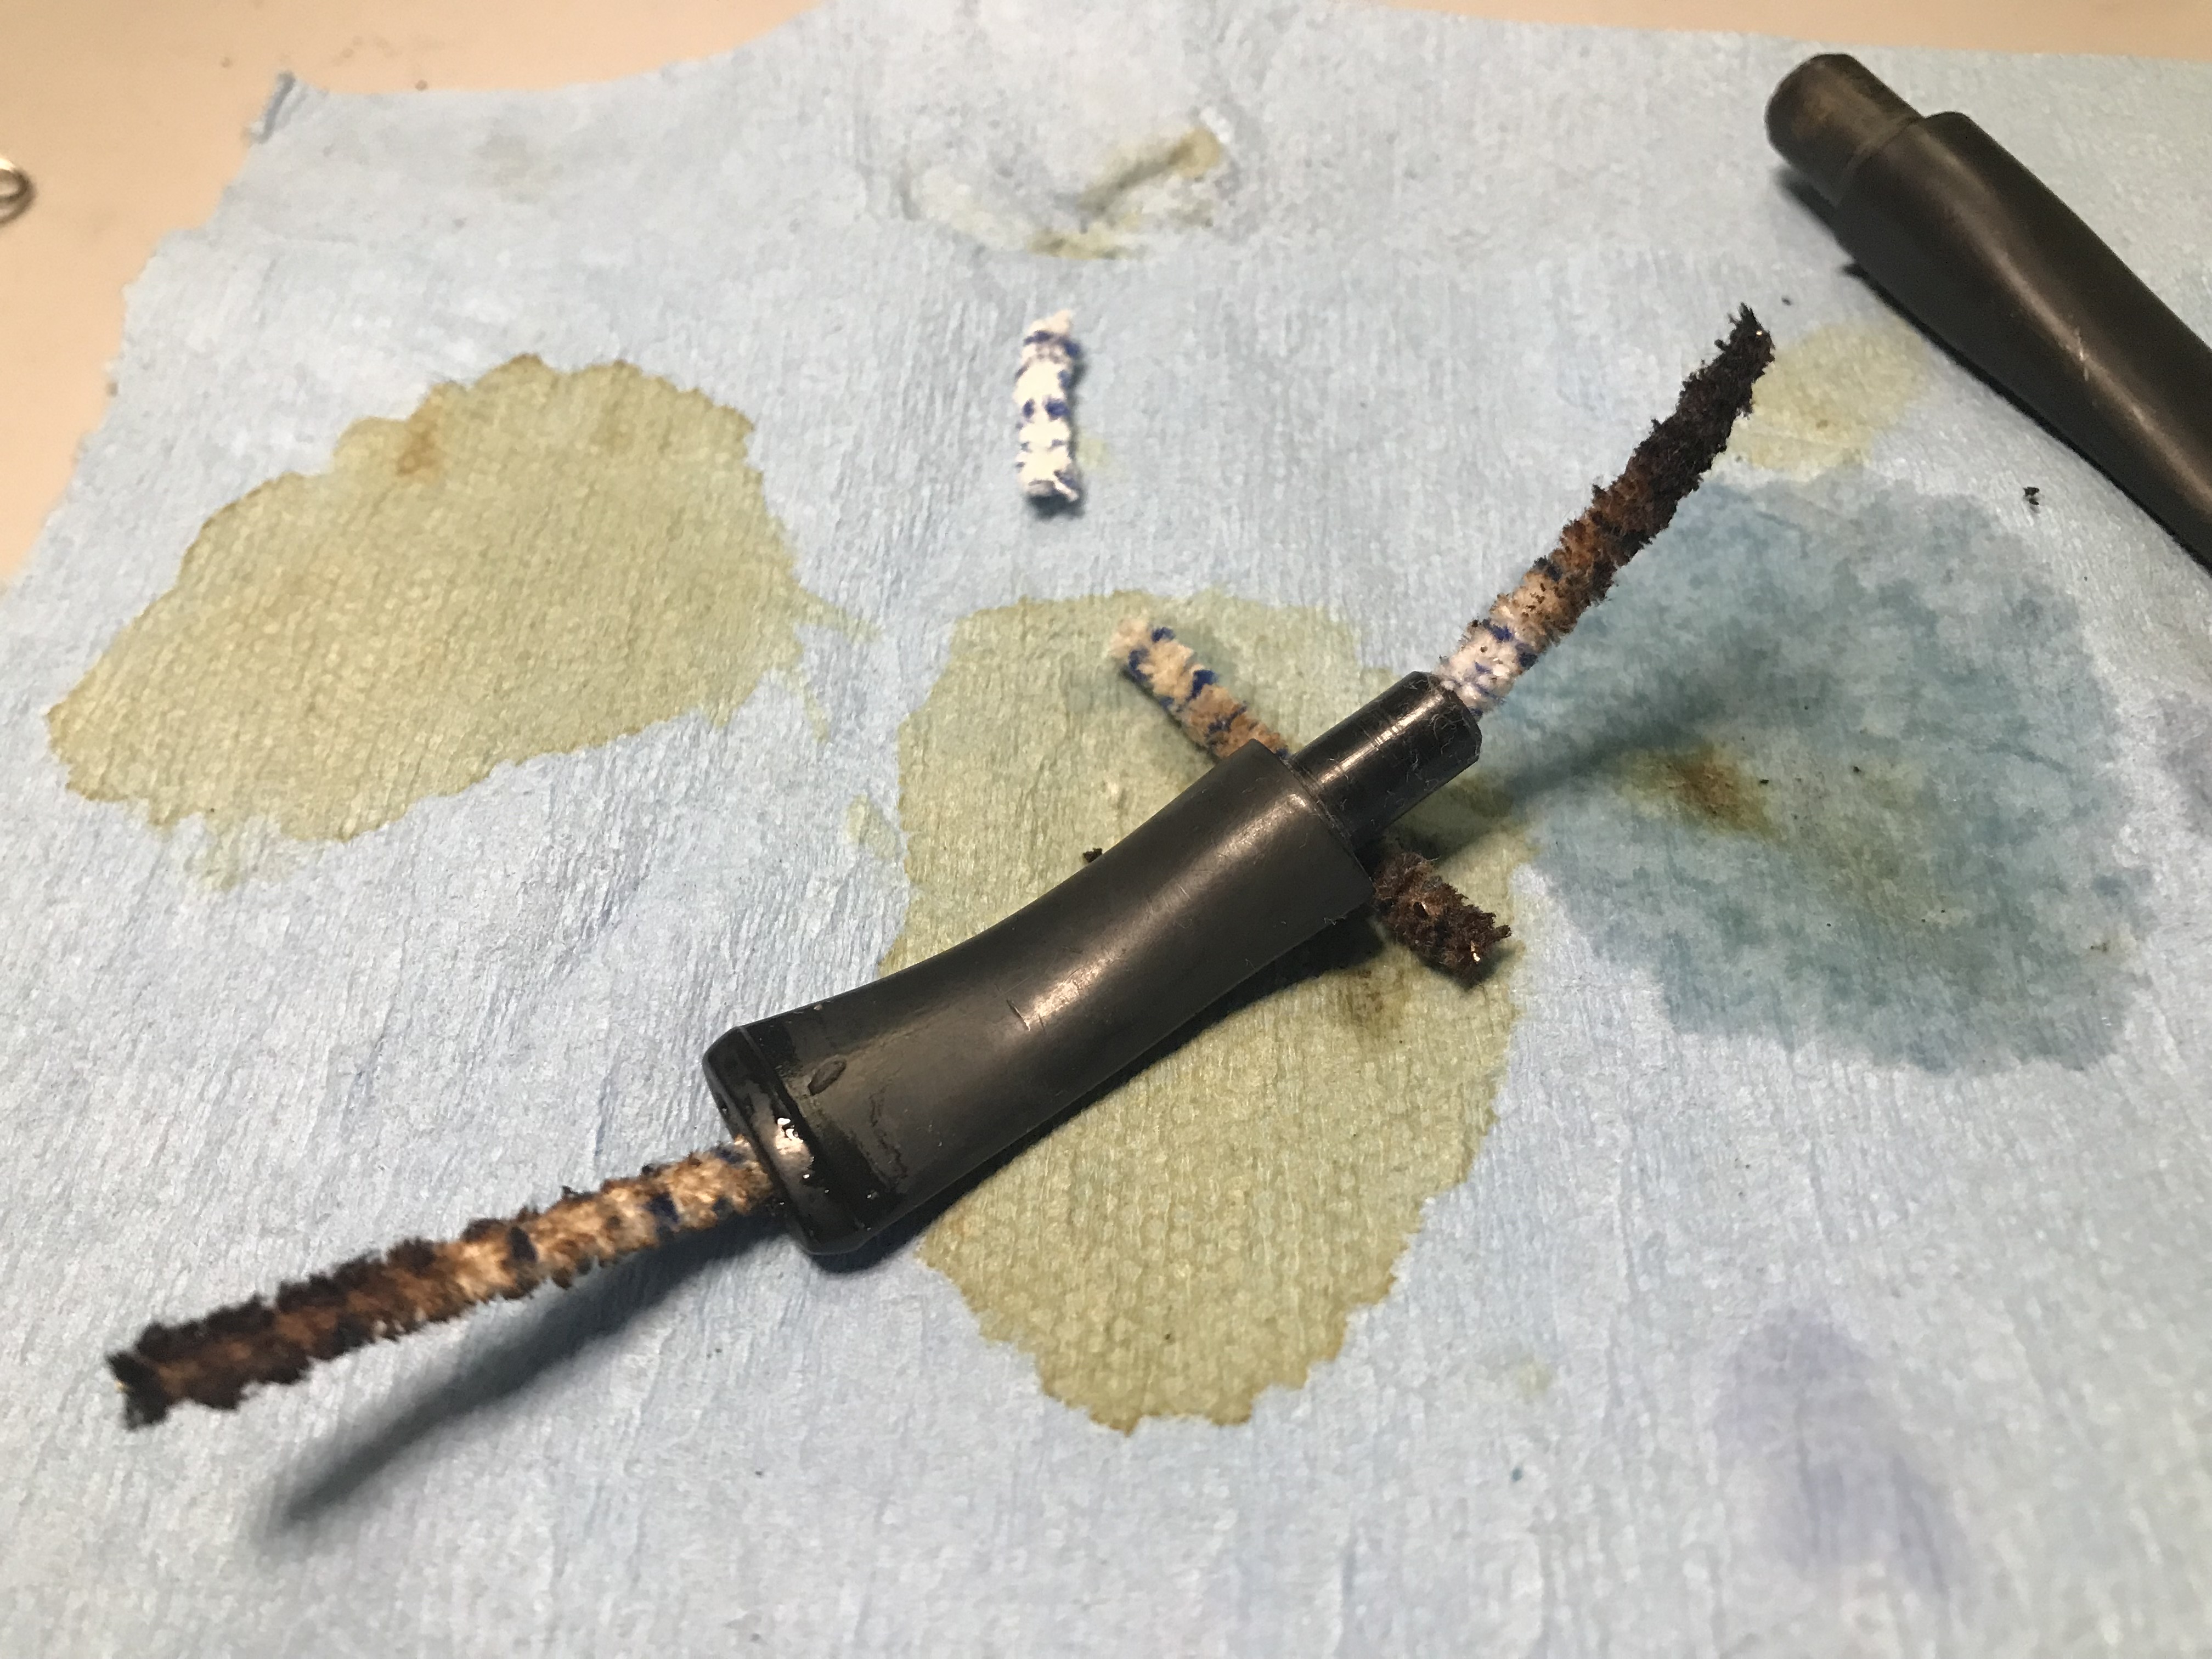
With the carbon buildup removed, it was time to clean and deoderize the internals of the airway of the stummel and clean the airway in the stem. I use a combination of nylon brushes, bristled pipe cleaners, regular pipe cleaners and a retort system.
First, I scrubbed and cleaned the stem until I was able to remove all of the brown buildup in the airway.
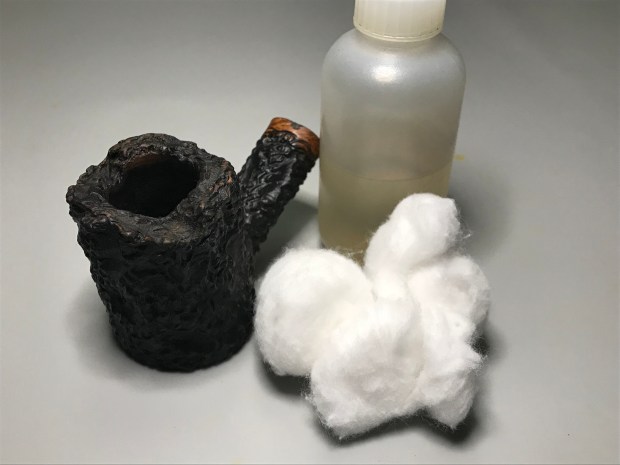
I used cotton batting soaked with alcohol to deodorize any lingering aromas or flavours left behind in the pipe.
Step 3: Refinishing
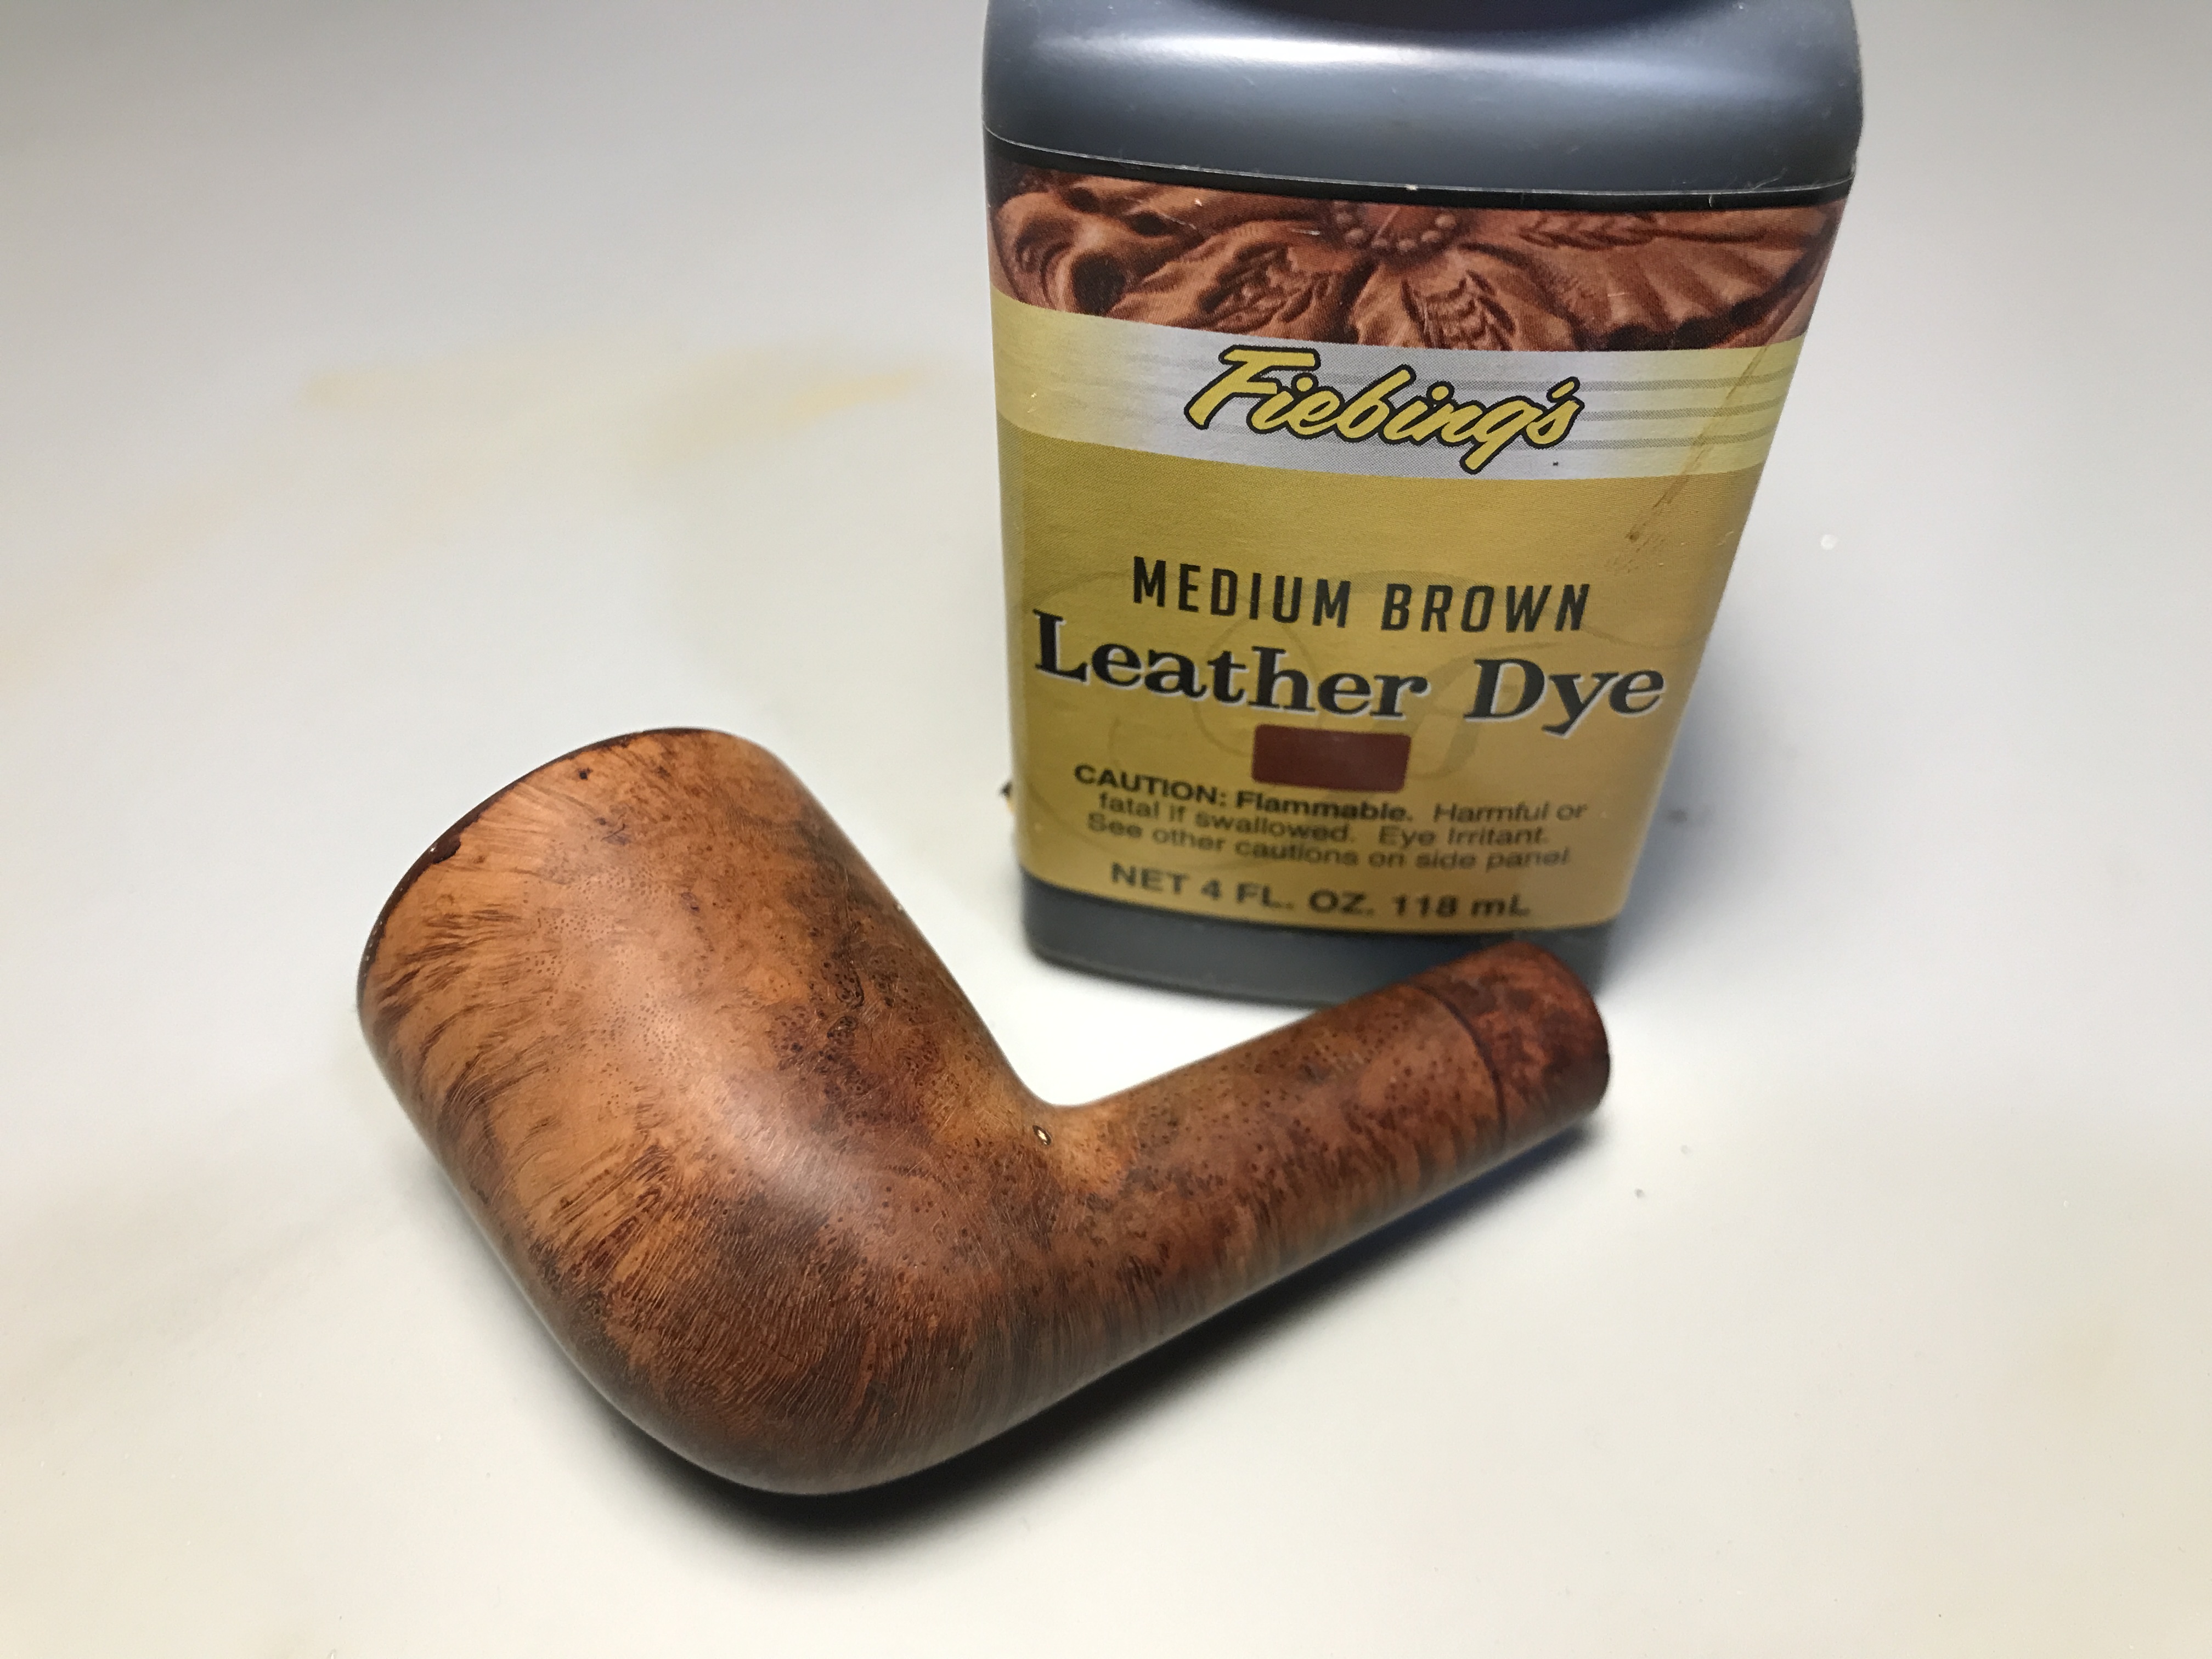
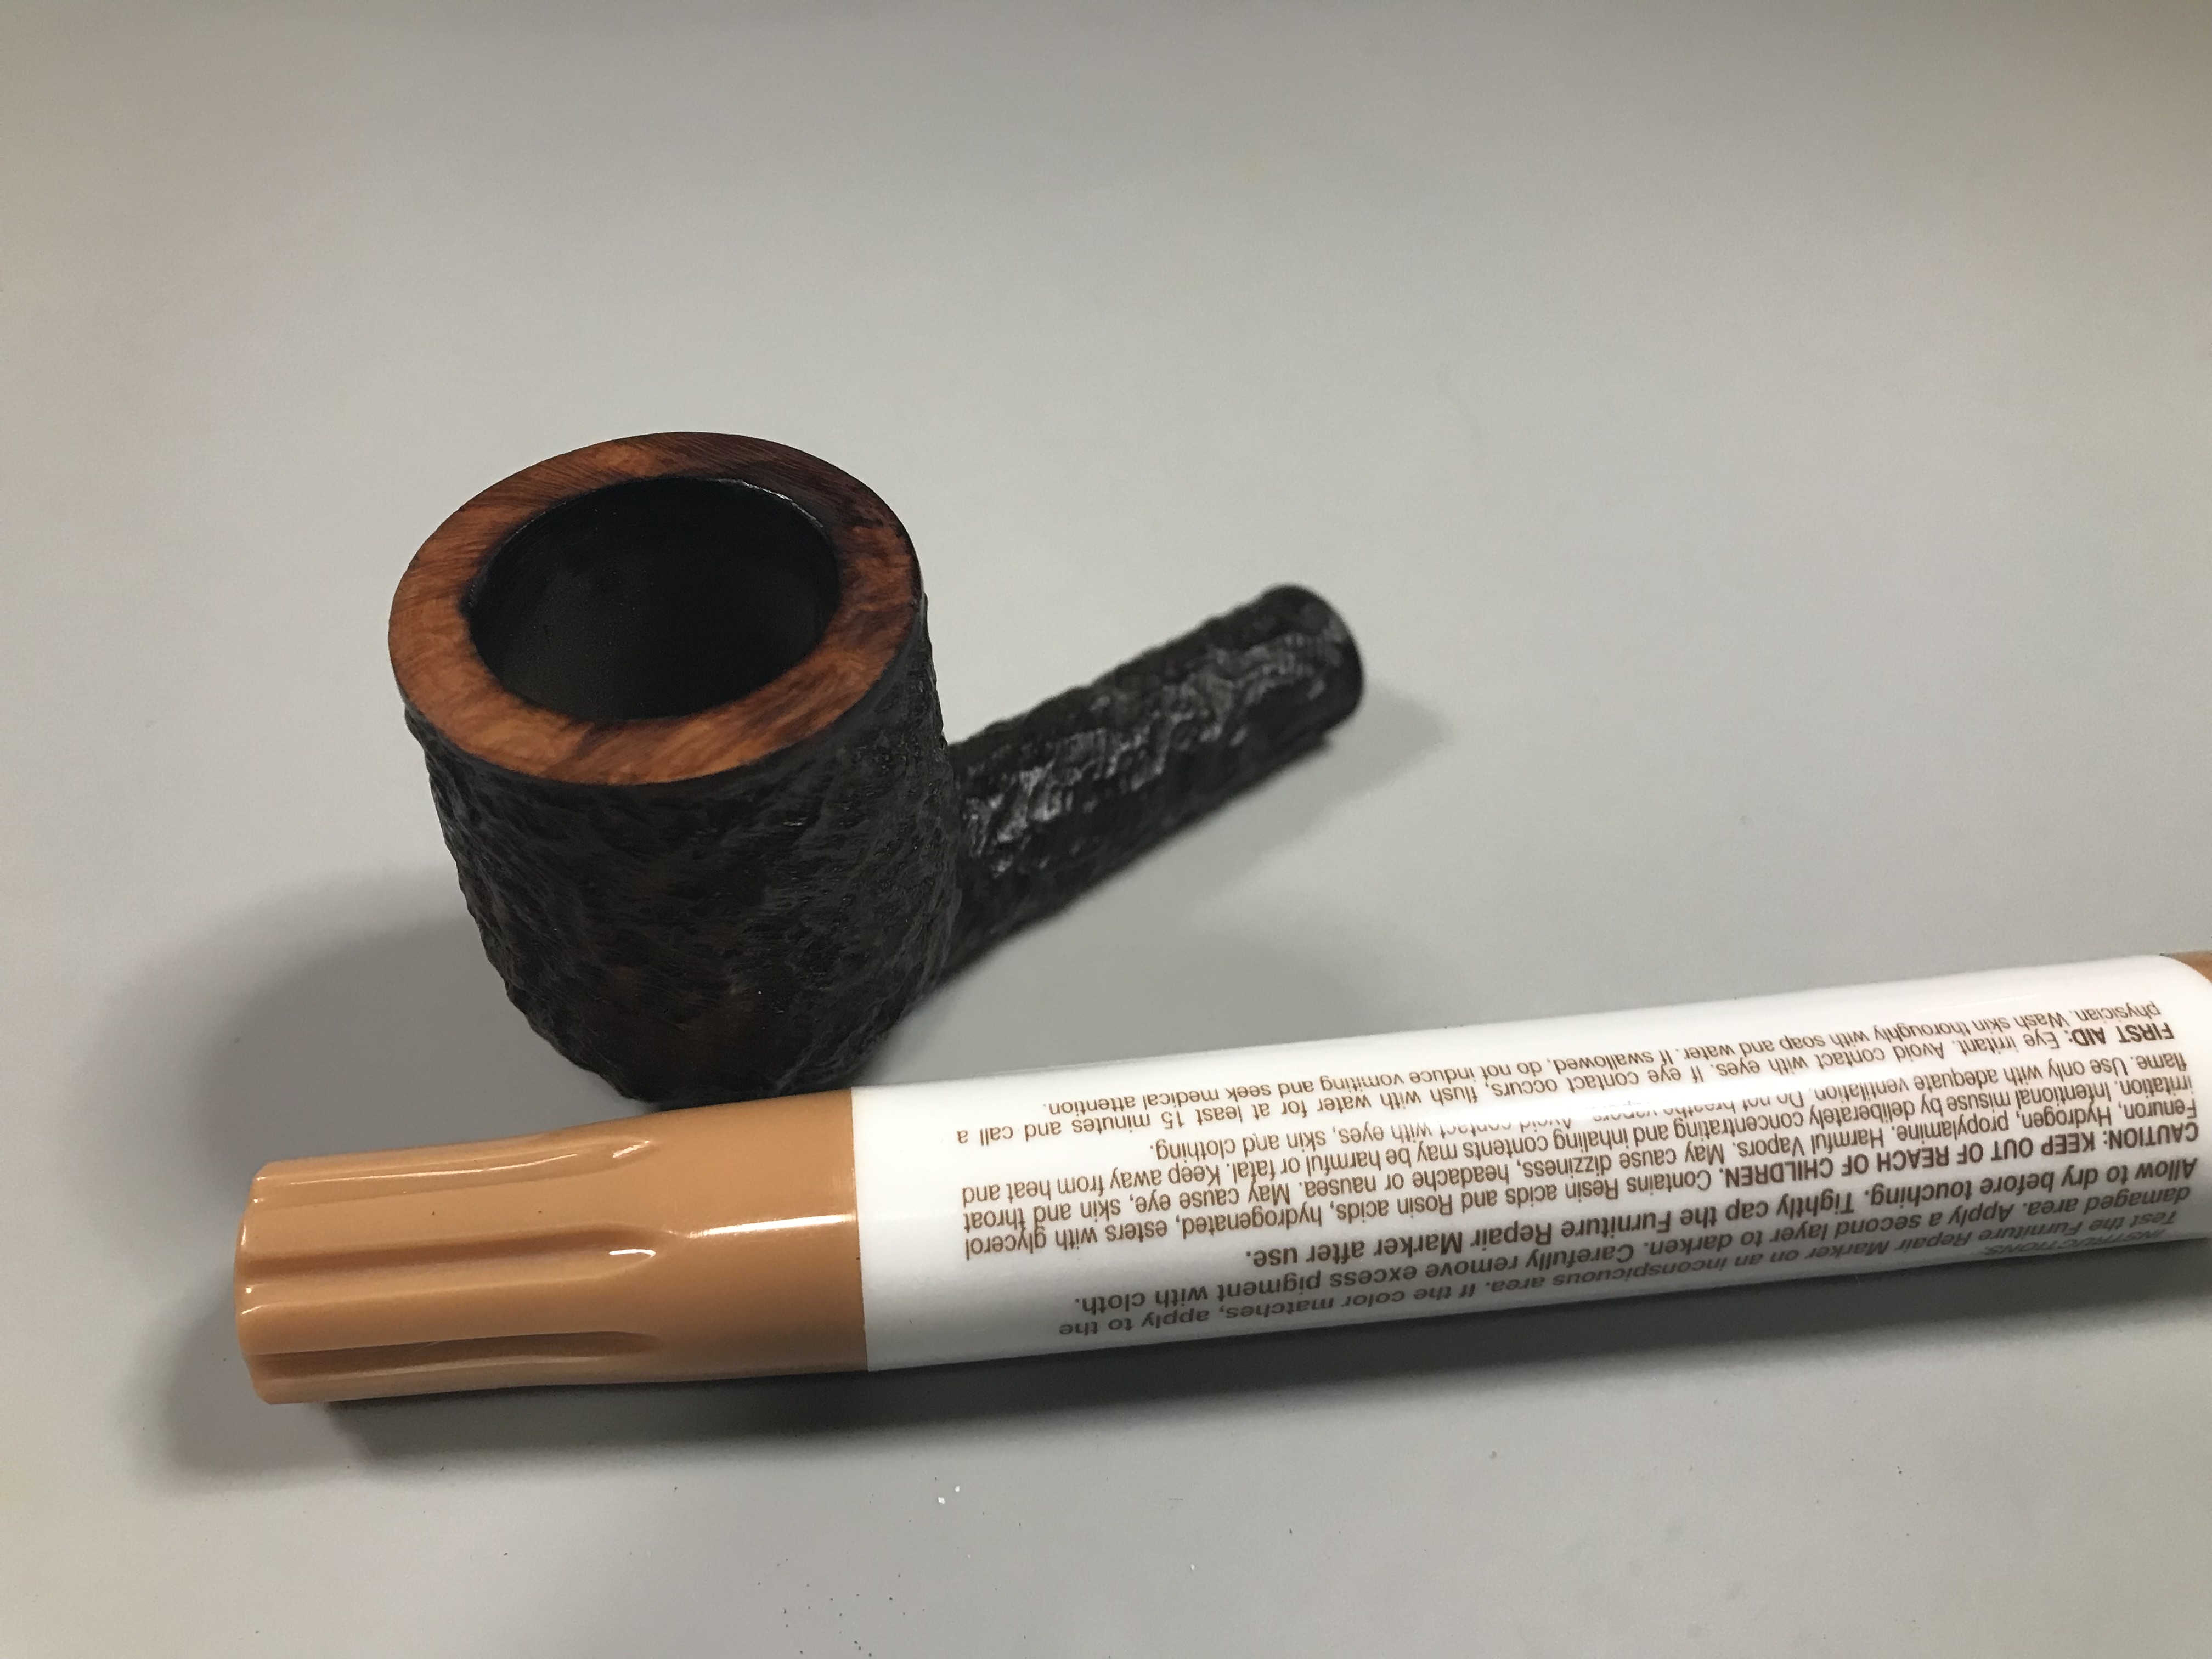
I used a combination of Feibings Dark Brown leather dye to restore the brown finish on the smooth accent on the shank as wells as the smooth bottom where the nomenclature is located. I touched up the rim and any peaks in the rustication with a Wood Furniture Repair Marker in the Espresso colour. These stain markers are one of the most useful tools for matching stains when refinishing pipes. You can buy these usually in a pack of 6 at most Hardware stores.
Step 4: Stem Polishing
I used my micro fibre pads to restore the finish on the acrylic stem. I don’t often work with acrylic as most of the pipes that come my way usually have Vulcanite stems. I find acrylic very forgiving to work with when you reach the polishing stage. I was able to start at 1500 grit and work my way up quite quickly. I was able to achieve an excellent finish on the stem, I don’t think I even needed to buff it, but I will anyway for the sake of process.
Before moving to the buffing stage for this pipe, I replaced the Jobey link back into the shank of the pipe. It threaded back in quite easily and I was able to push and pull the stem from pipe as originally intended. The stem seated firmly on the push tenon firmly.
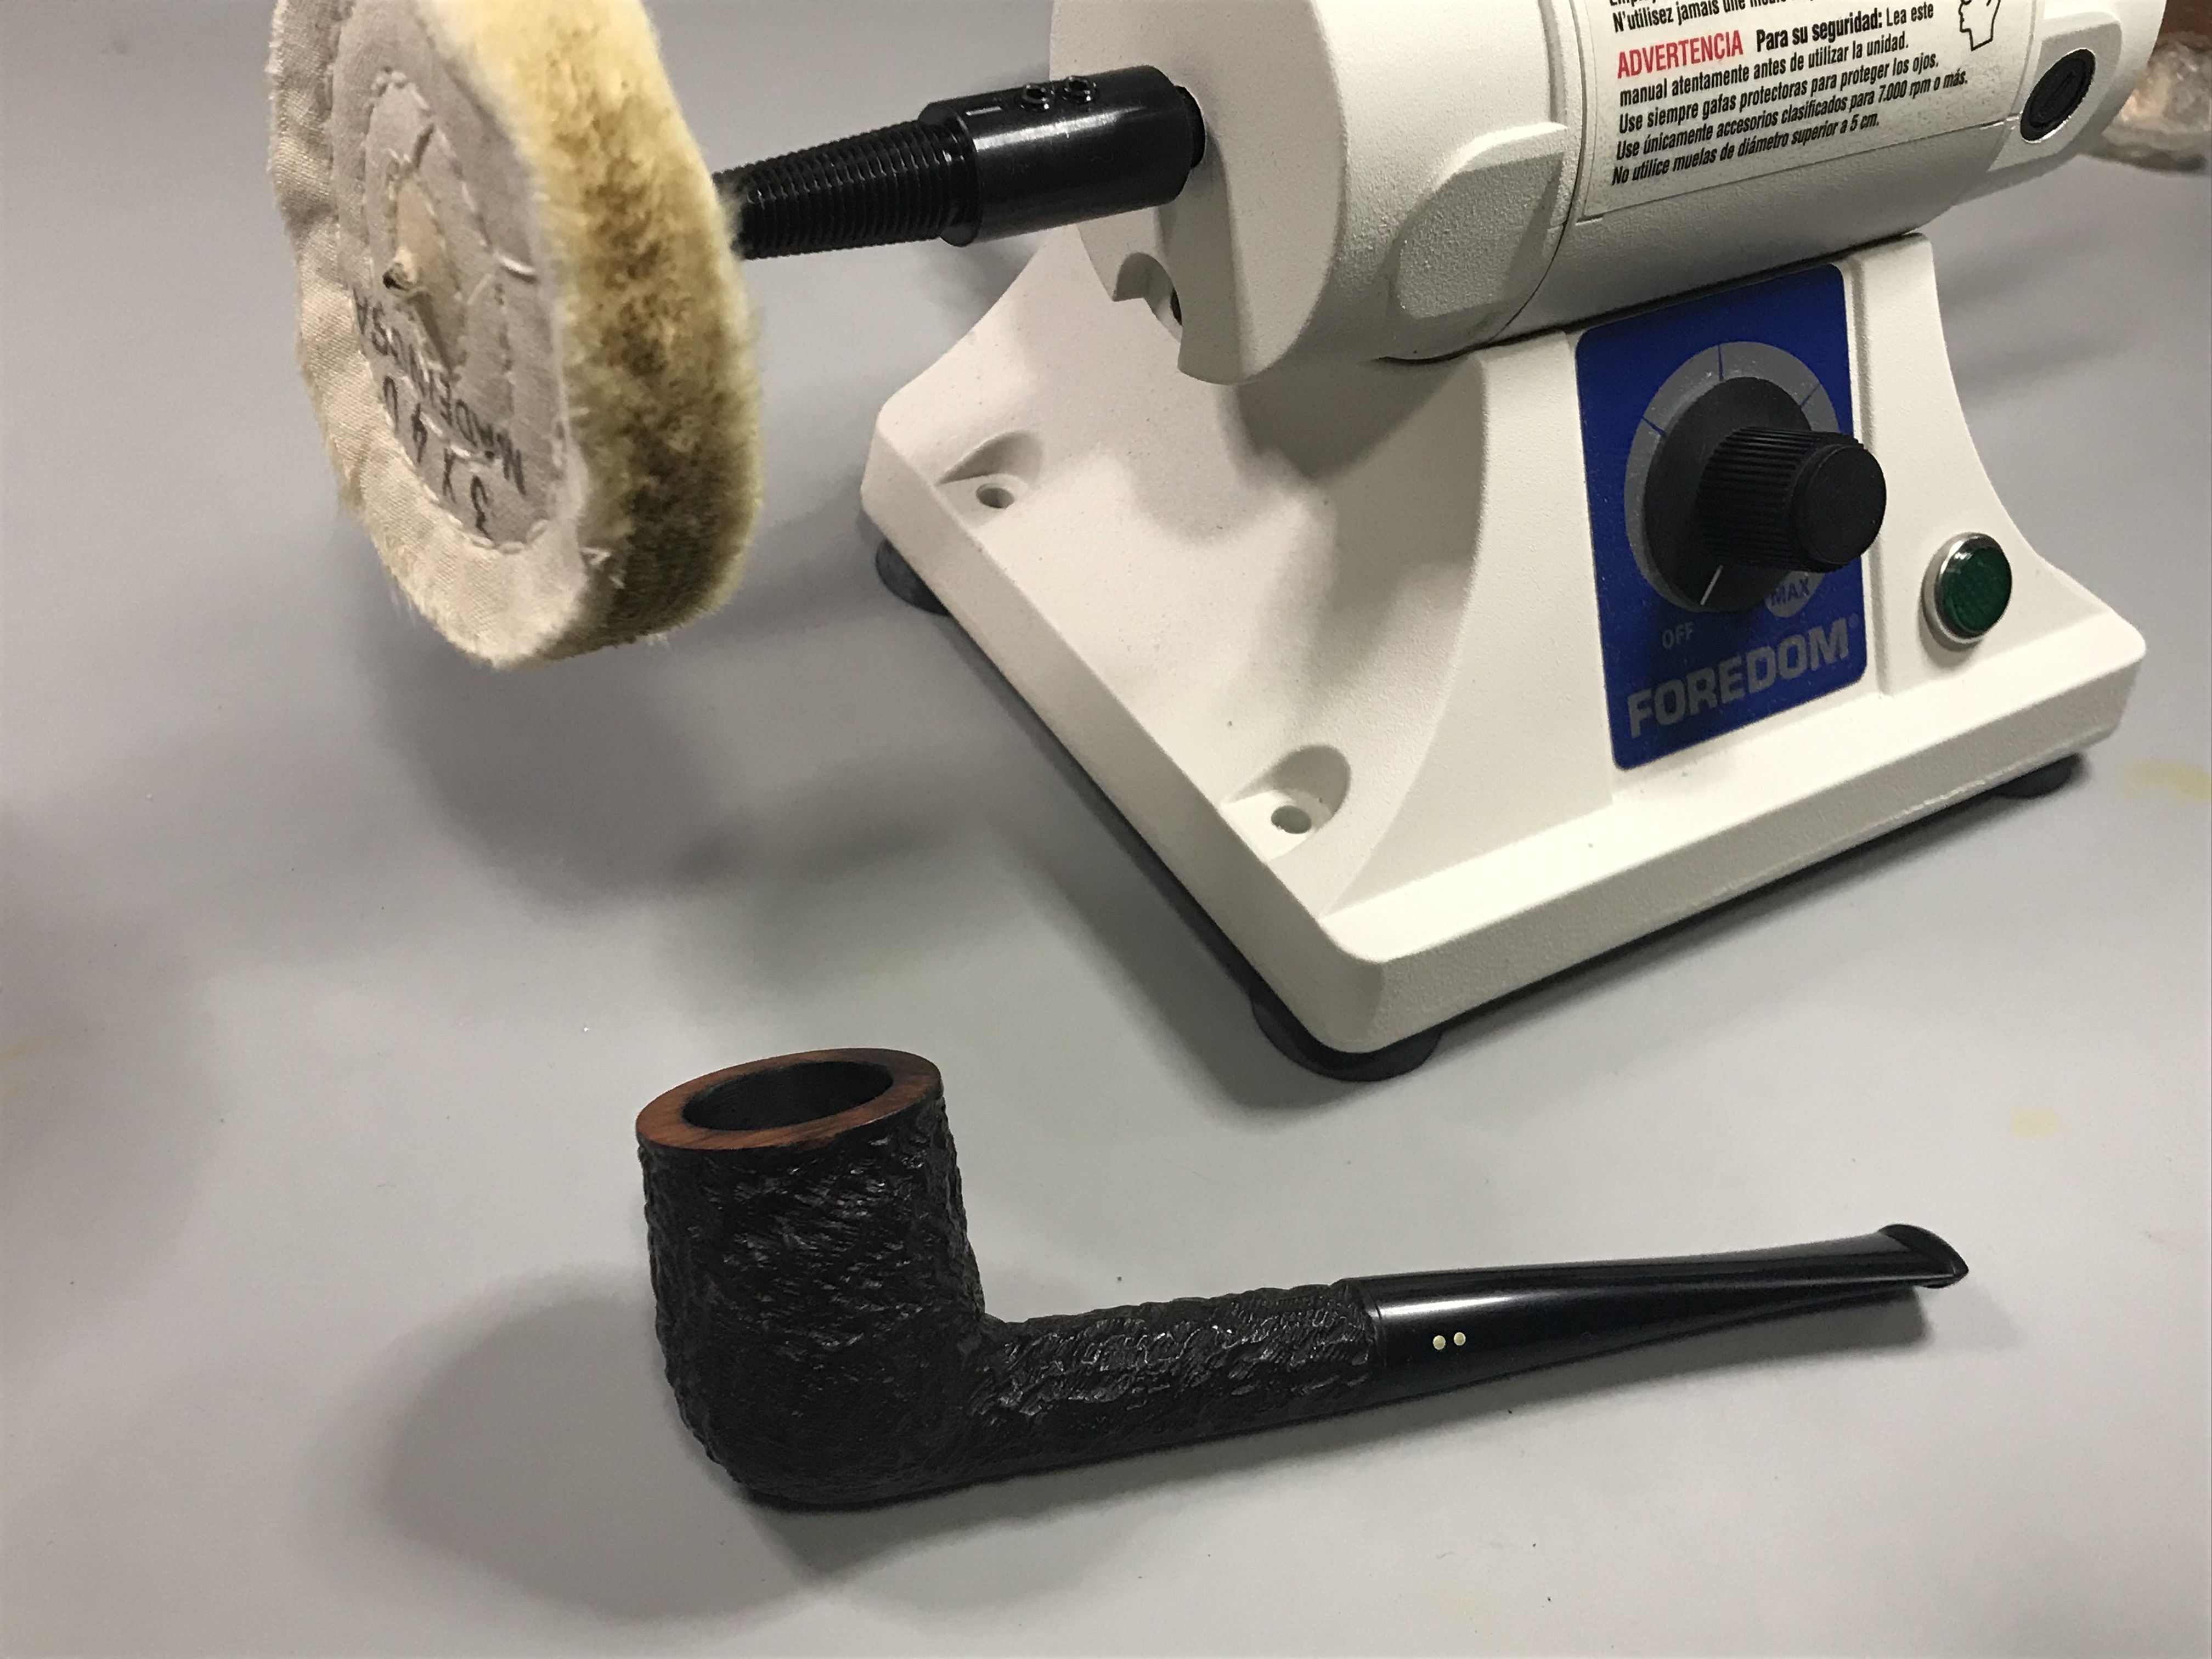
Step 5: Buffing and Polishing
I used a buffing wheel on my rotary tool to buff and polish the whole pipe. I start with Red Tripoli, then White Diamond and finally Carnauba Wax. Here is the finished pipe.
This pipe is available at the Lunting Bear StoreBUY IT NOW for $60 plus shipping!
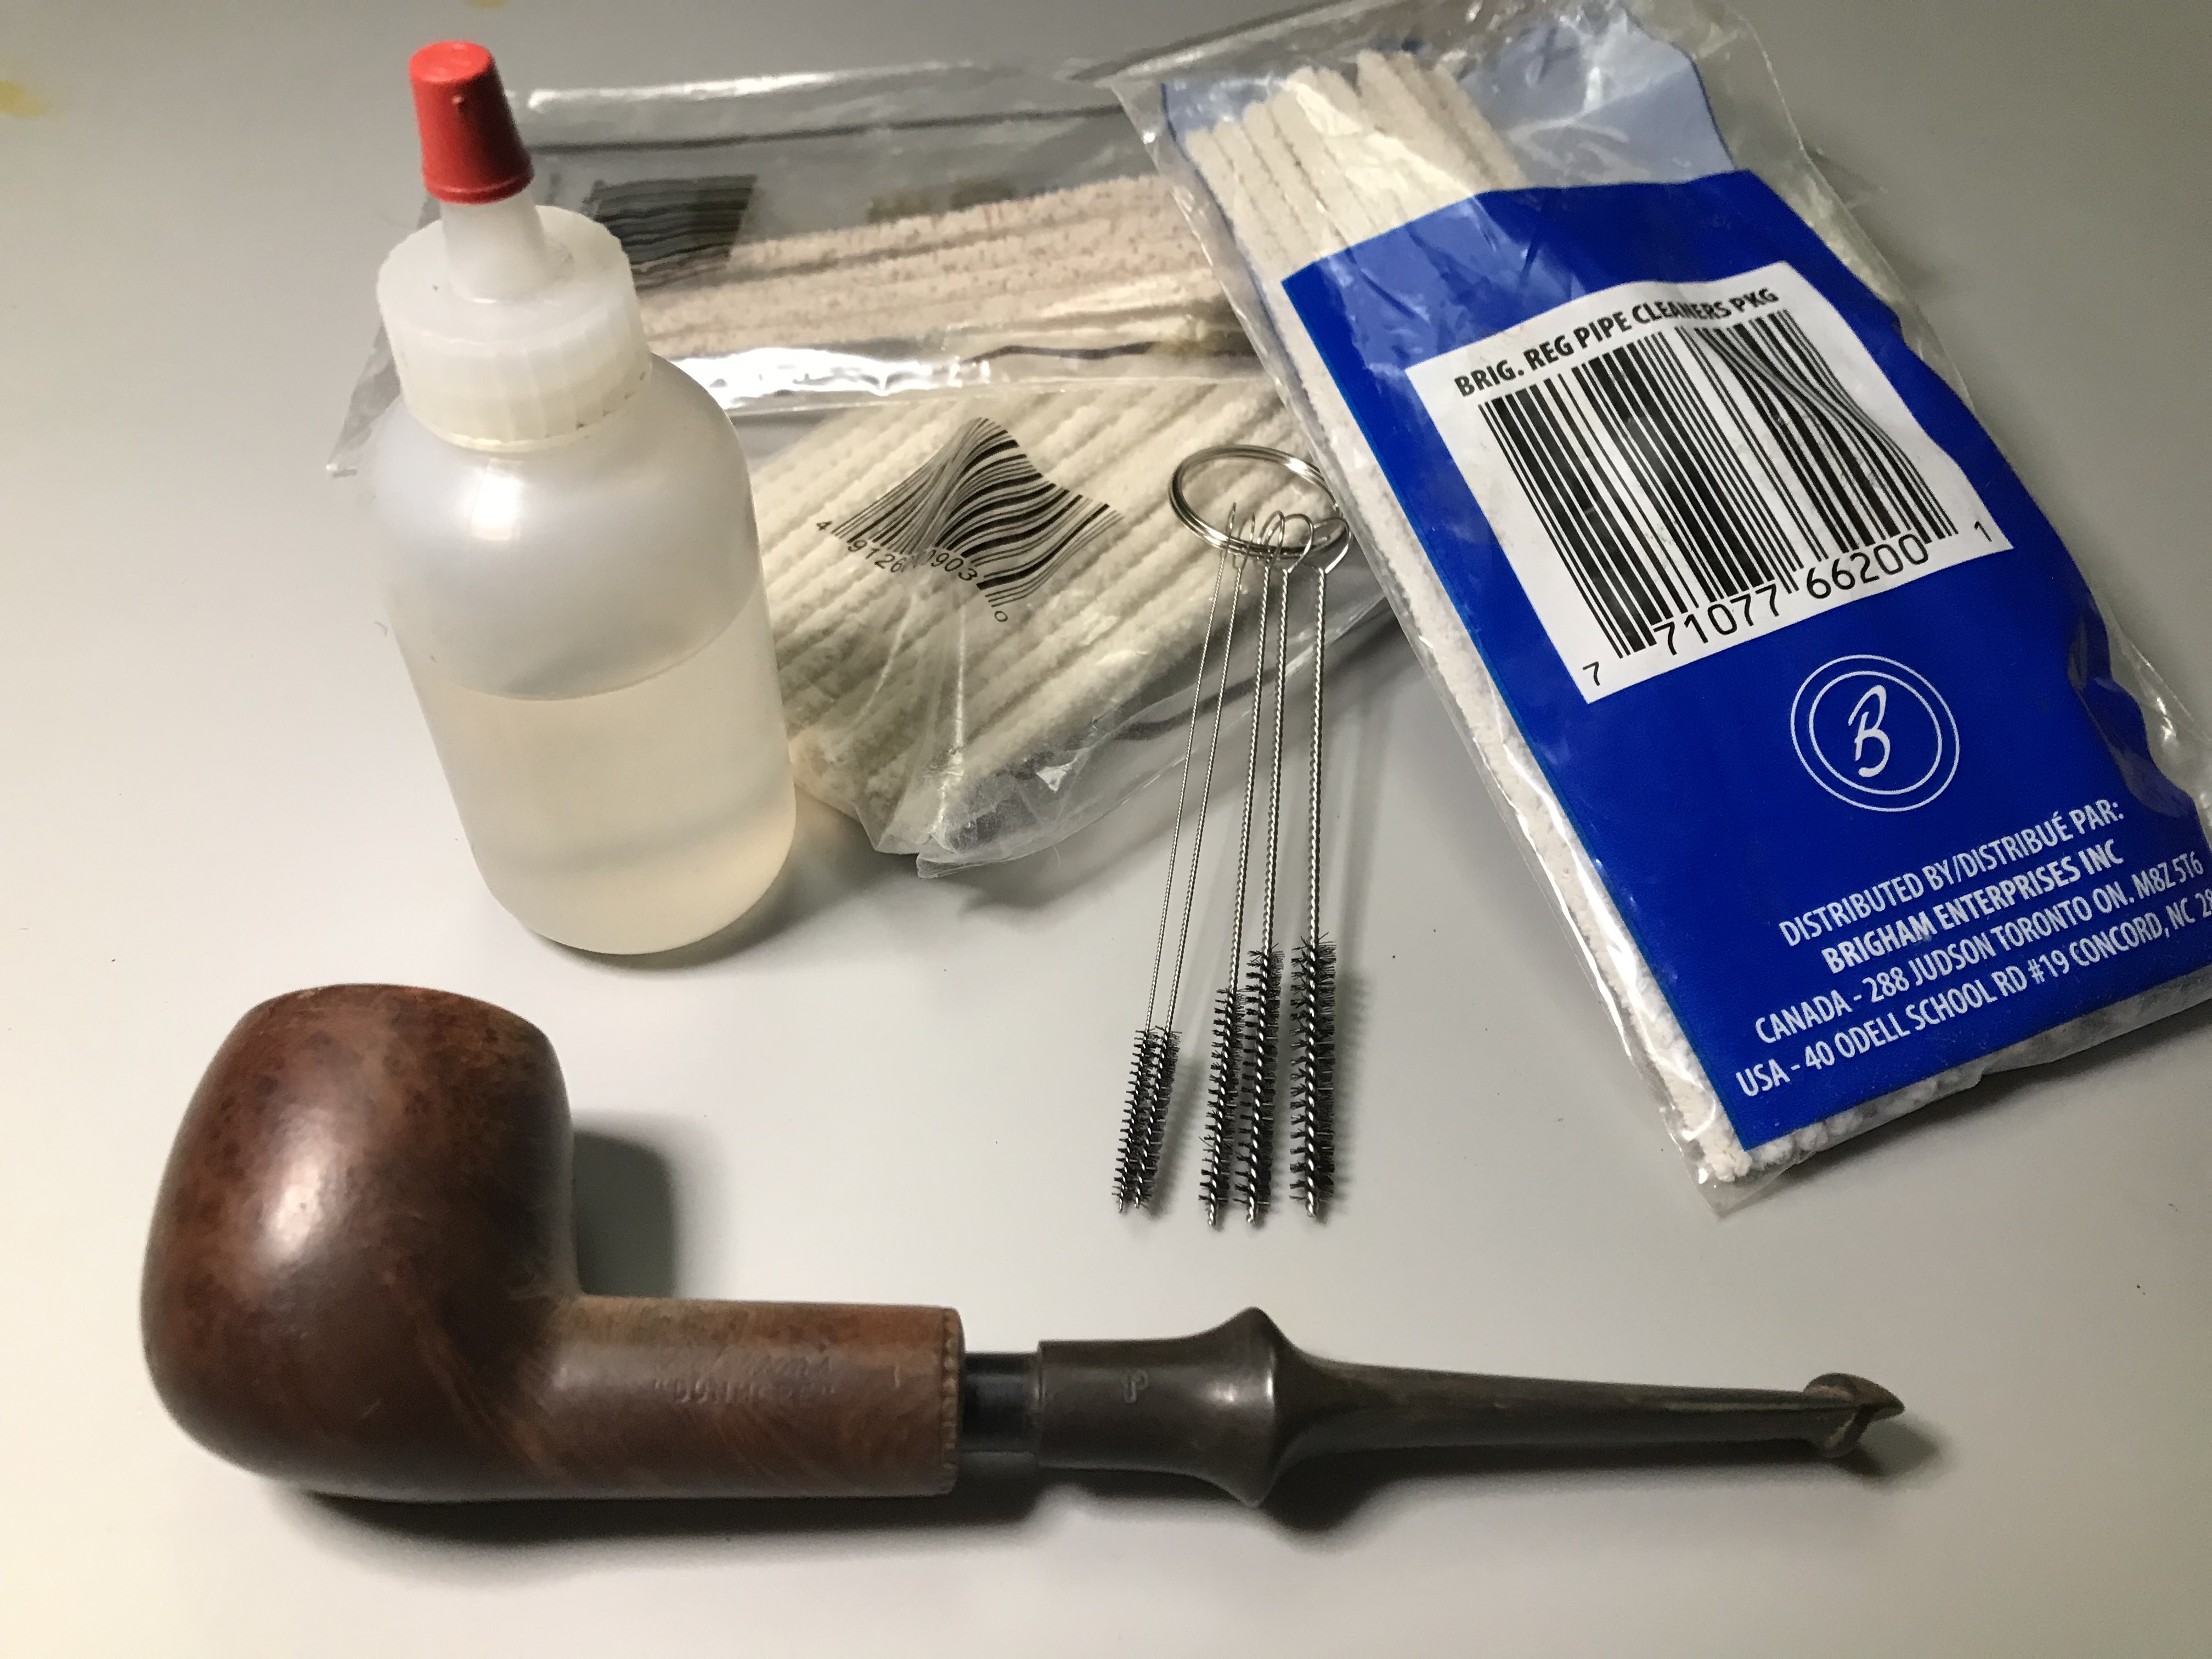
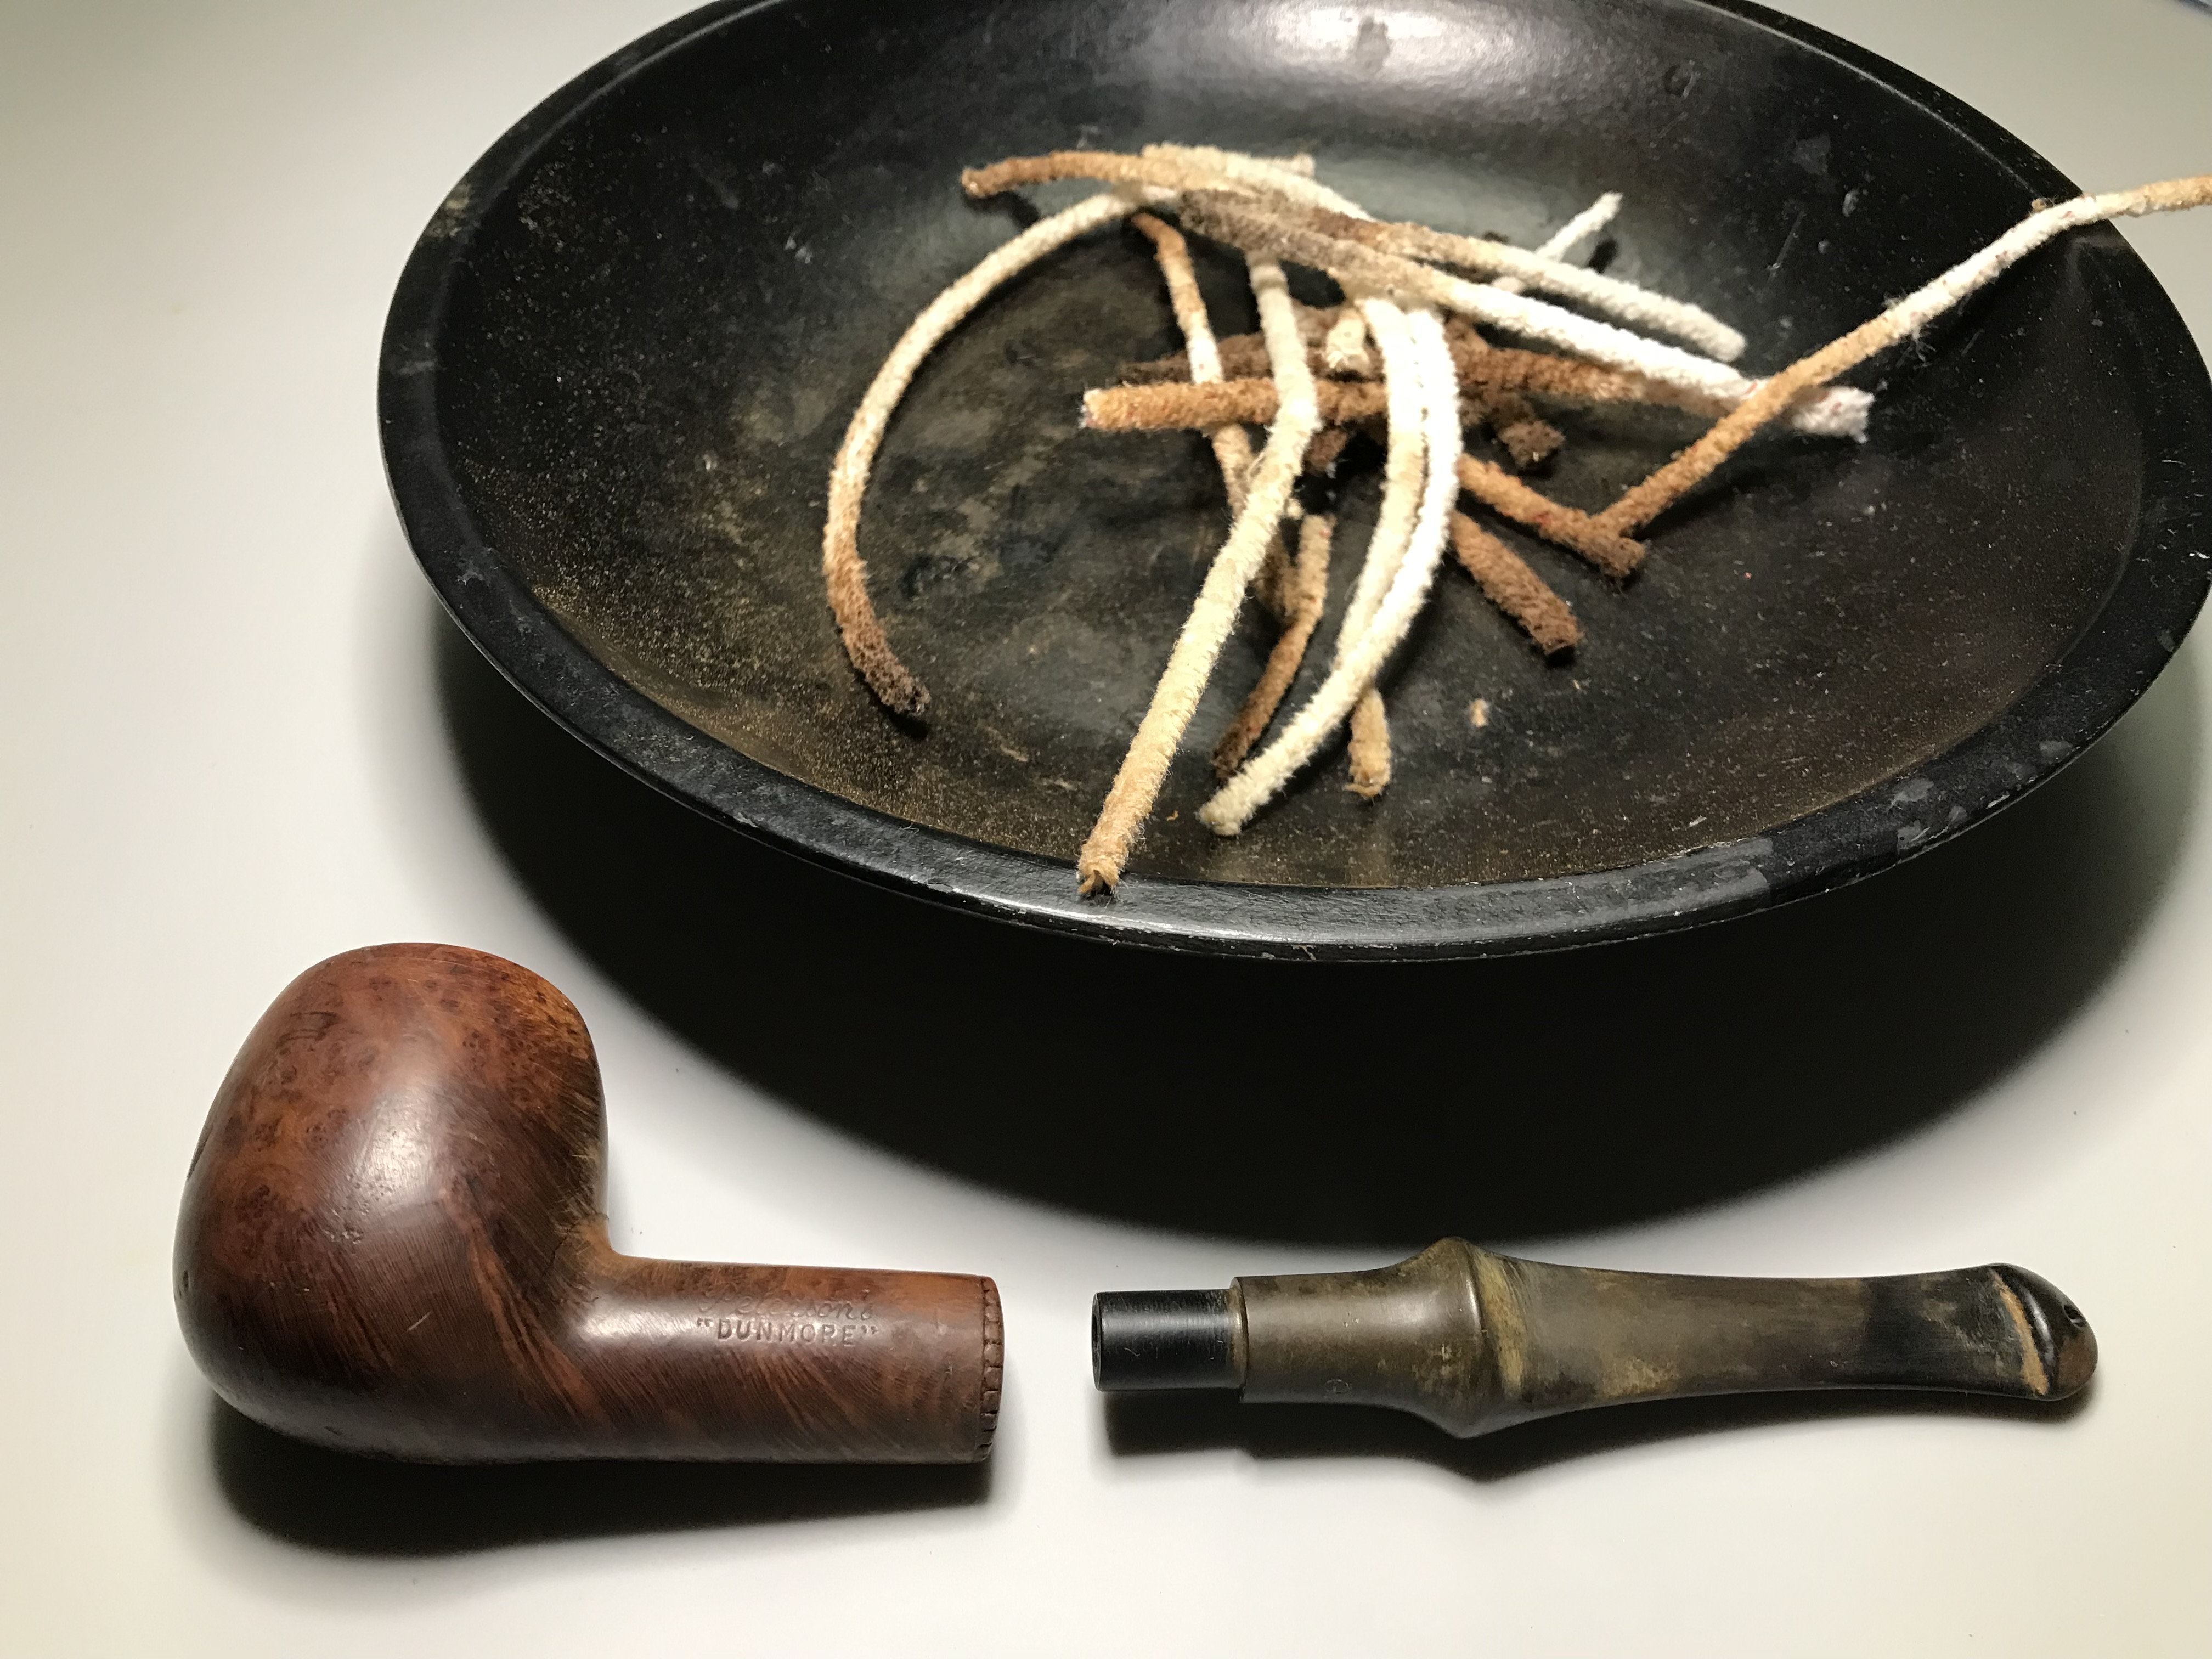
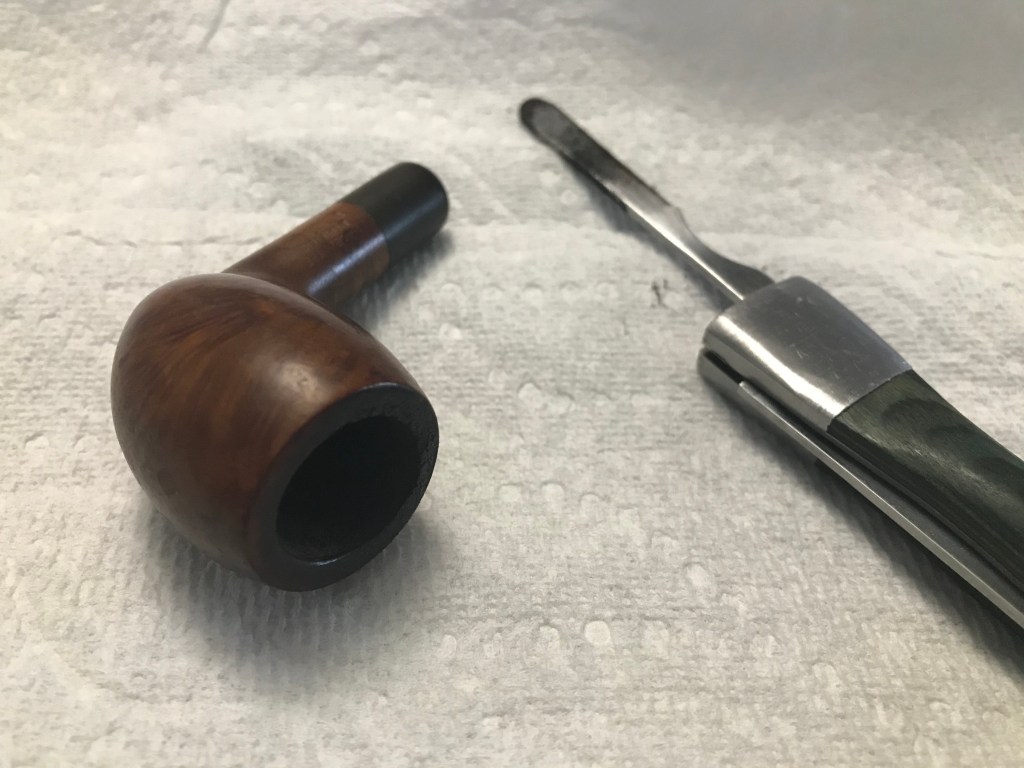
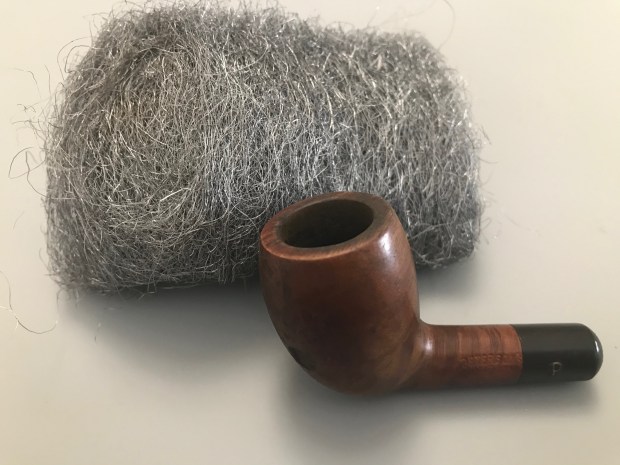
“The Dunmore is one series we just don’t see a whole lot of anymore. They’re still fairly recognizable, however, as each edition features a minimalist presentation with the only accents being some ornate carving at the end of the shank. They’re also notable for the non-traditional shape numbers they’re usually stamped with.” sourceSmokingPipes.com.
First Impressions
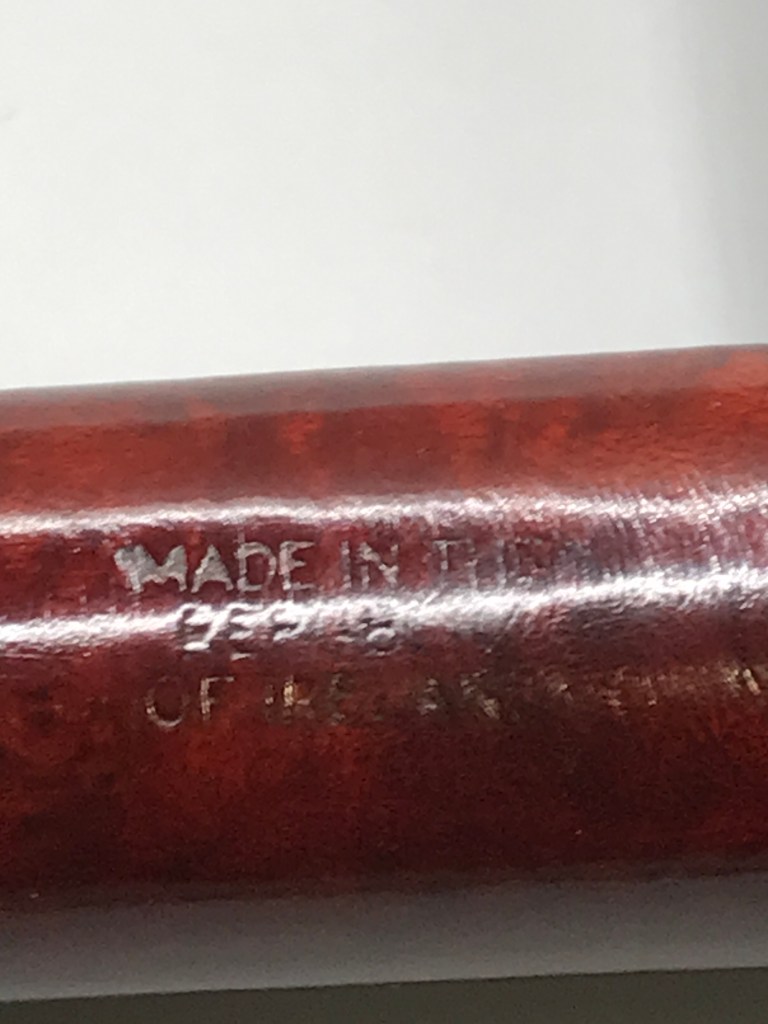
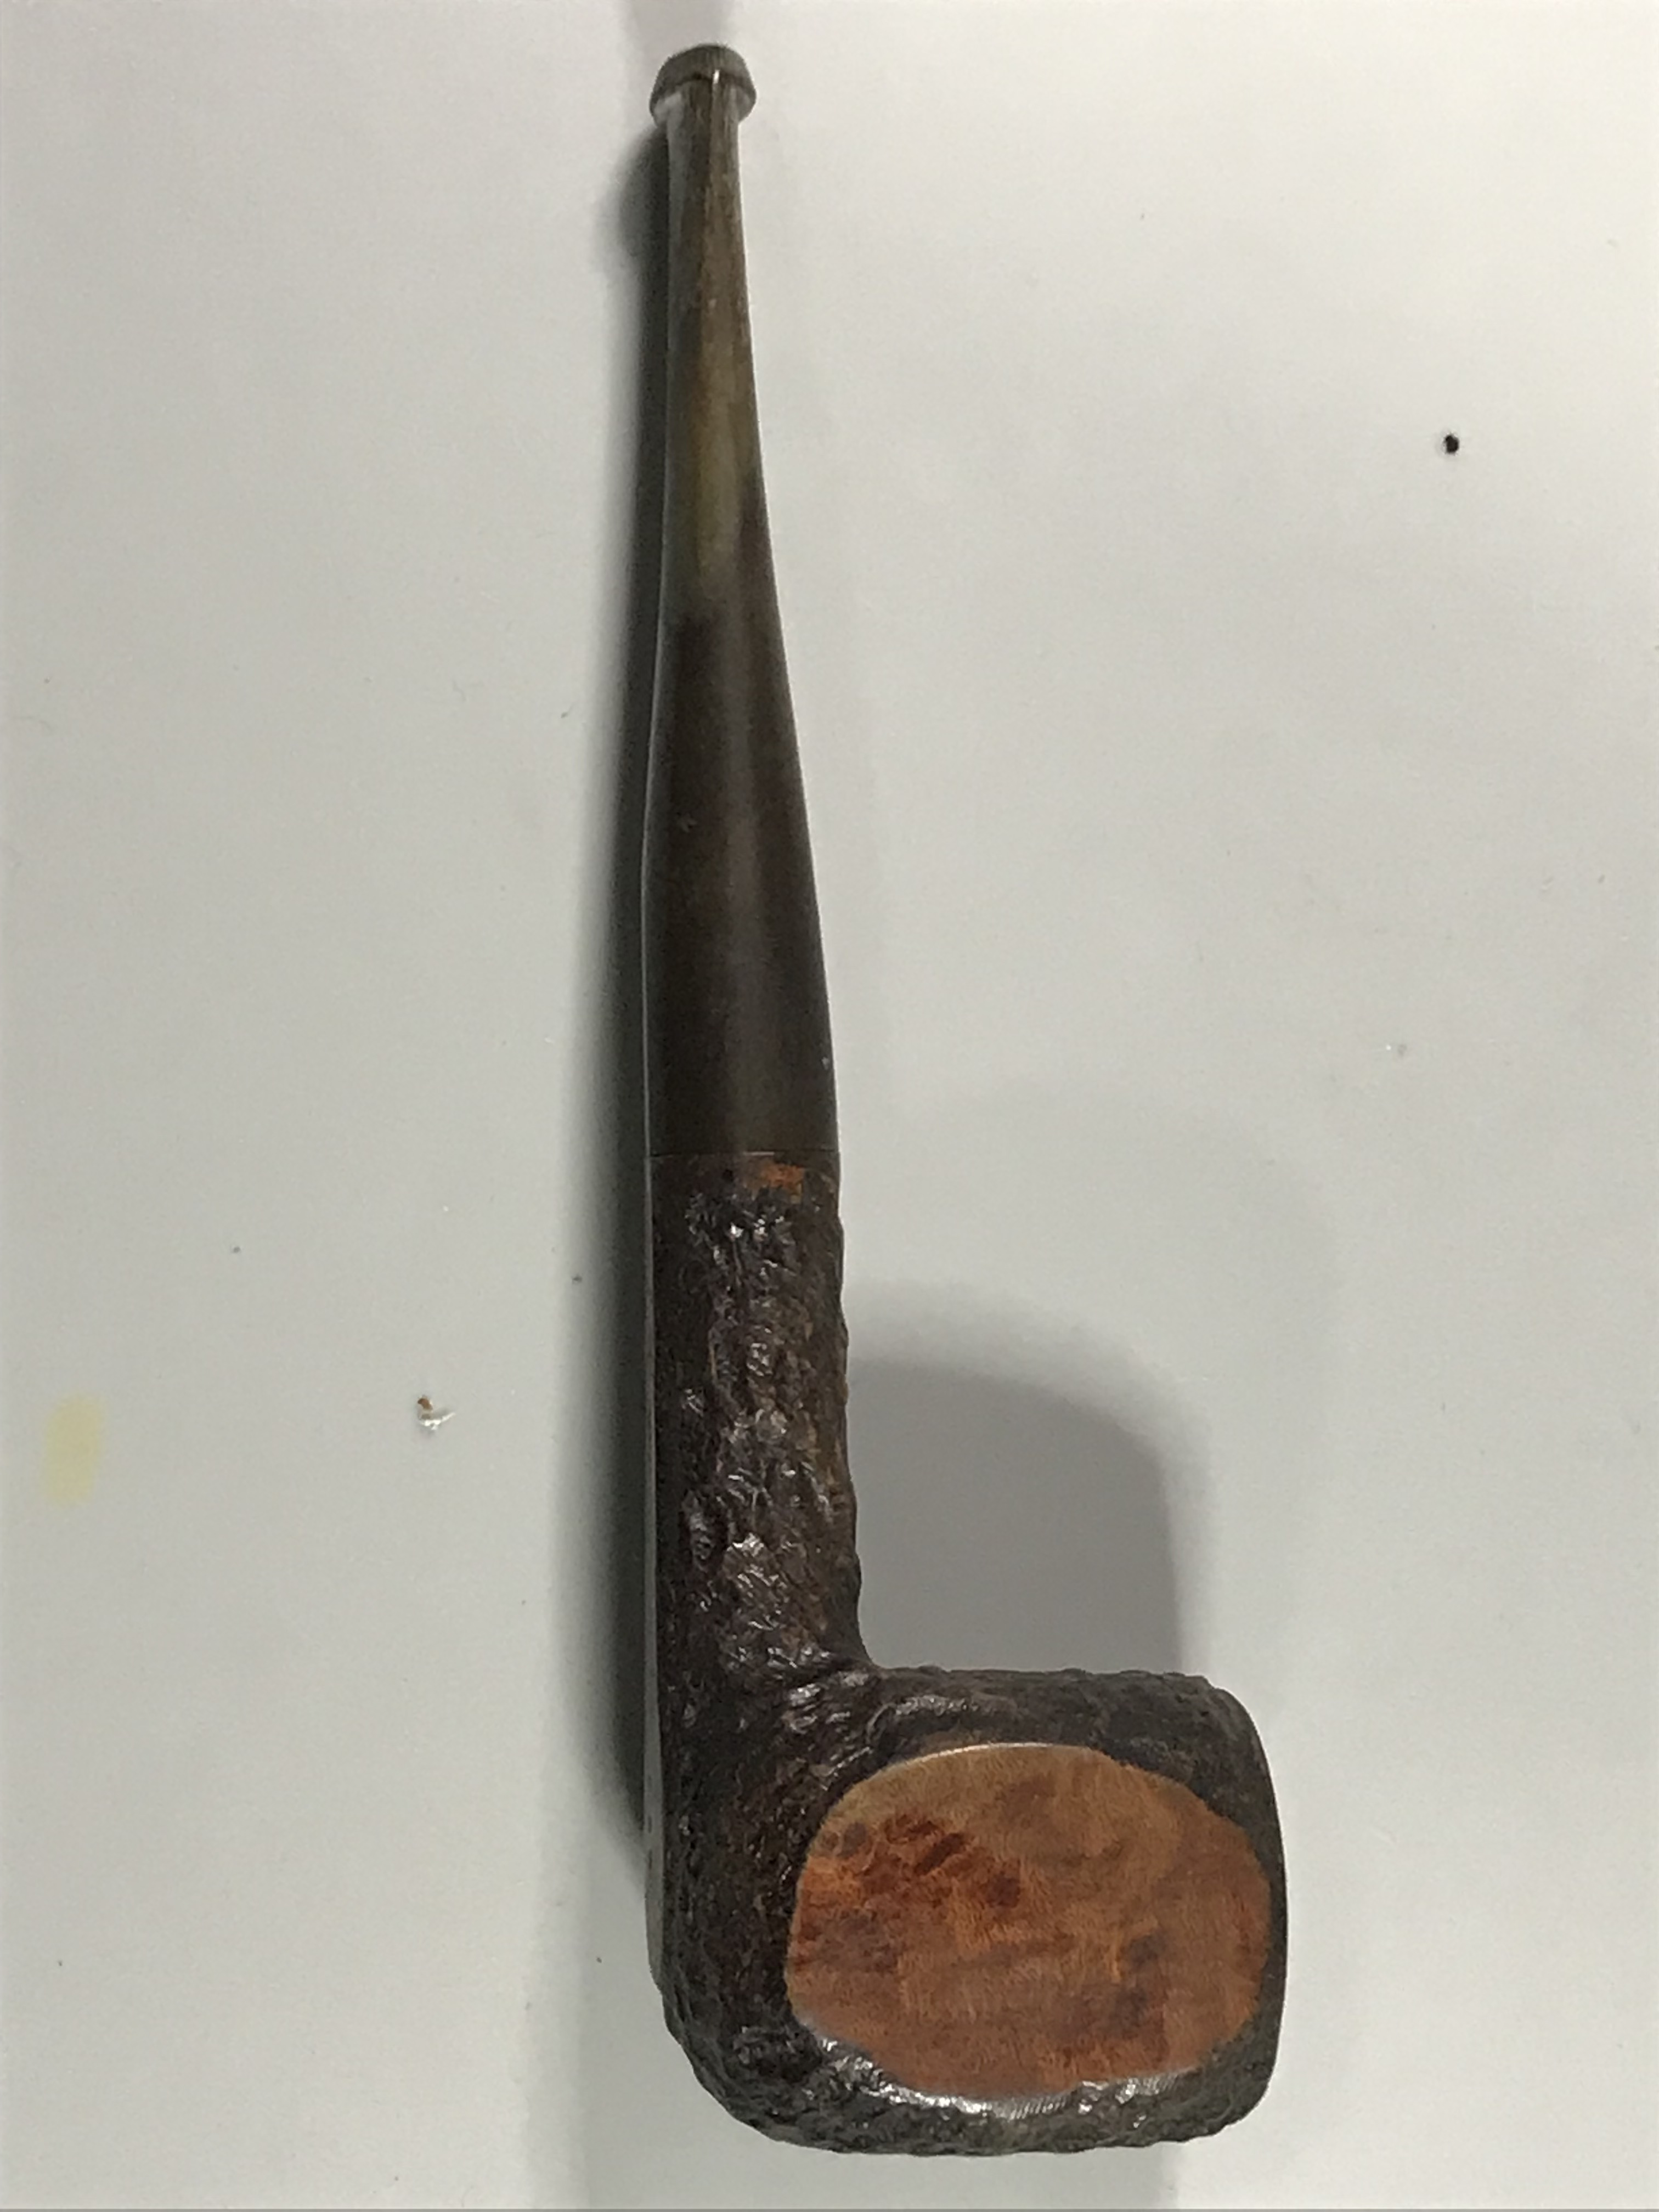
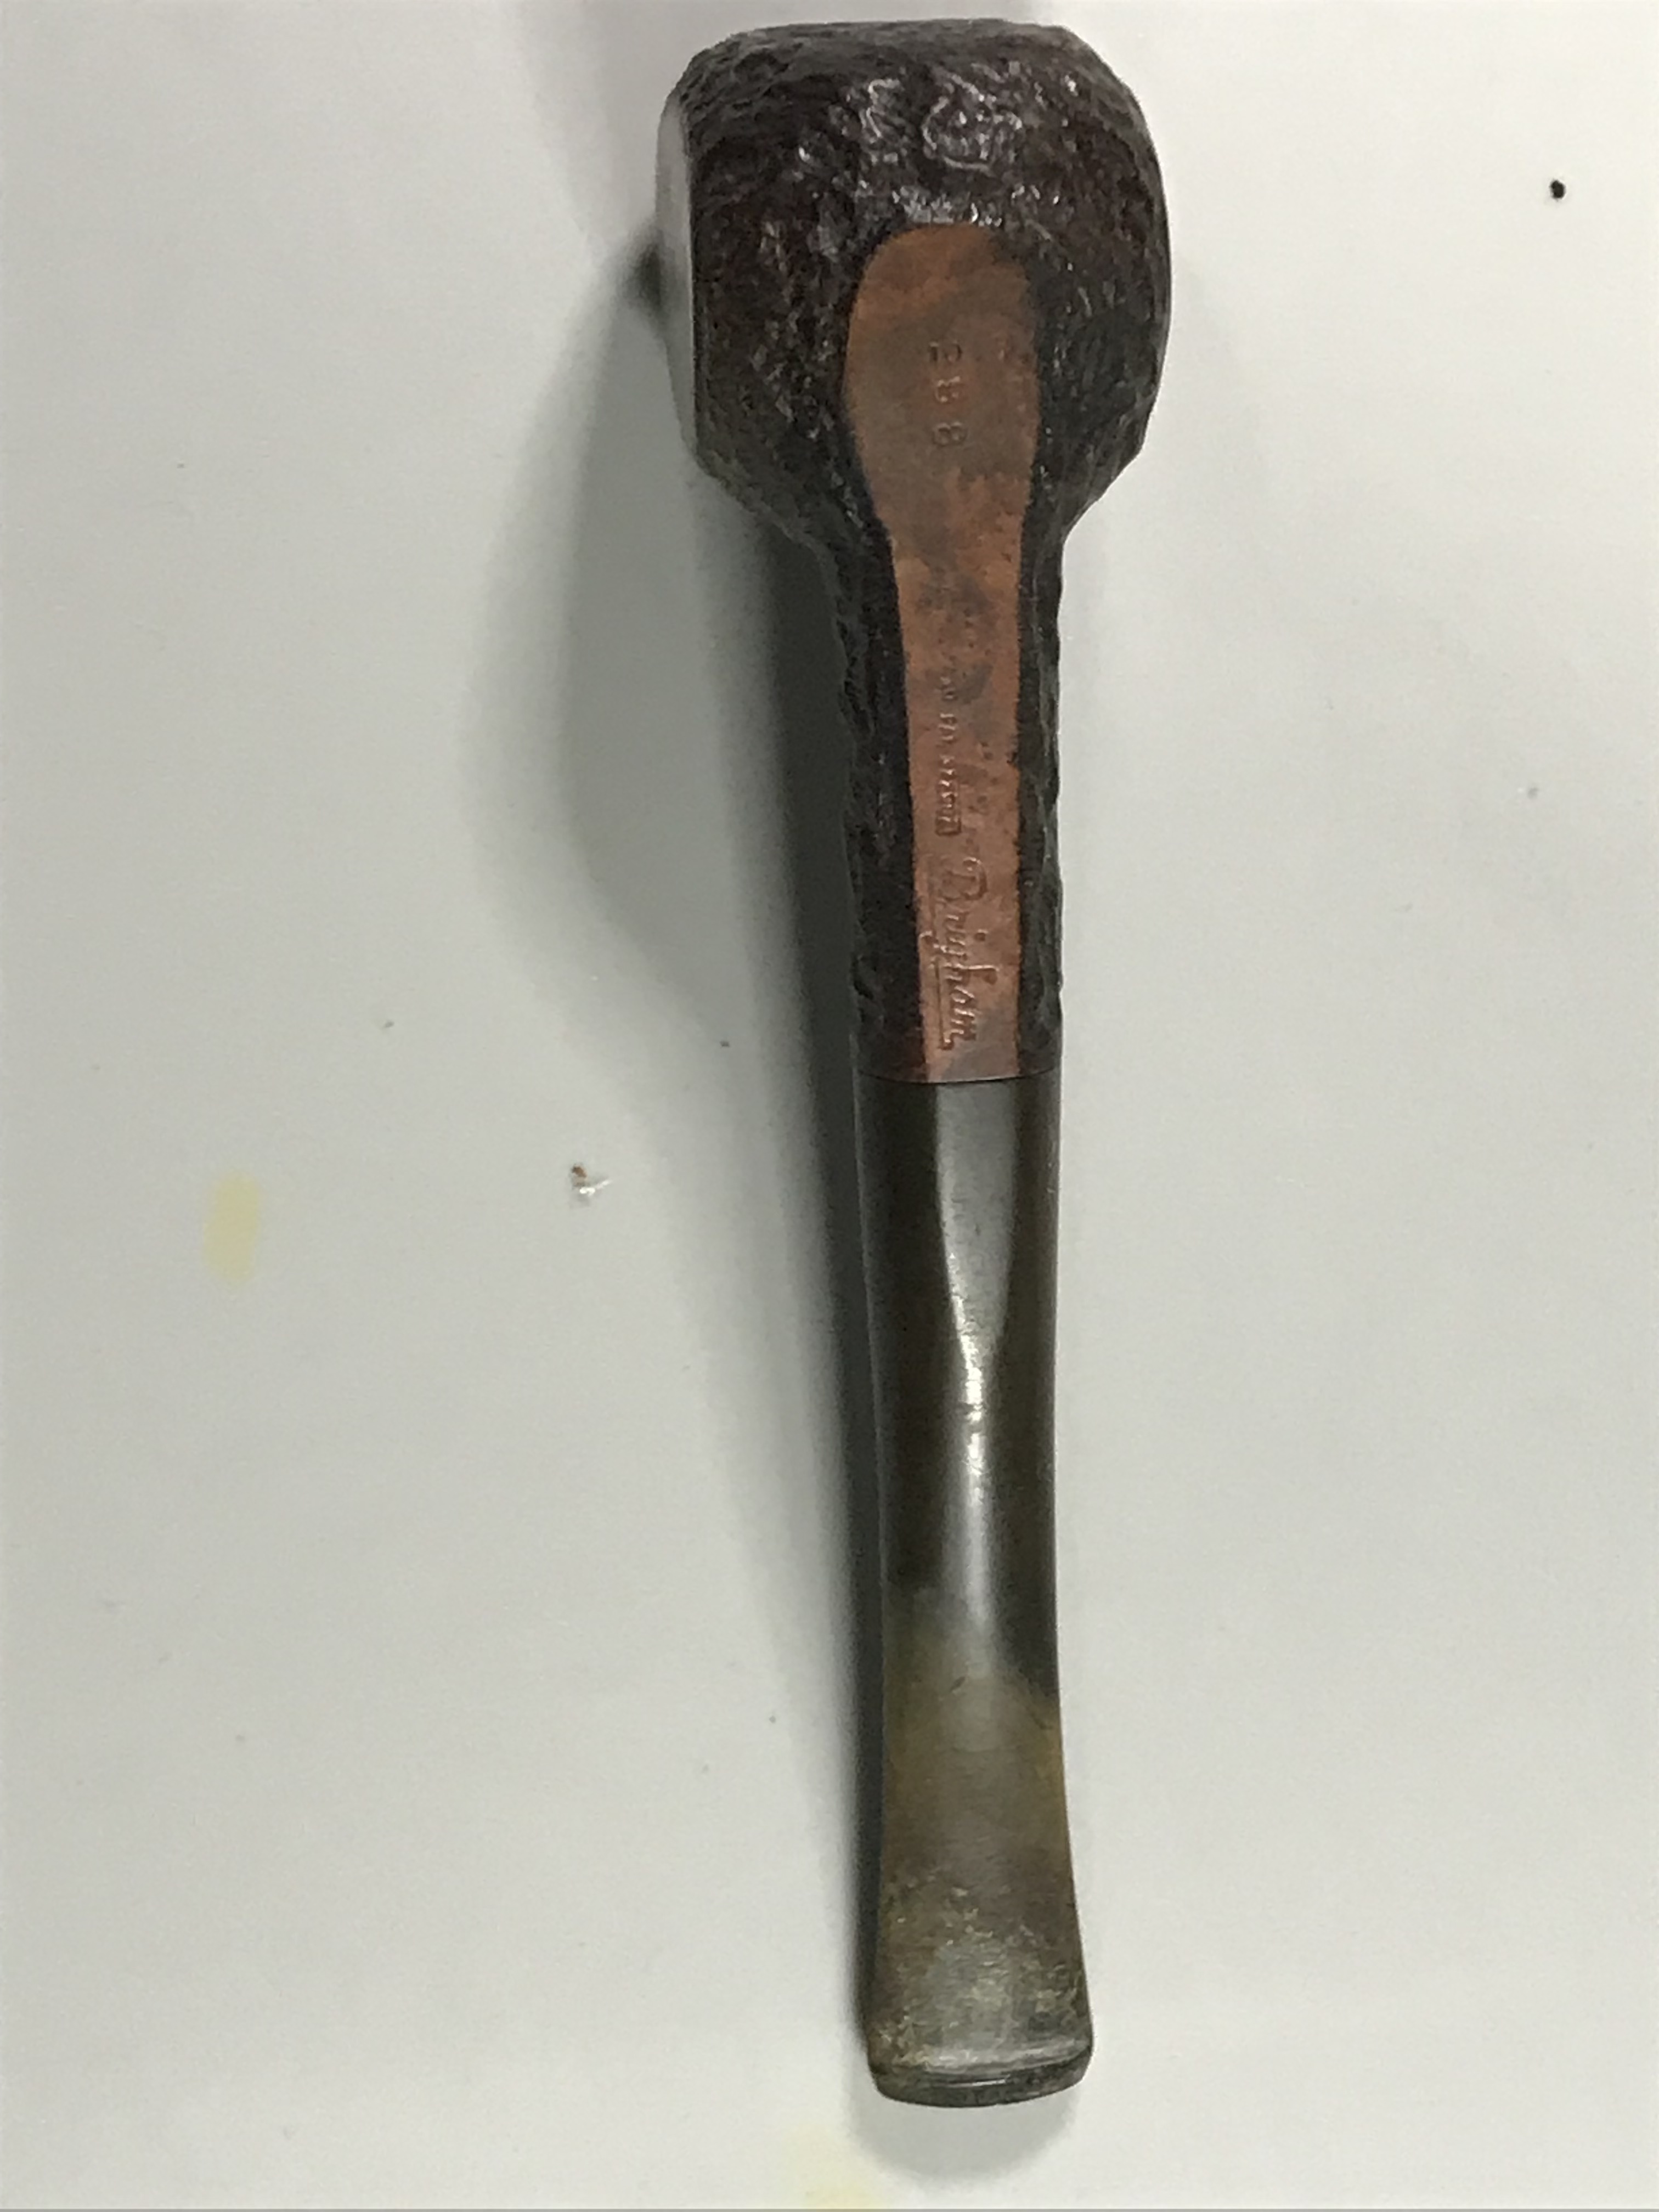
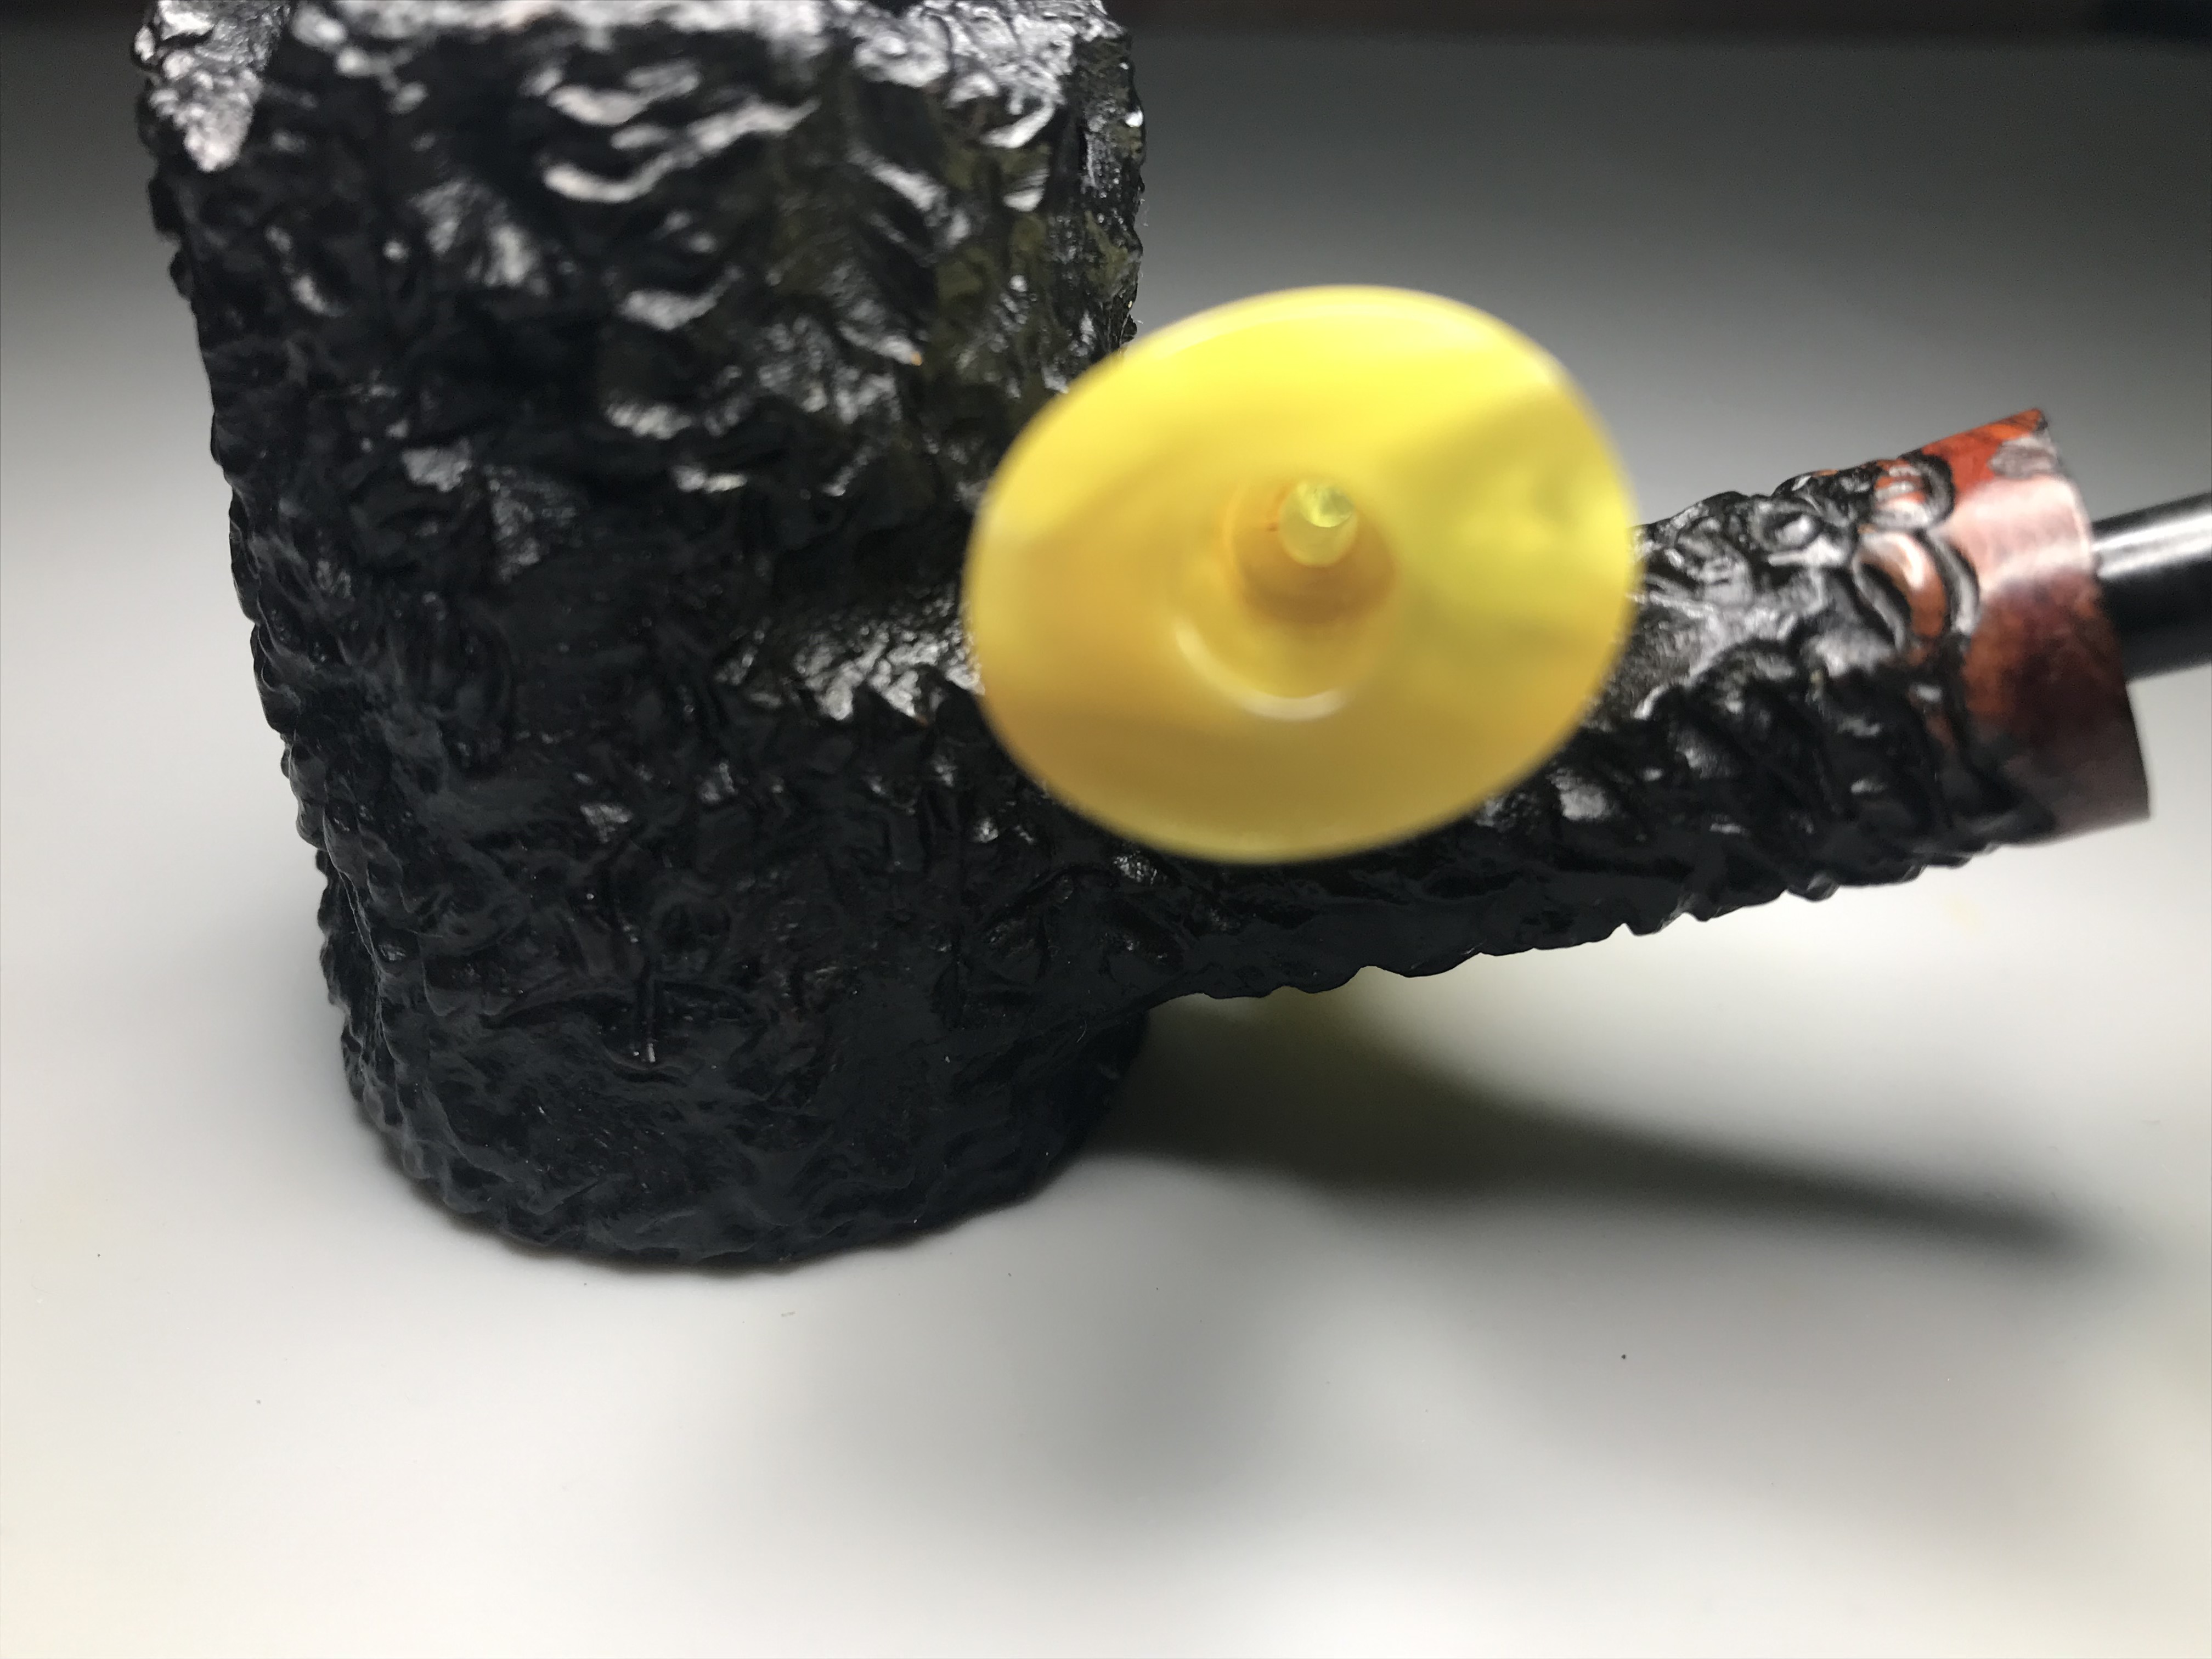
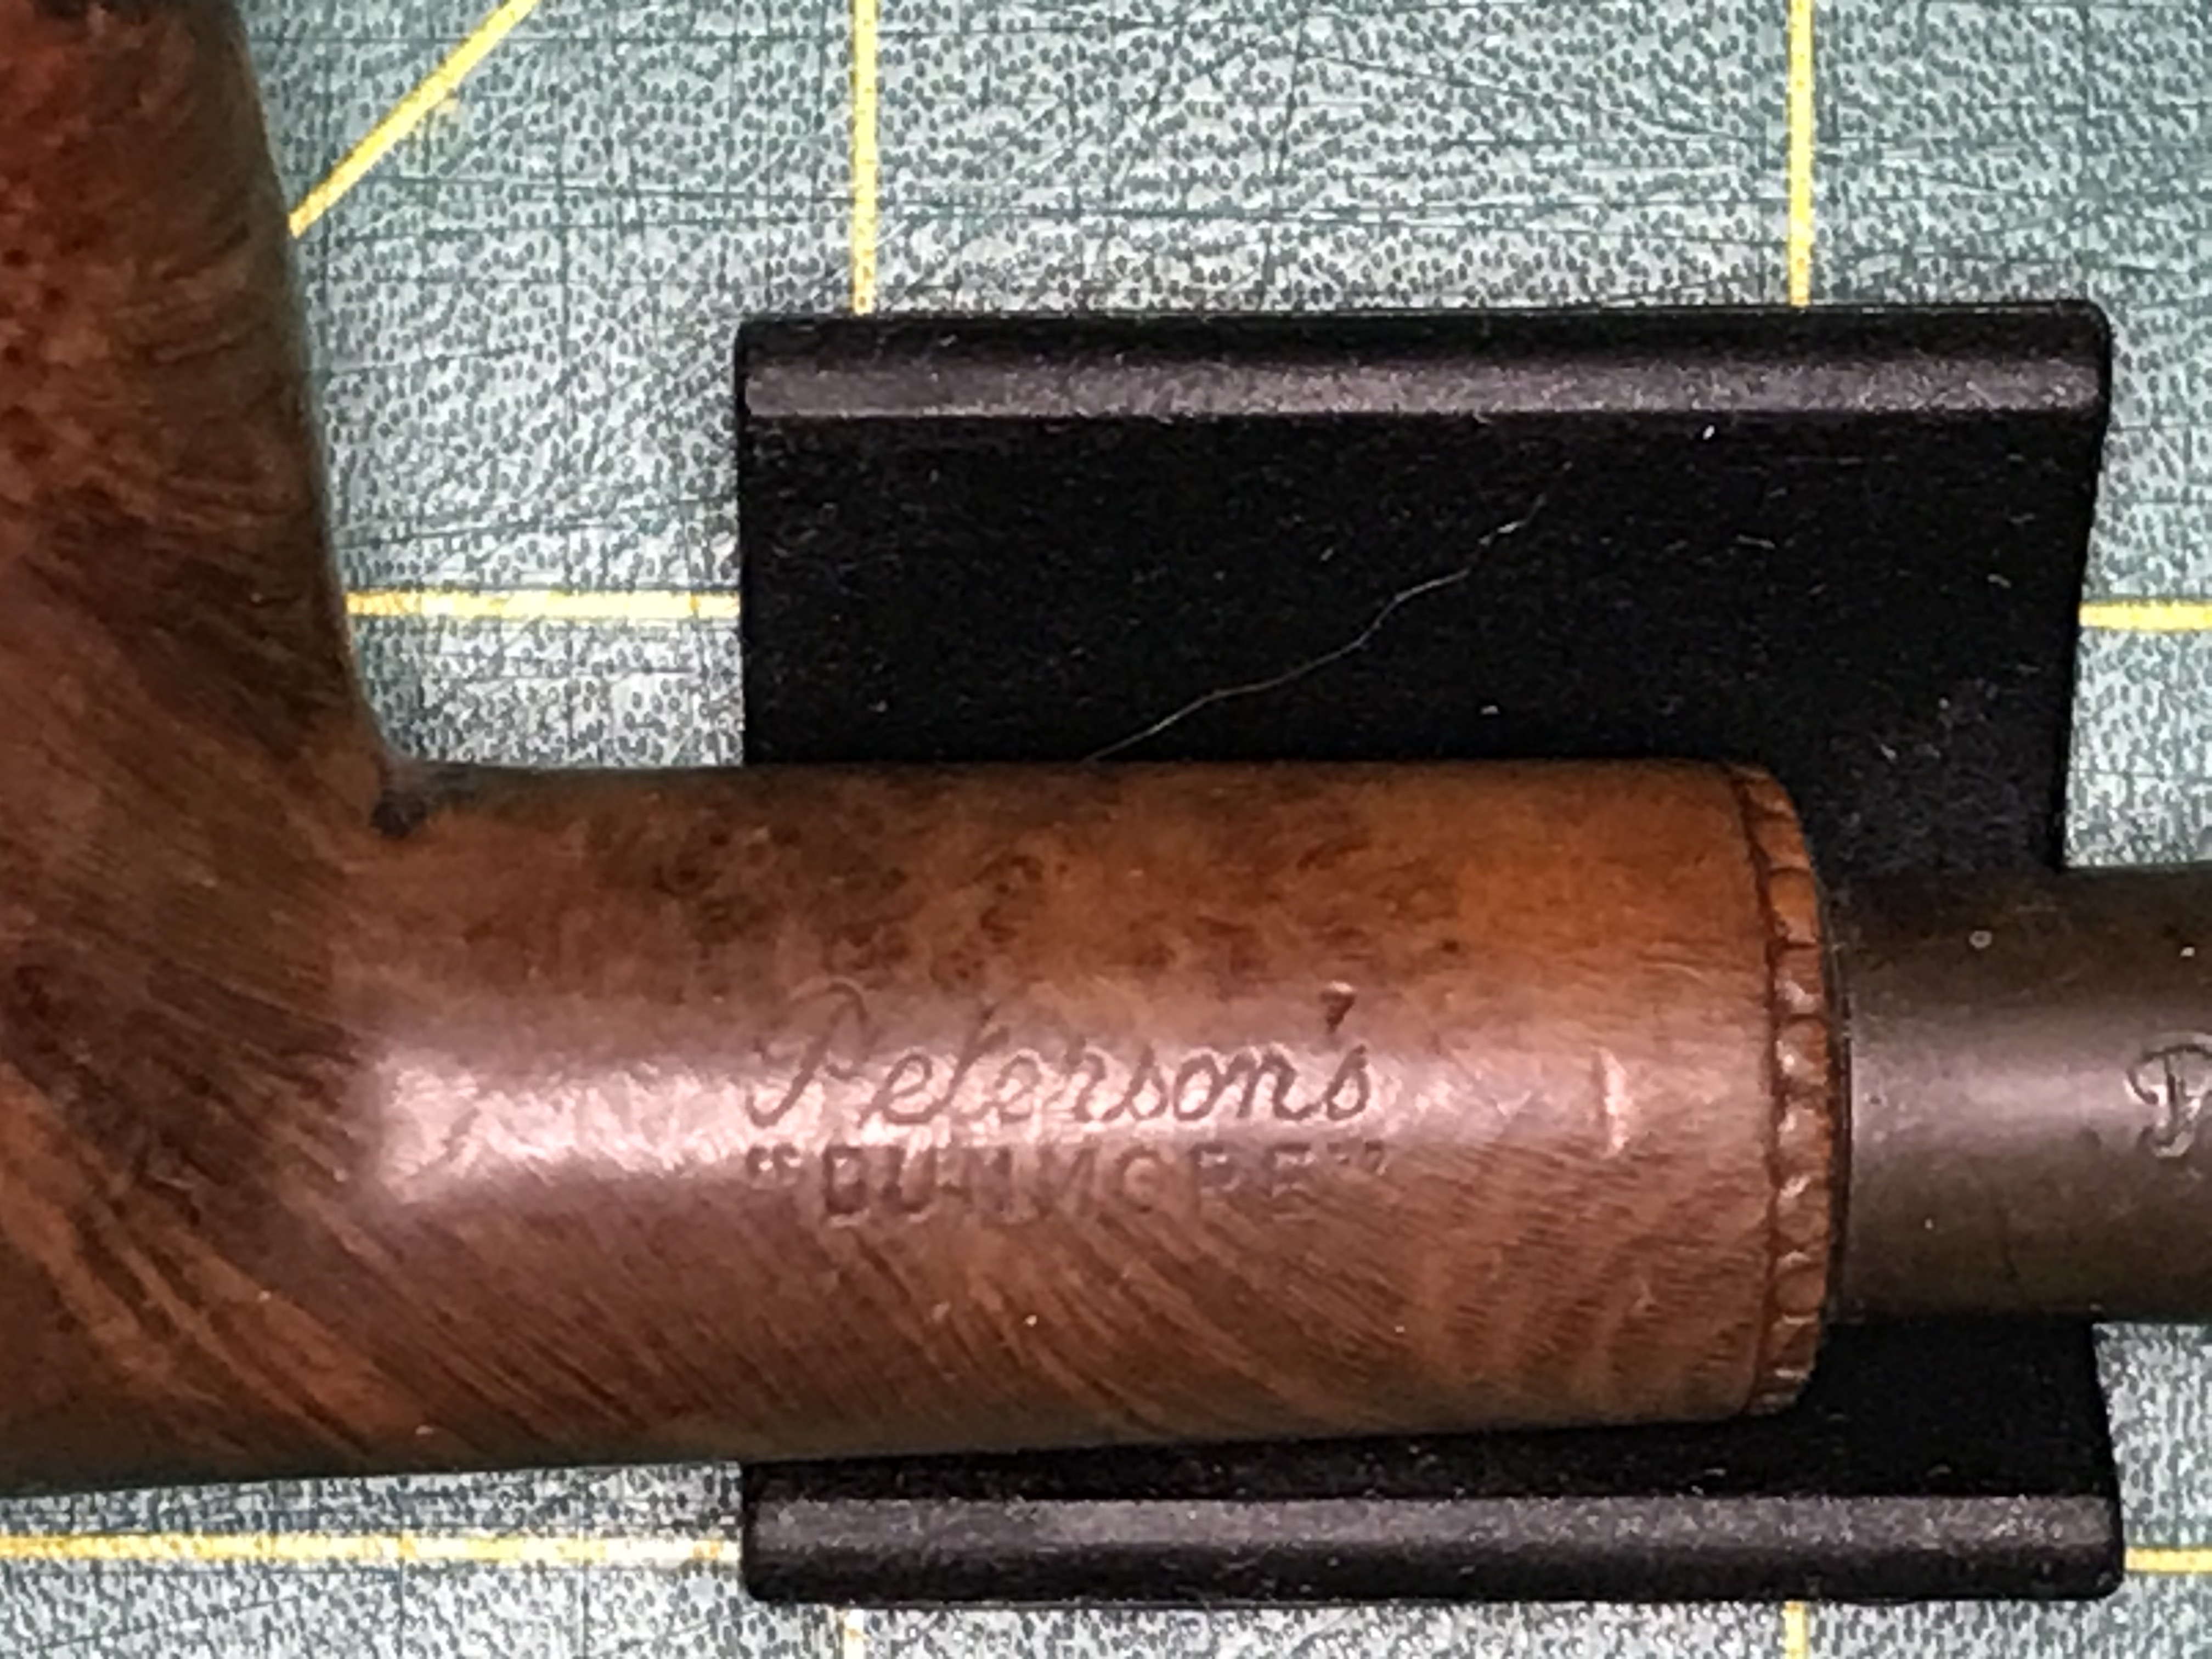
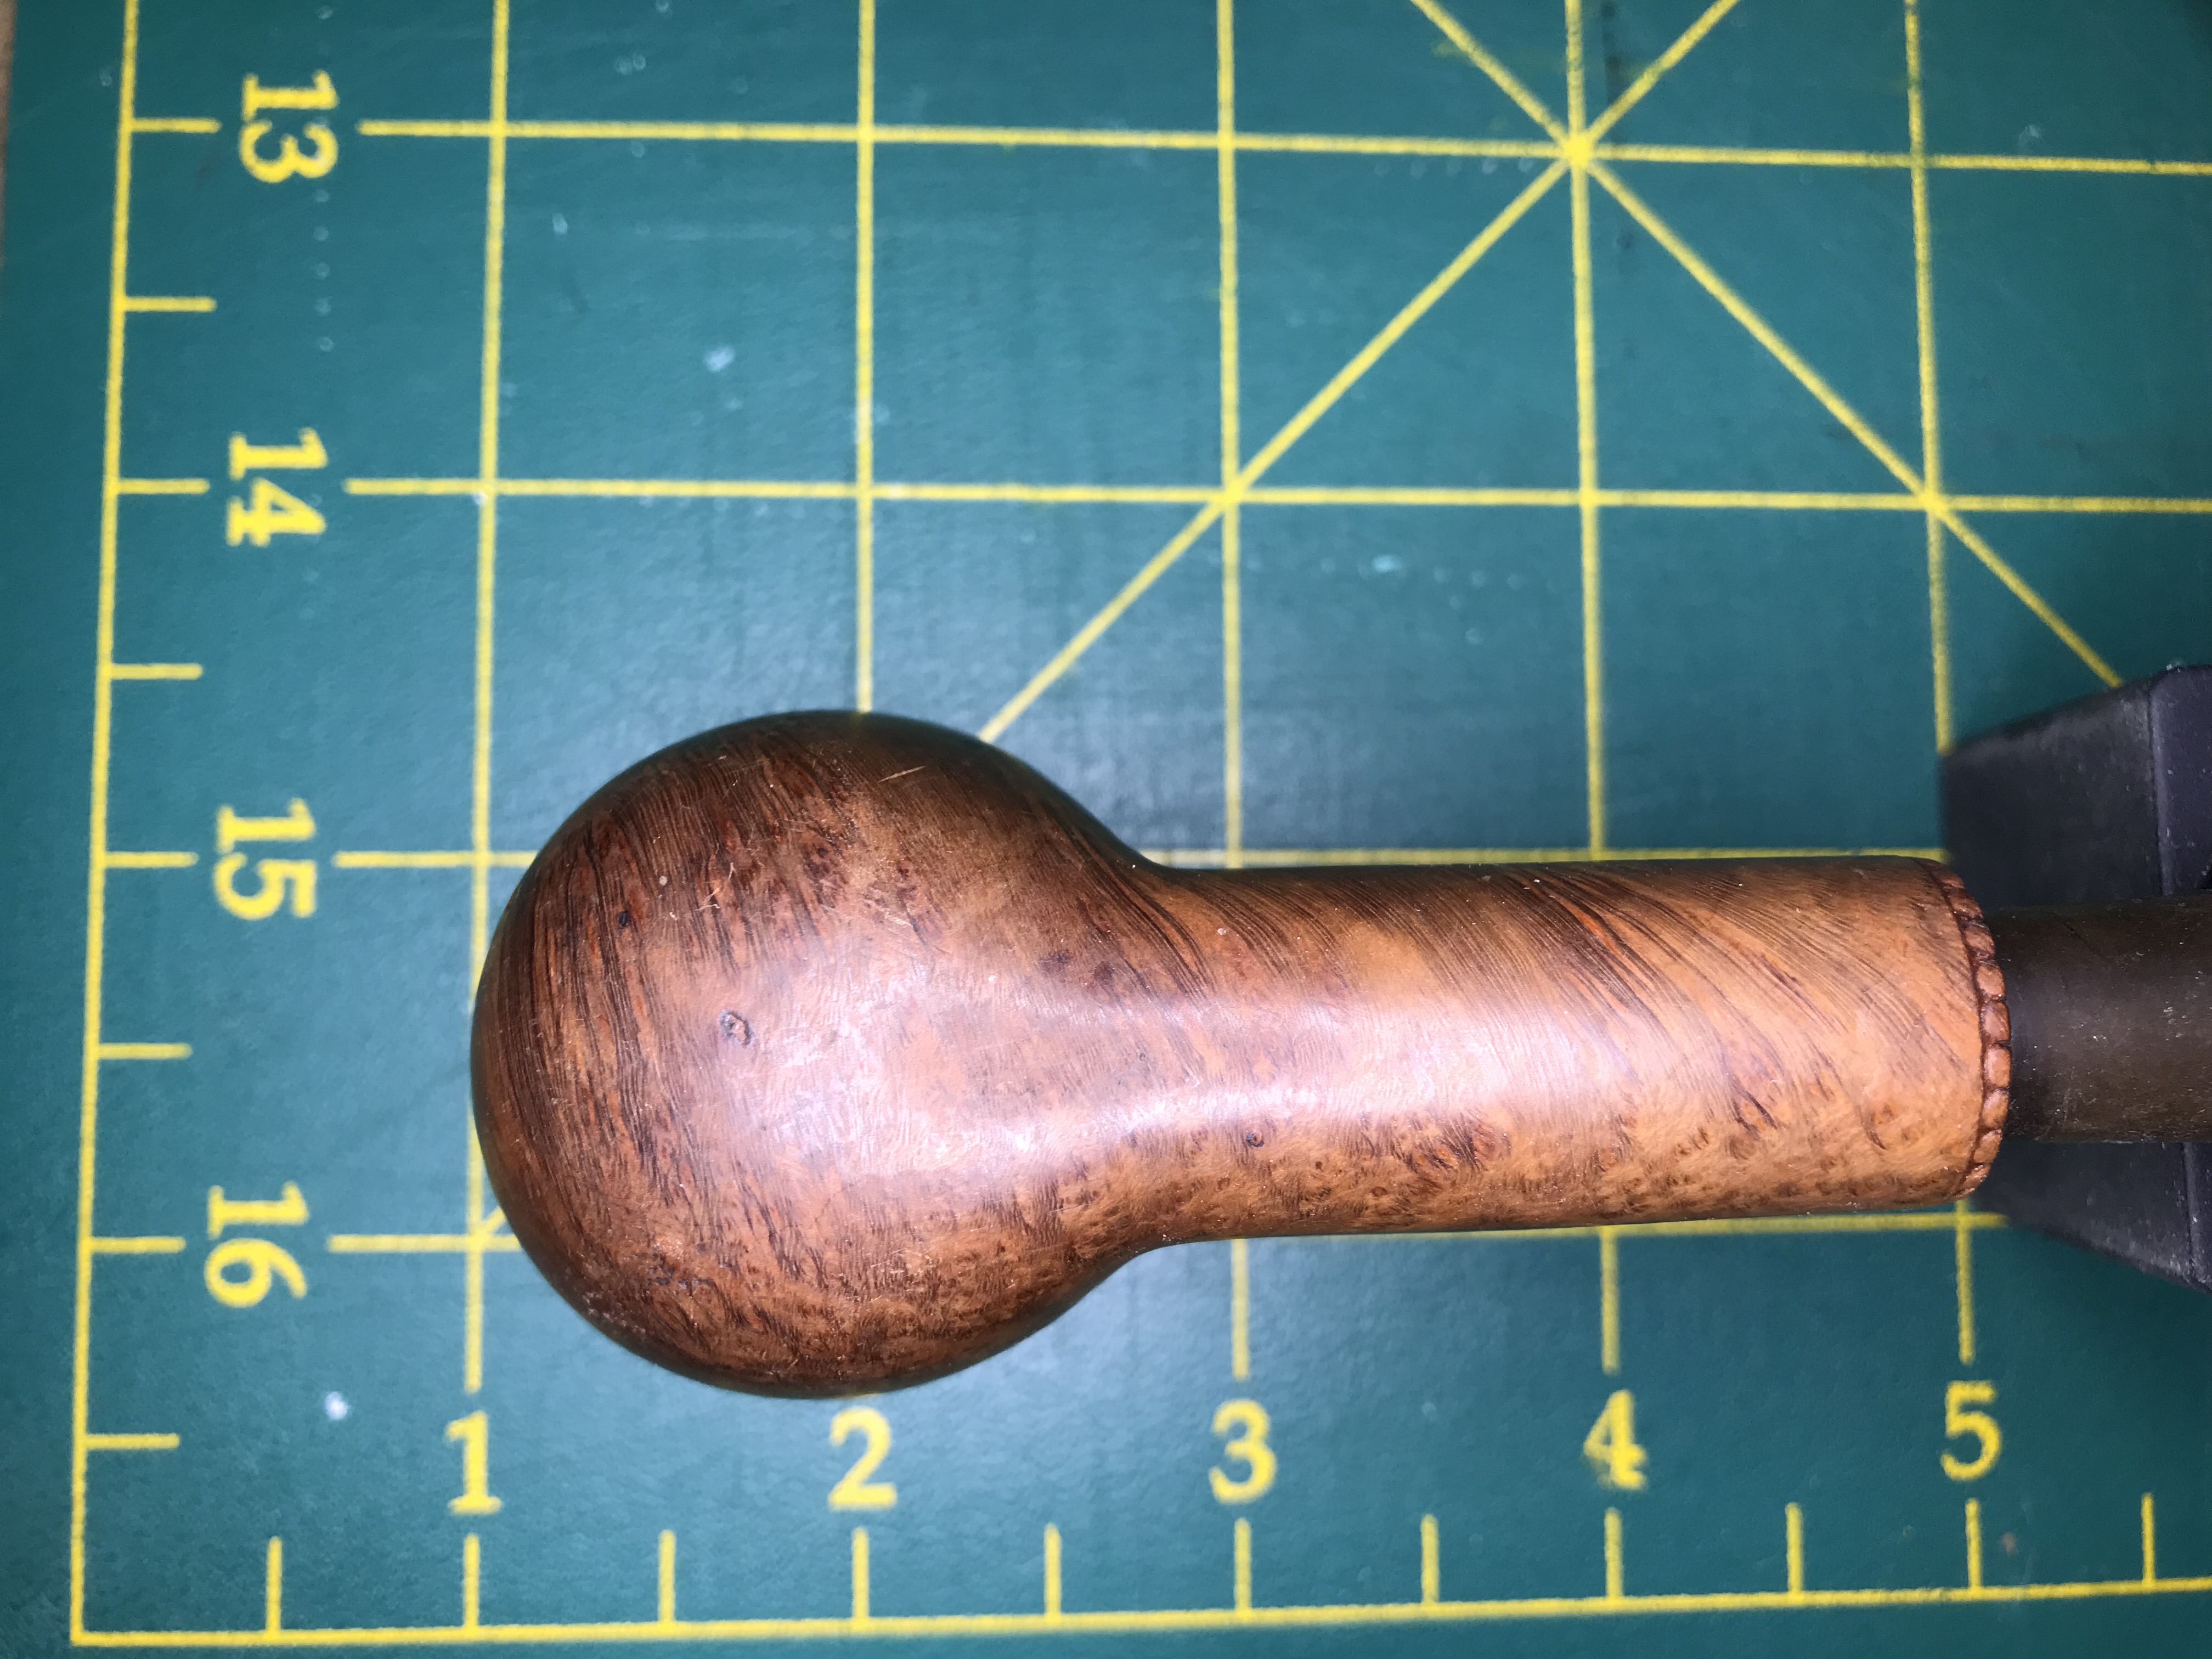
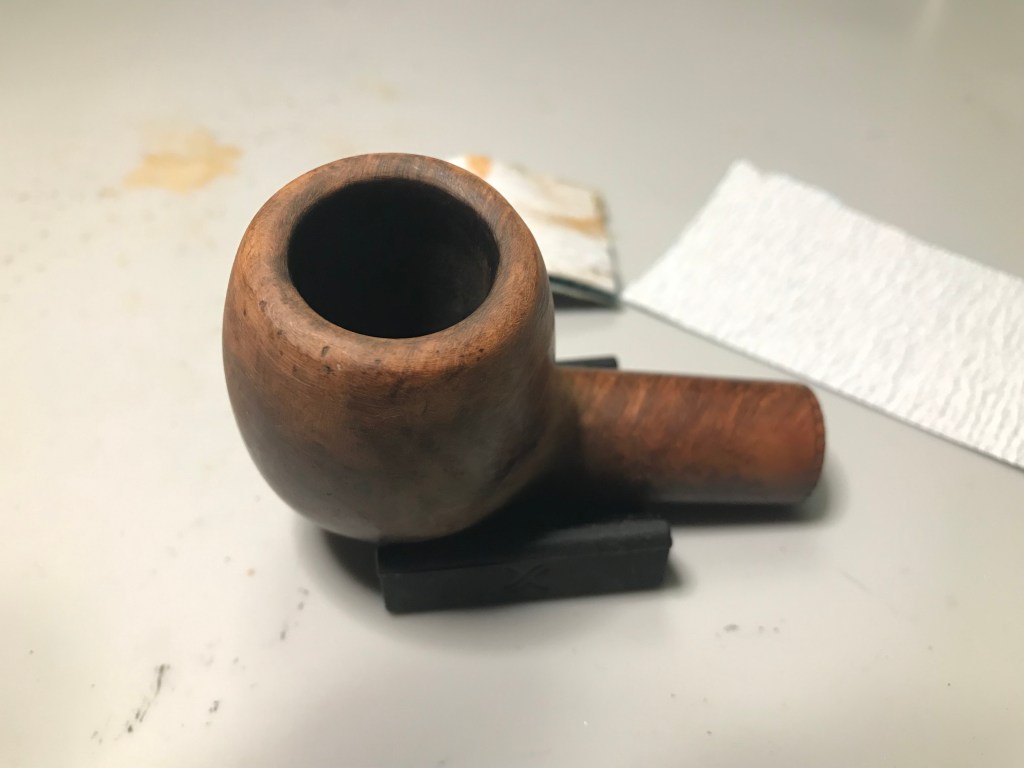
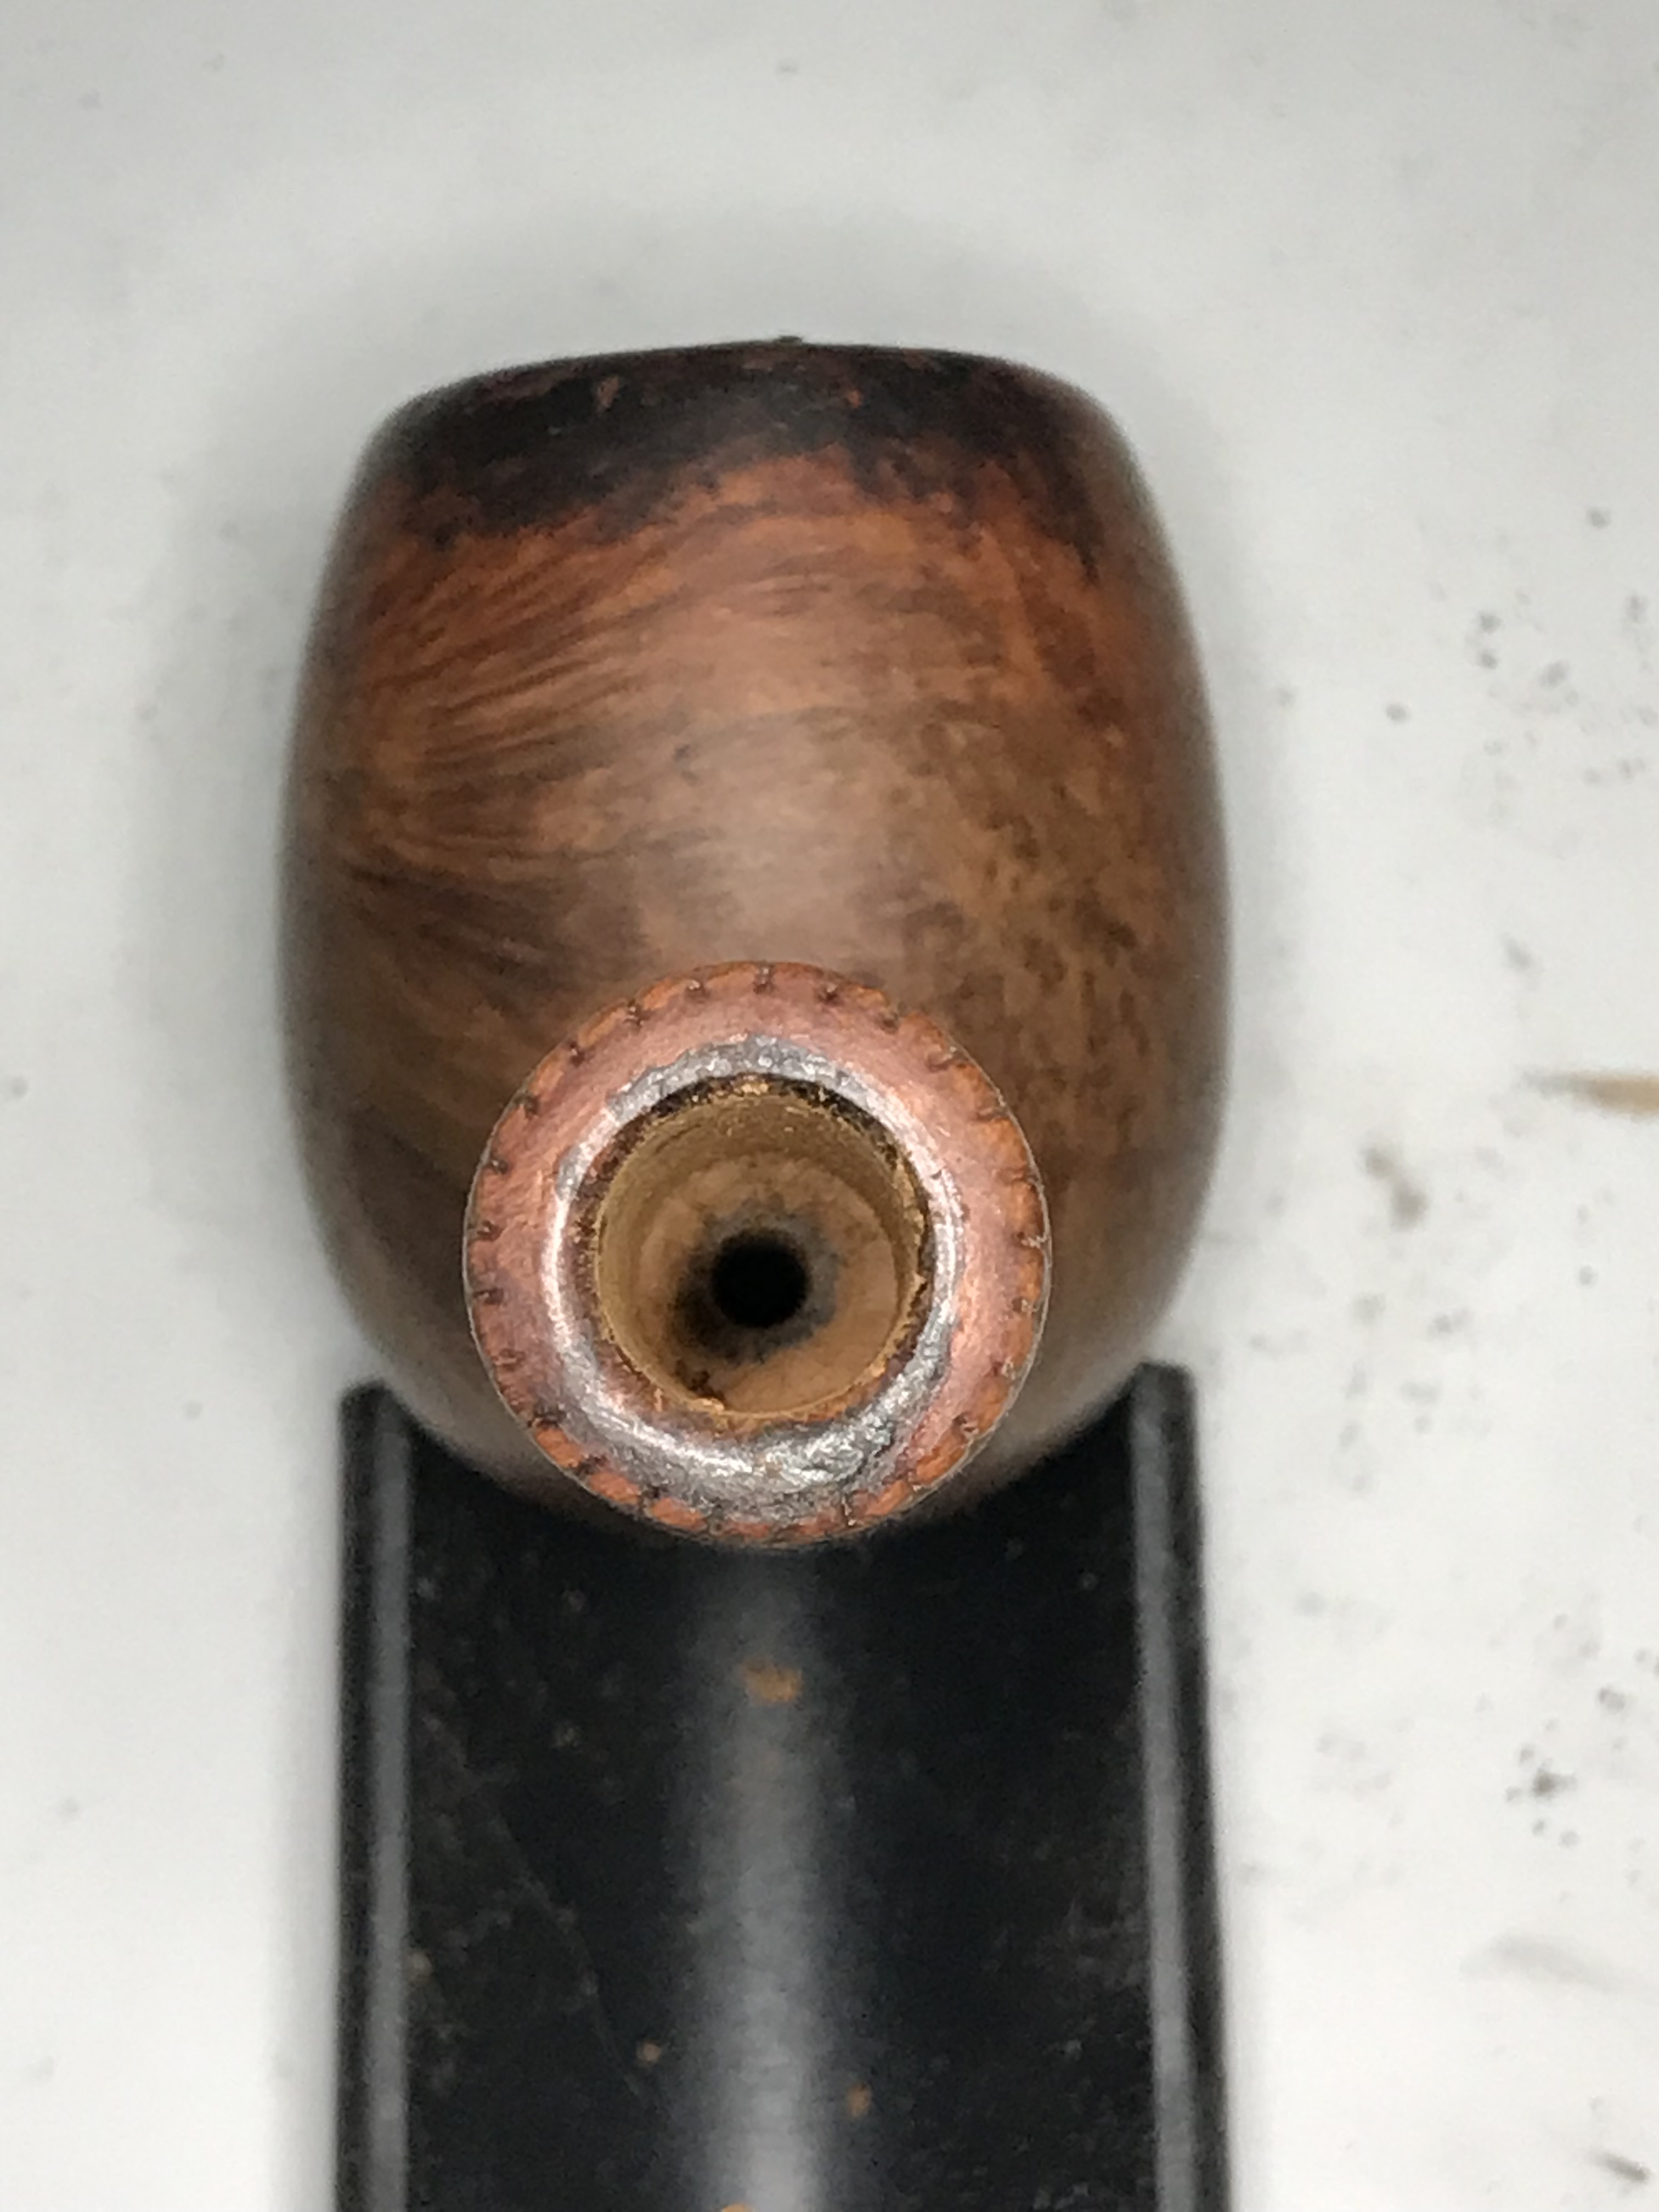
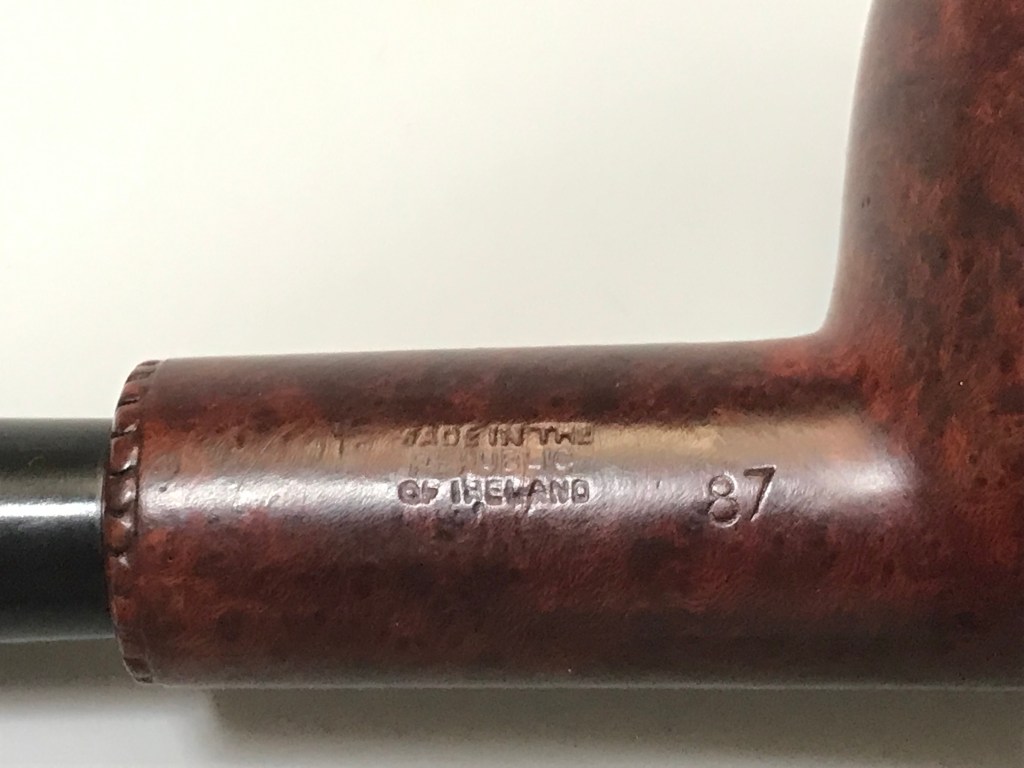
I would describe this pipe as a standard sized straight apple. The pipe is just over 7 inches long, with a “P Lip” stem. The pipe is stamped “Peterson’s Dunmore”, “Made in the Republic of Ireland”, Shape 87.
Judging by the condition of the pipe, I’m going to conclude that this was either the previous stewards favourite pipe or their workhorse pipe. The tobacco chamber was heavily caked with carbon buildup, I hazard a guess that they could barely fit a pinch of tobacco in the chamber. The oxidation on the stem was calcified to the surface of the vulcanite stem. Structurally the pipe was in good shape, there were no cracks or major flaws that needed repair. The pipe just needed a very thorough cleaning and reconditioning.
Step 1: Carbon buildup removal
There was considerable buildup in the tobacco chamber and caked to the rim as well. I used both my castleford reaming set and a senior reamer to get through the carbon buildup and back to briar.
I used some steel wool to remove the carbon buildup on the rim. I was expecting to see some charring on the rim, there was none surprisingly. The carbon in the chamber and rim seemed to preserve briar beneath. There’s a couple of nicks on the rim but nothing of major concern.
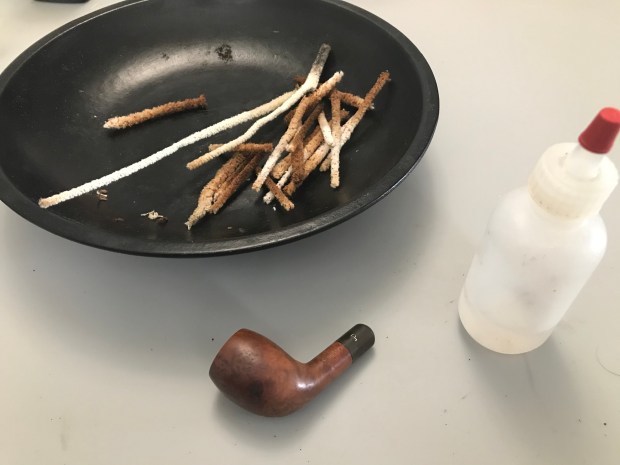
Step 2: Recondition the airway and mortise
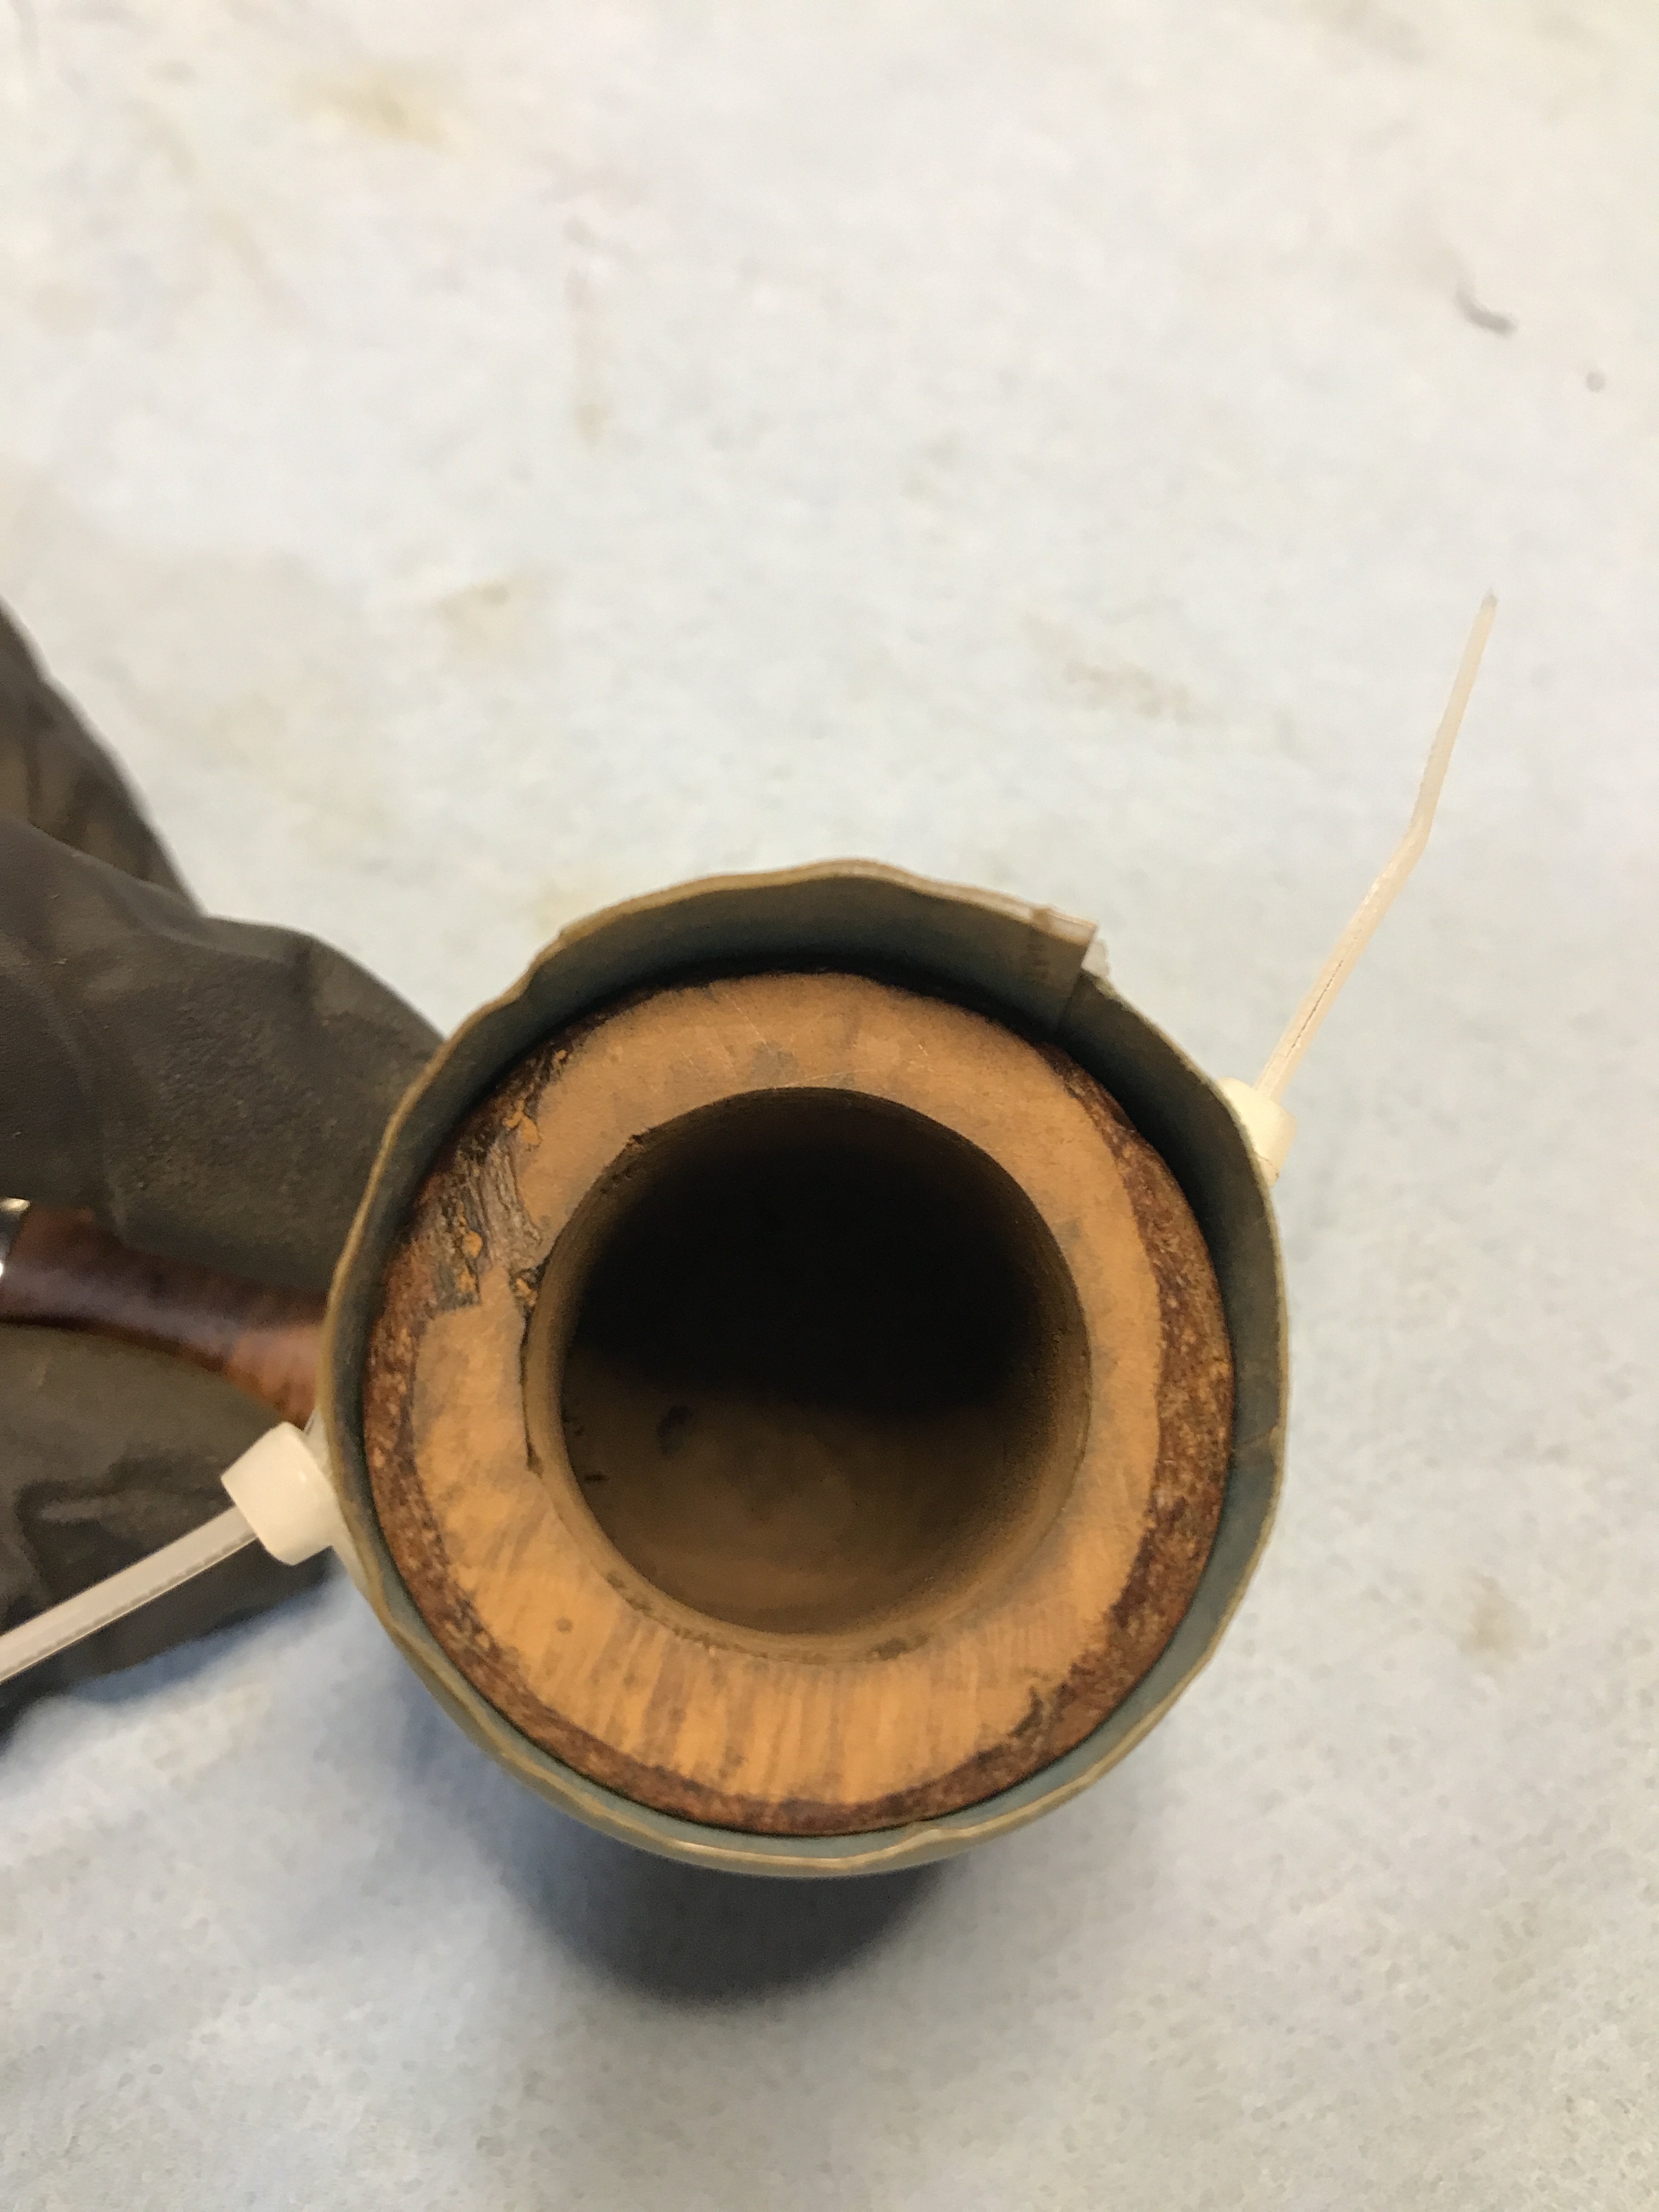
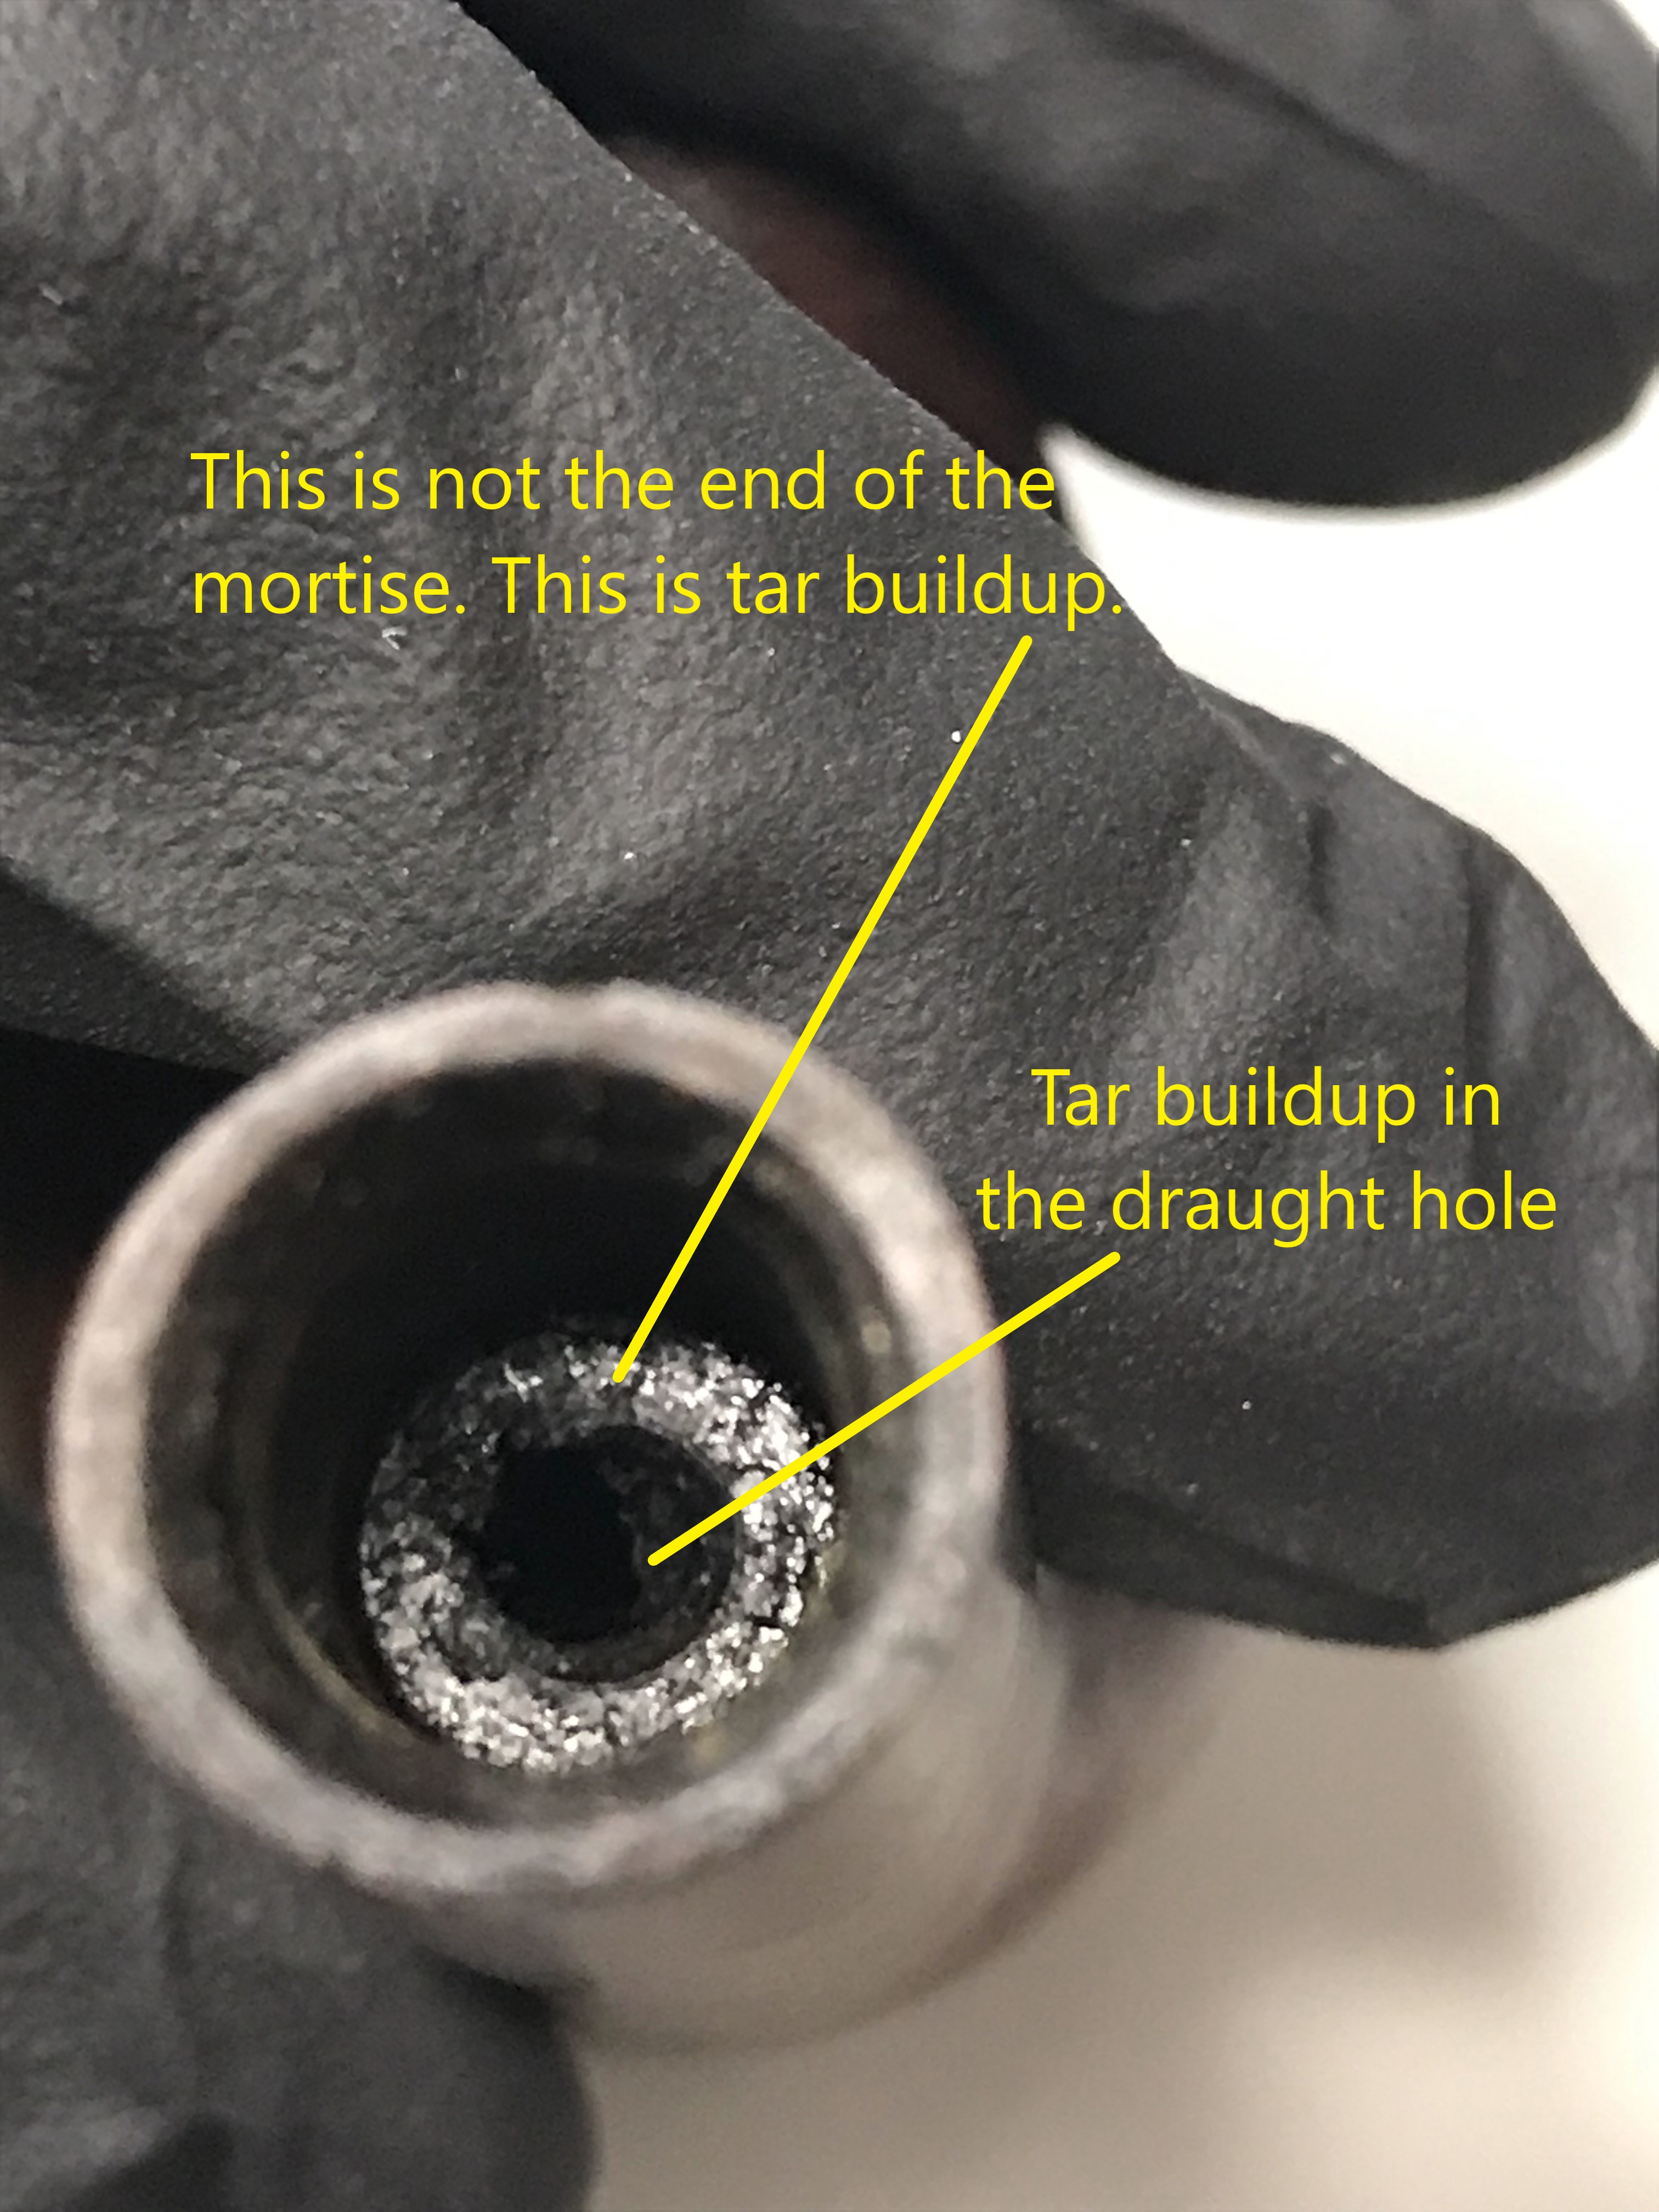
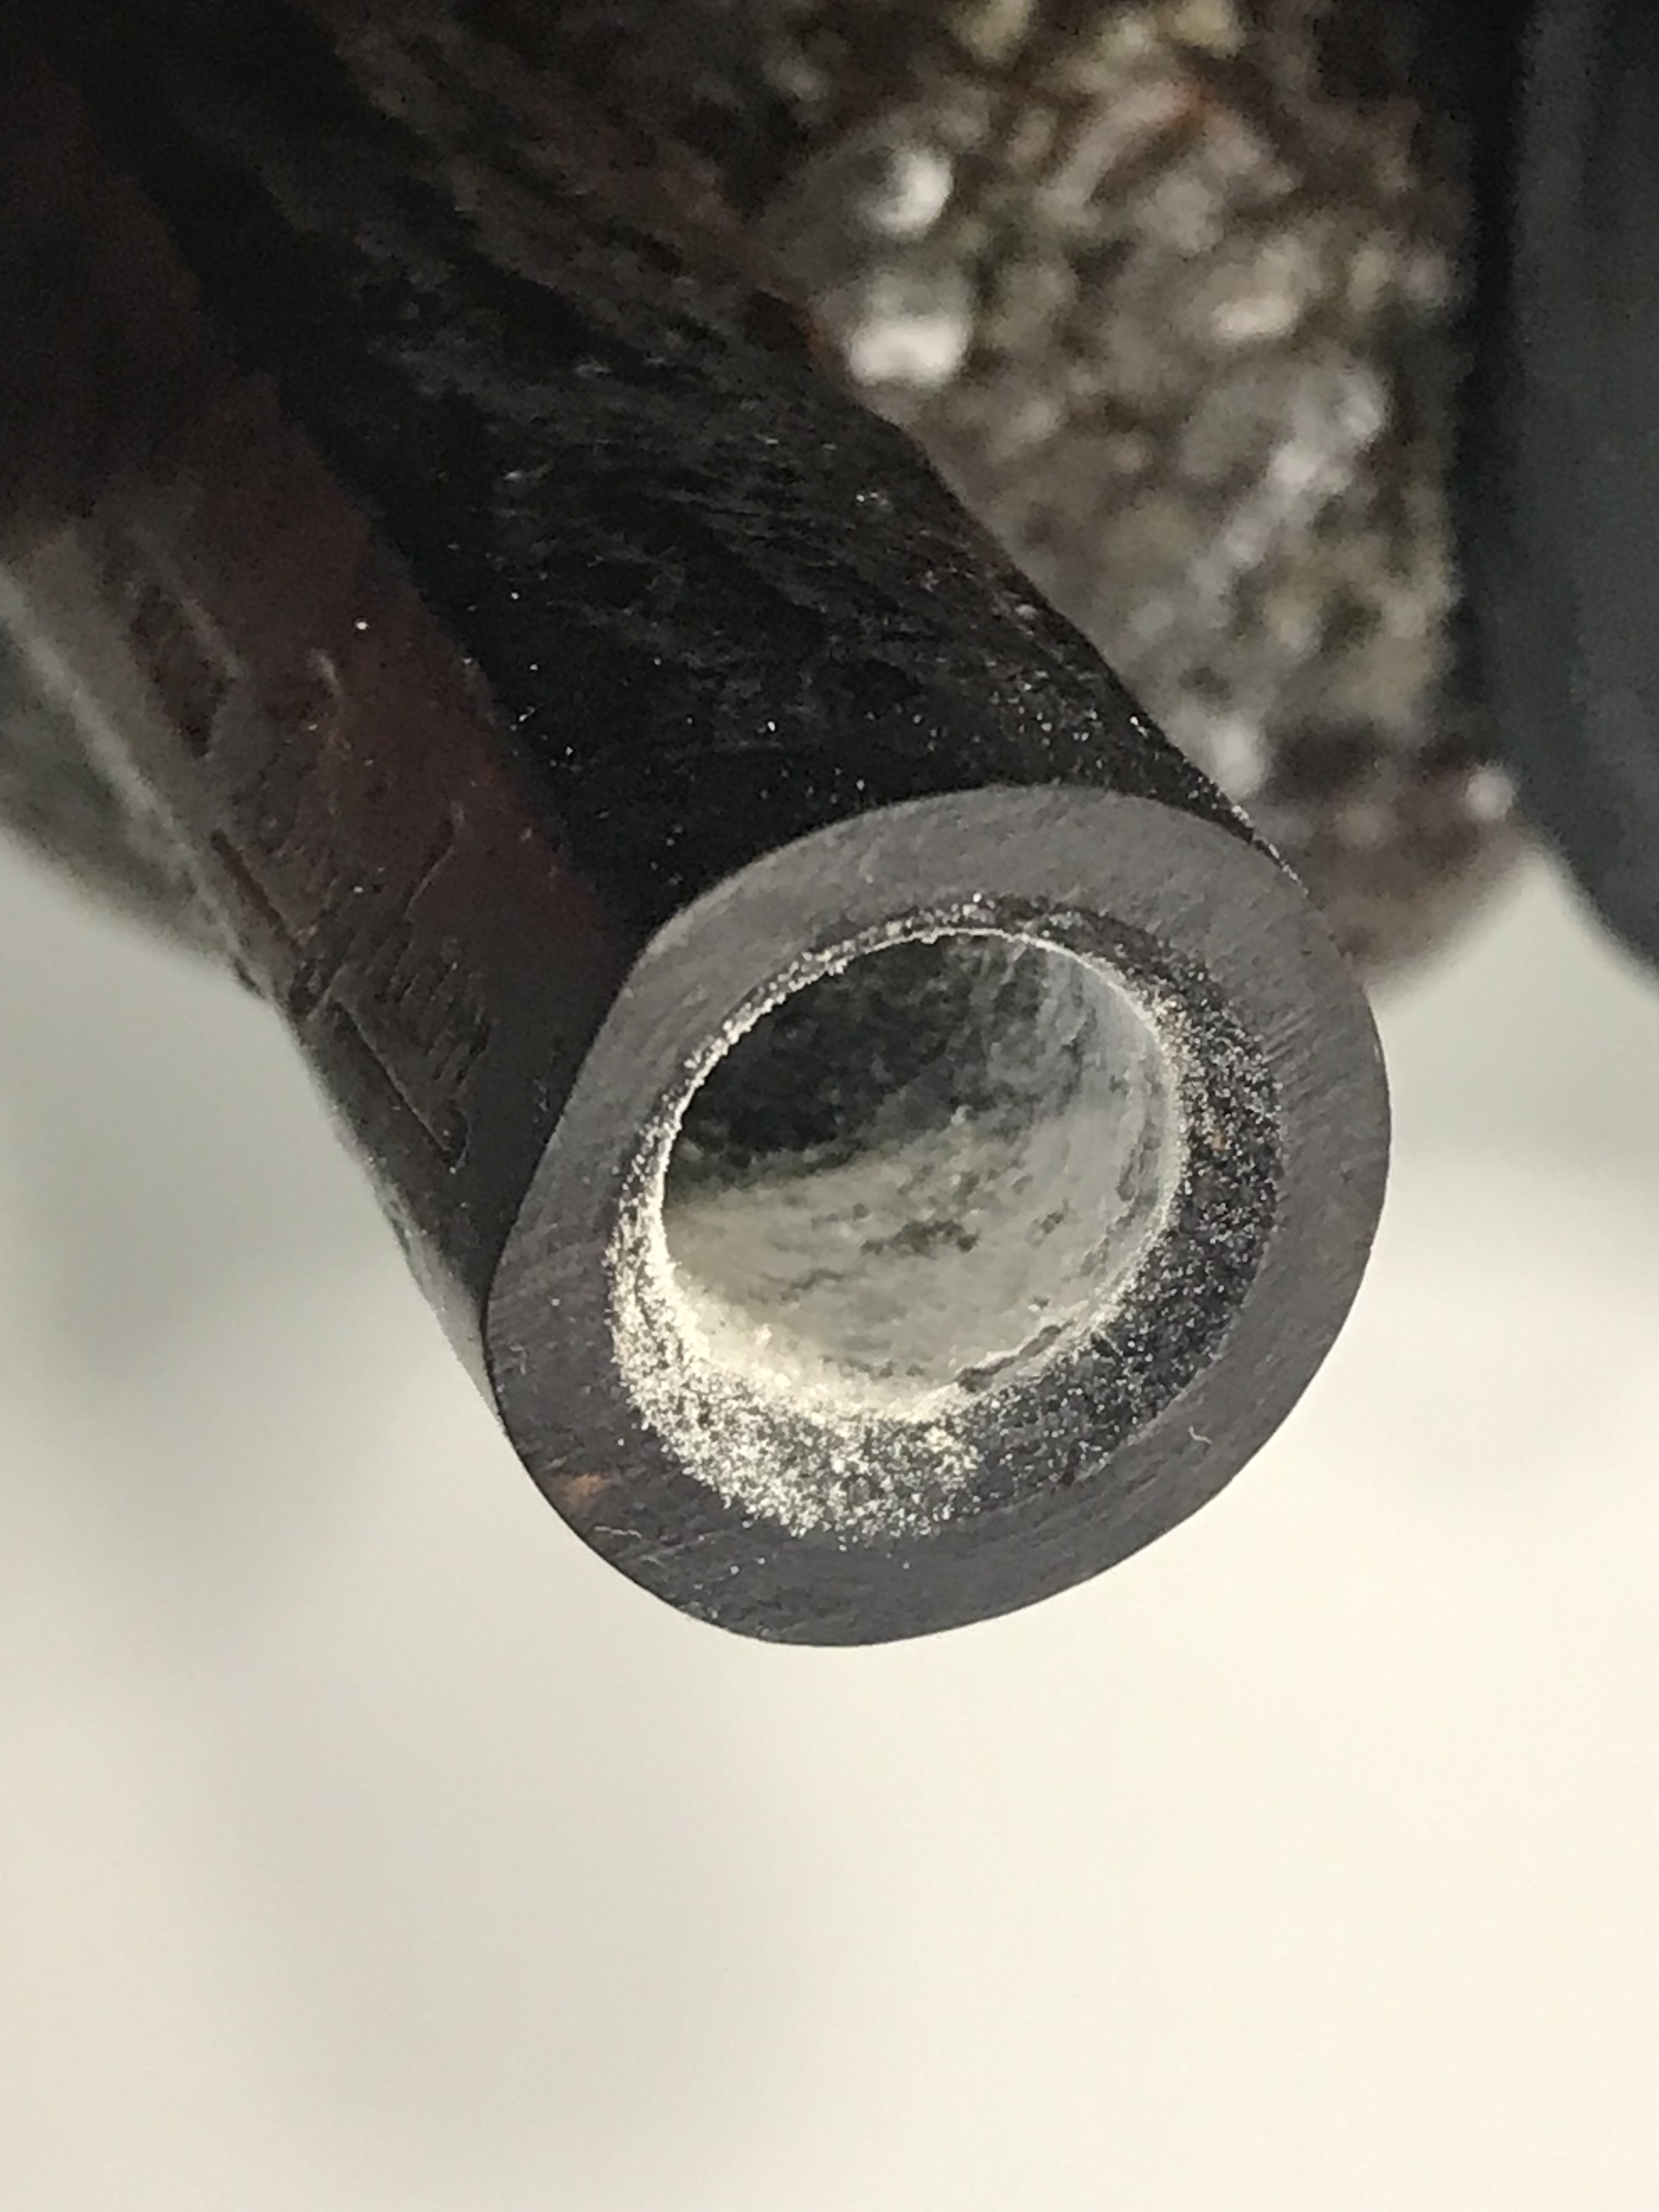
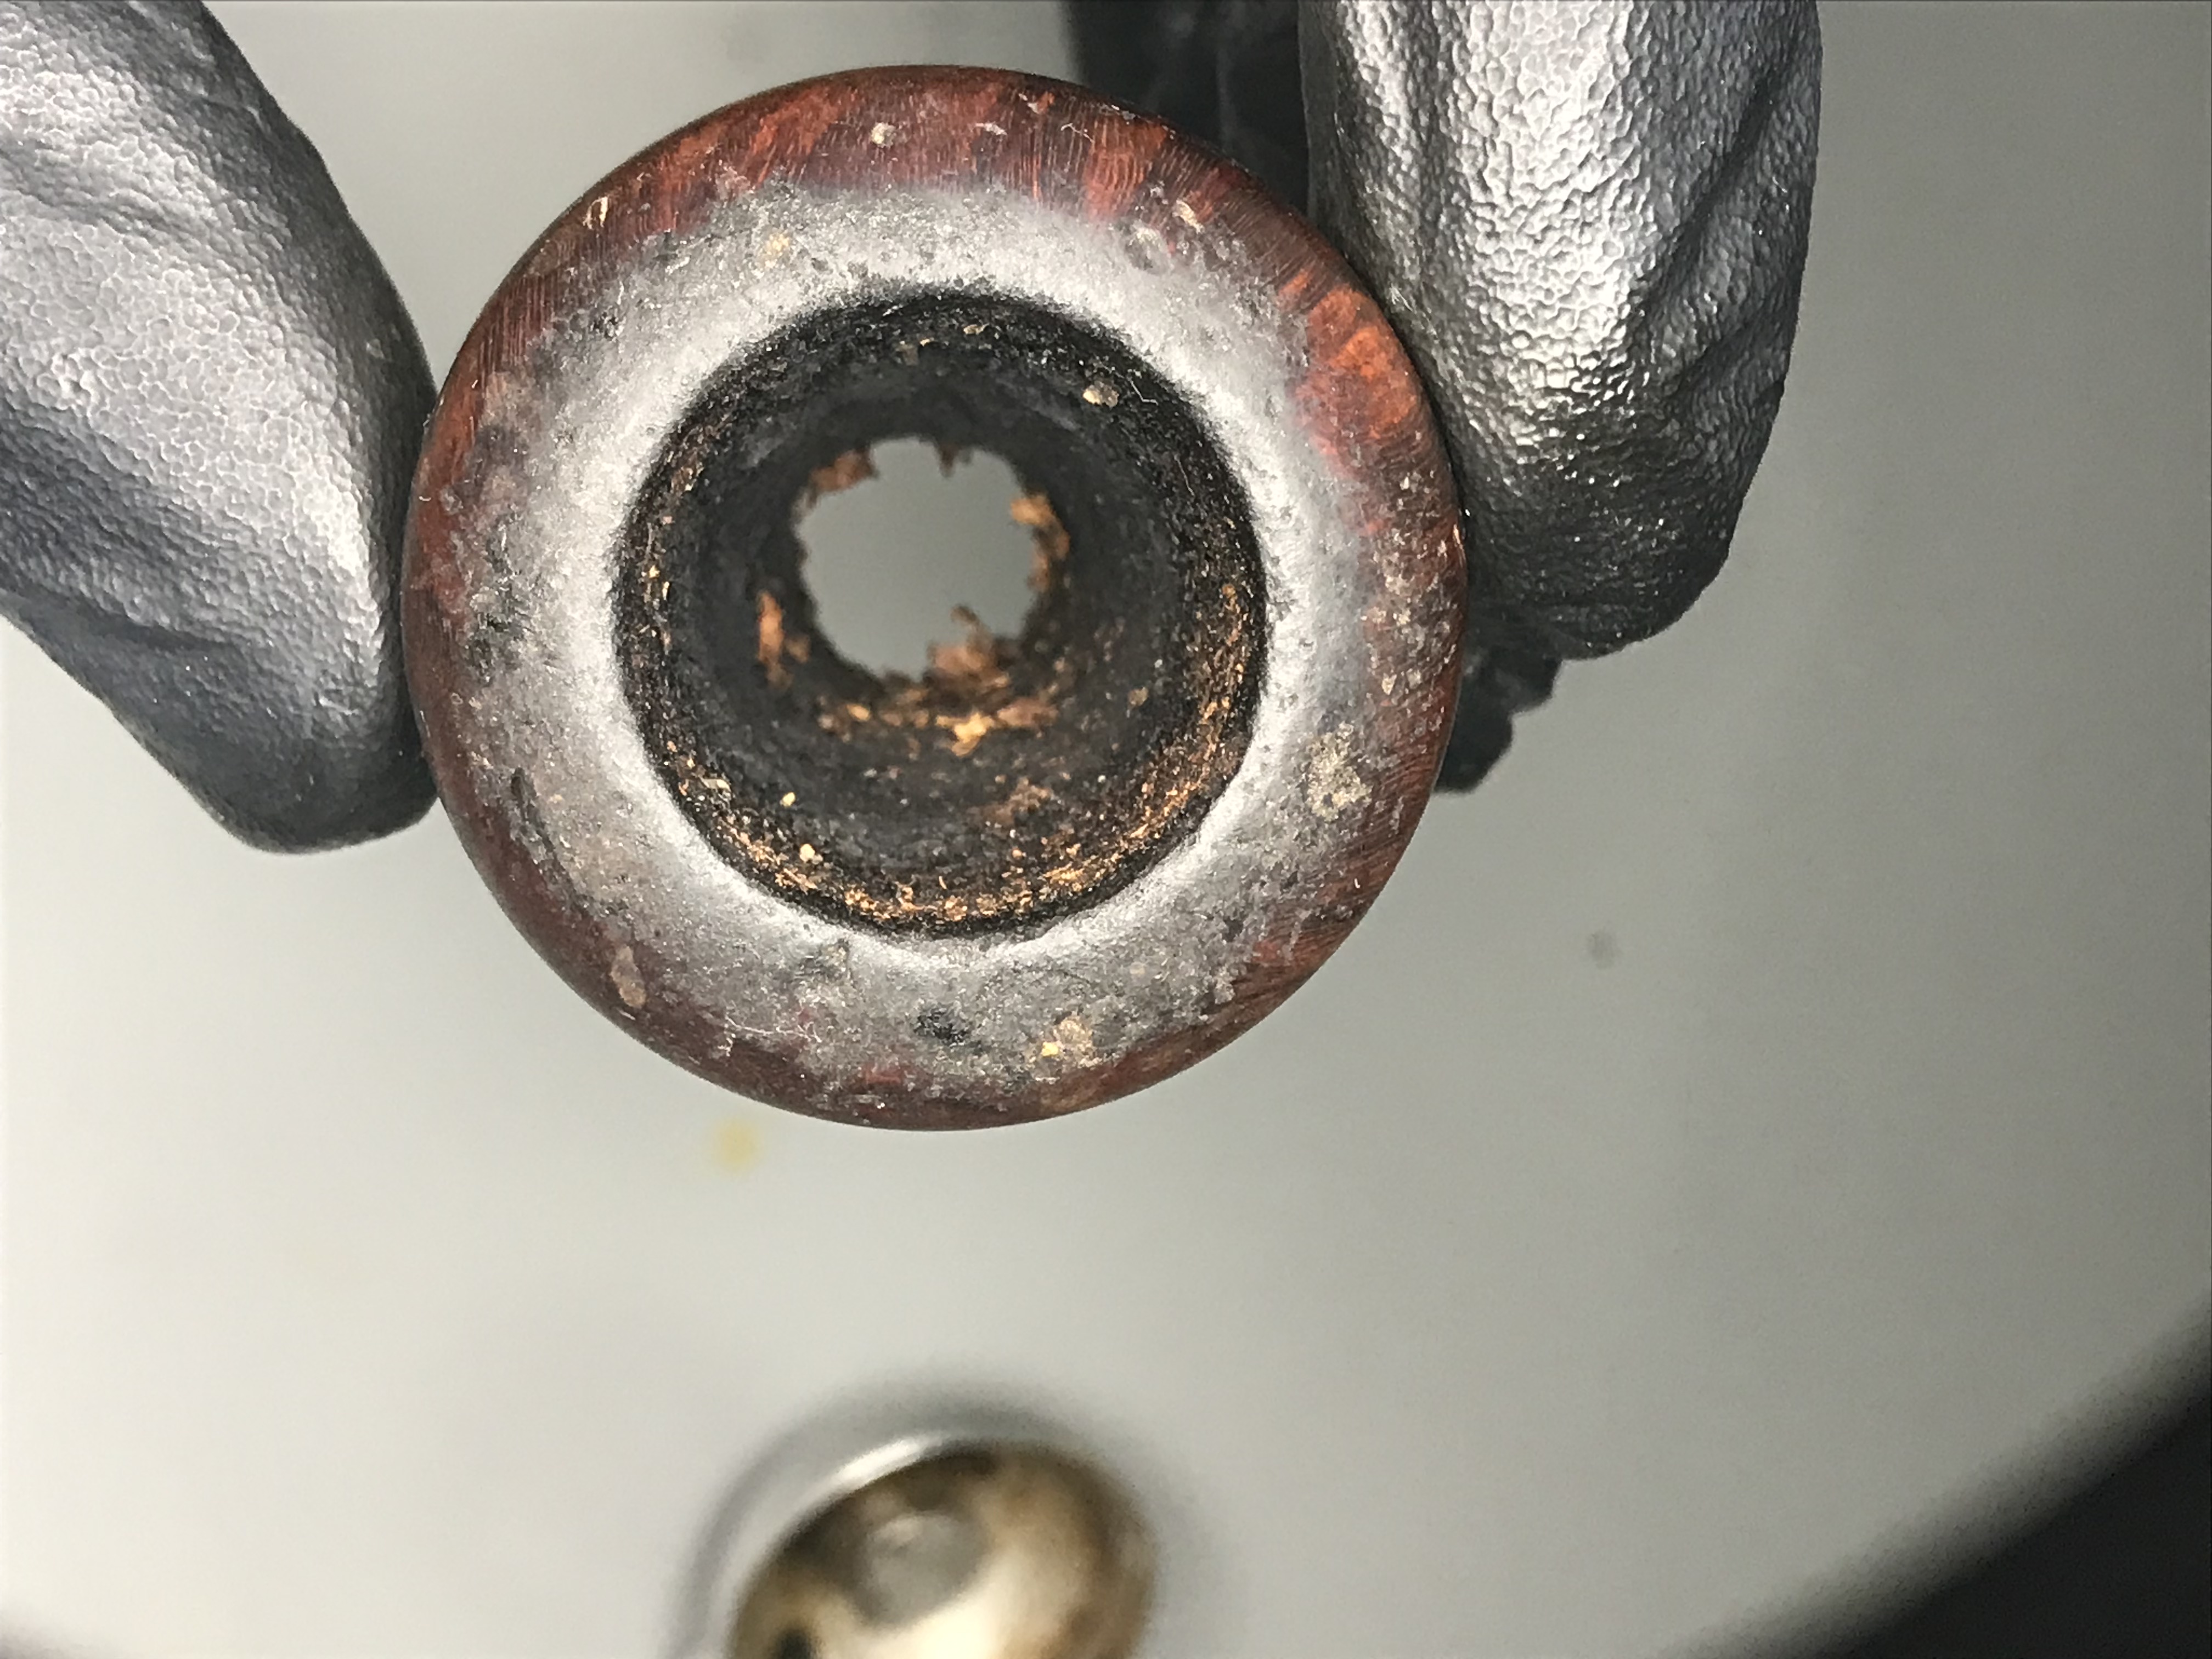
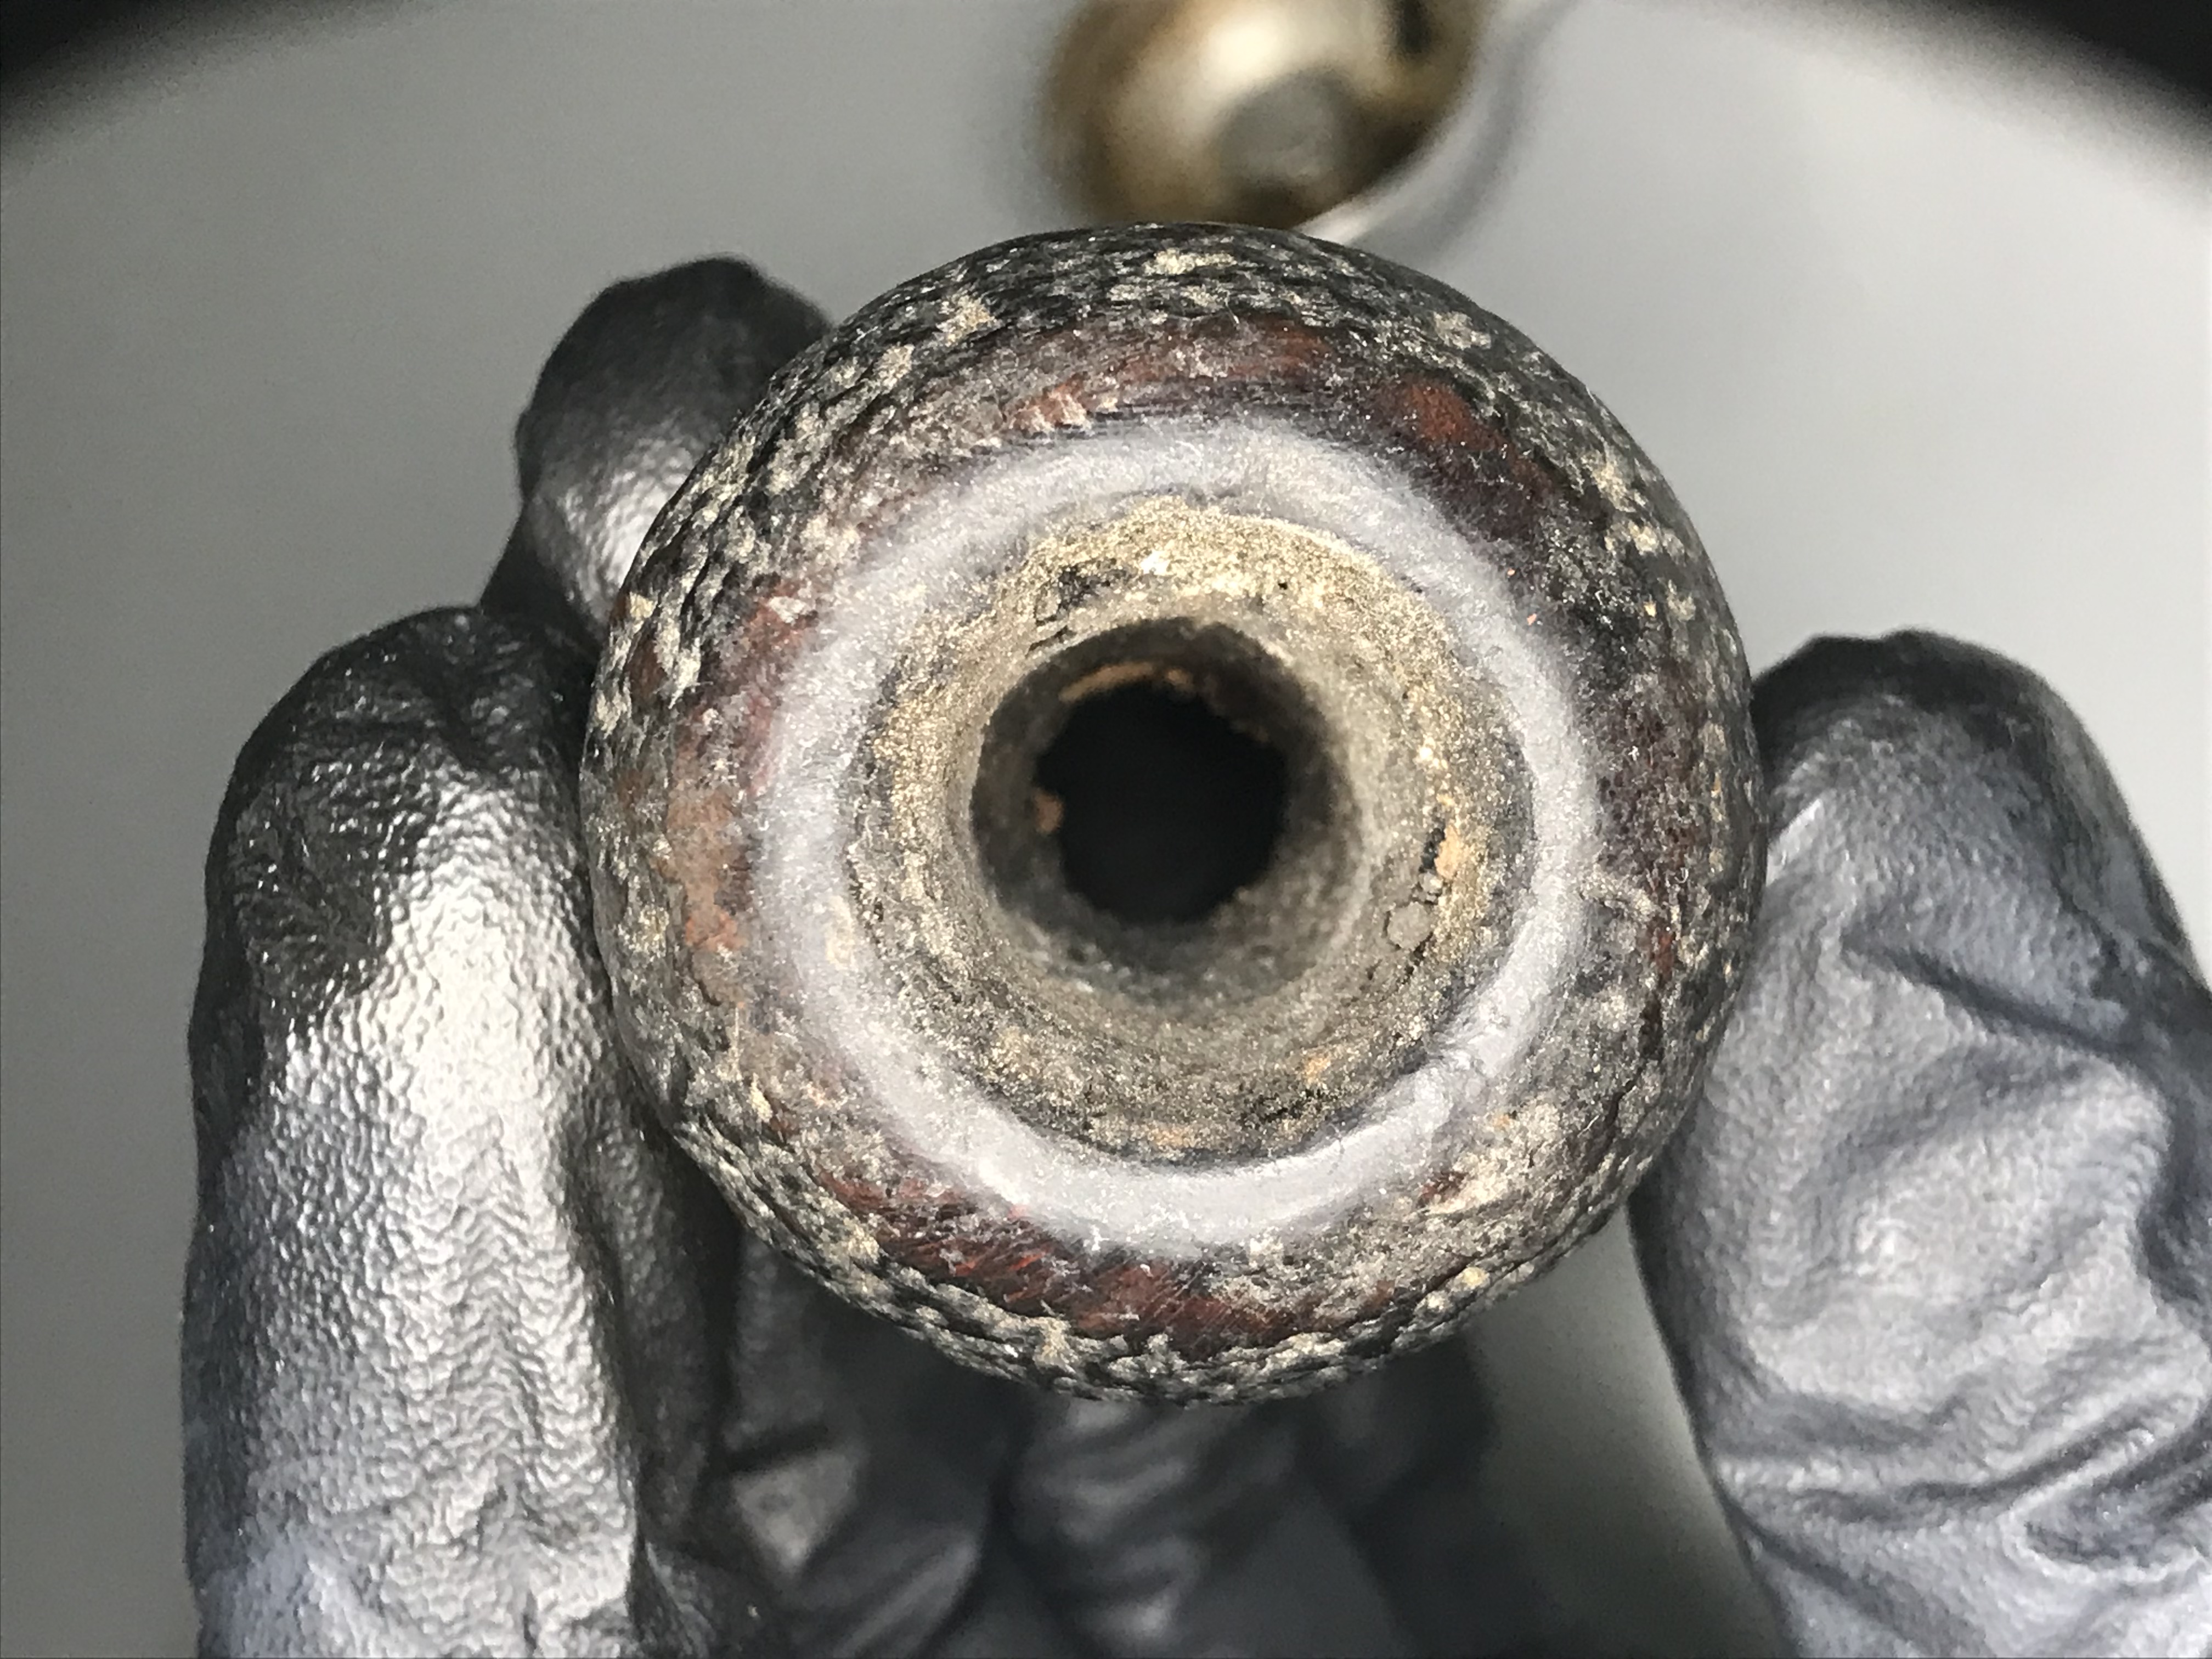
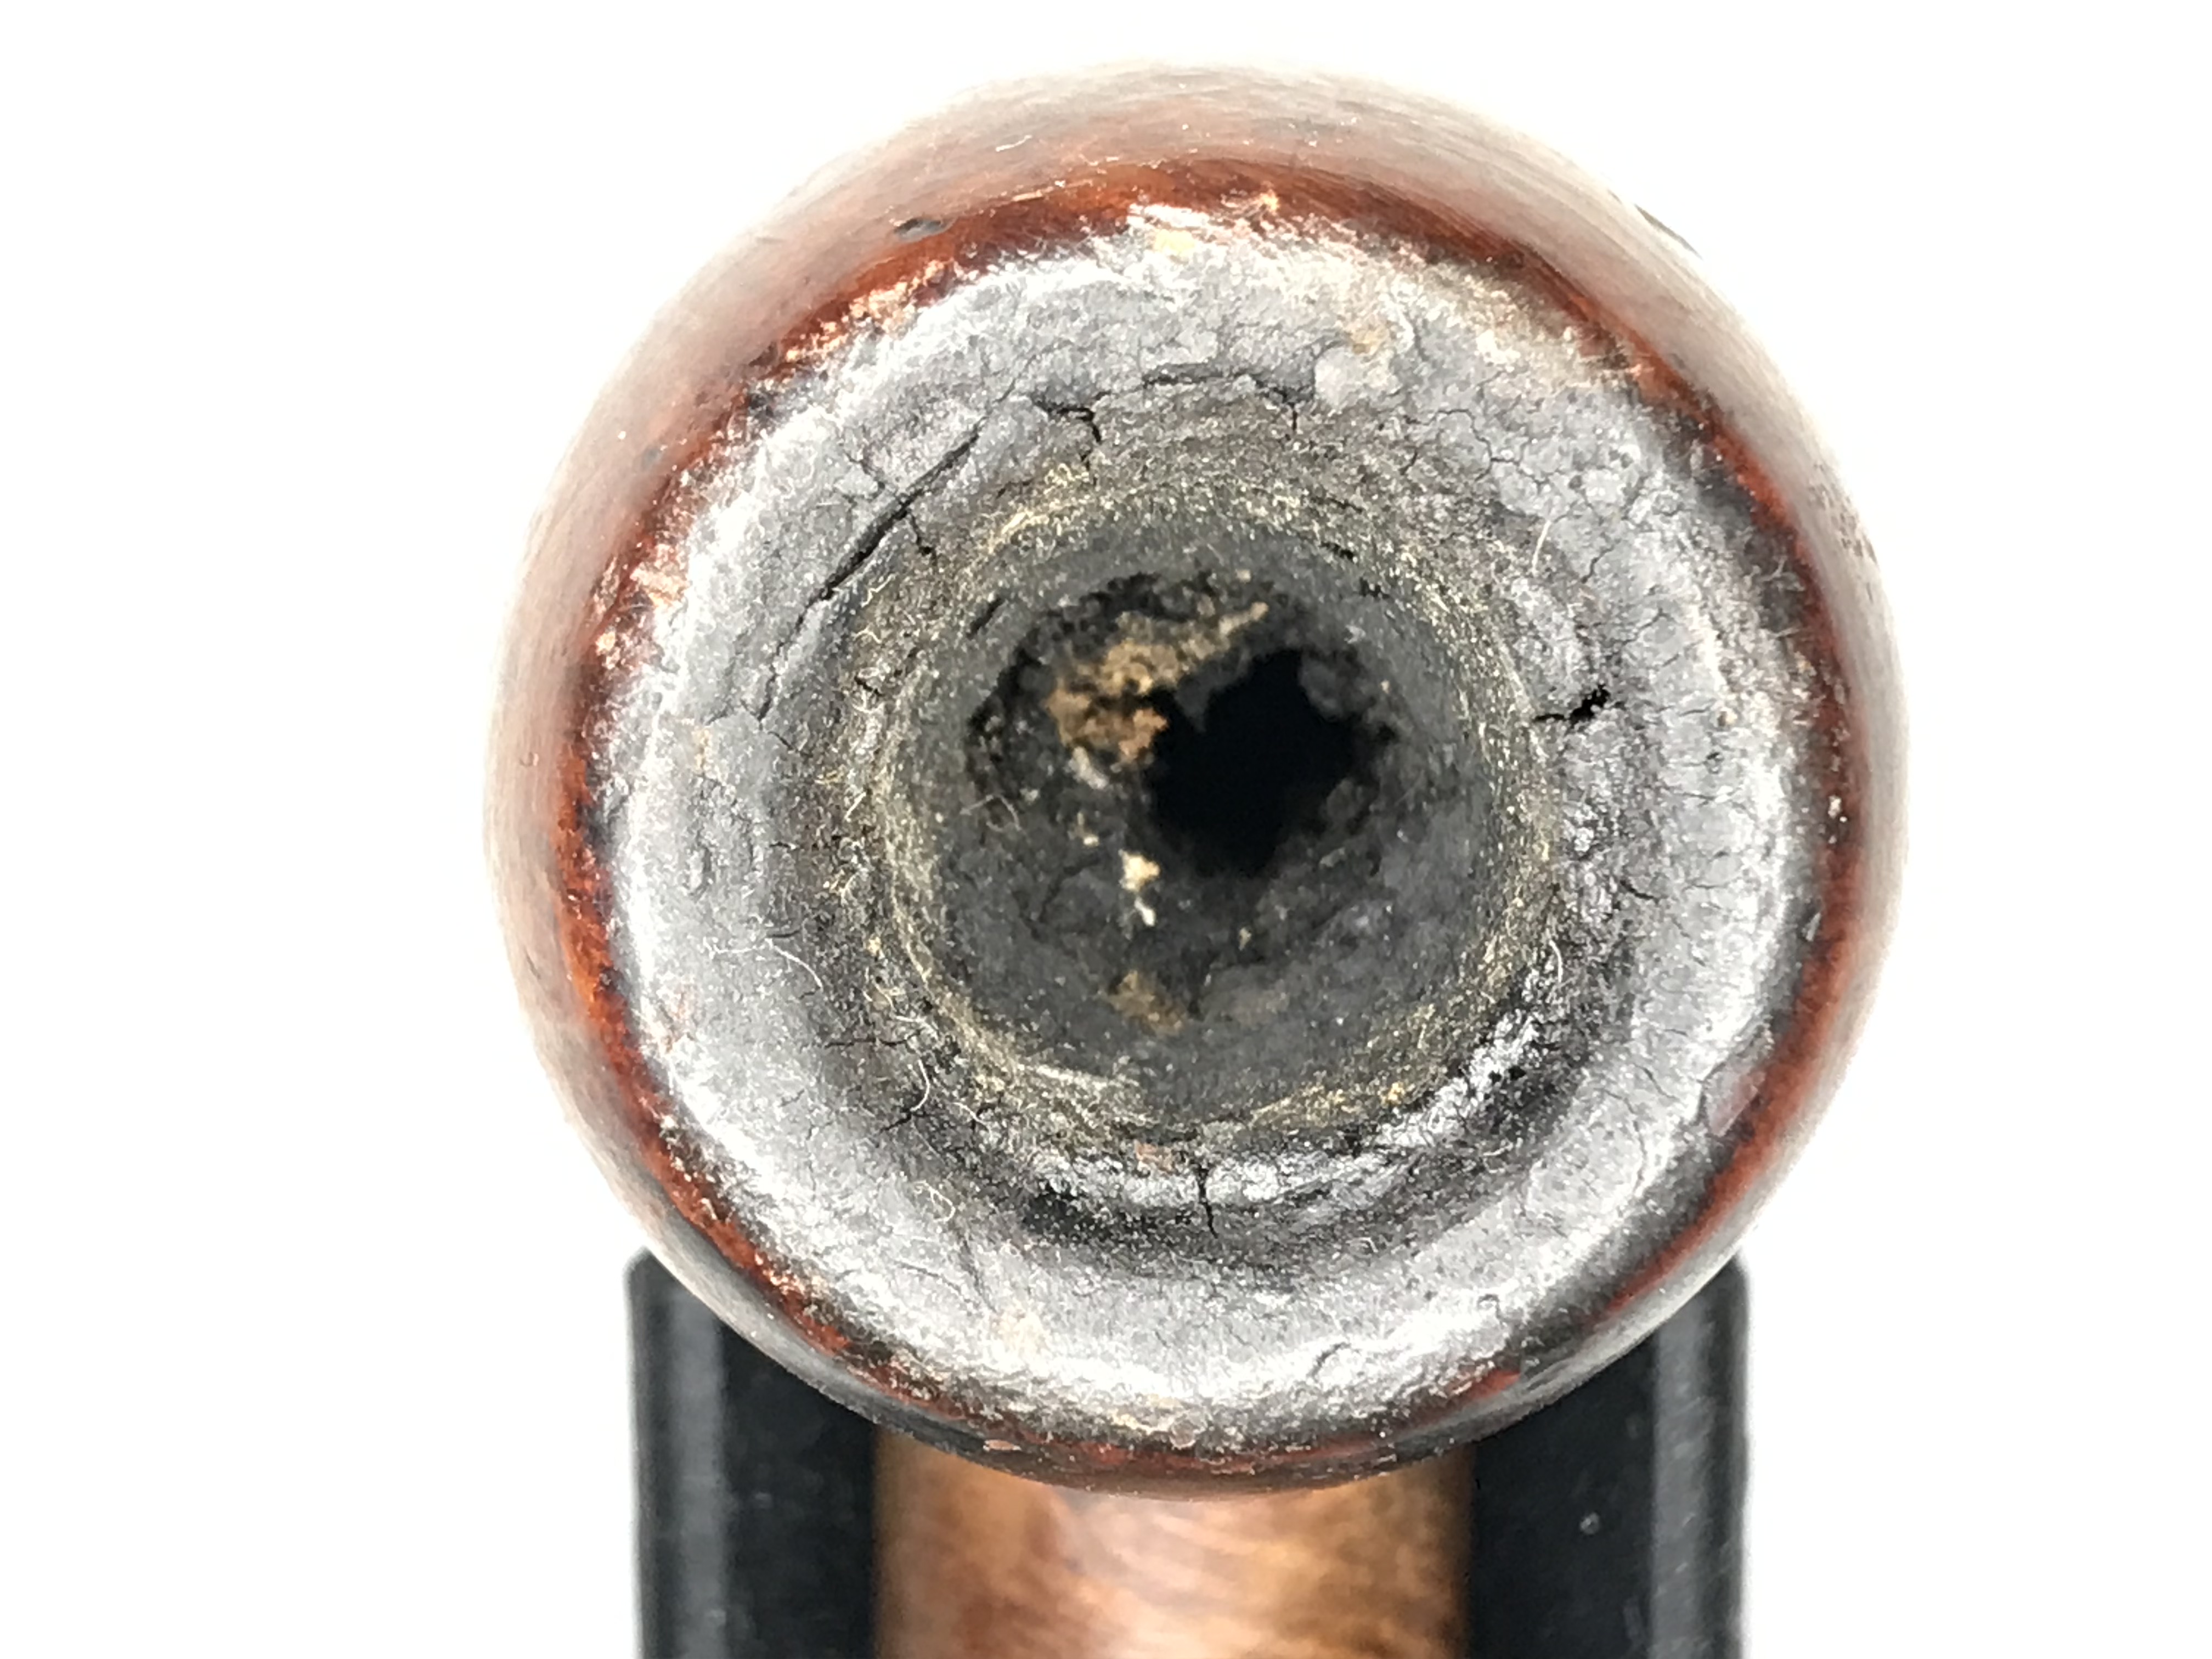
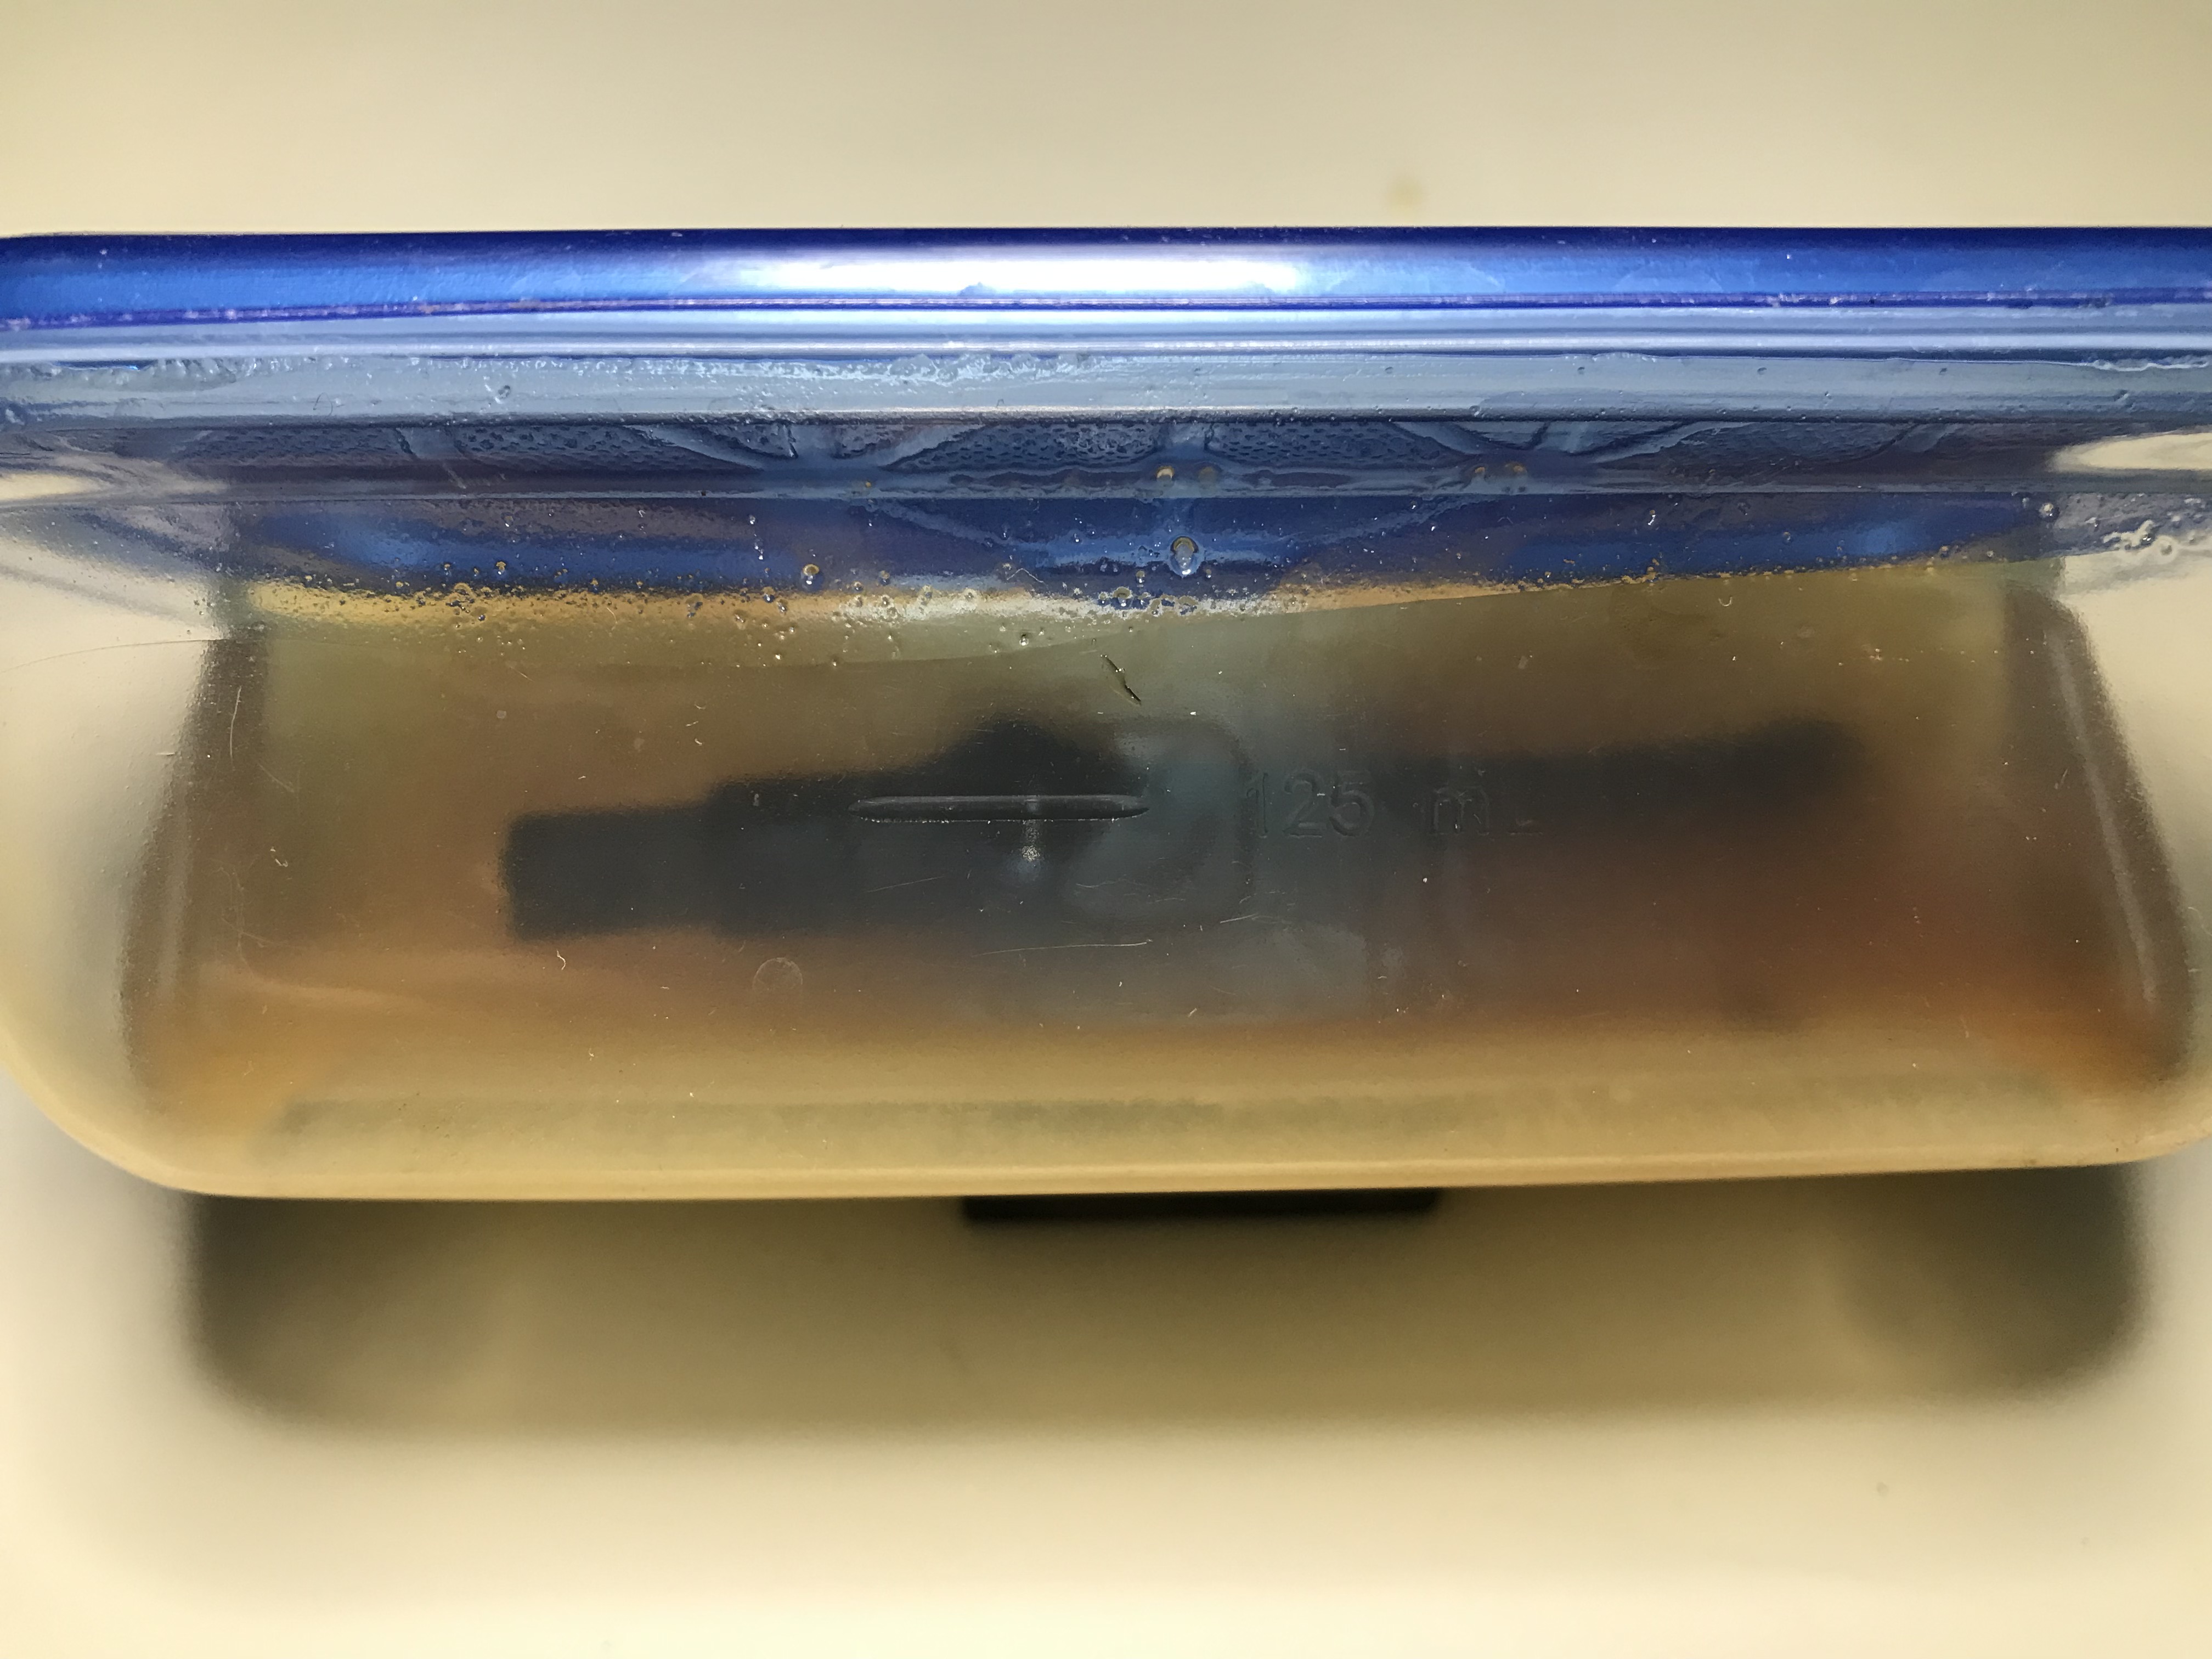
Mortise and airway tar buildup
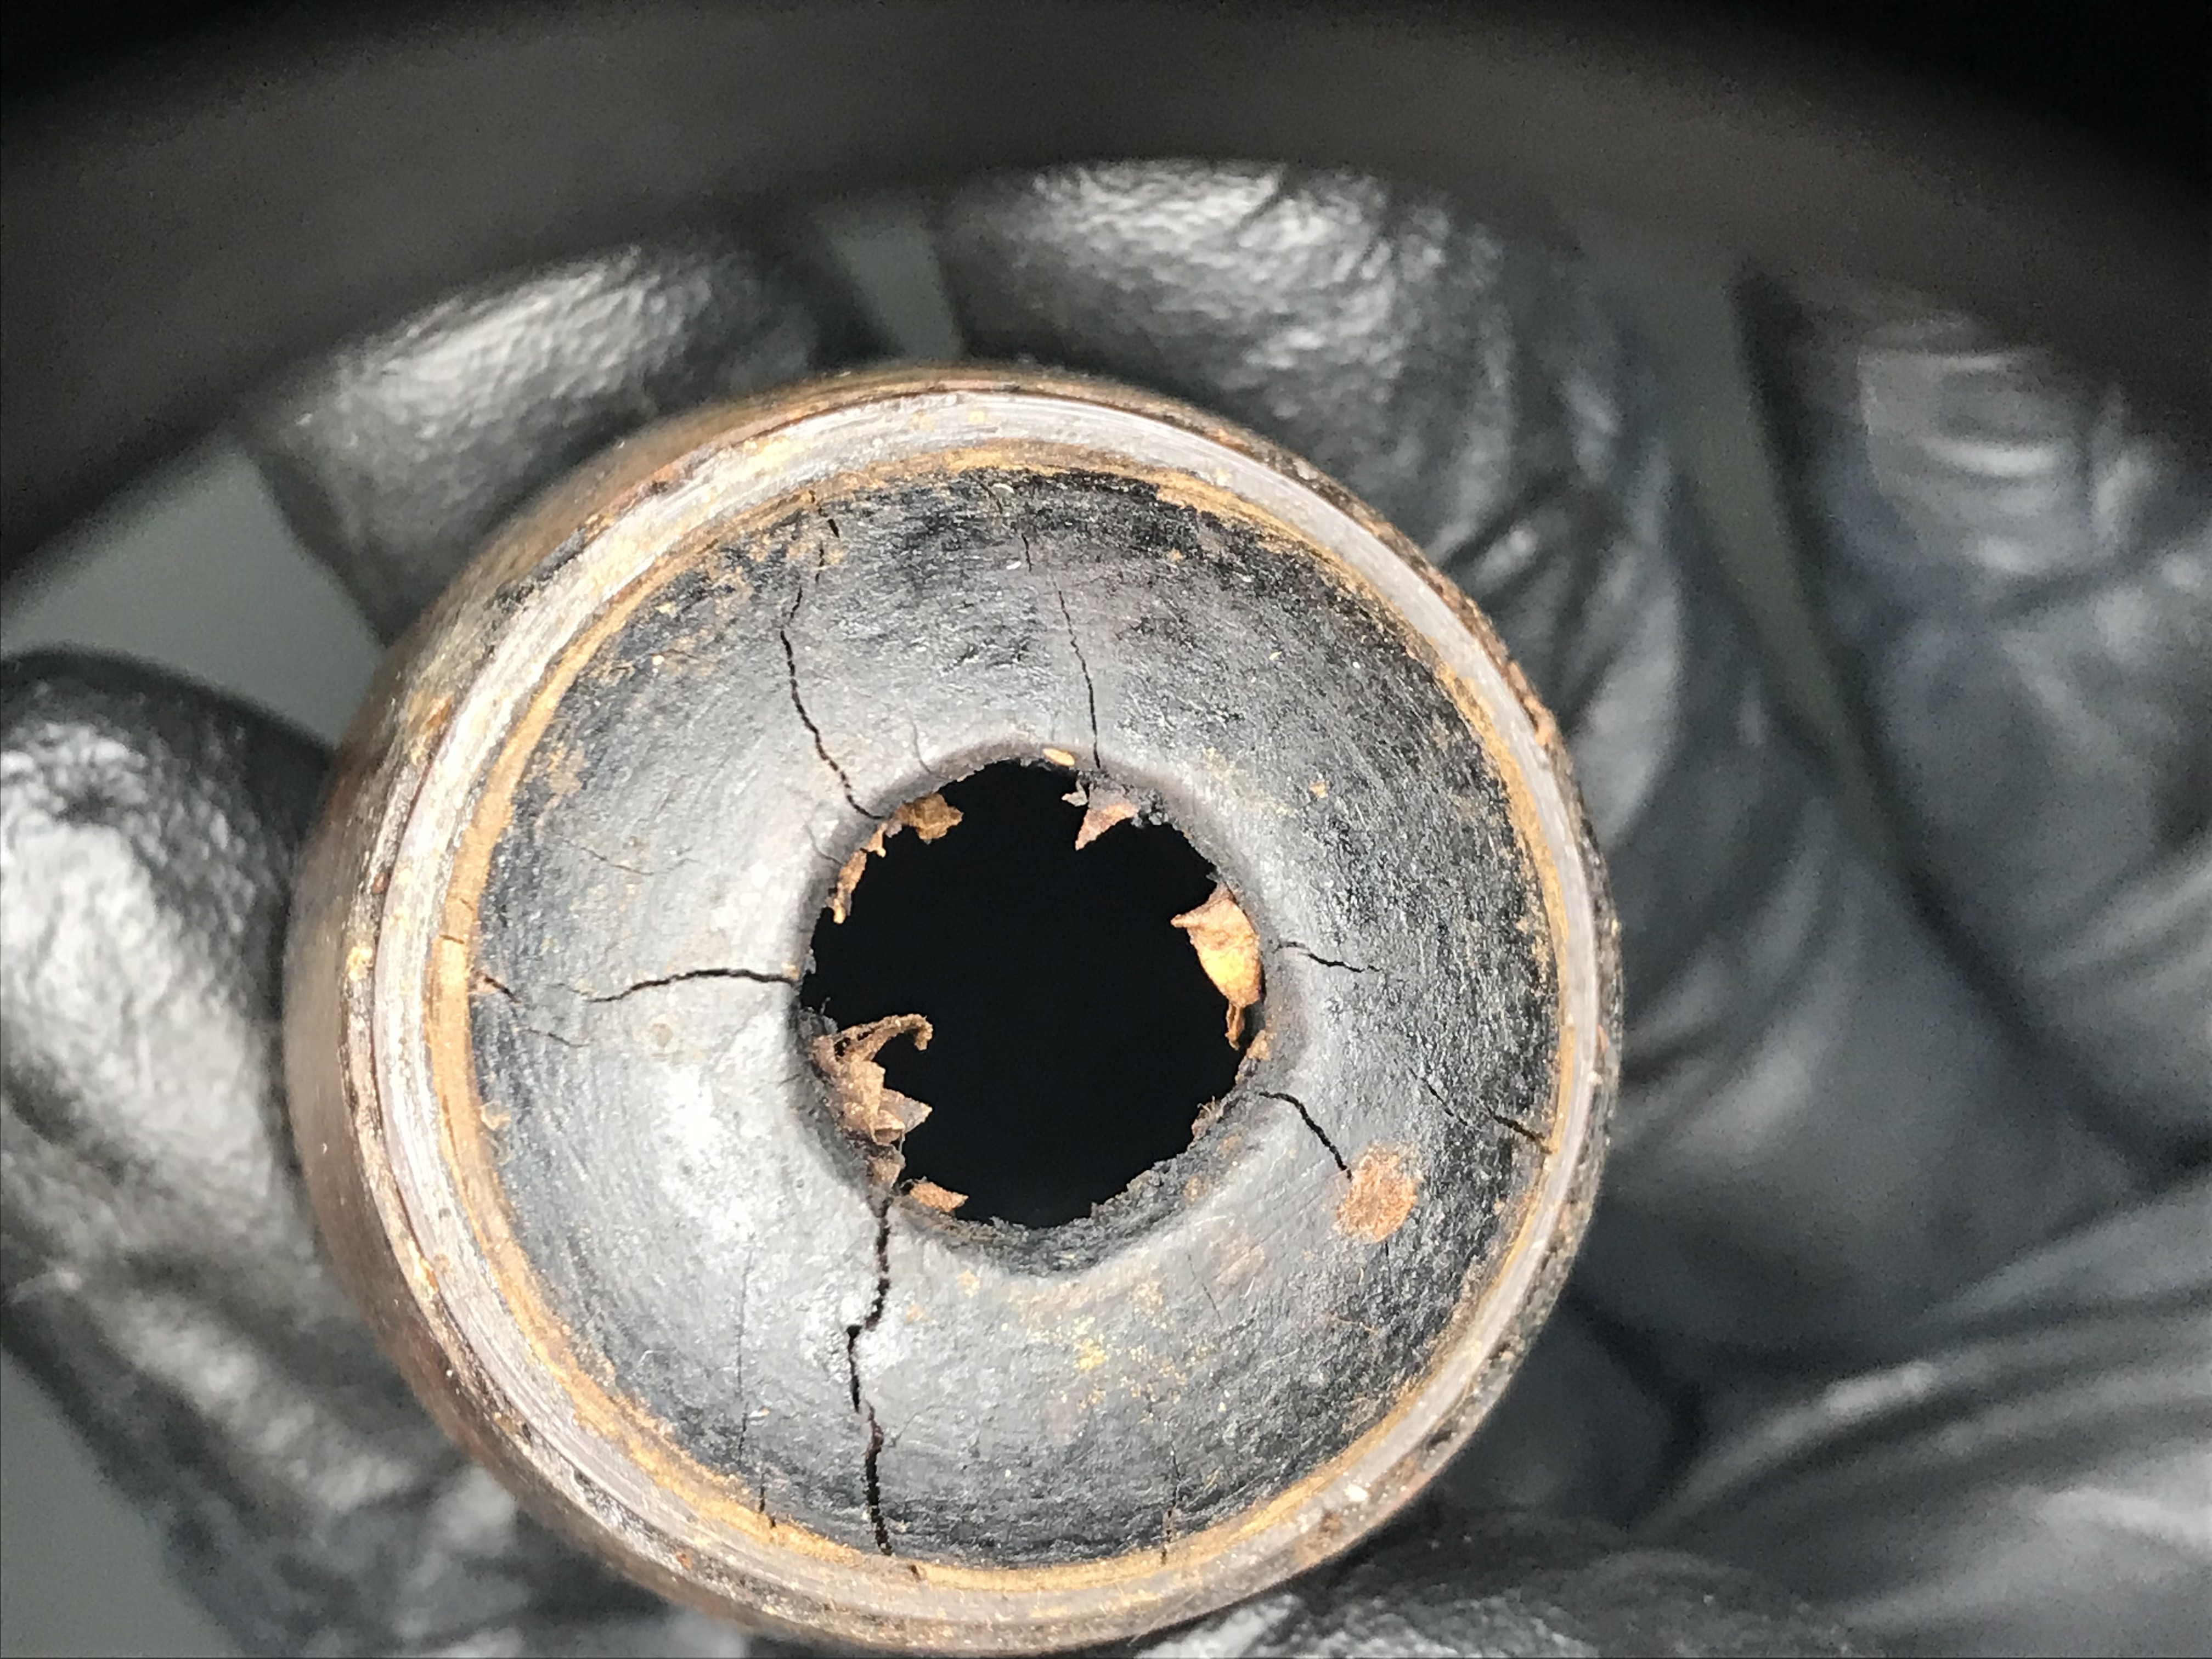
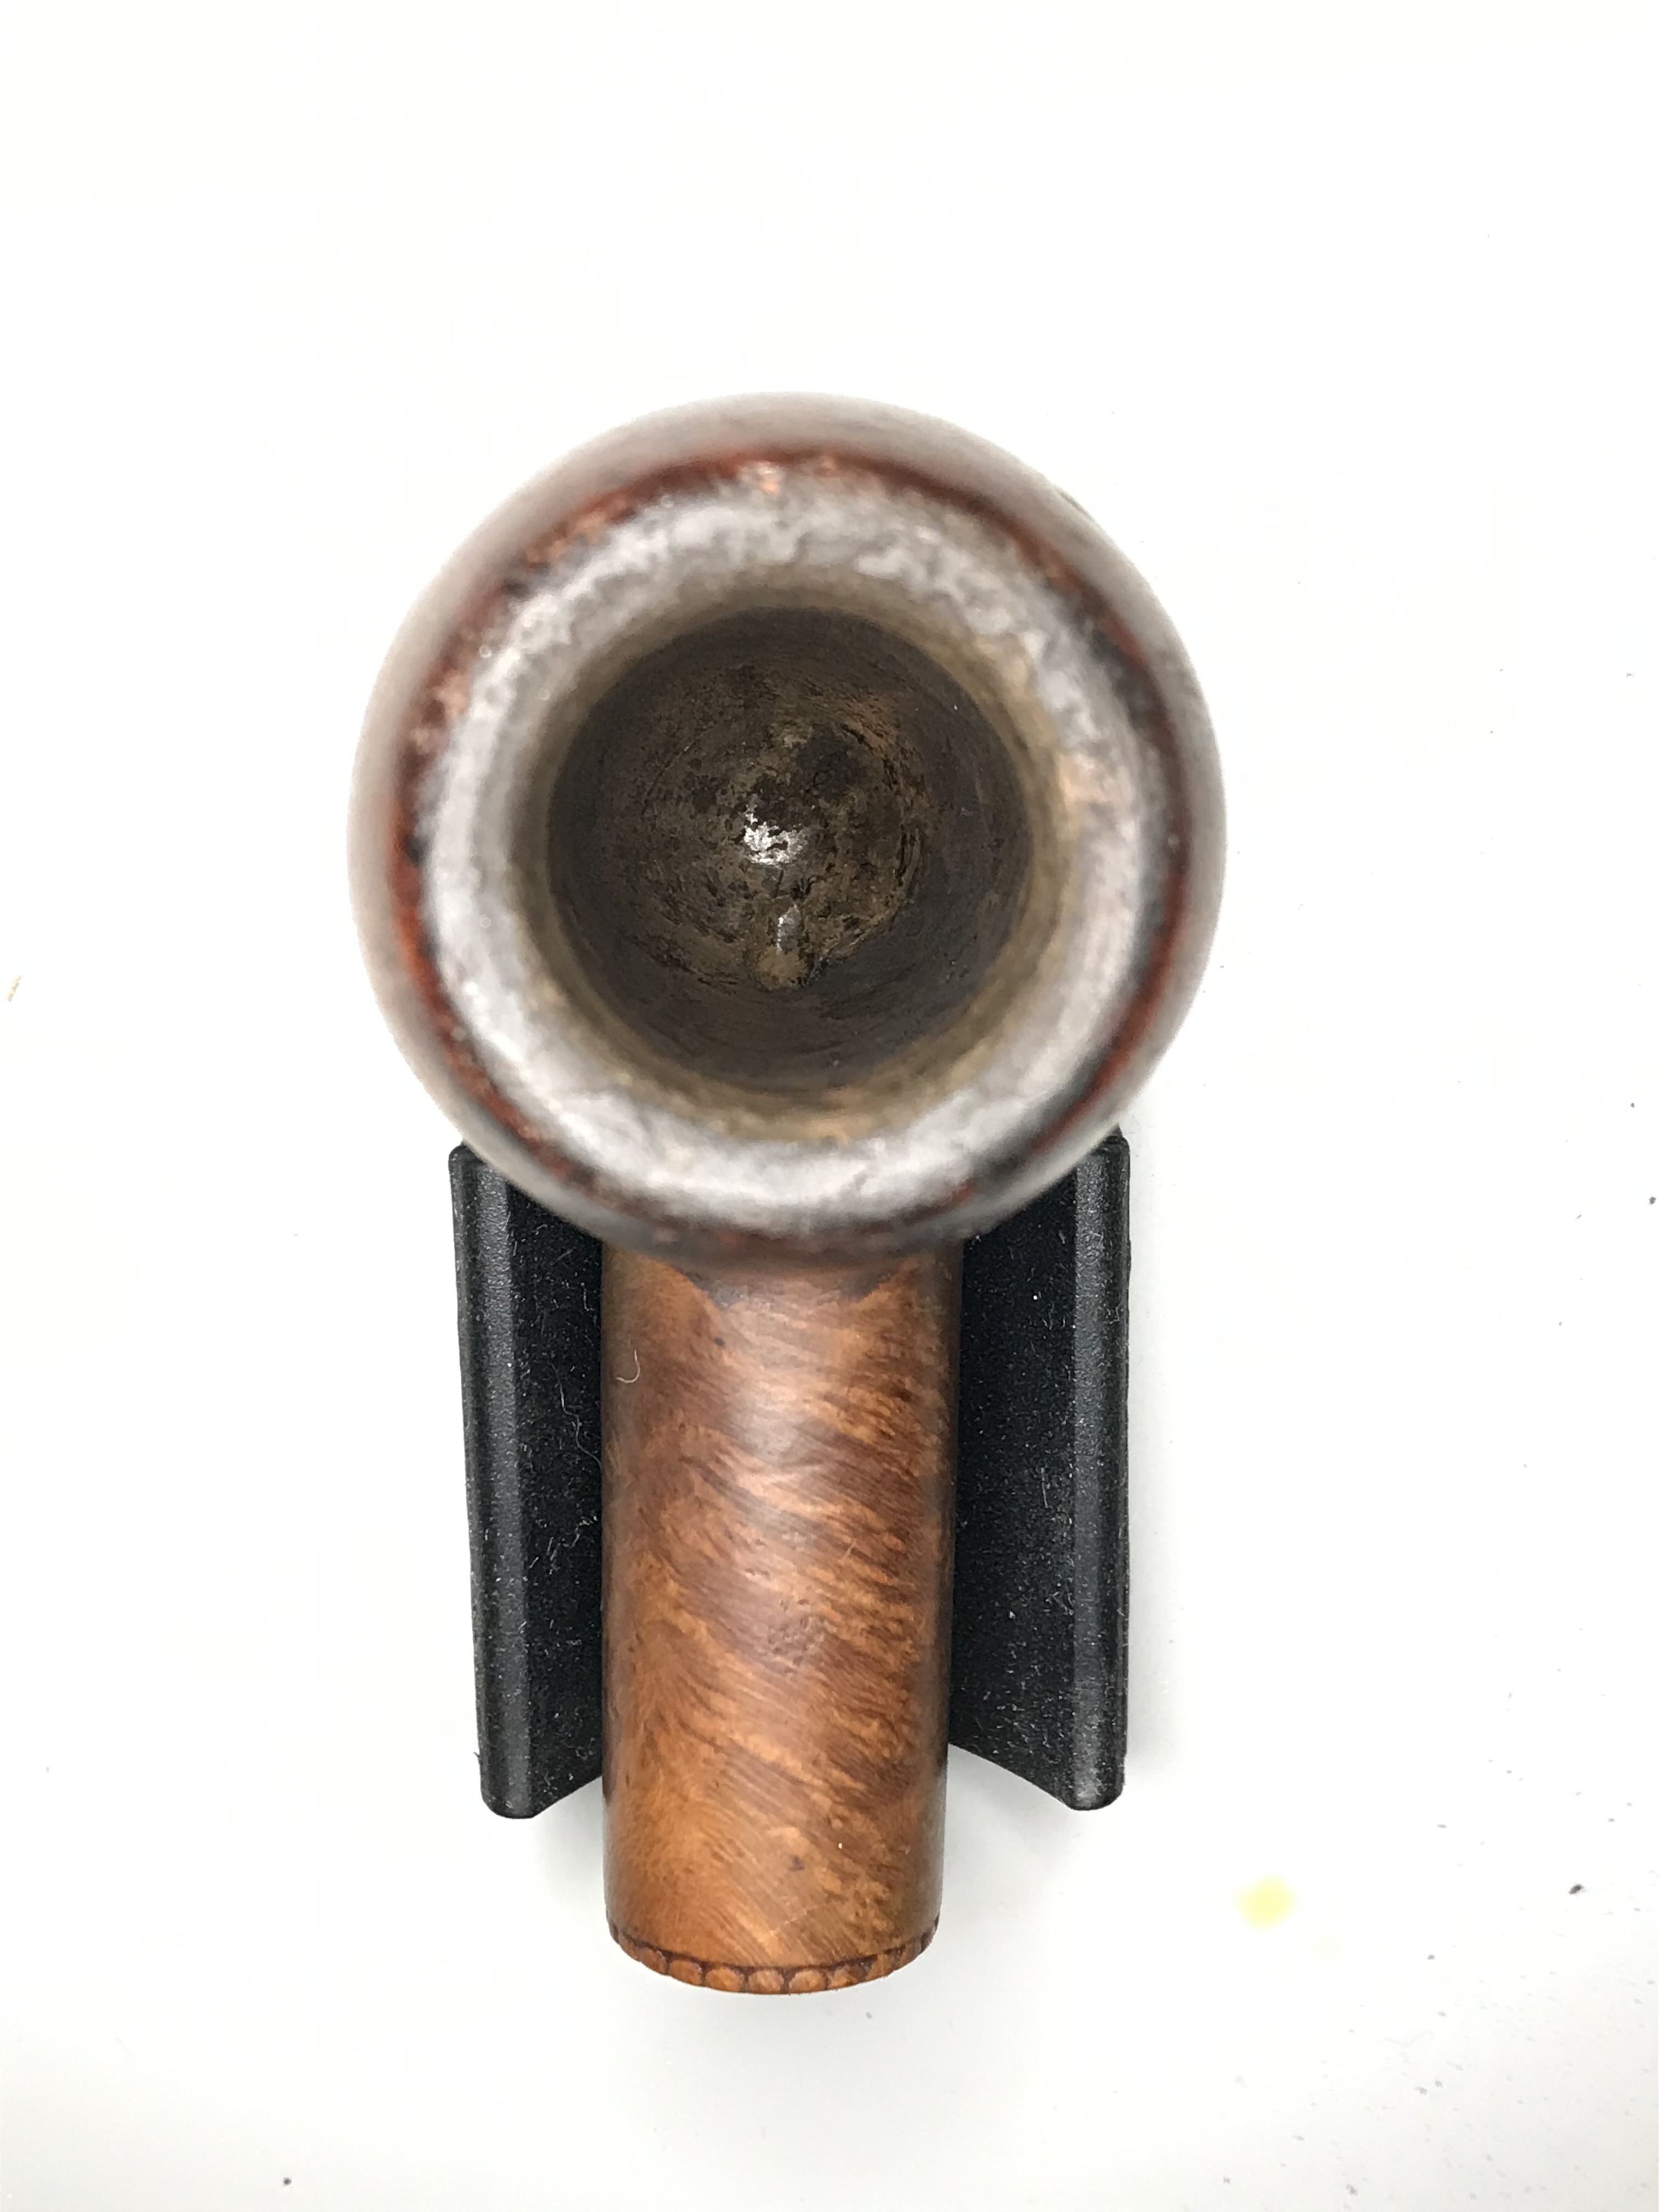
At first glance, when I looked down the mortise to the airway, I thought to myself. “How the heck did this smoker manage to deform the airway in such a way”. I thought the black matter I was looking at WAS the beginning of the airway at the end of the mortise. I was wrong! What you’re seeing in the before picture is a buildup of matter that accumulated on the walls of the mortise chamber itself (tars, nicotine, moisture etc).
To digress for a moment, the Peterson Patented system involves an alternative method of drilling the stummel of the pipe. It involves drilling a void within the pipe between the mortise and the tobacco chamber. This void, or “sump”, is there to collect the moisture created by the smoker and it naturally deposits itself in that sump. Well if you don’t ever clean out that sump, that deposited matter just builds upon itself until you have the buildup seen in this pipe.
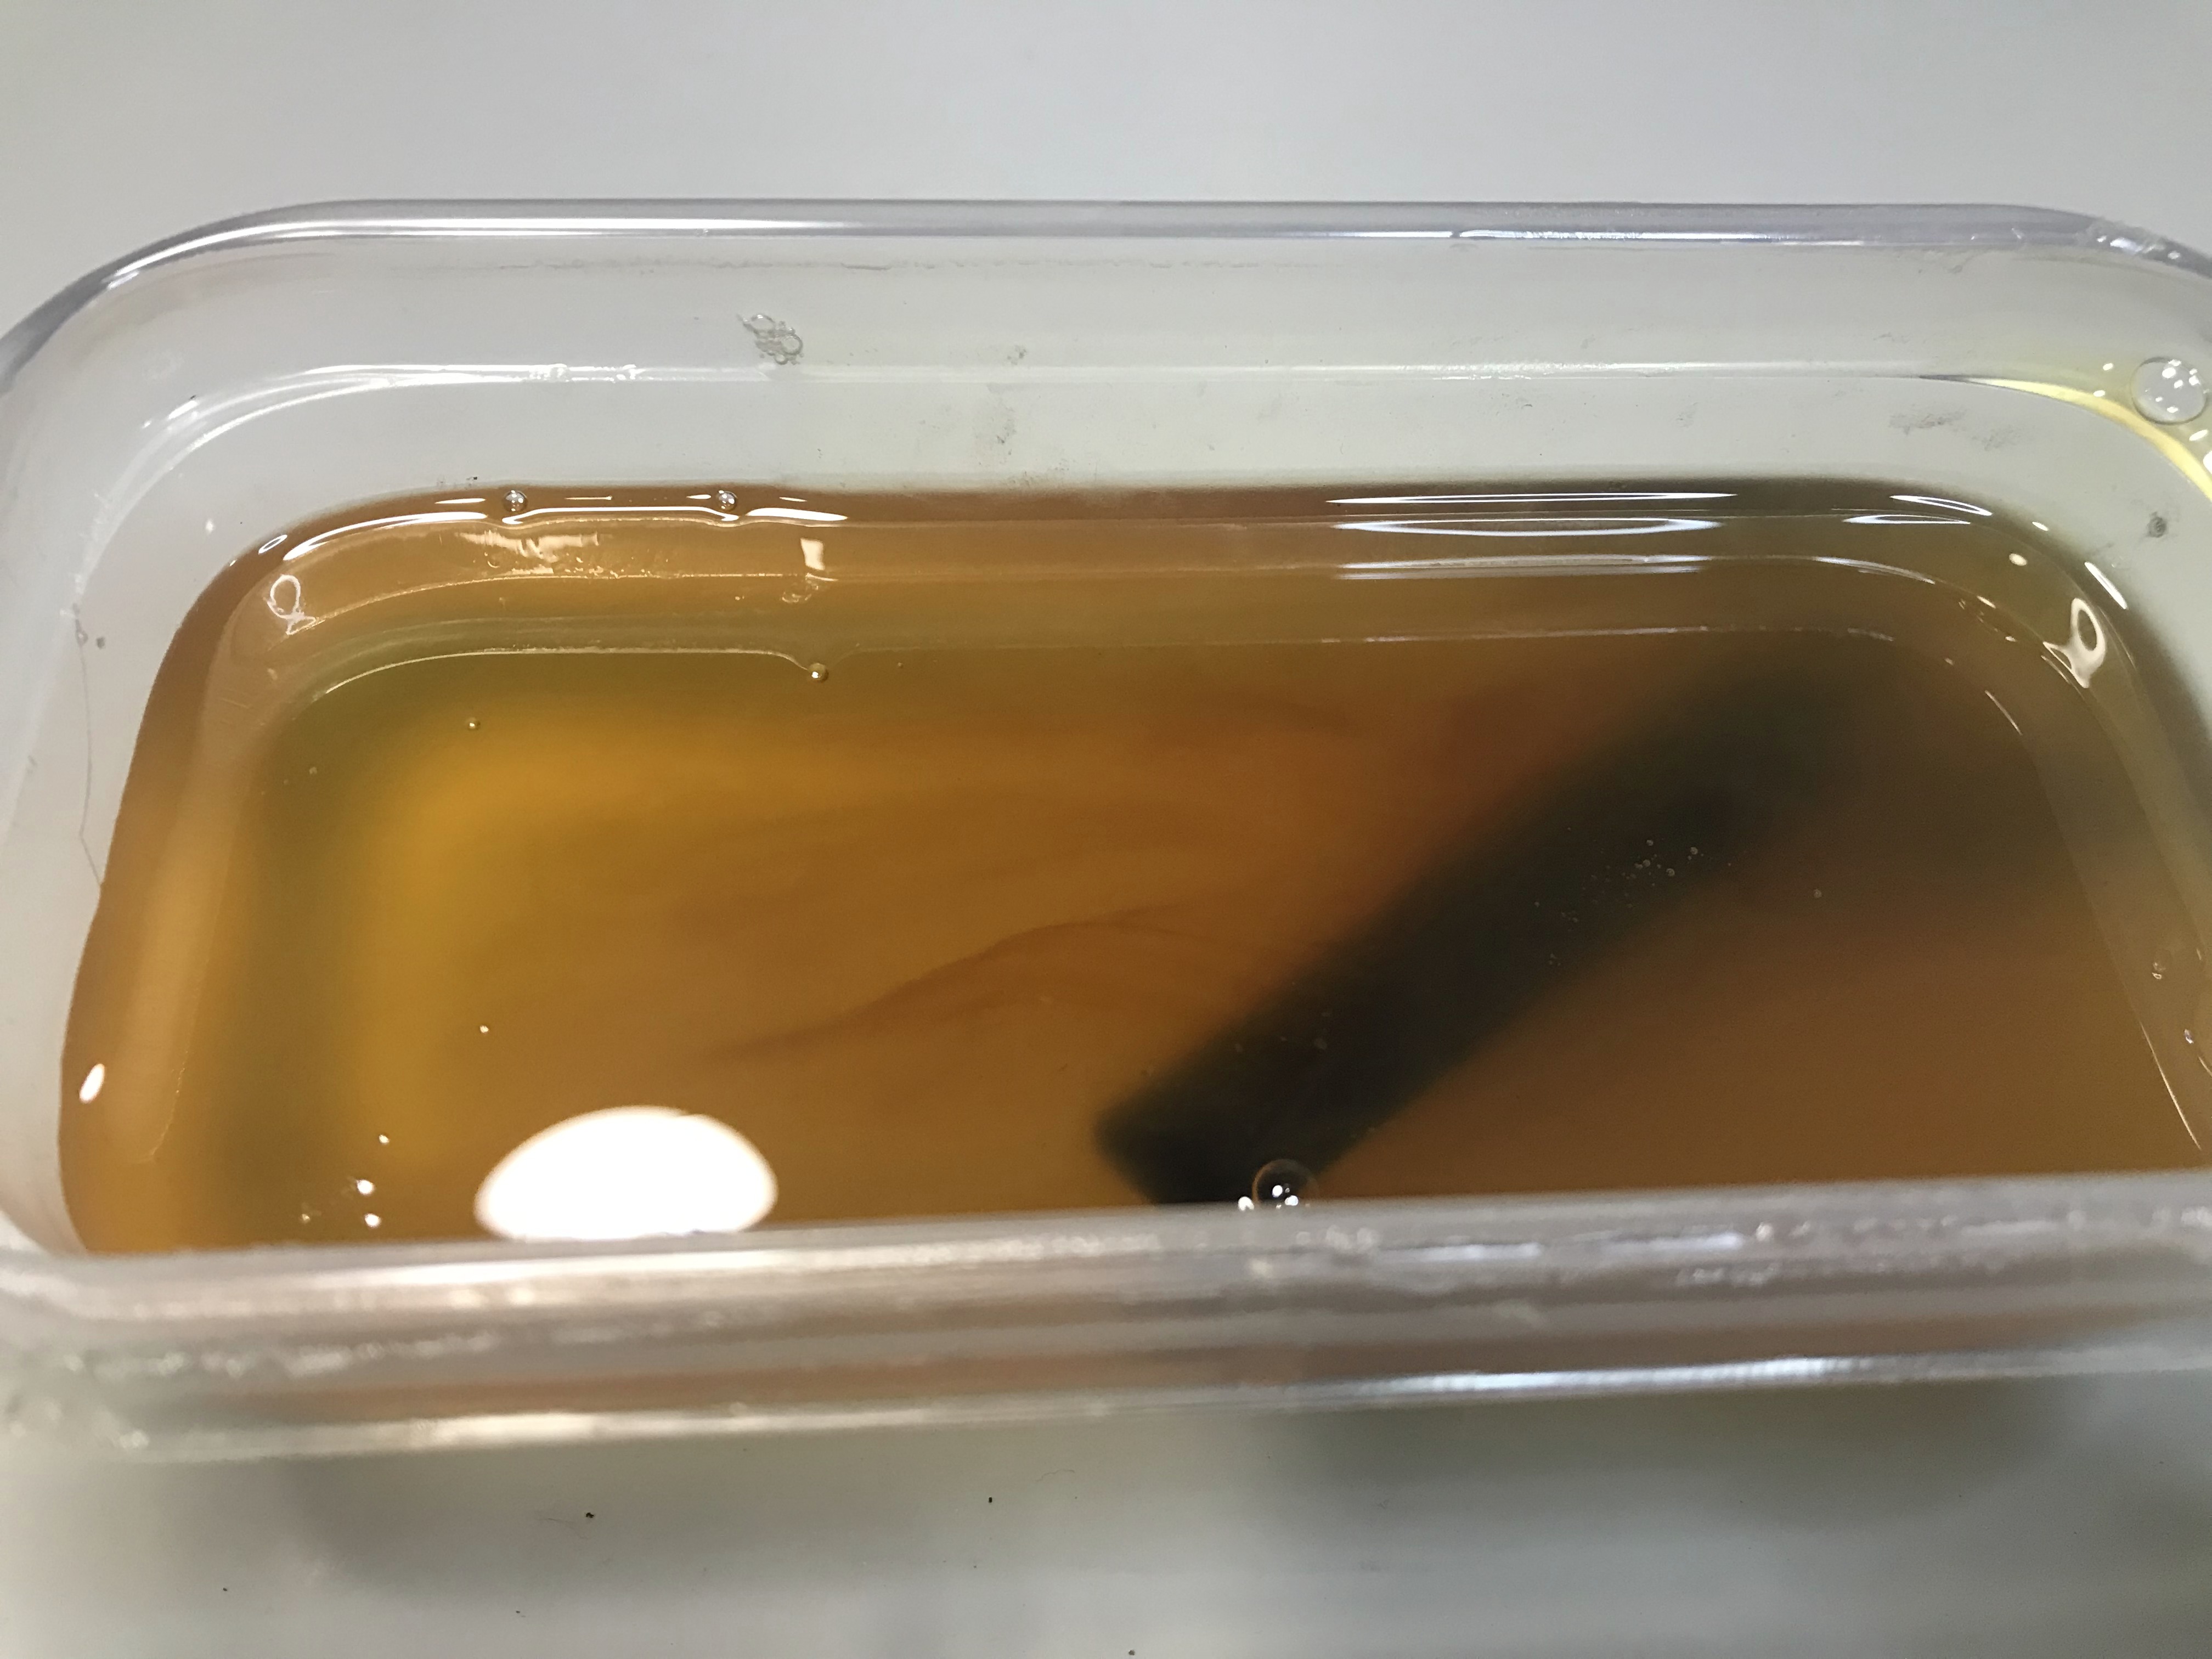
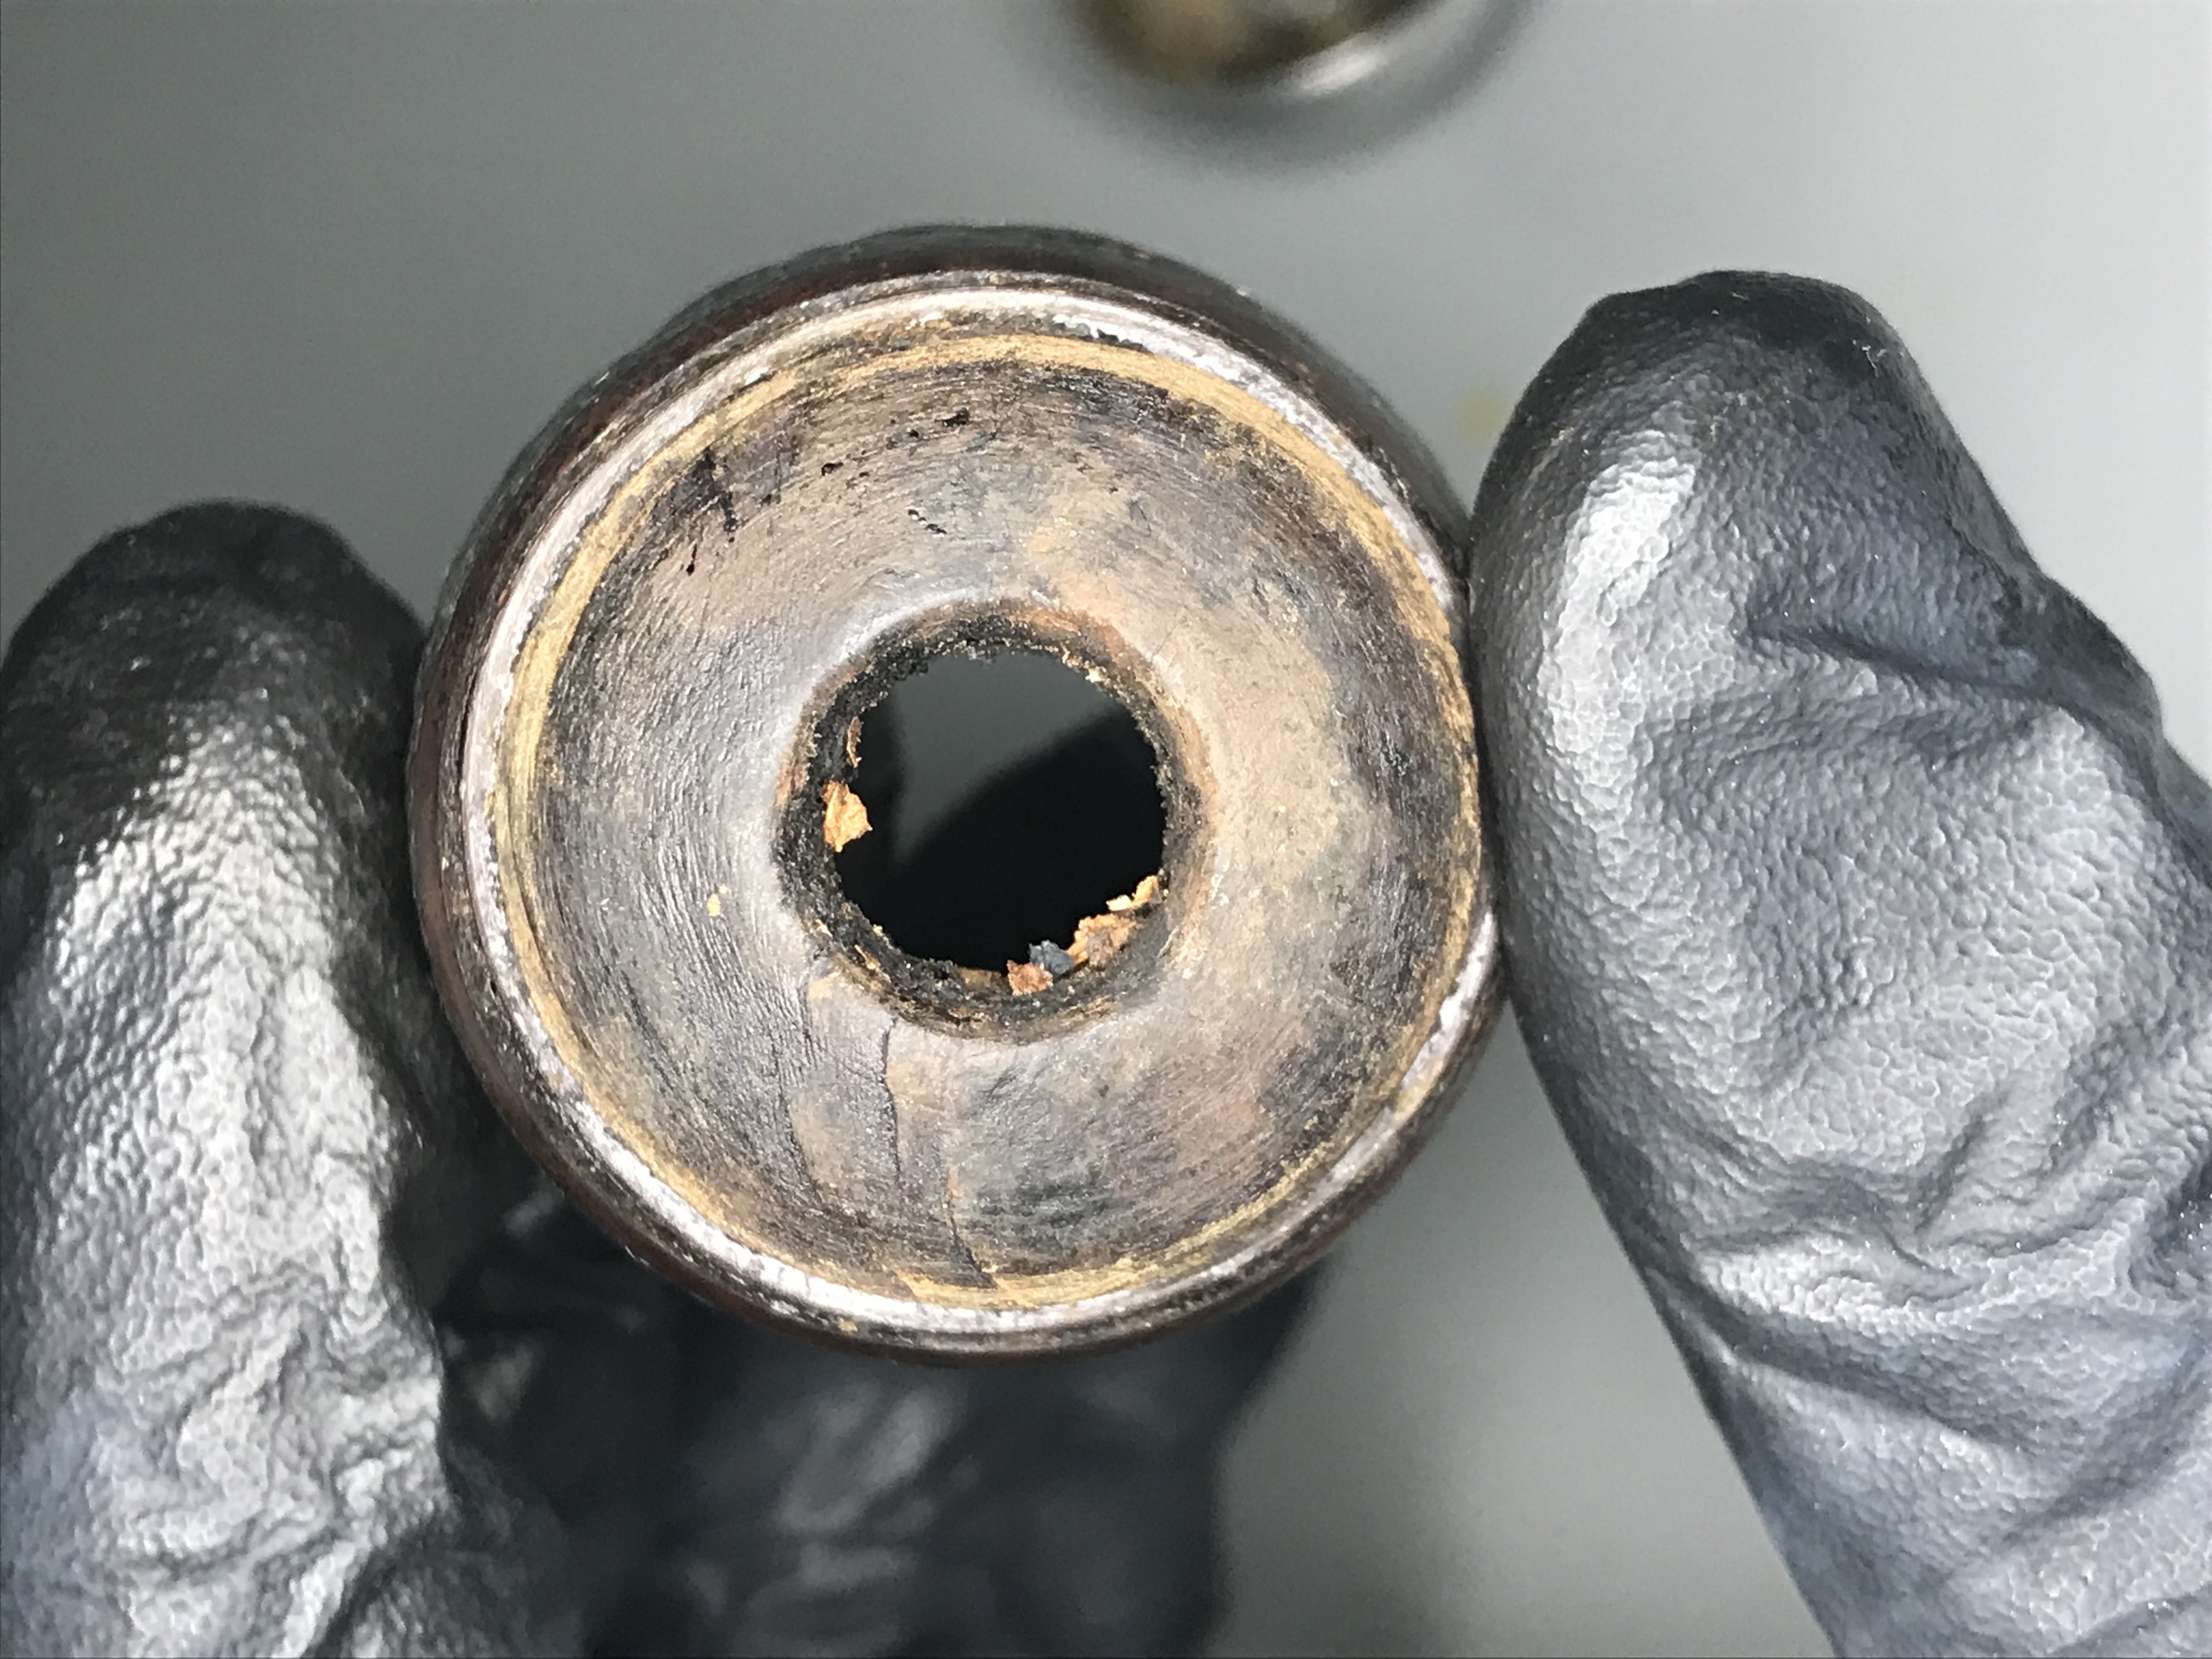
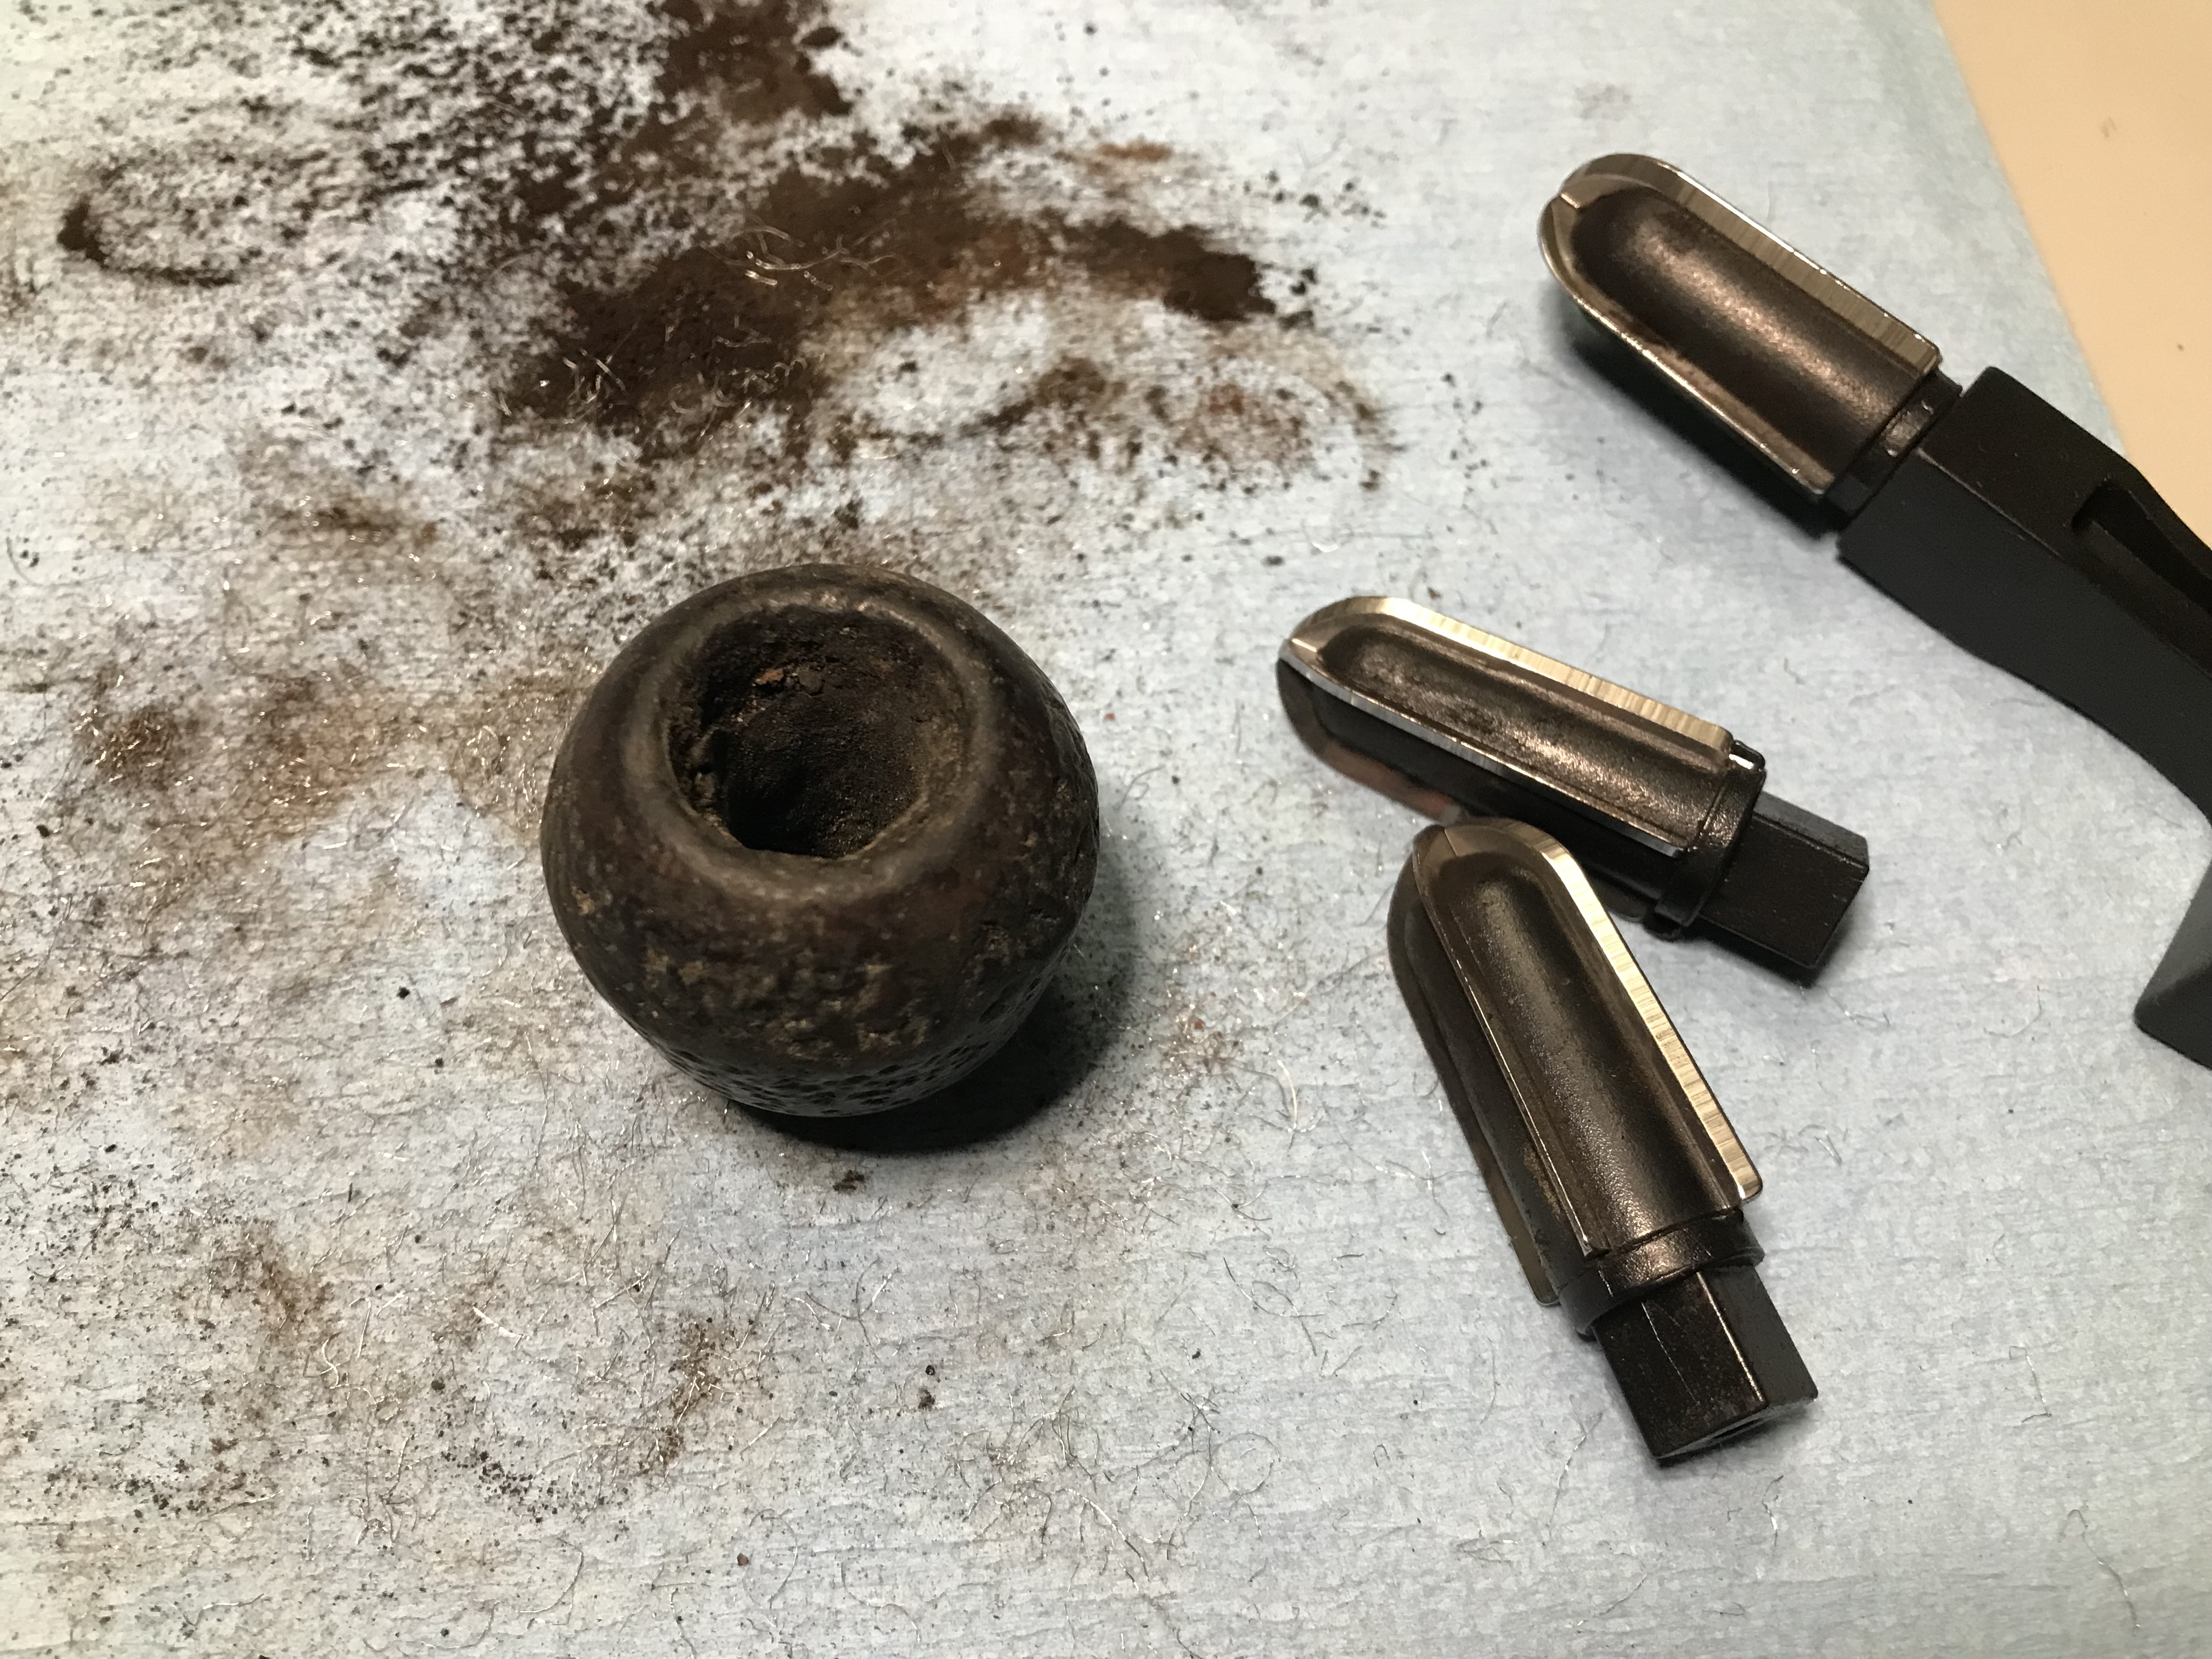
I used a drill bit the same diameter of the mortise and turned the drill bit by hand to remove the material in the sump. In the image above you can see all the gunk that came out of the sump at the end of the drill bit in the bowl. I reamed the mortise all the way to the airway, with one last turn I refaced the beginning of the airway, thus concluding the bulk of the dirty work for this pipe.
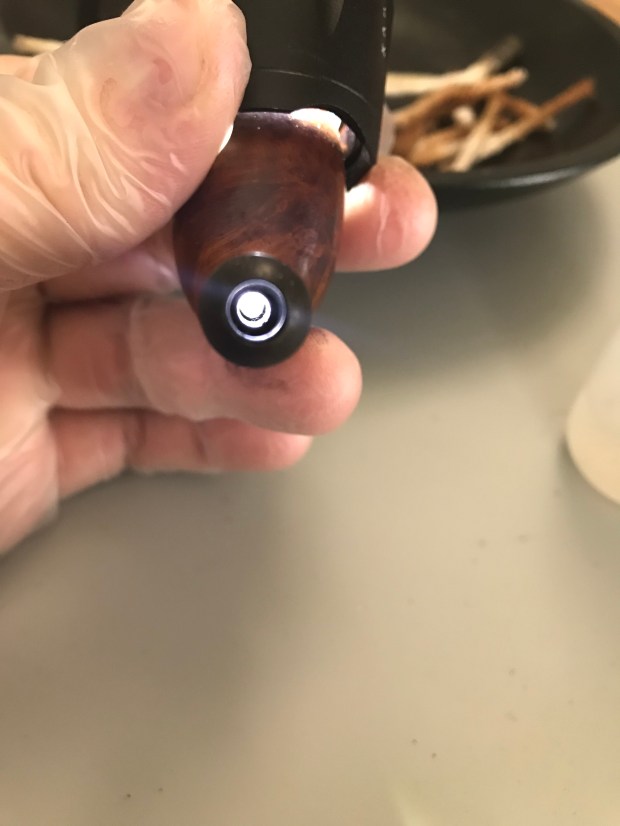
Step 3: Clean the internals of the stem and stummel
Before I started the alcohol cleansing process, I used some steel wool to remove the calcification off the stem. Afterwards I used a combination of pipe cleaners and nylon brushes to scrub and clean the internals of both the stem and stummel. The stem is still destined for a deoxidizing soak but I wanted to ensure it was clean before putting it in the deoxidizer. I figure this way the deoxidizer doesn’t have to work too hard and it will remove the oxidation on the stem much more efficiently.
Once I’m satisfied that the internals are clean, I will work on removing any ghosting or remnants of the previous smokers tobacco choices. Some tobaccos like Aromatics and other stronger tobaccos will “ghost” the bowl resulting in masking the flavour of other tabacco smoked in the bowl. This process helps to eliminate that.
Lastly after the cotton batting and alcohol have done their job I perform an alcohol retort on the stummel. I find this removes any stubborn tars and nicotine that may remain as well as cleaning all the previous steps away.
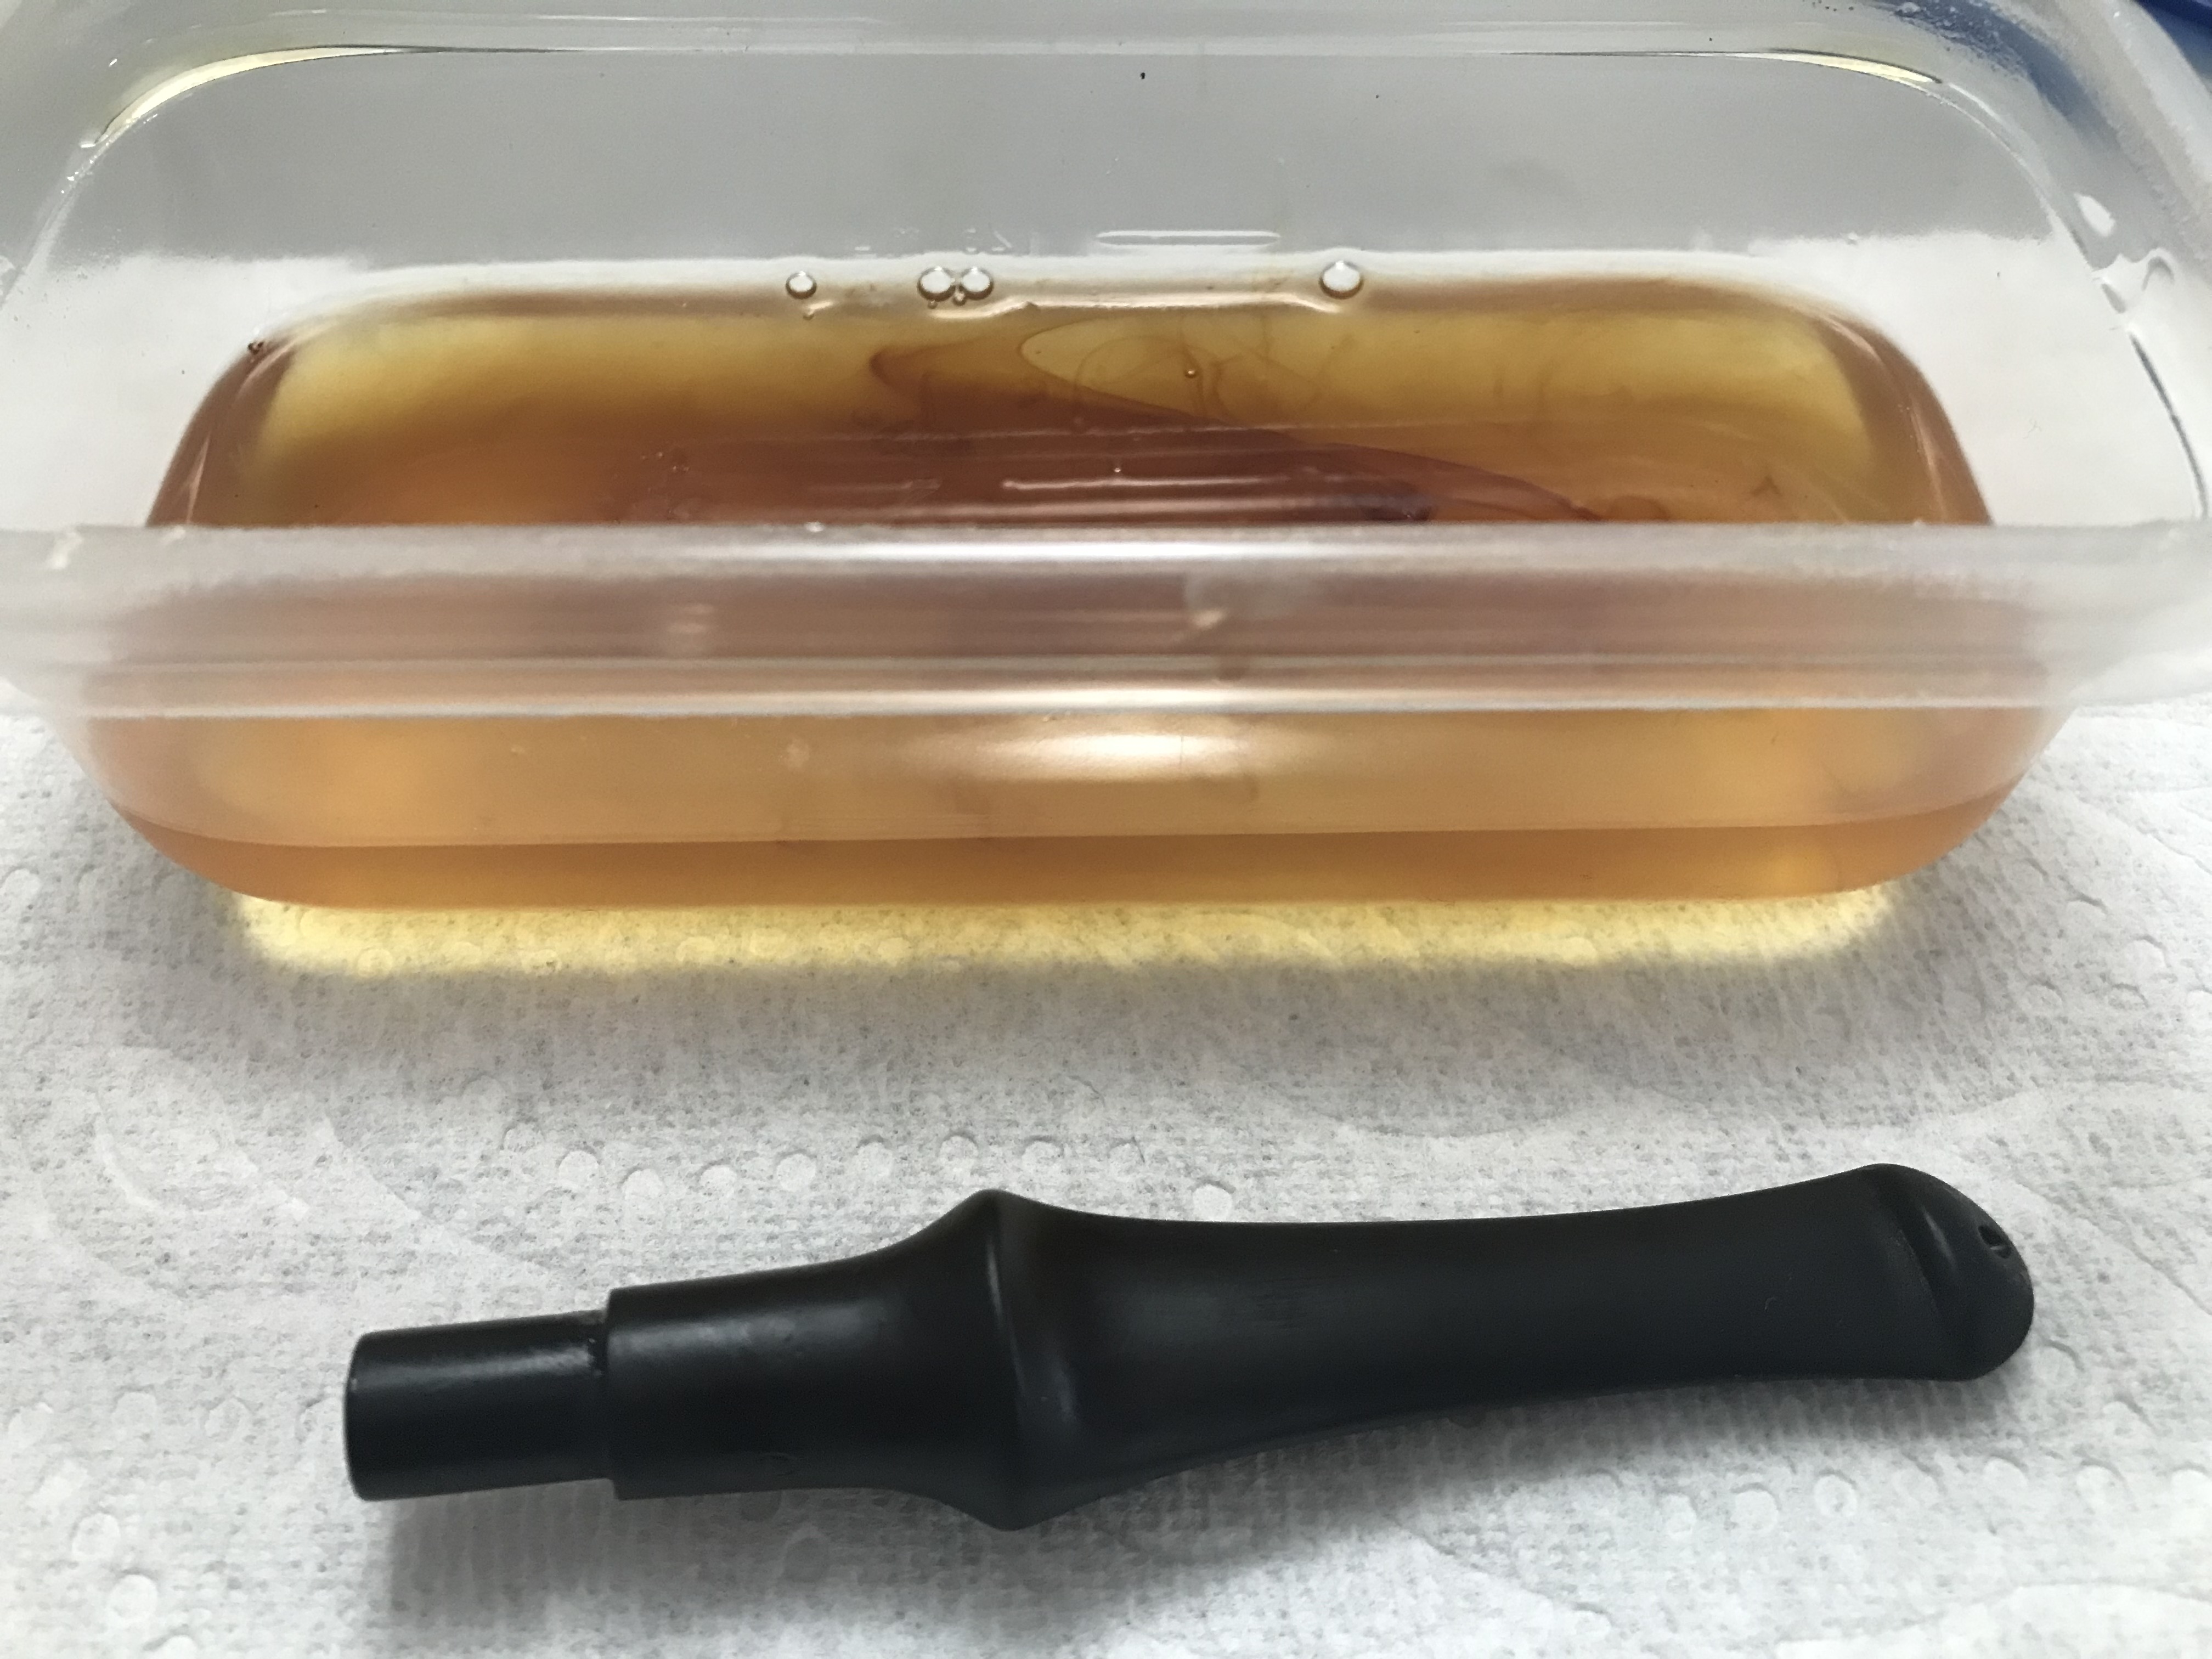
Step 4: Stem deoxidation
I used the Before & After Hard Rubber Deoxidizer from lbepen.com to remove the oxidation from the stem. I was pleased that I made the effort to remove the calcification before this step as the stem came out exactly as I wanted.
Step 5: Stem Repairs
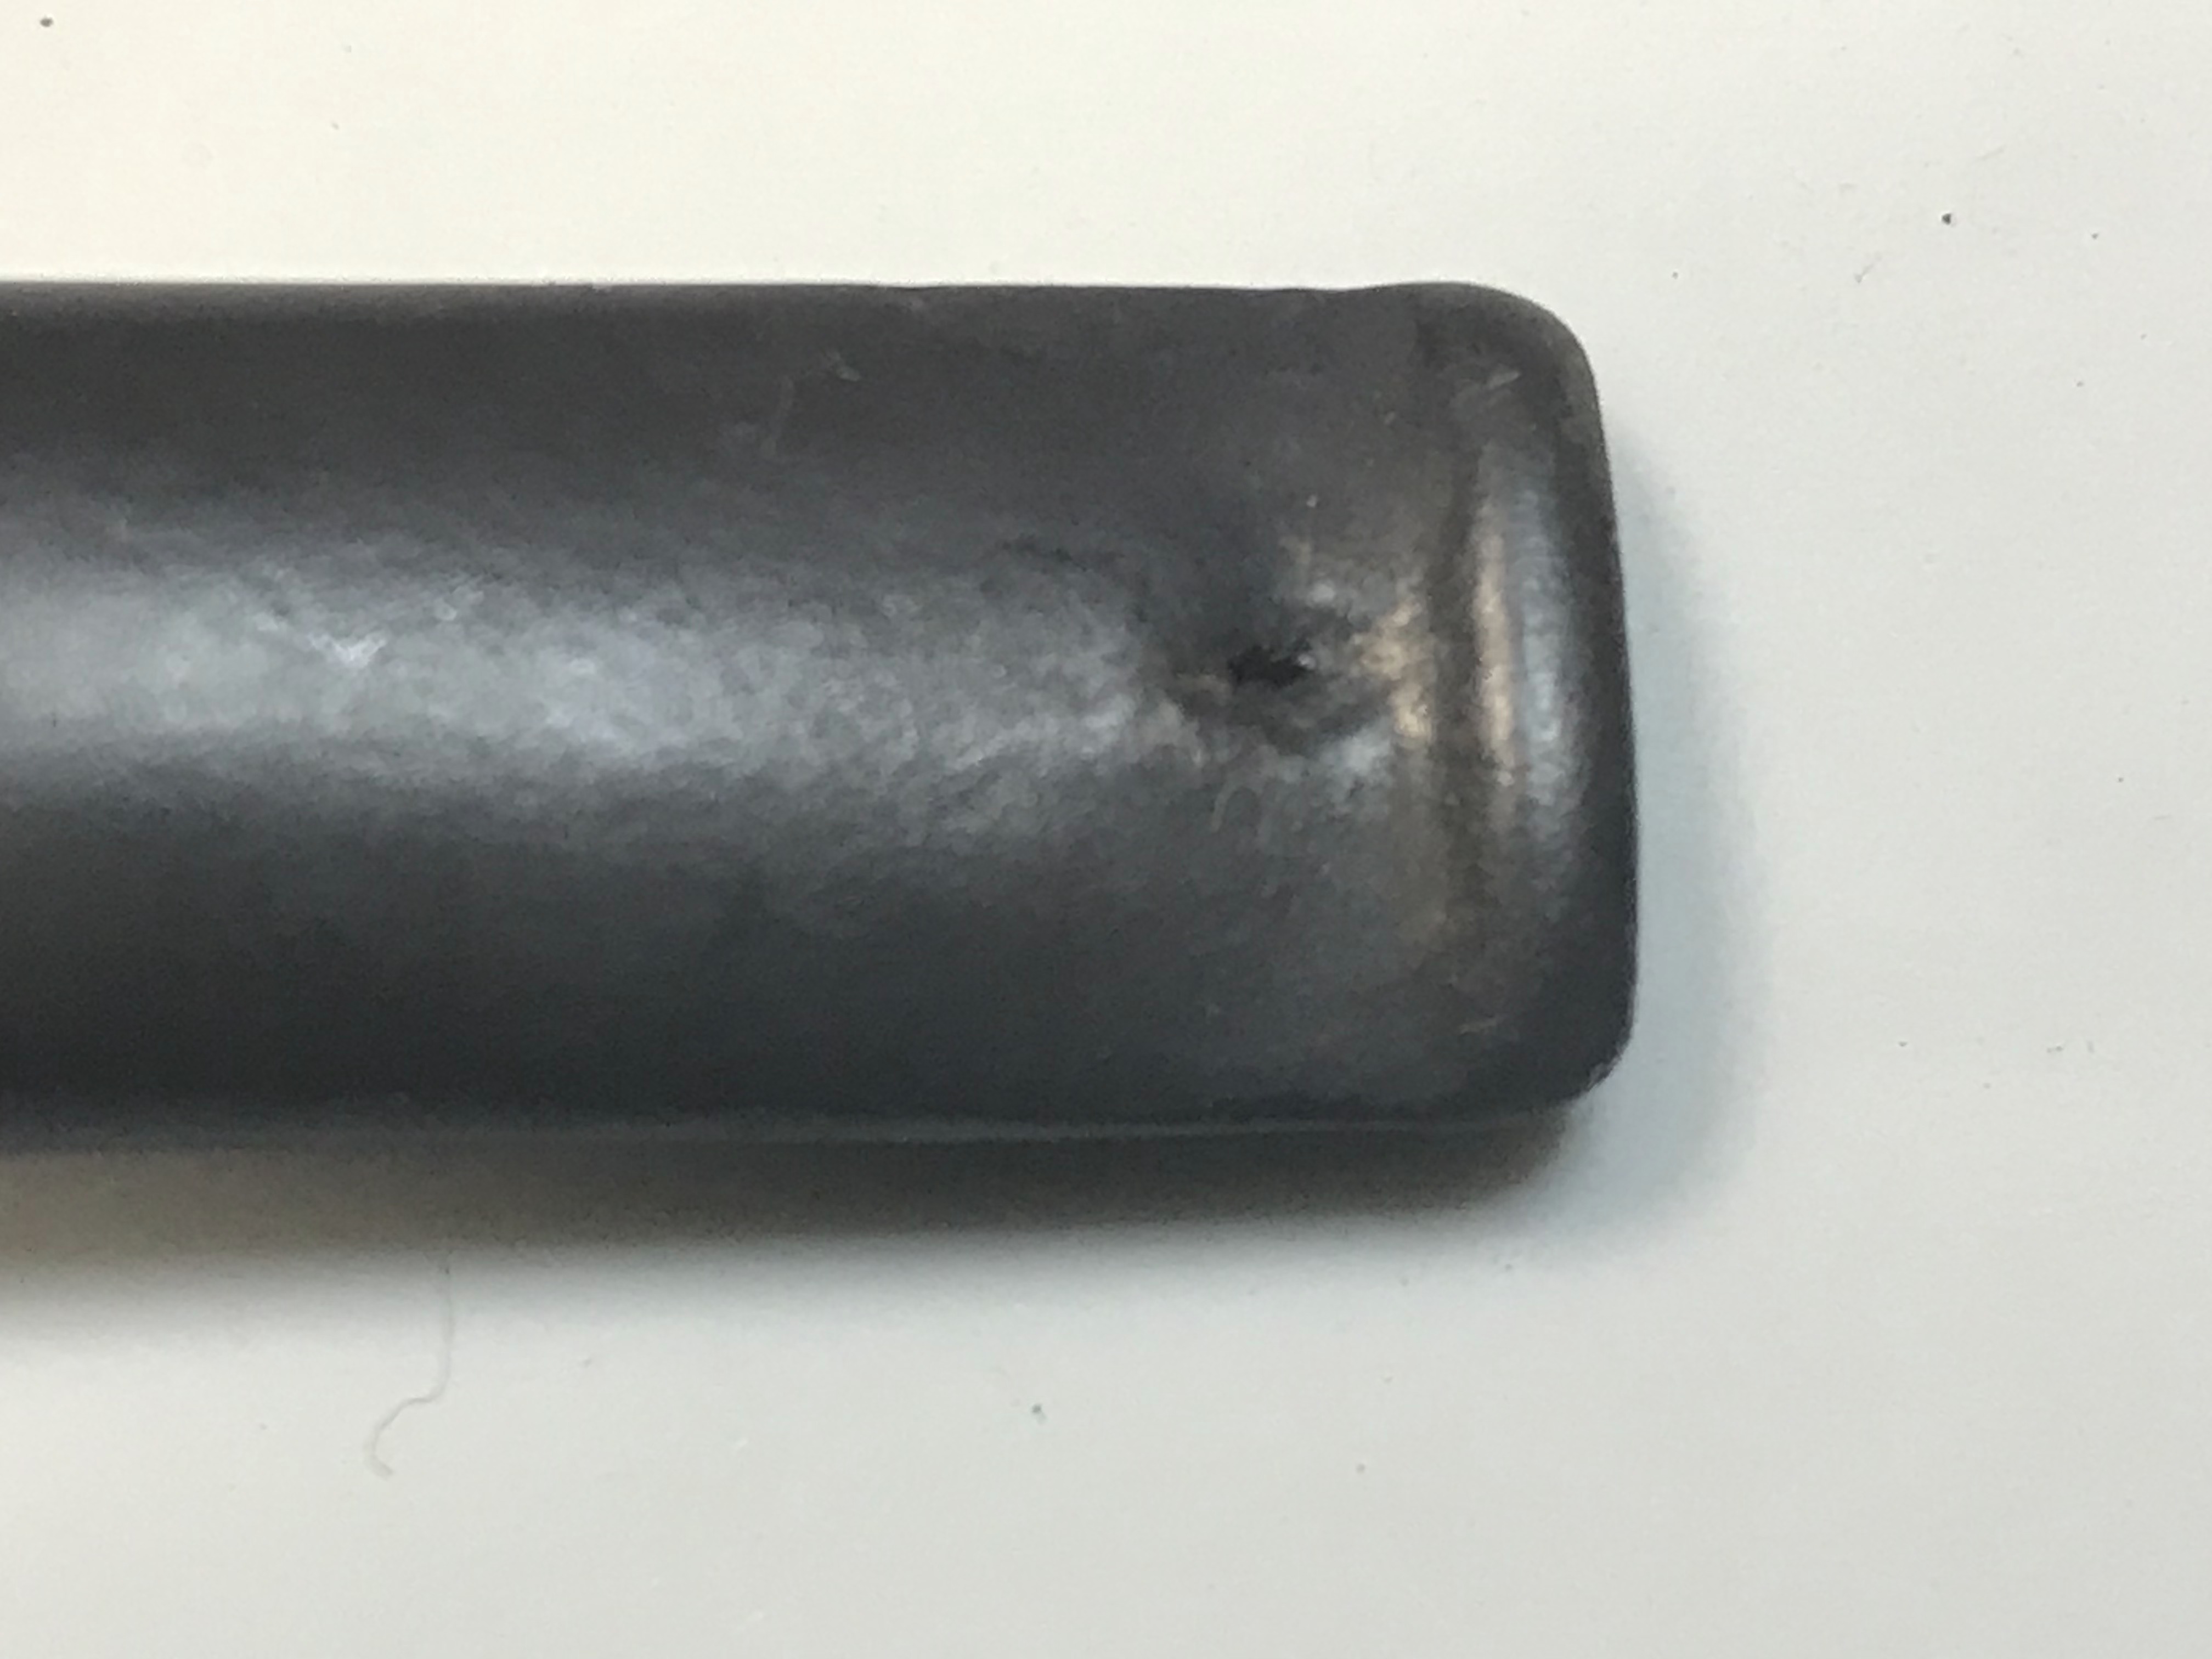
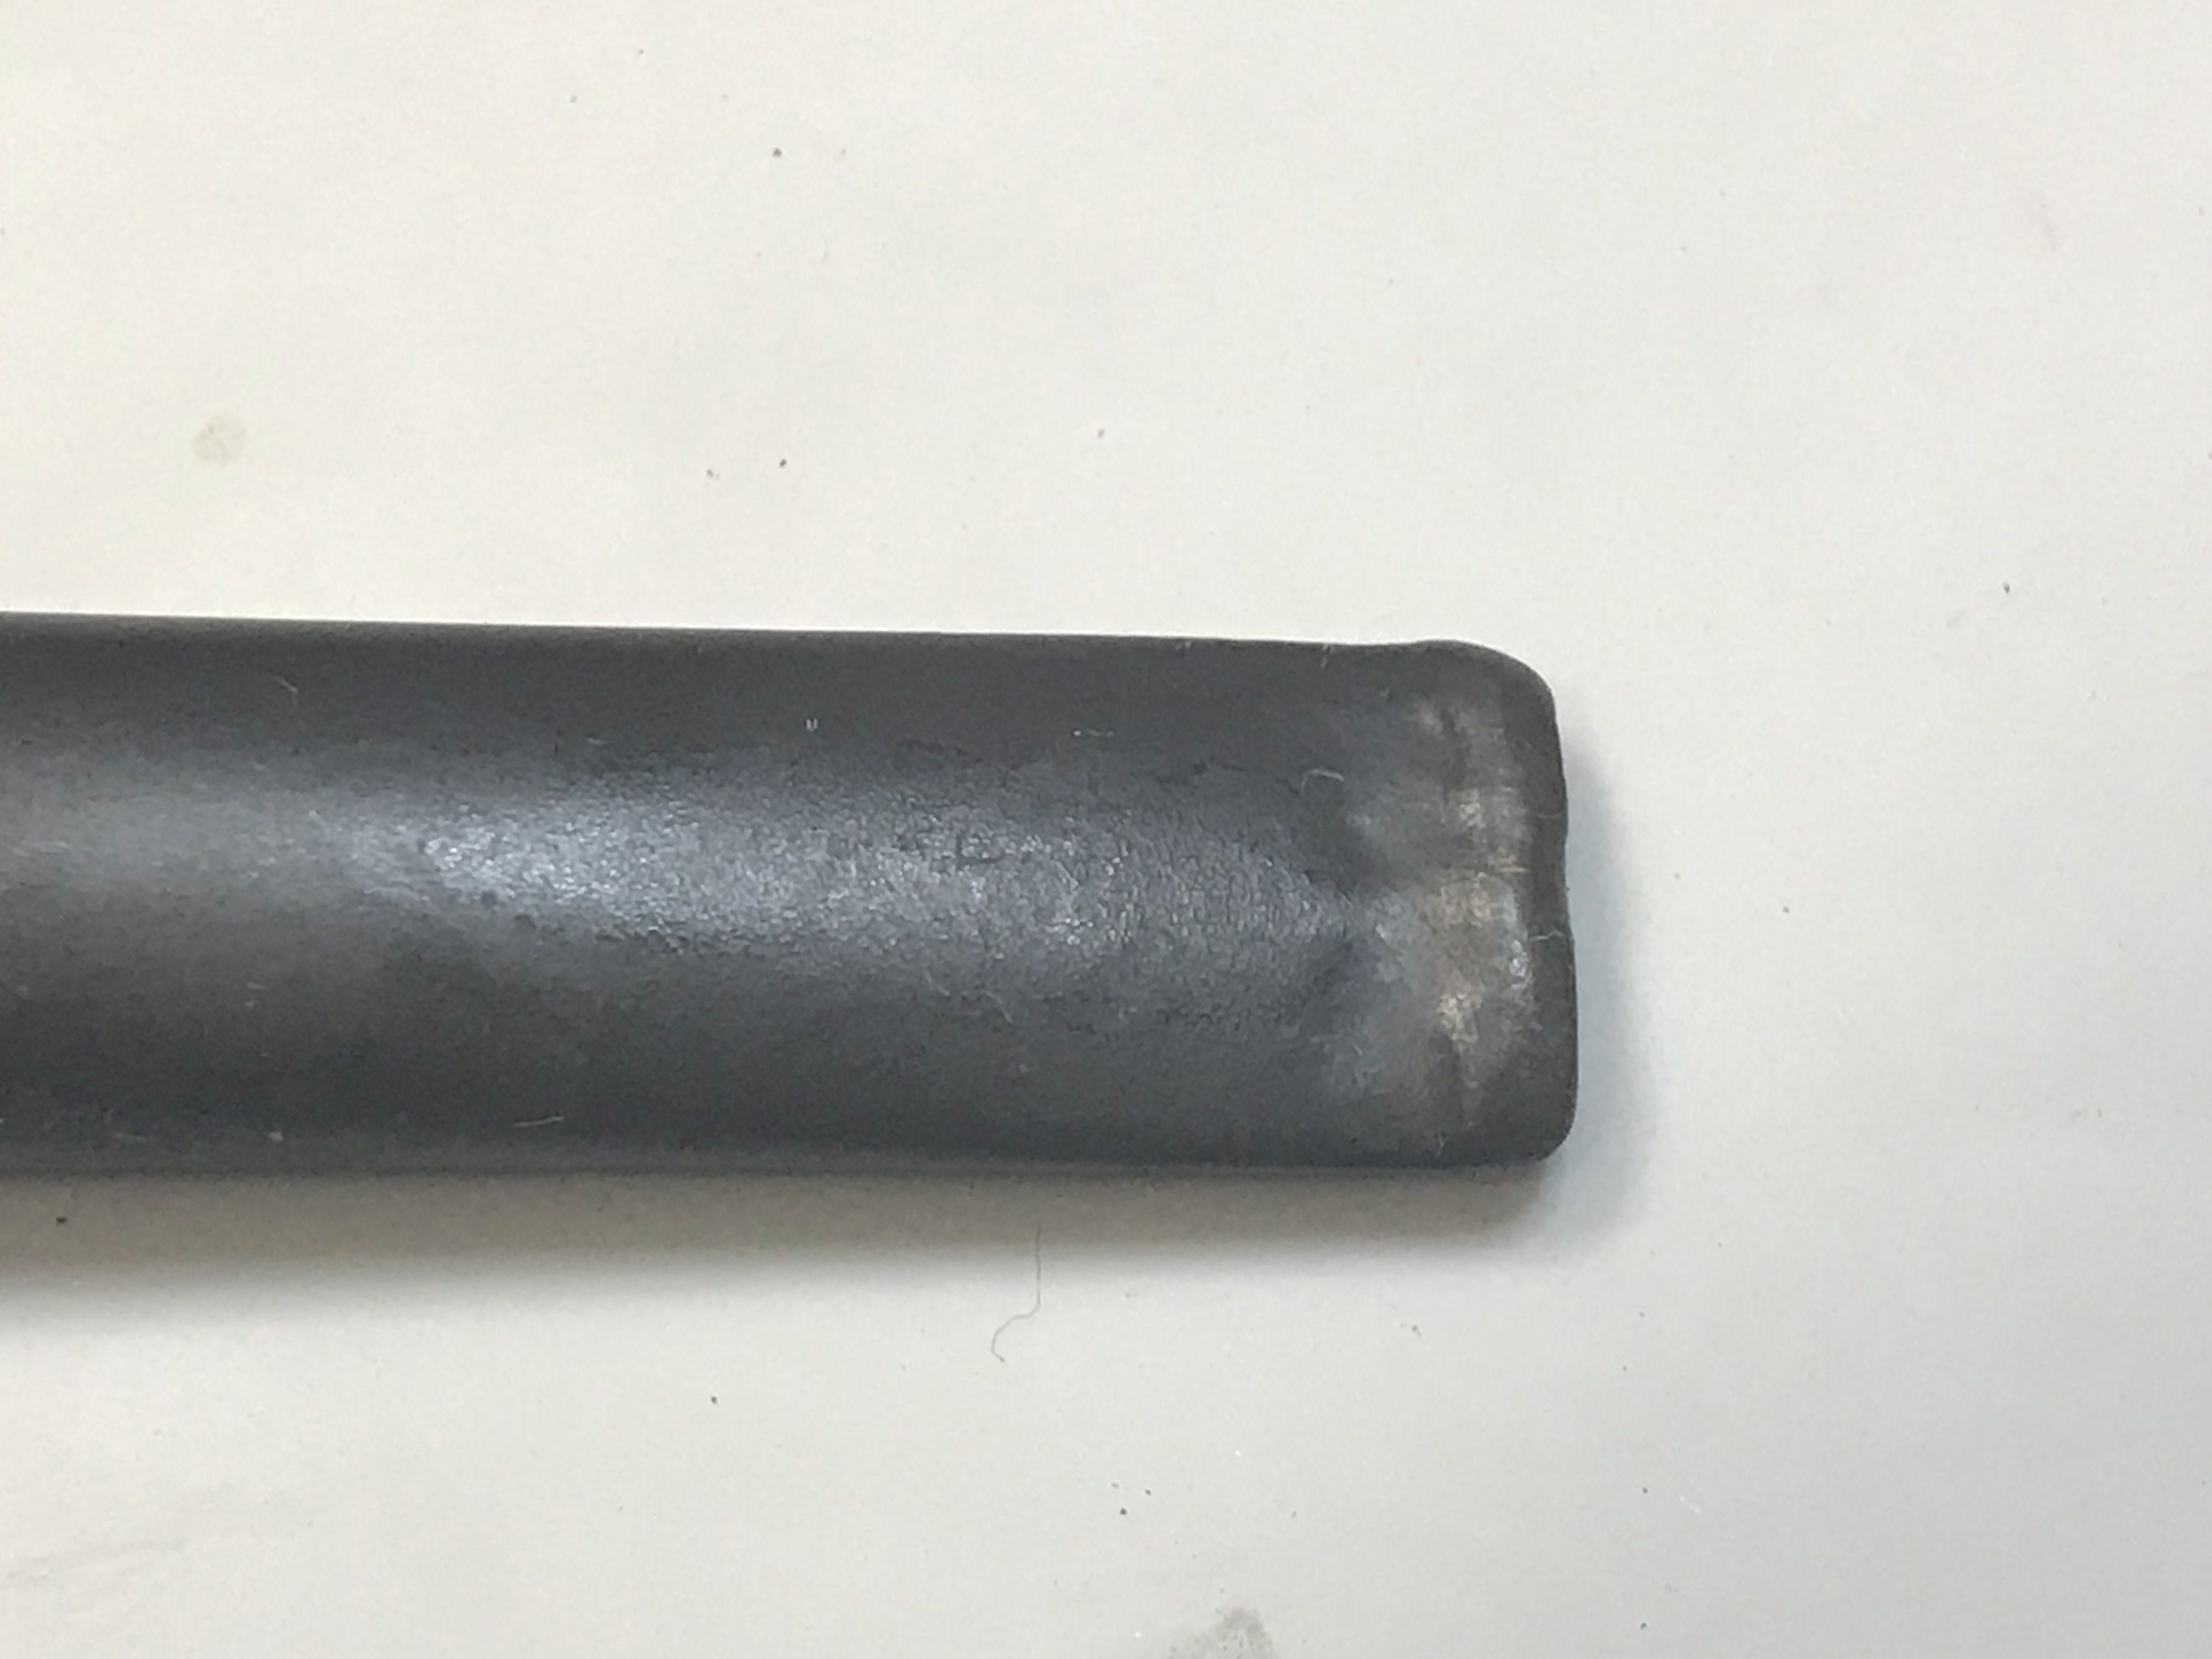
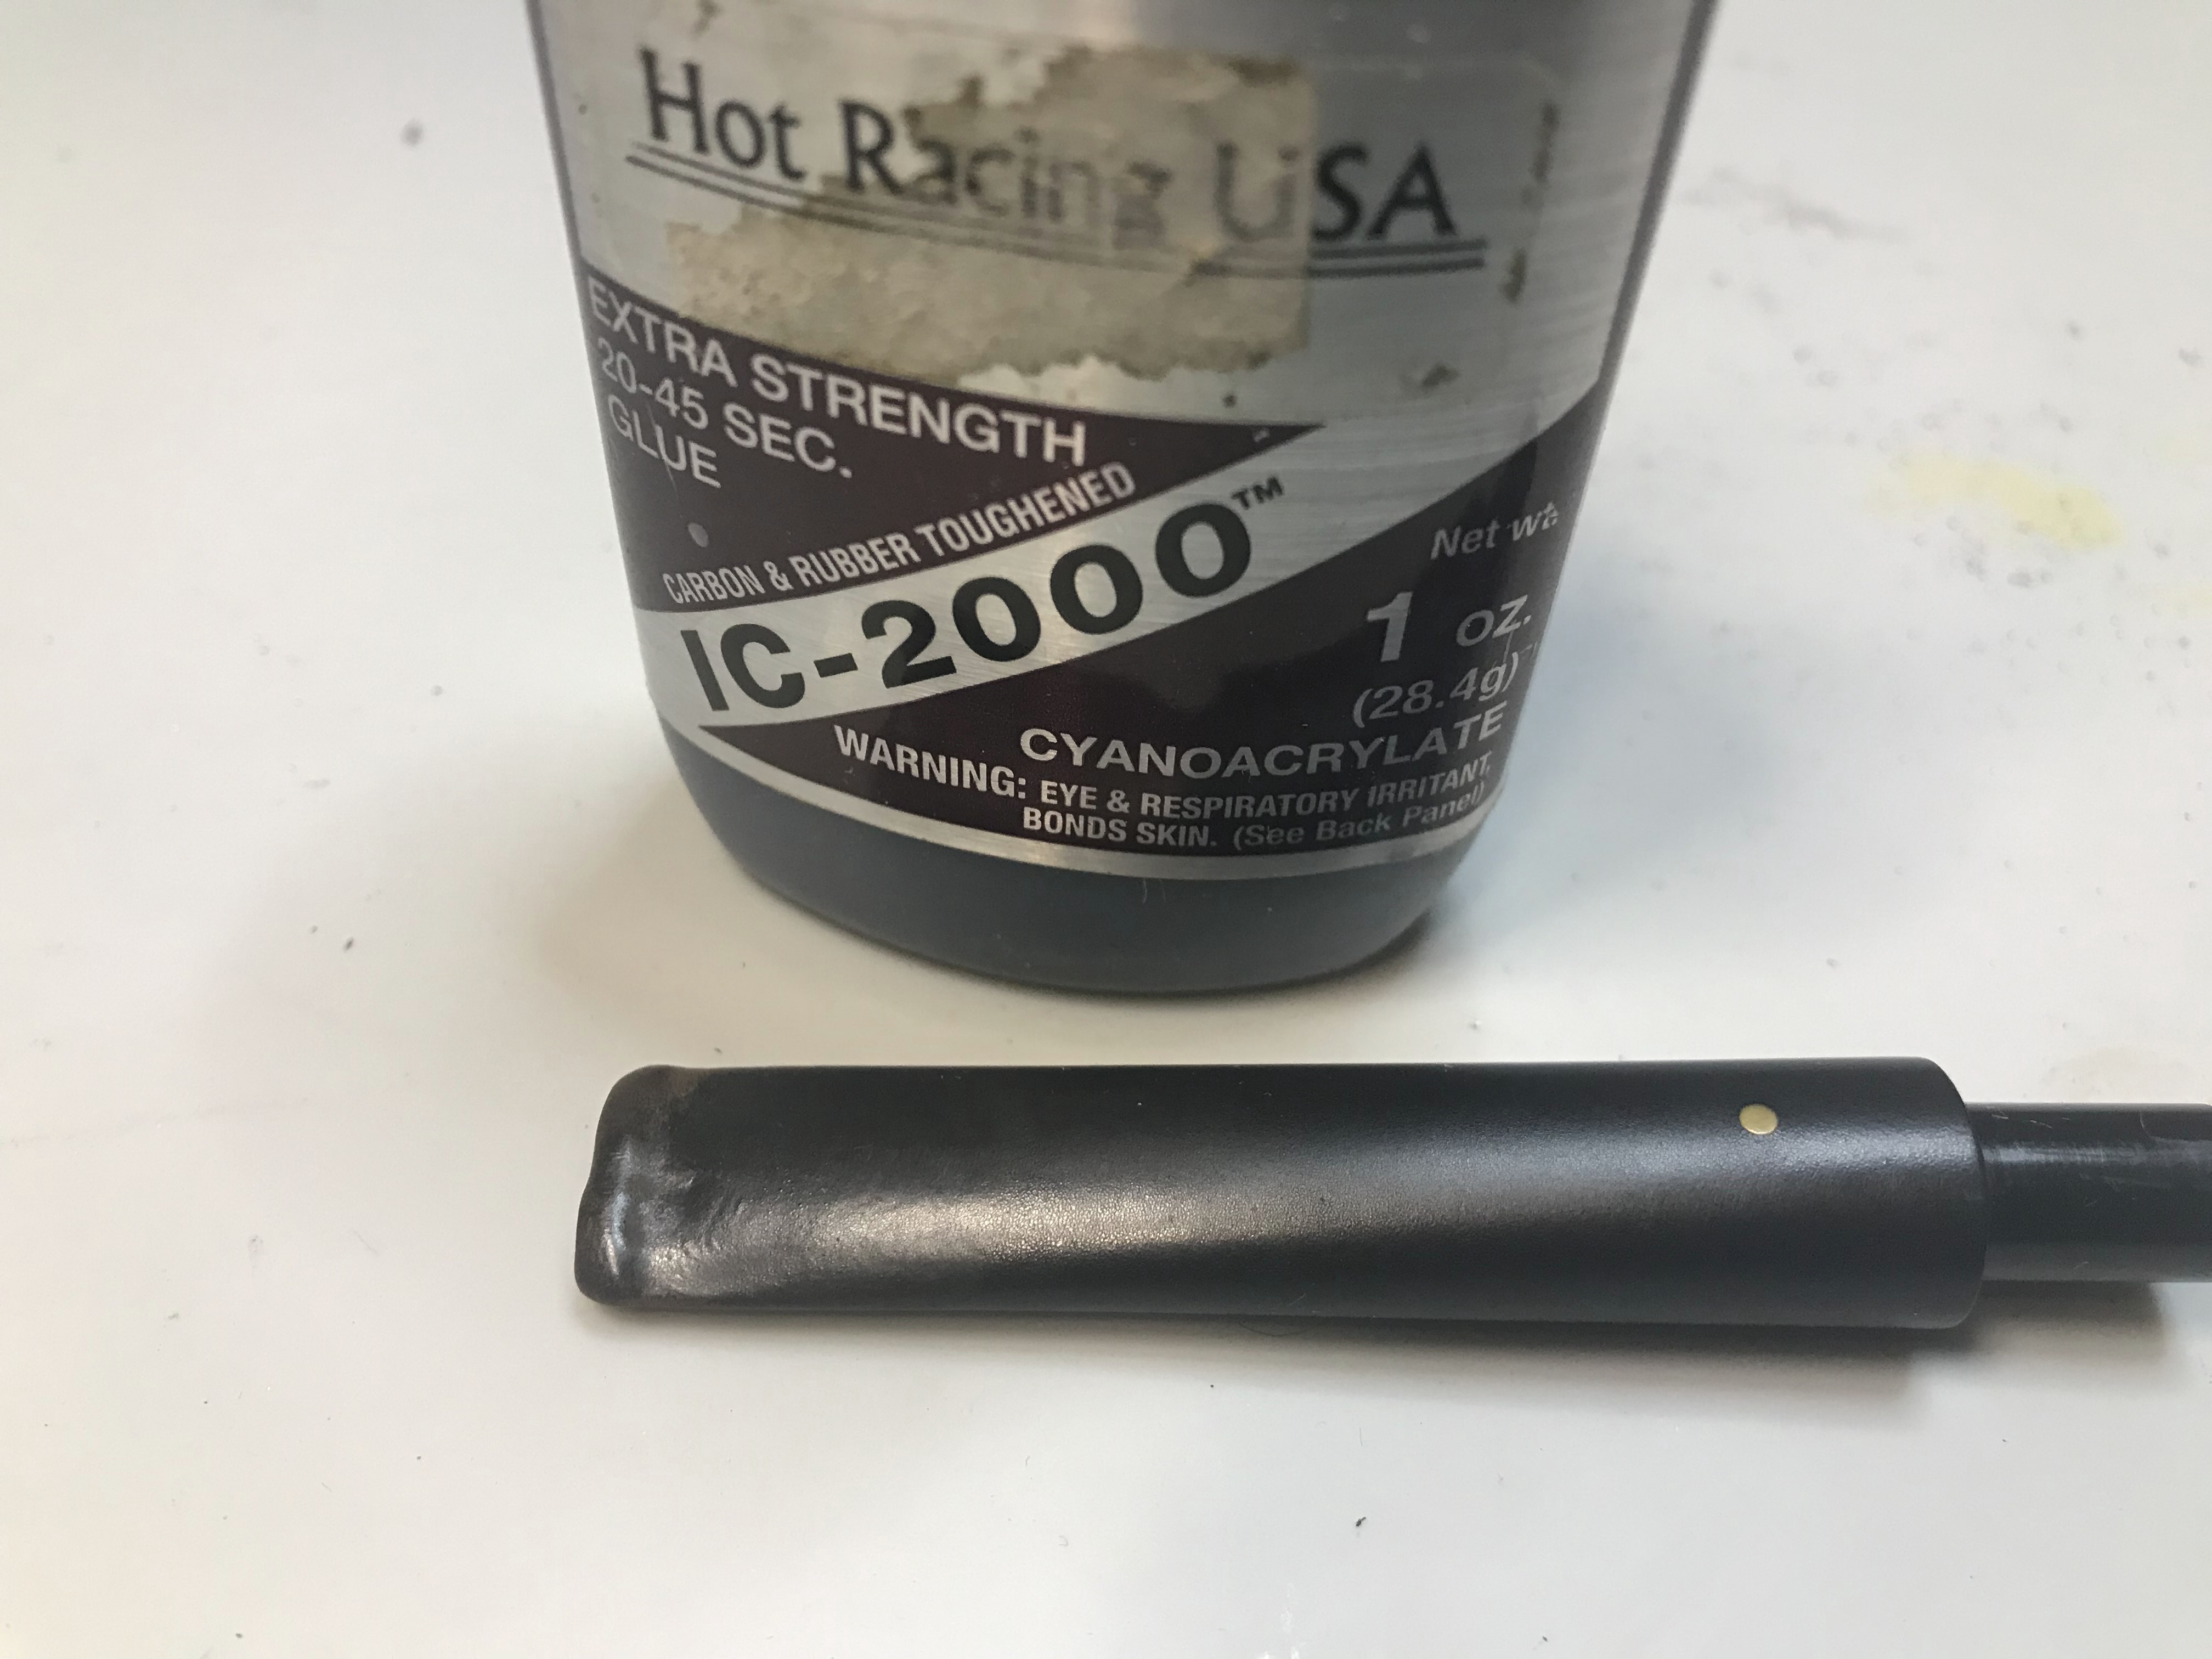
I really like to use this Carbon and Rubber toughened CA Glue by Bob Smith Industries. It blends in with the vulcanite stem quite well and becomes almost invisible once you reach the polishing stages. I’m pretty sure the tooth chatter on the underside of the bite area would qualify as dental records. You can see in the middle photo at the bottom has 4 well spaced tooth indents left behind from clenching the pipe in the smokers teeth.
Typically I use a product called Rub N Buff to restore the stamped nomenclature on the stems. Mine had dried out, so I bought this oil paint marker from Michaels. I filled in the impression on the stem then used a pad and rubbed off the excess with mineral oil.
Step 6: Refinishing
I used Fiebing’s Light Brown leather dye to refinish the stummel. Once the stain had set, I unwrapped the pipe with a buffing bit on my rotary tool using red tripoli.
Step 7: Bowl Coating
When a pipe has been smoked as heavily as this one, I felt that the pipe would need a protective barrier to preserve the briar. Not every pipe smoker prefers to have cake buildup in their bowl. This would ensure some protection from the heat produced when smoking and hopefully extend the life of this pipe for years to come.
I applied a waterglass bowl coating to the inside of the tobacco chamber using a small brush. Inserting a pipe cleaner before hand will ensure you don’t seal the airway accidentally.
The Reveal
With the pipe reconditioned, restored and freshly polished it is now ready to go to its new home. You canBUY IT NOWexclusively for a limited time at the Lunting Bear Store. Don’t forget to follow us on Instagram by clicking the links at the bottom of the page. Thanks for stopping by!
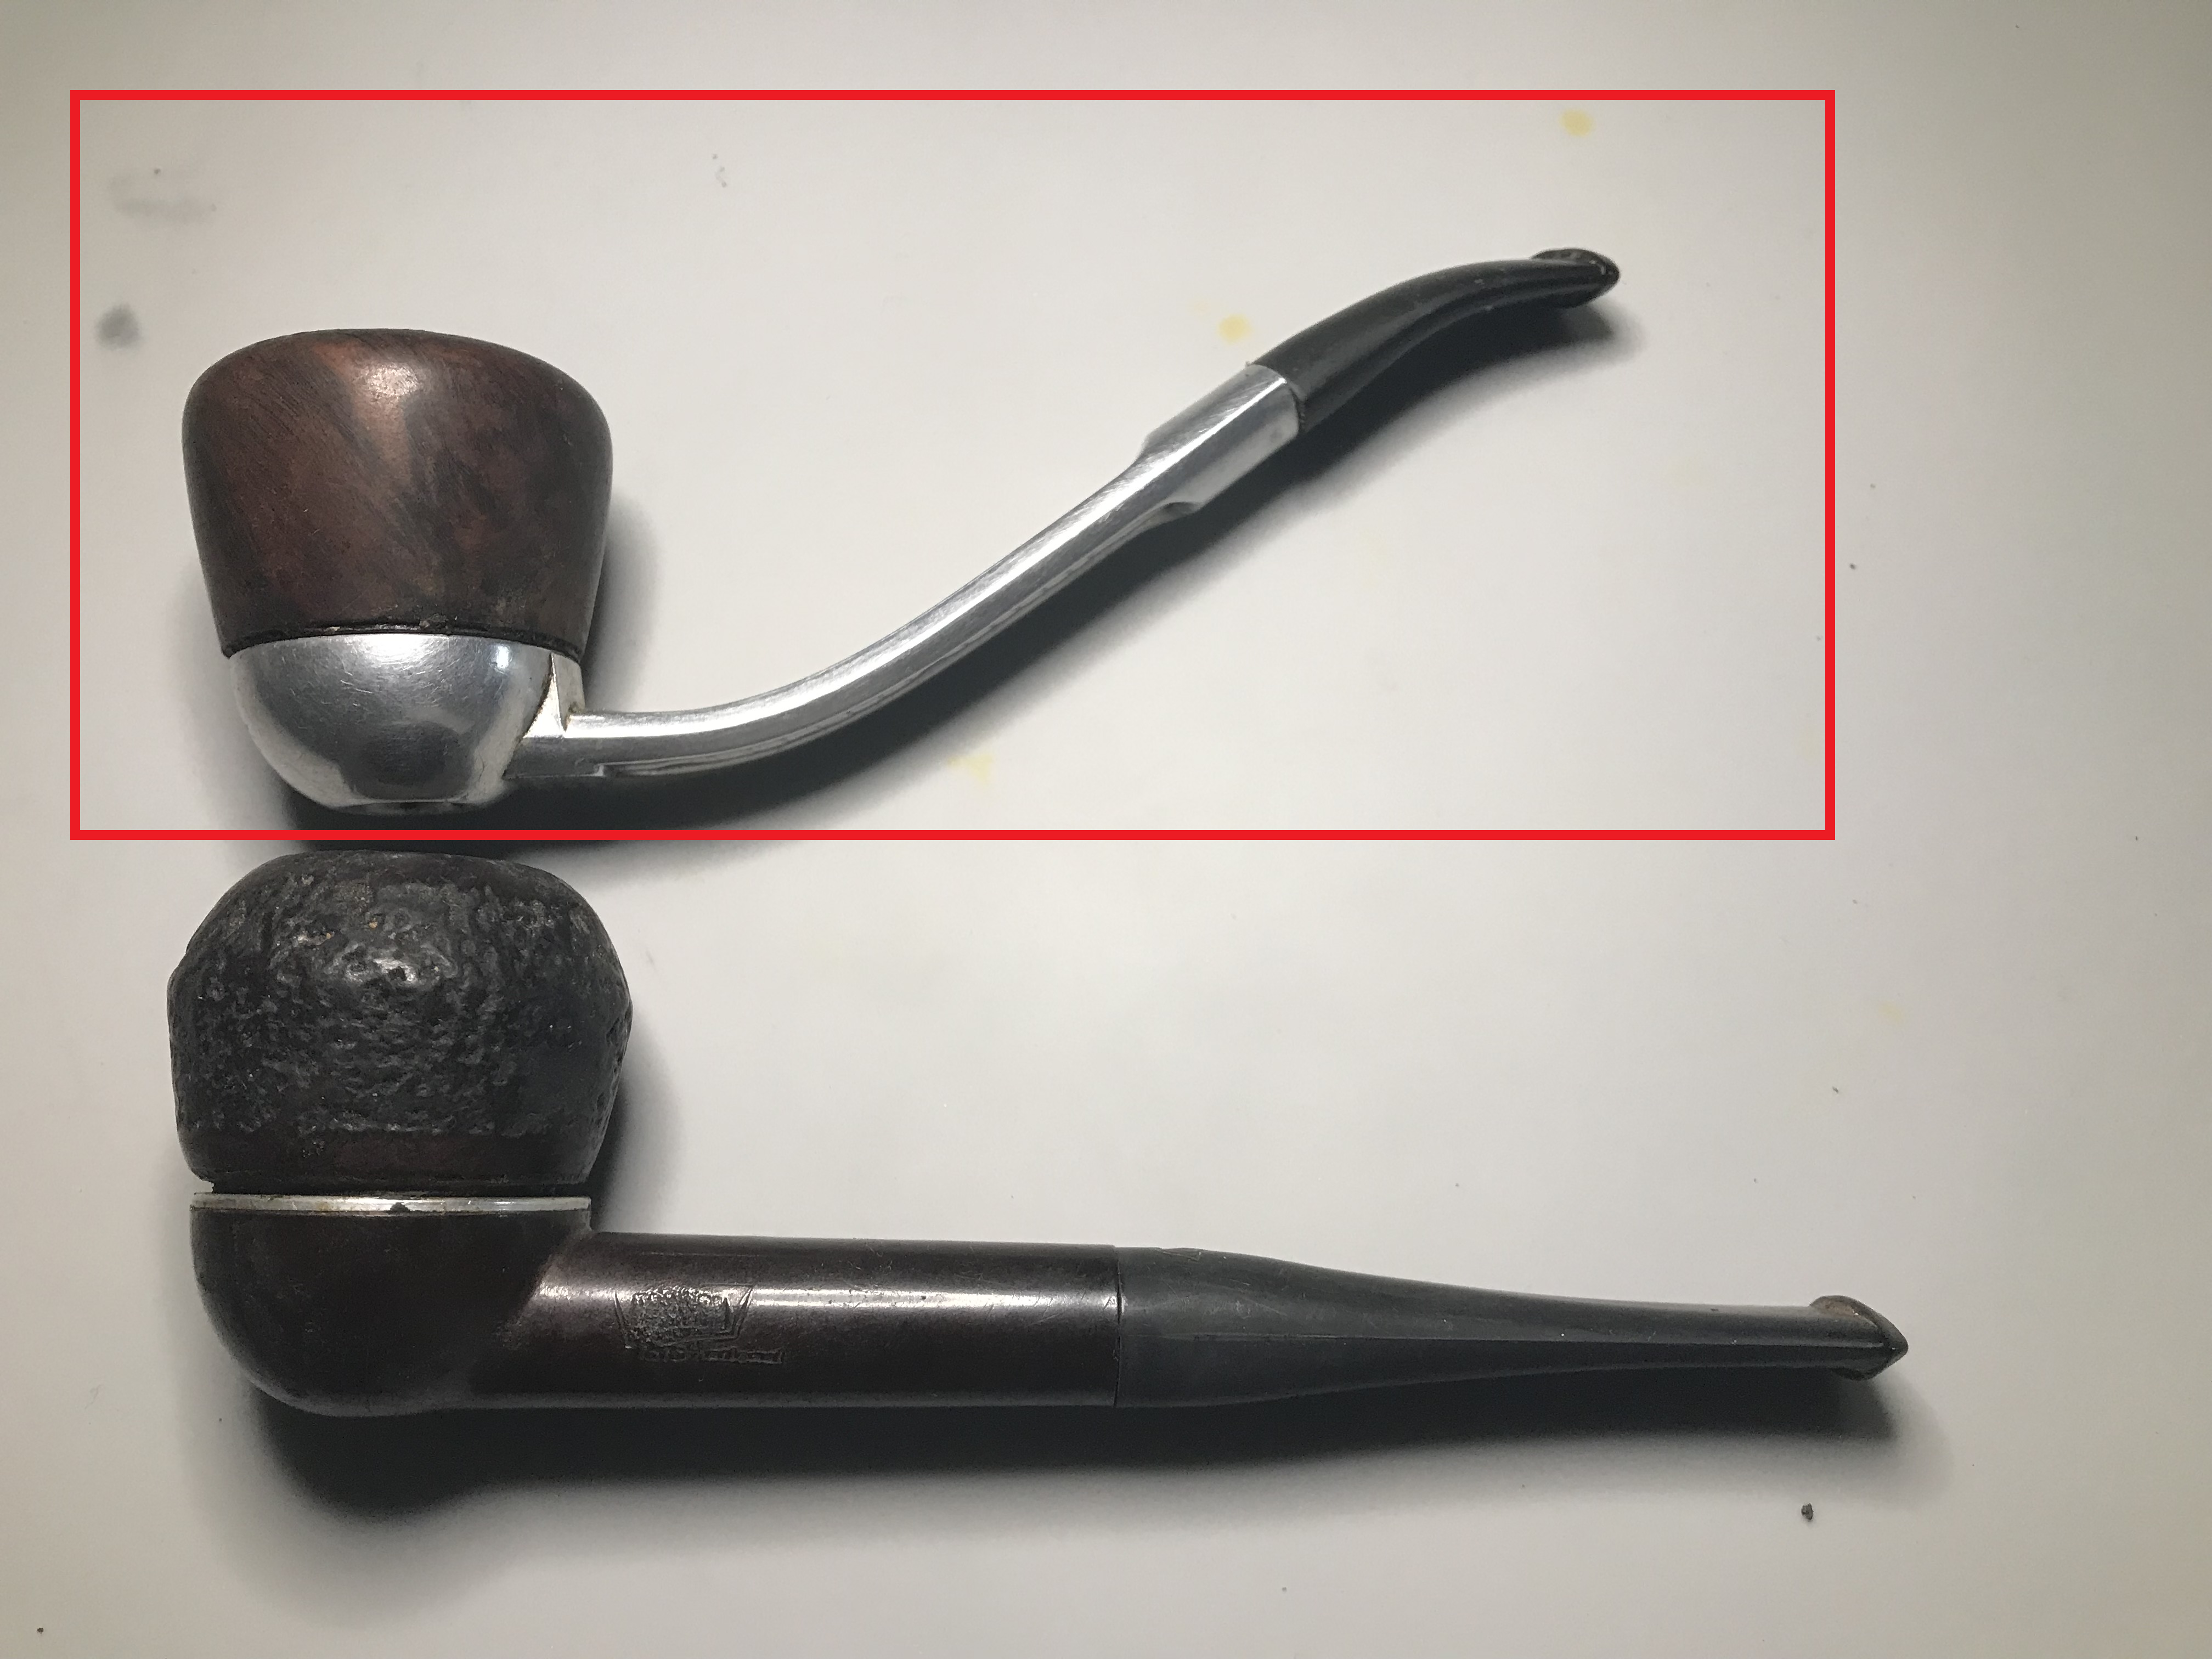
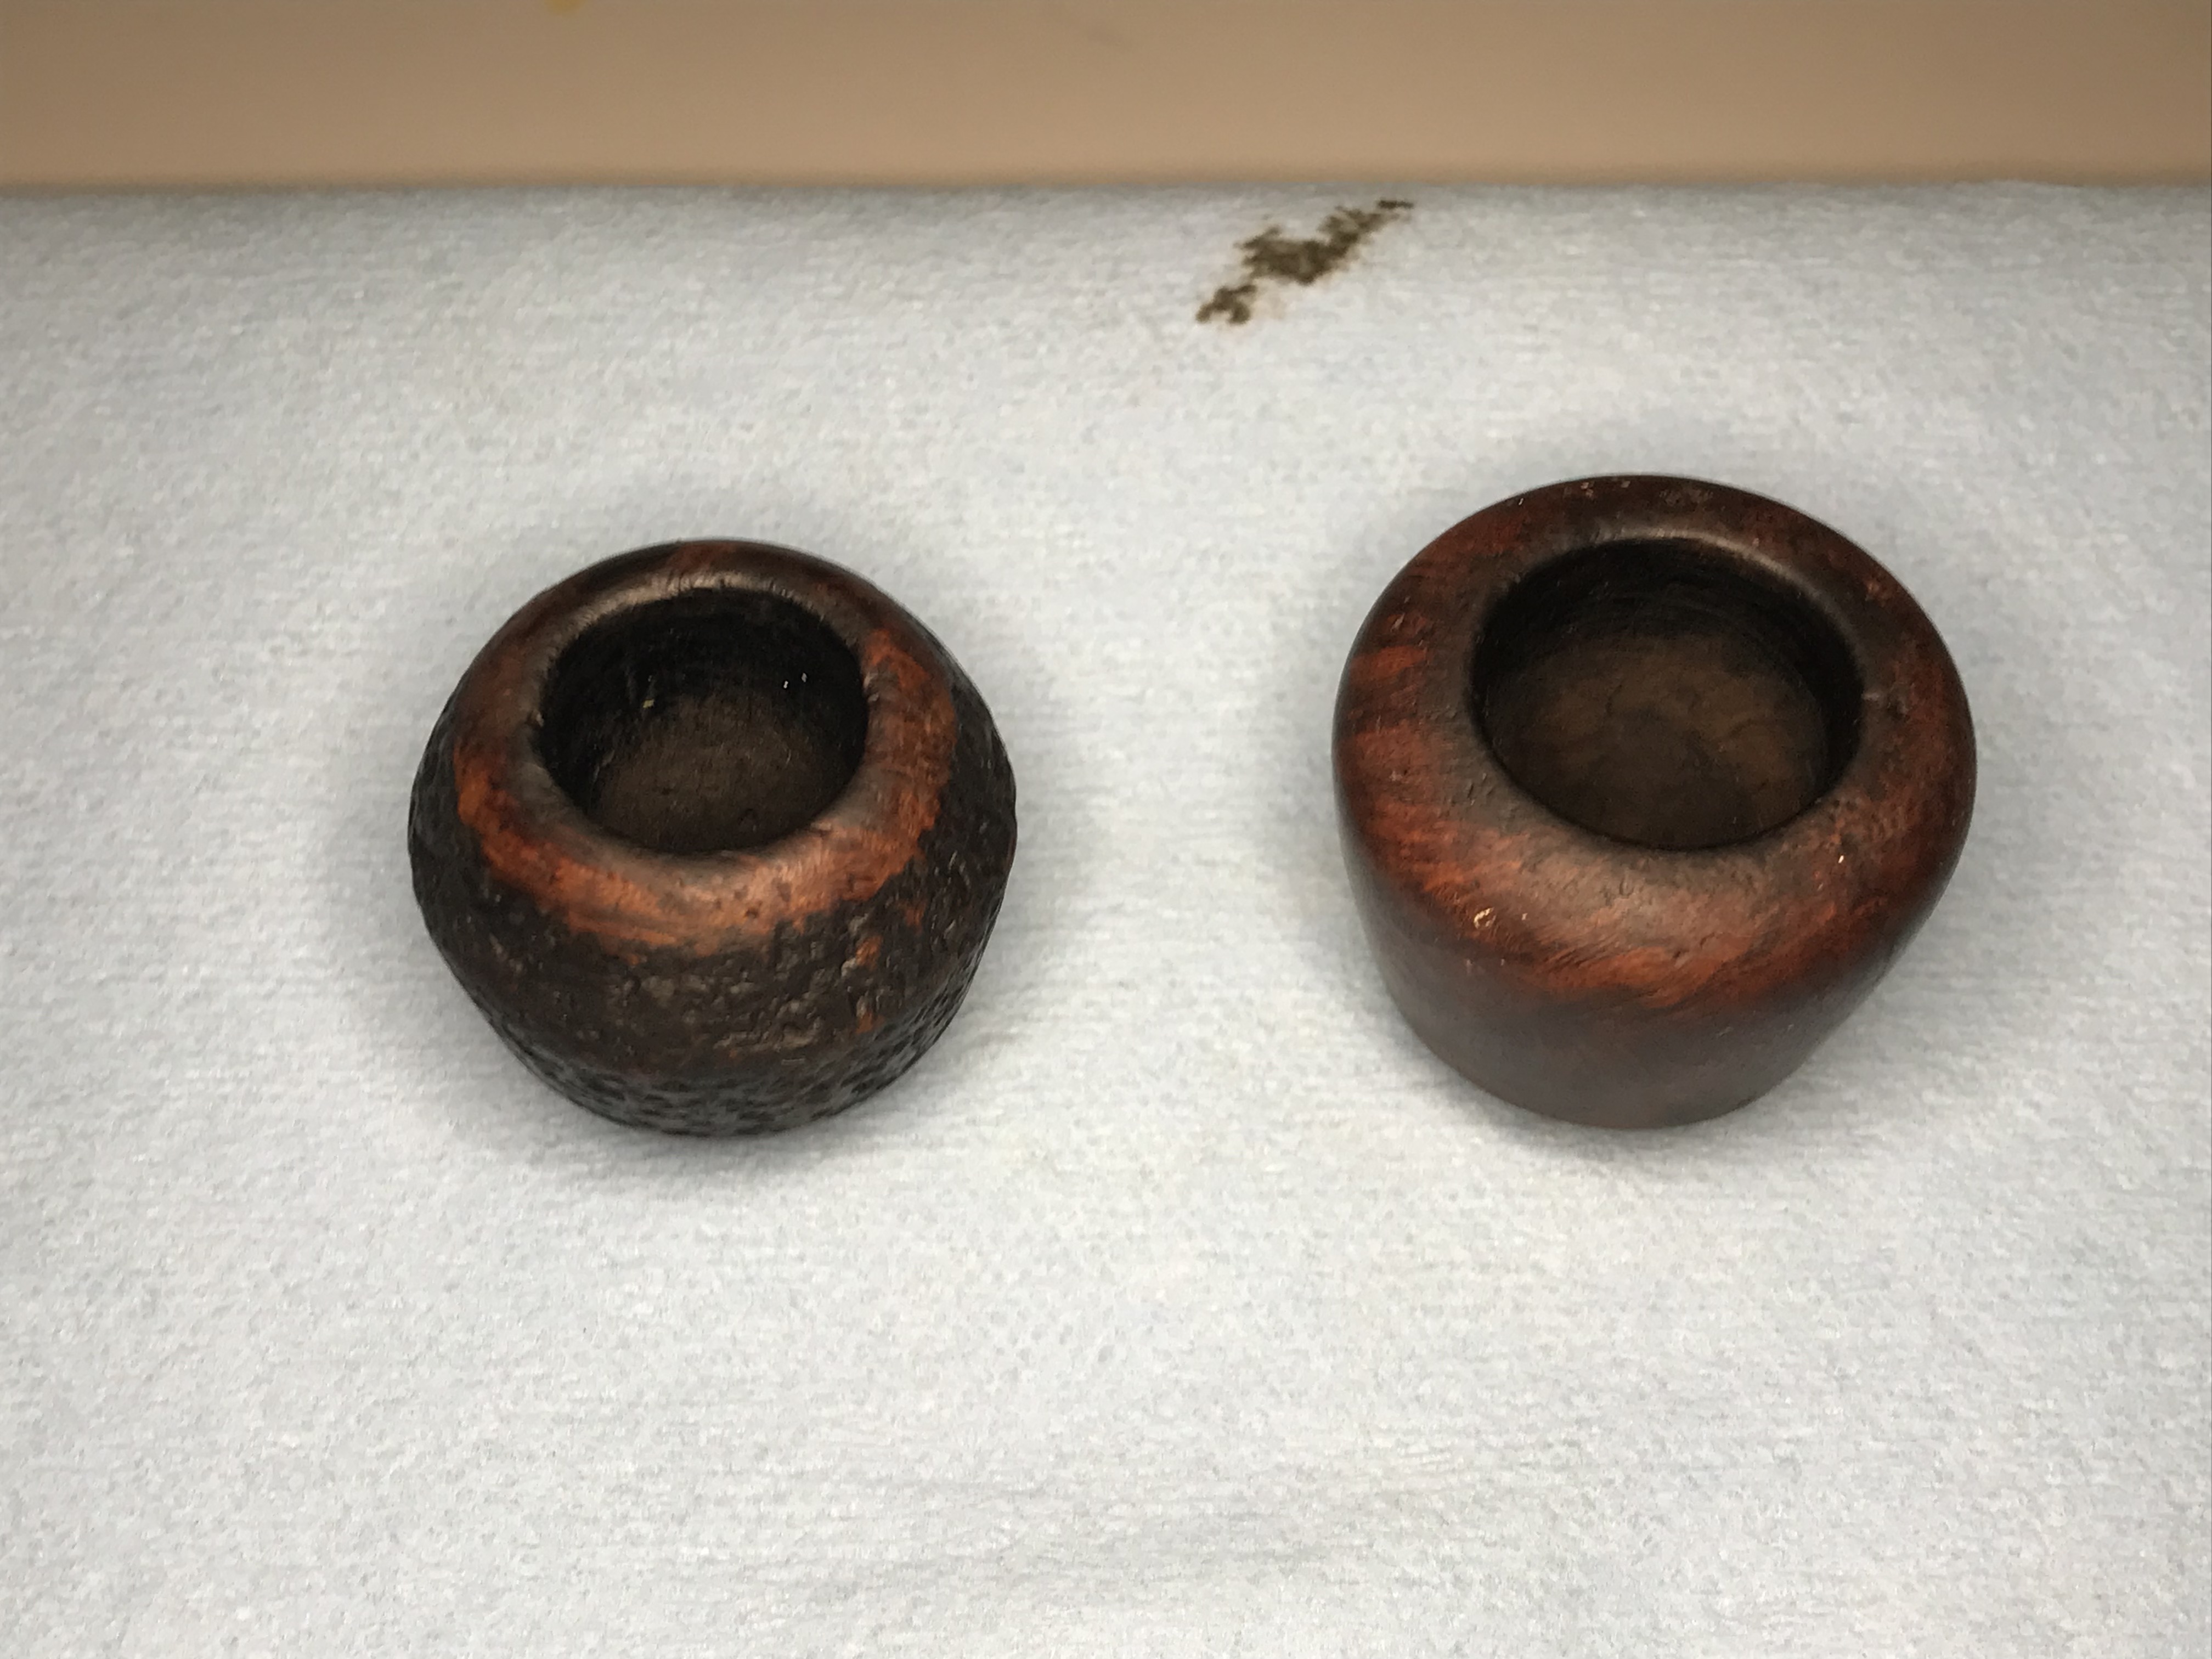
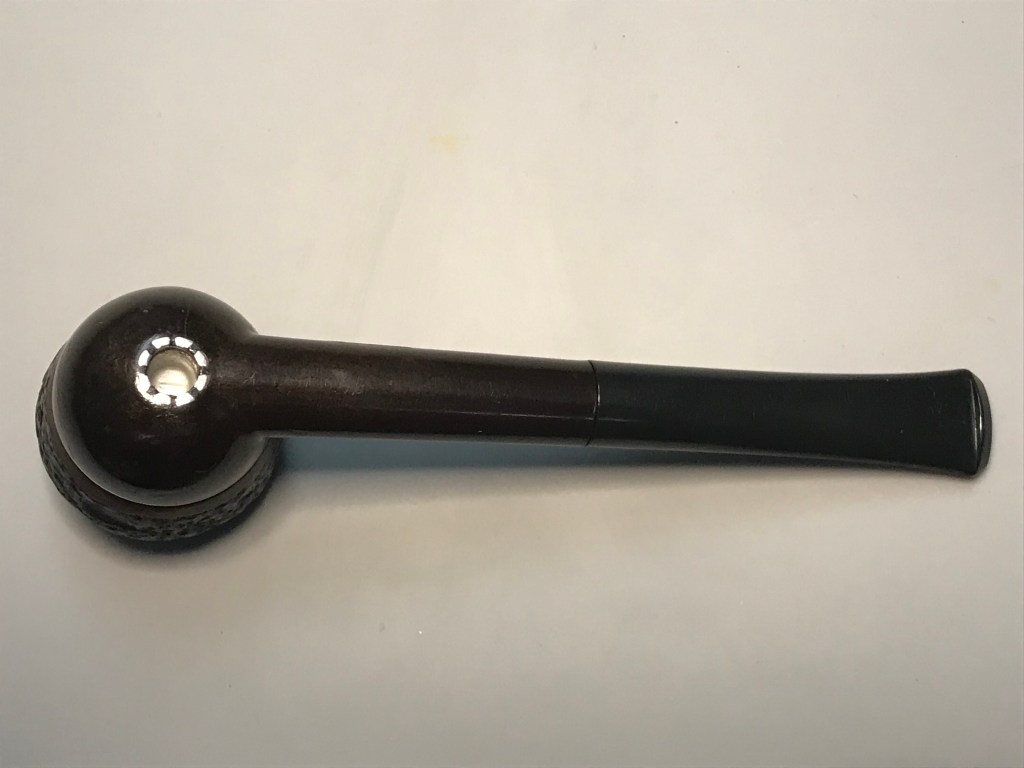
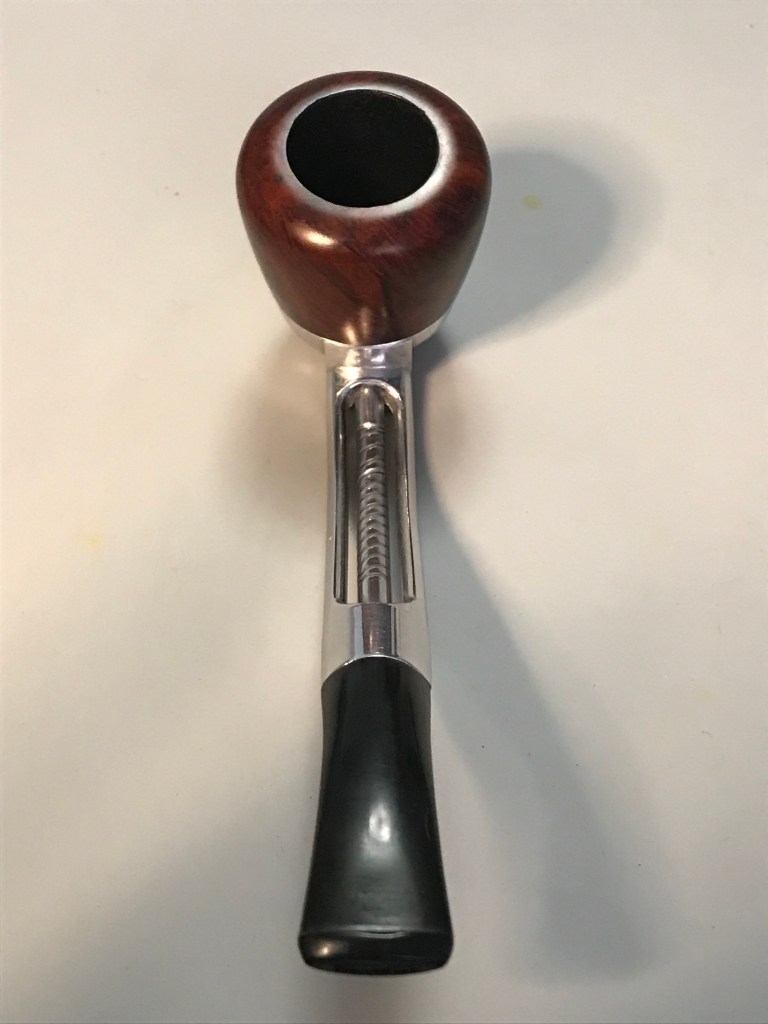
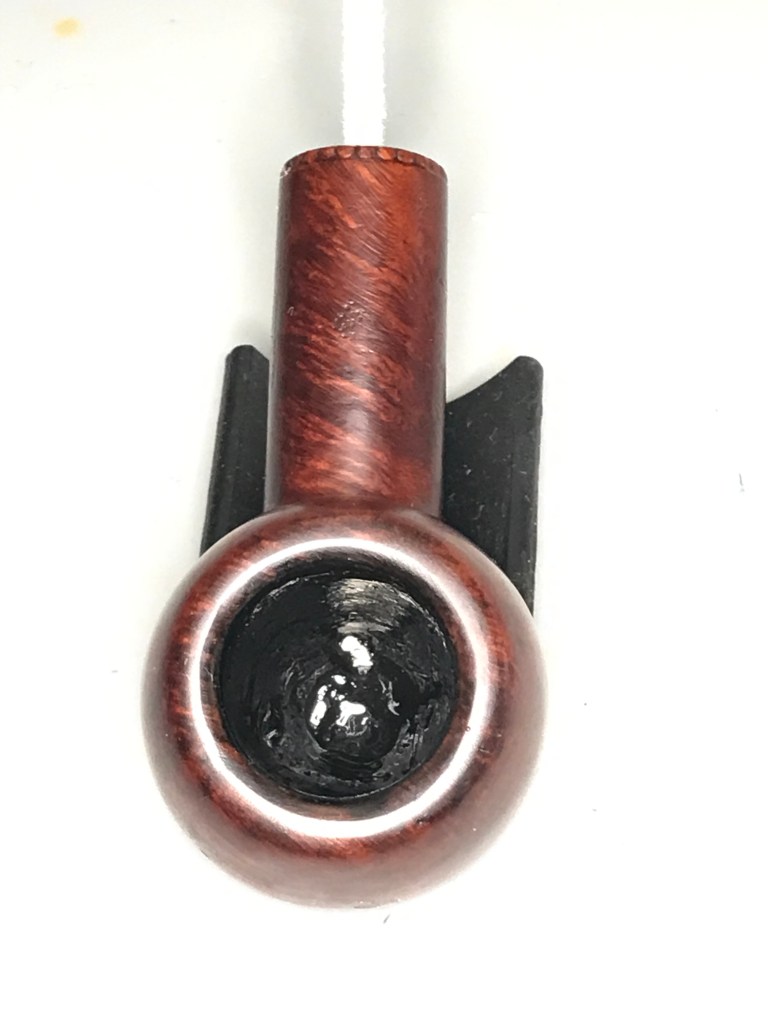
The last restoration of this lot is this wee little pipe made by Peterson of Dublin from their Specialty line called Belgique. Steve Laug wrote a very thorough write up on this shape here—> https://rebornpipes.com/tag/petersons-of-dublin-belgique/ .
“Originally released as one of four Specialty shapes in 1945, the Belgique is our signature take on the traditional Belge, its Egg-like bowl and forward cant reminiscent of the clay tavern pipes of yesteryear.” Source; Peterson Pipes
I’m not exactly certain of the age of this pipe, however; the rest of this lot came from the same individual, pipes from their collection ranged from the 1950’s to the late 1970’s. It’s likely safe to conclude that they purchased this pipe in that time-frame.
First Impressions
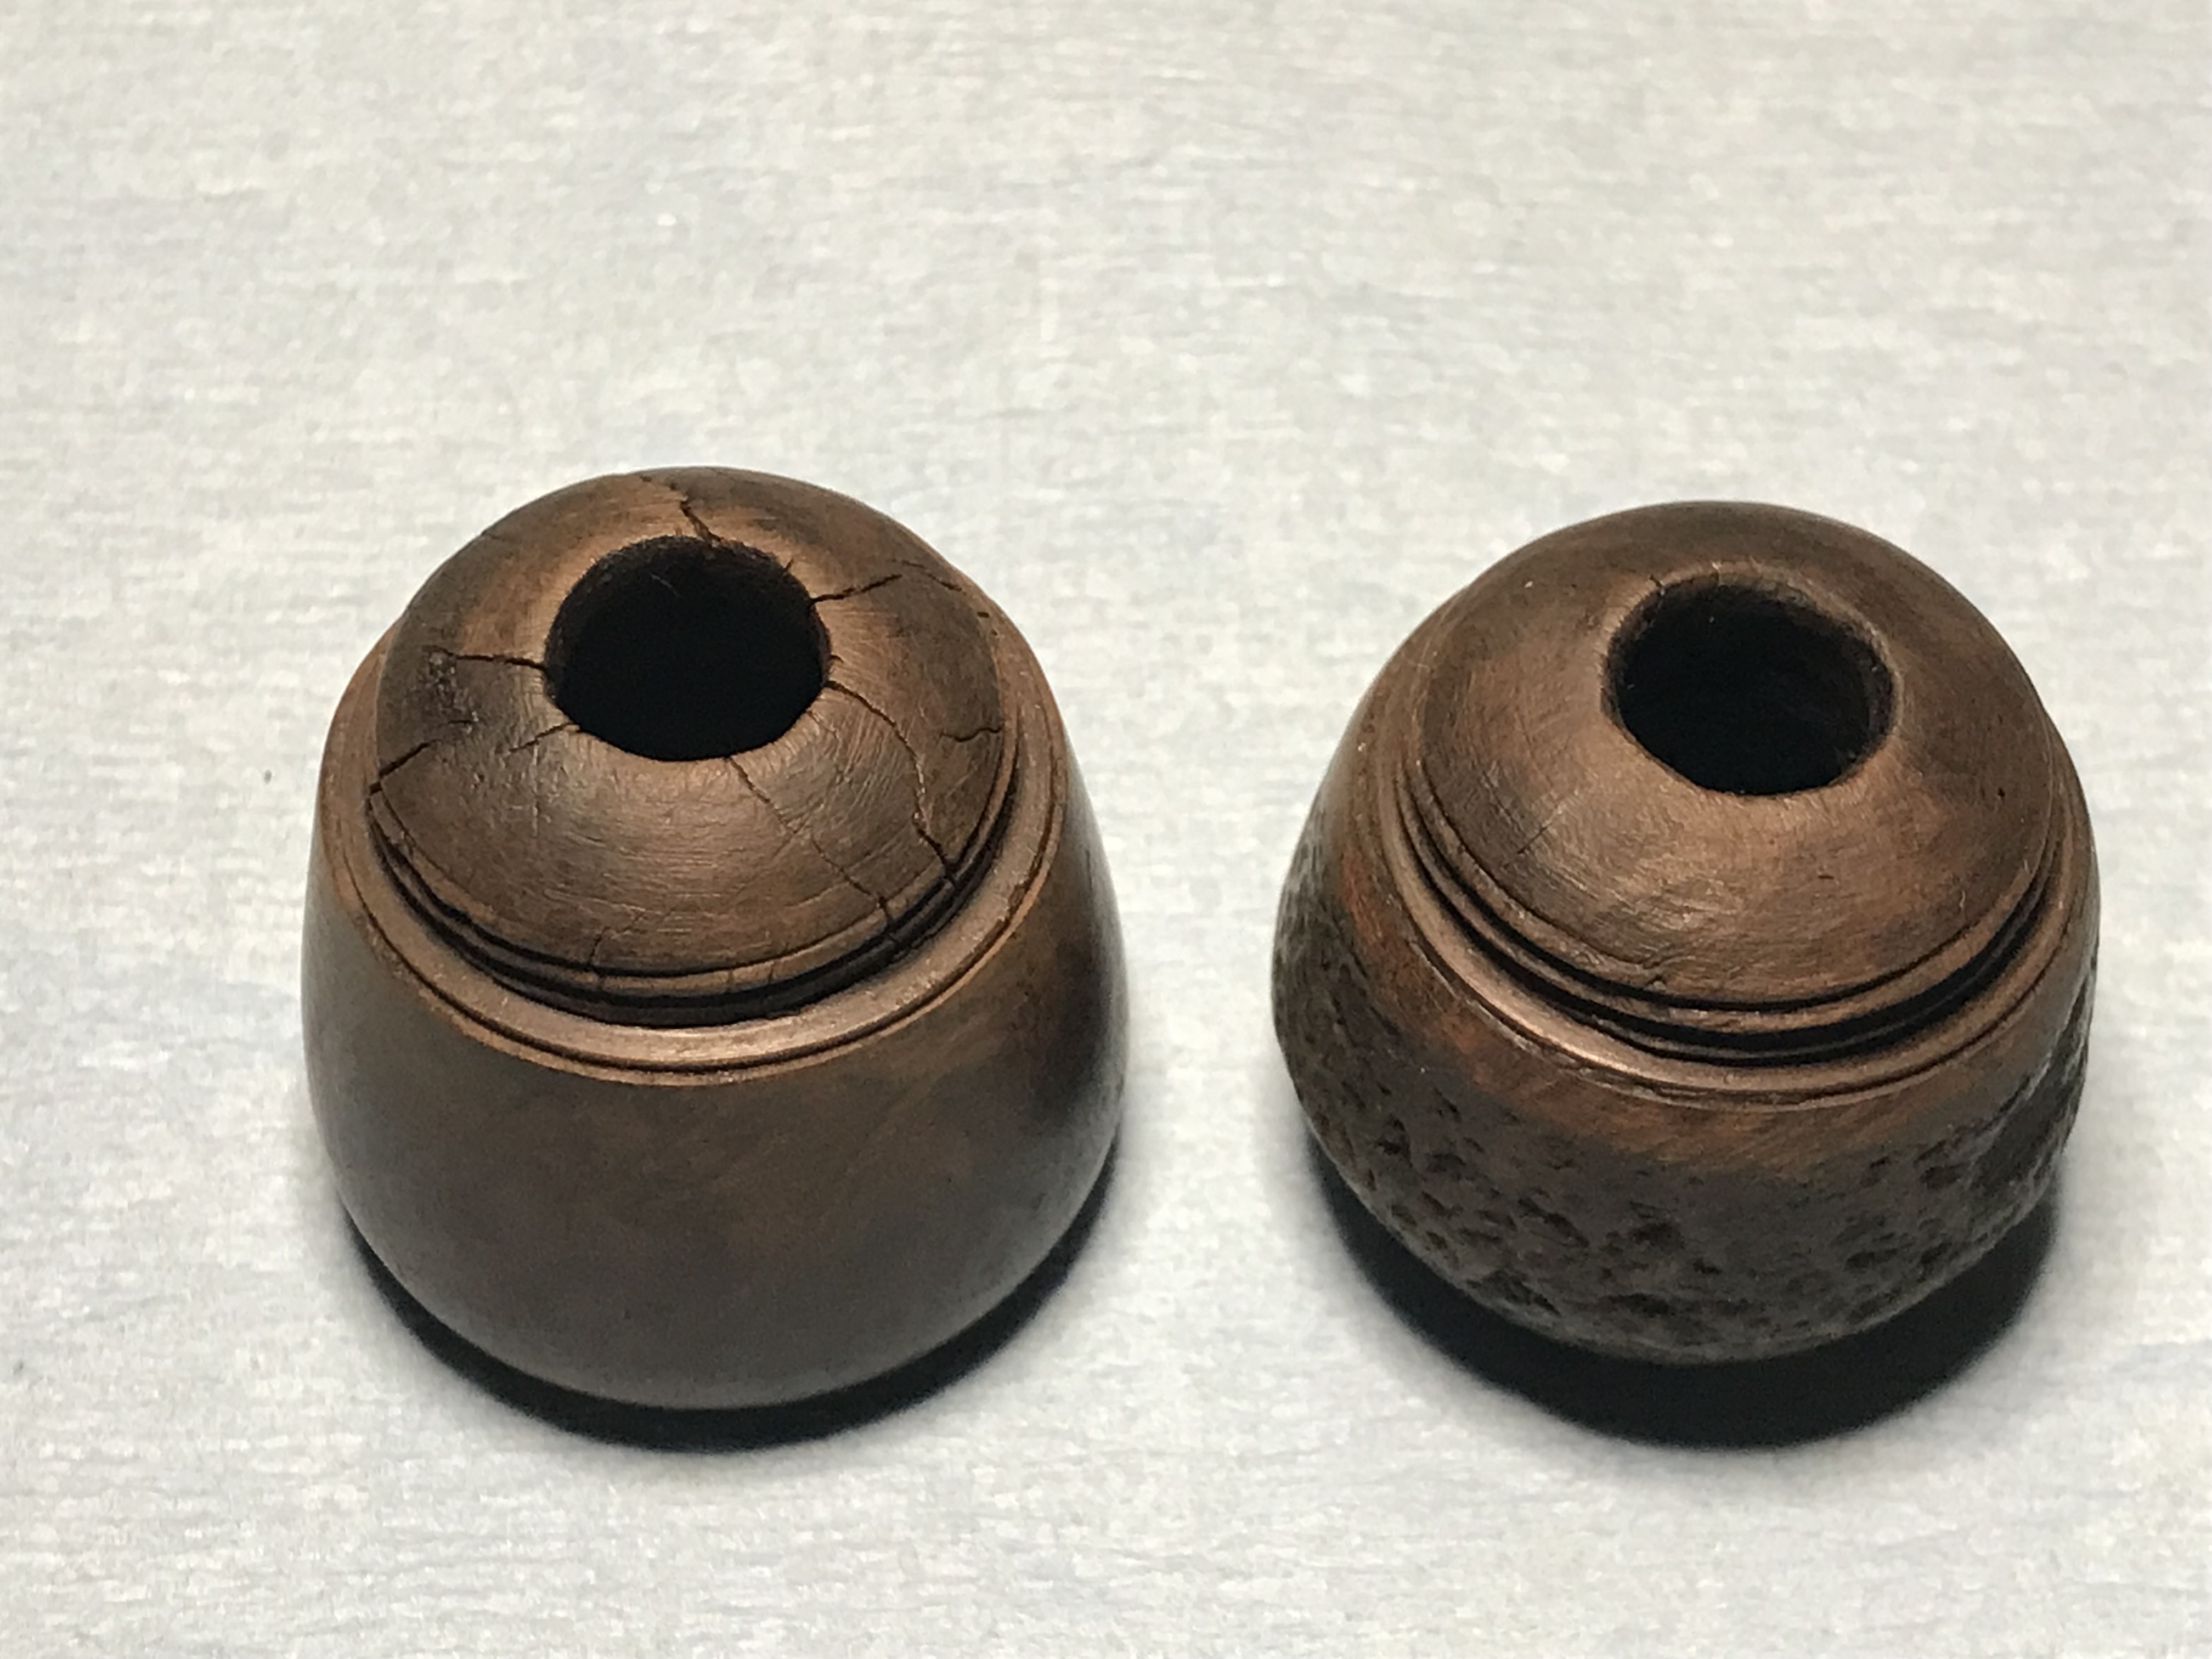
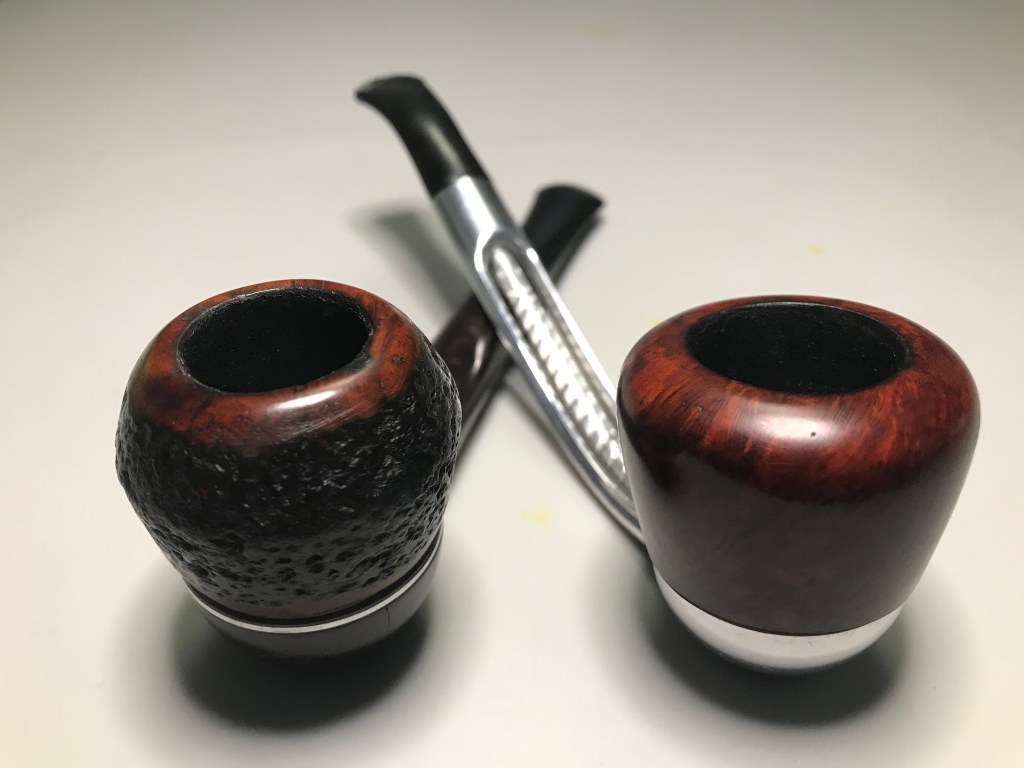
Size comparison between Group 4 Dunhill and Peterson Belgique
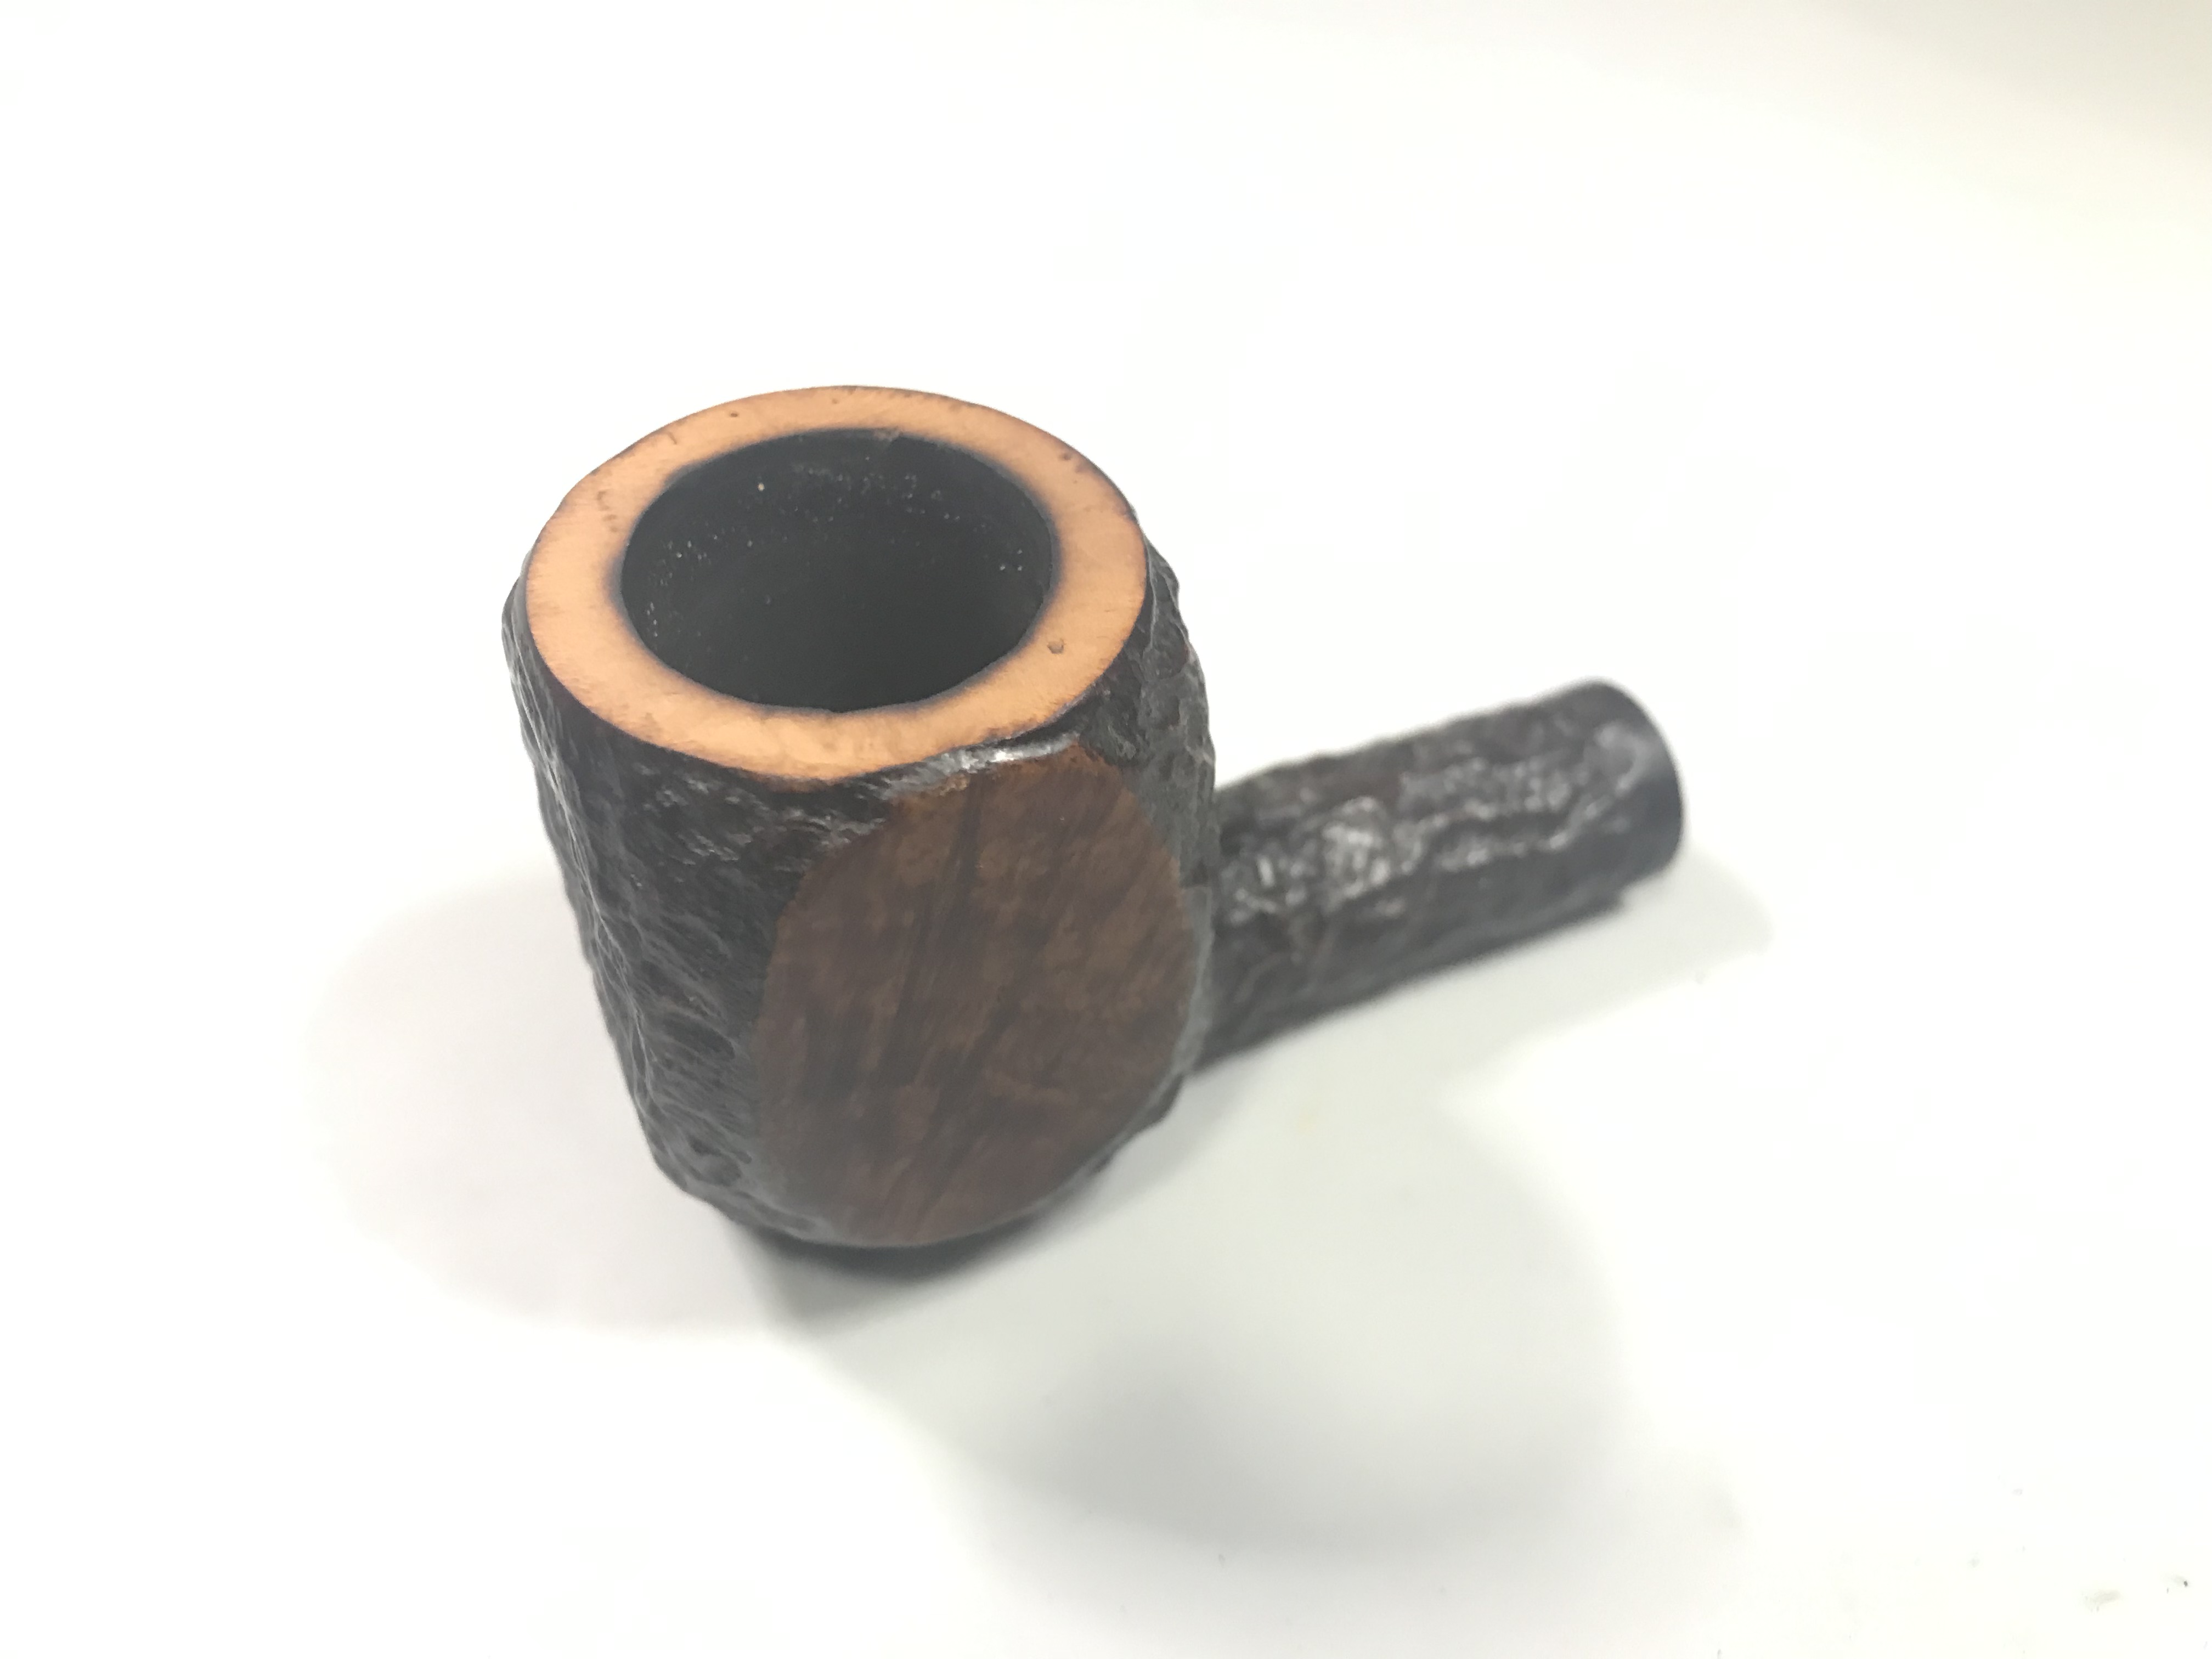
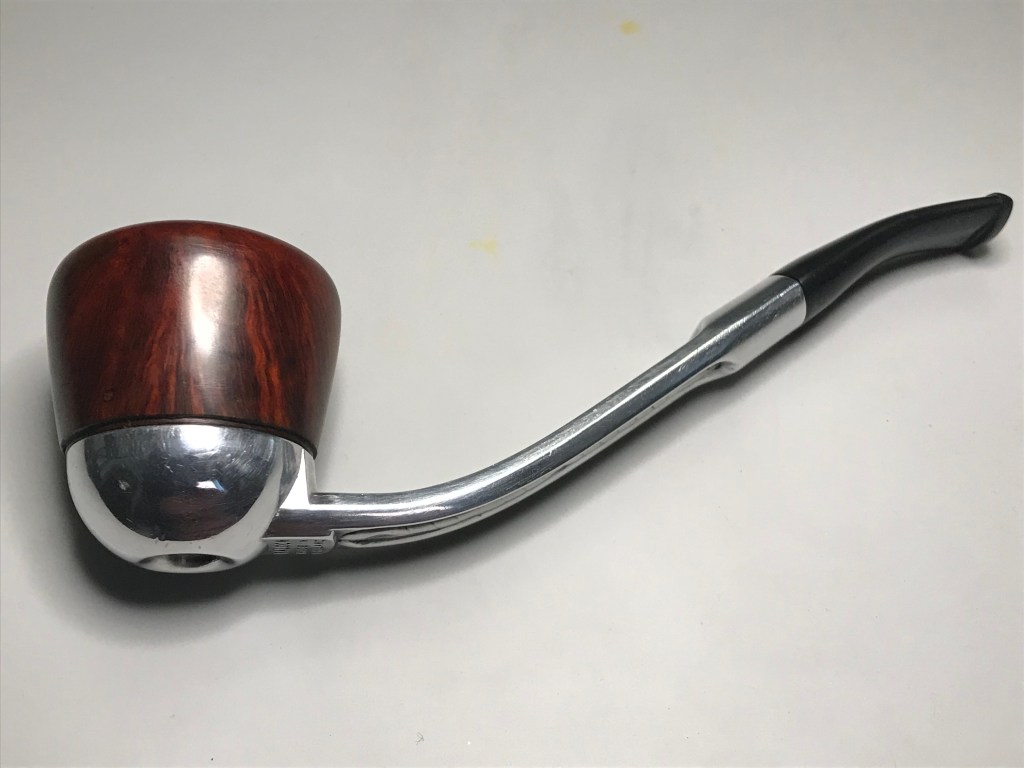
The pipe was in good condition overall. This pipe has a military mount stem. Both the stem and vulcanite shank extension had some mild oxidation. There are no visible fills on the bowl which is a bonus on a smooth pipe and there was minimal amount of carbon buildup in the tobacco chamber and the rim of the bowl.
Step 1: Ream and Clean
I removed the carbon buildup in the bowl relatively quickly and cleaned up the rim with some 0000 Steel wool.
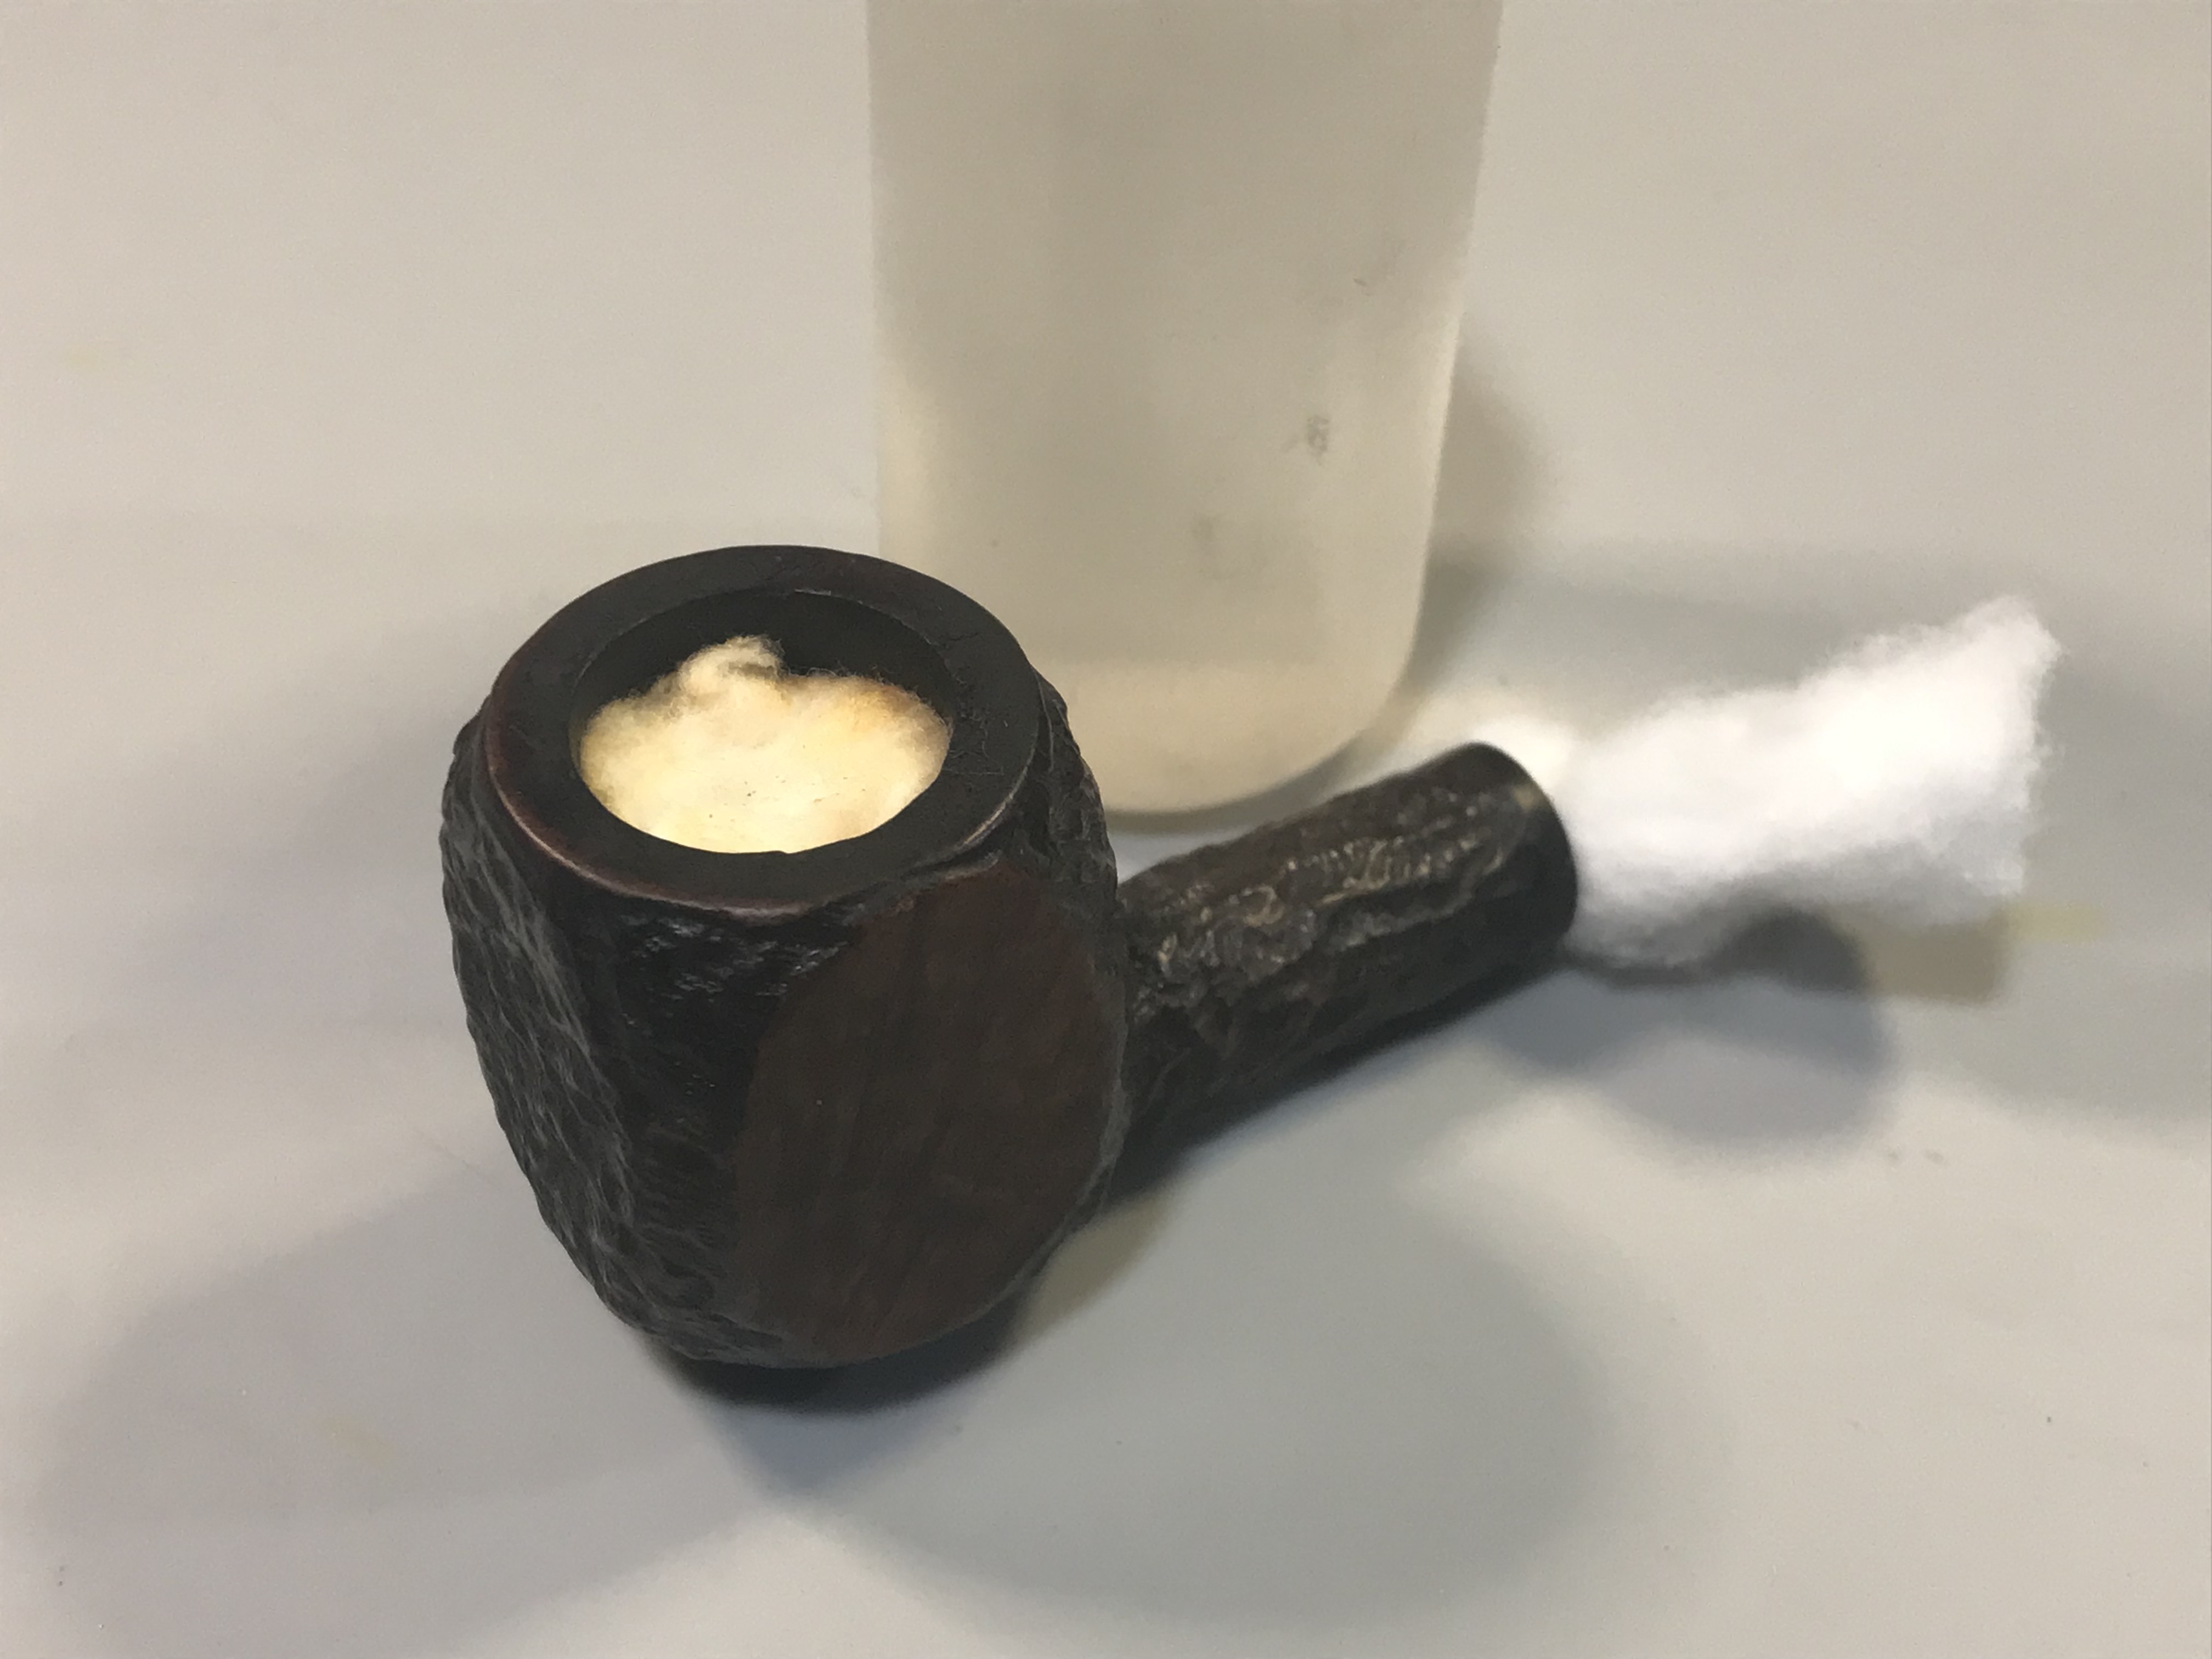
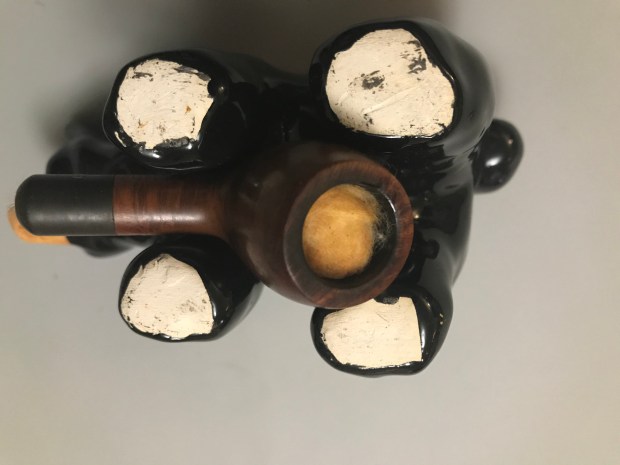
Once I started cleaning the internals with pipe cleaners I realized that the pipe was going to require a more thorough cleaning.I plugged the mortise and the tobacco chamber with cotton batting then saturated it with alcohol. I use food grade alcohol called Alcool which can be purchased from the LCBO (Ontario). You can use 99% Isopropyl Alcohol as well. In my experience it evaporates so you’re not leaving any in the bowl, but just to be safe I use food grade alcohol. As you can see the alcohol did the trick as it absorbed a lot extra matter from the bowl and shank. (that is an upside down bear holding the pipe lol)
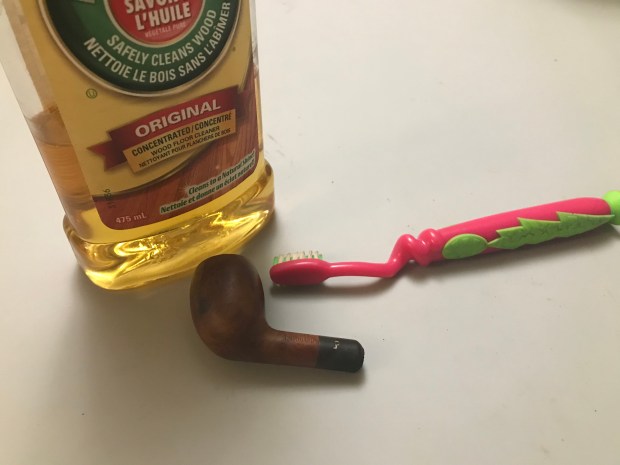
Lastly I scrubbed the exterior of the stummel with Murphy’s Oil soap which does a great job of removing dirt and oils from the previous owners hands that may have transferred to the bowl as well as any deleterious matter from the restoration process.
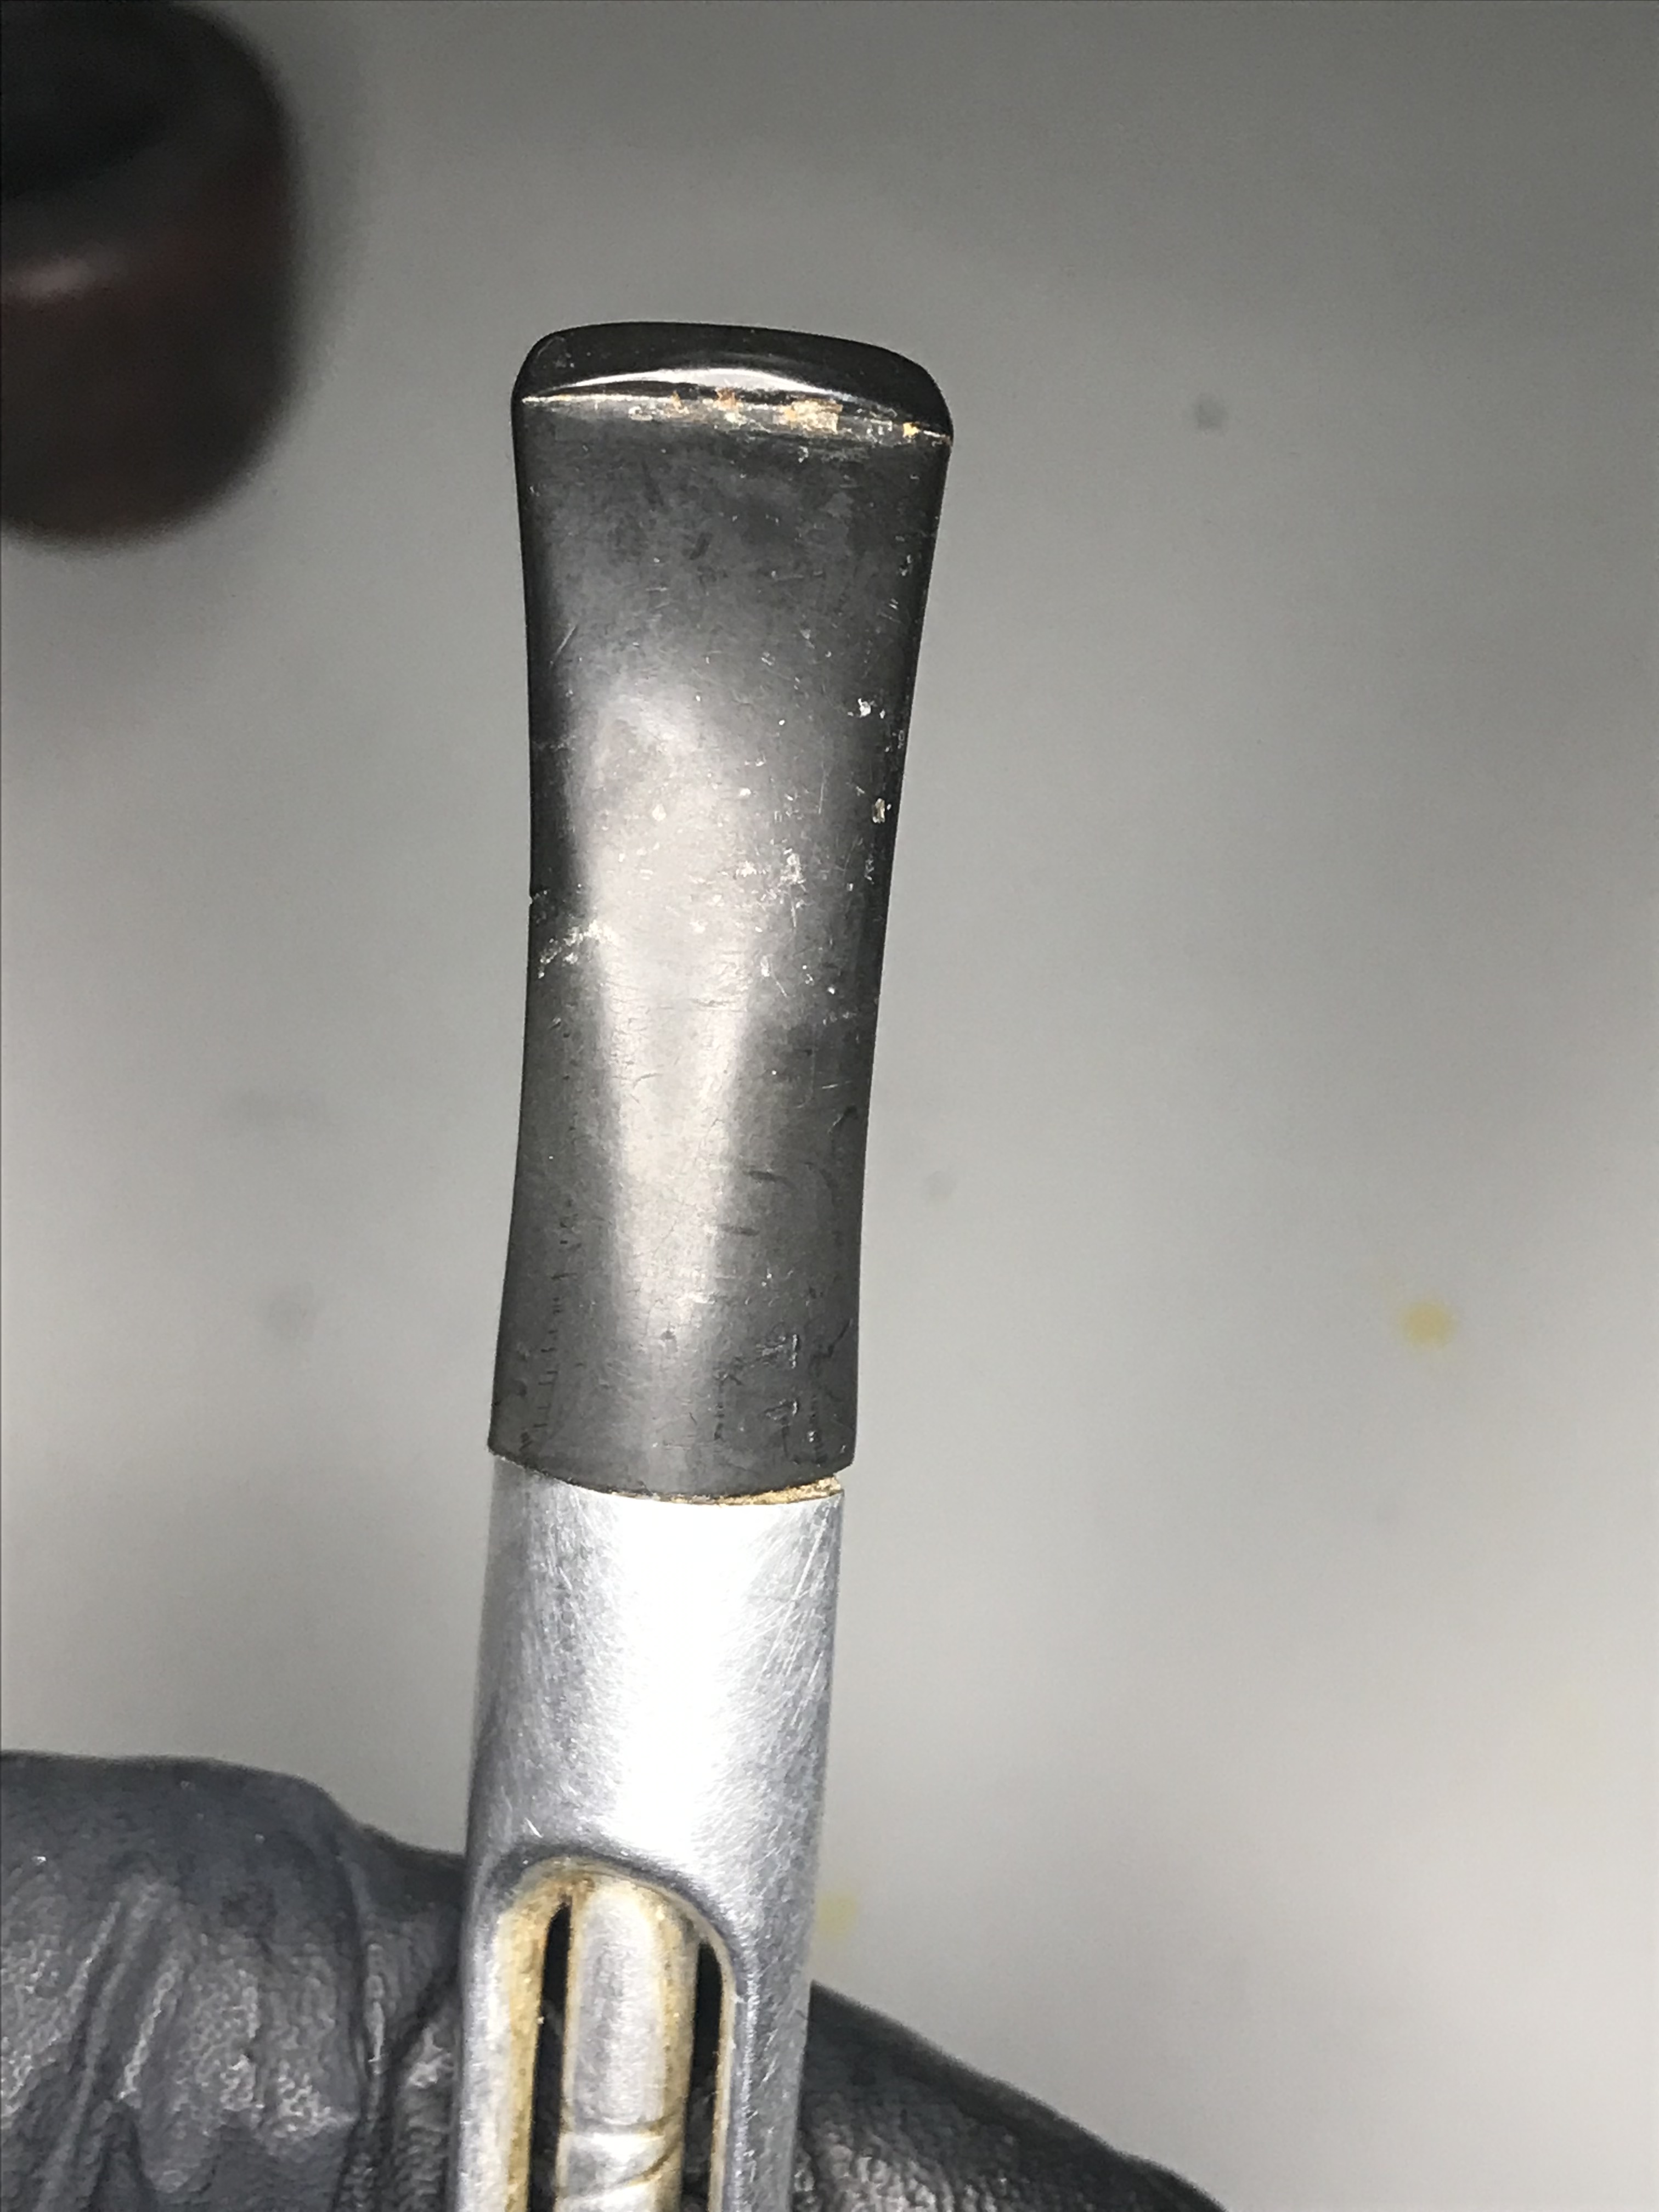
Step 2: Clean and Deoxidize the stem
There are multiple methods used in removing oxidation on vulcanite stems that work well. One such method is using a soft flame from a butane lighter or a Bic lighter. The process involves passing the flame over the stem which seems to burn off mild surface oxidation. You must be very careful not to overheat the vulcanite otherwise it will burn. This process is also useful for tooth chatter as vulcanite has “memory” and the heat will lift the indents.
I used the same process to remove the oxidation from the vulcanite shank extension. Now…..you must also very be careful around stamps pressed in the vulcanite, like the Peterson “P”. As I mentioned, the heat will lift out tooth chatter…..and in this case it also lifted out the stamped “P”.
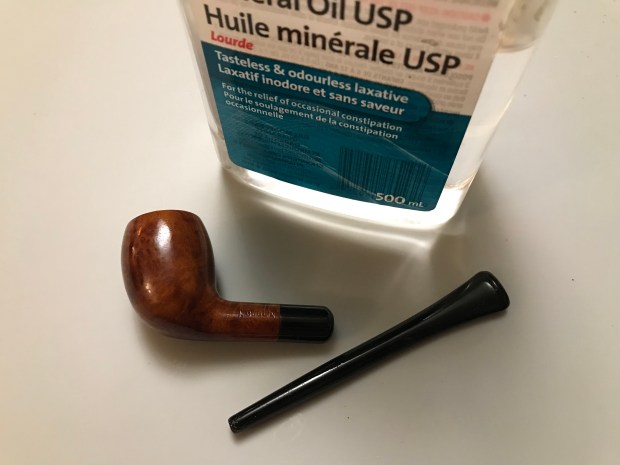
After removing the oxidation, I polished the shank extension and the stem with Micro Mesh sanding pads. They come in grit sets from 1500 – 12000. I buy mine from Lee Valley. Once completed, I applied a generous coating of Mineral oil to the entire pipe.
Step 3: Stem and stummel polishing
I leave the mineral oil to absorb into the stem and stummel before polishing with red tripoli, white diamond and lastly carnauba wax.