A tale of two Patent Era Brighams Part II

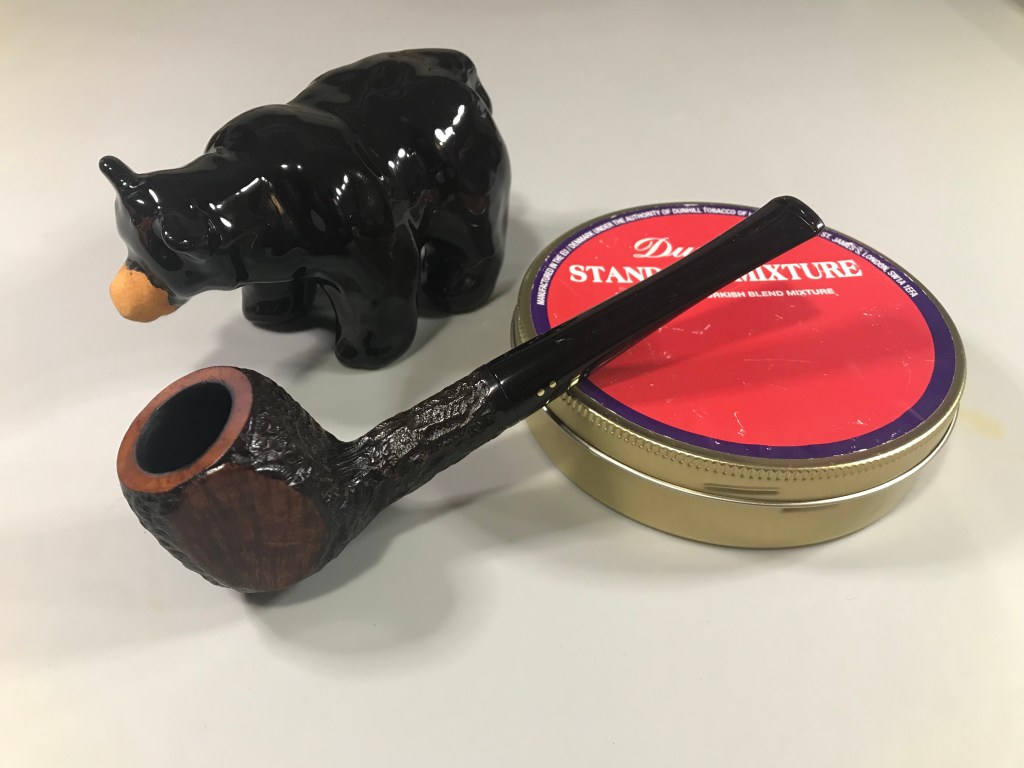
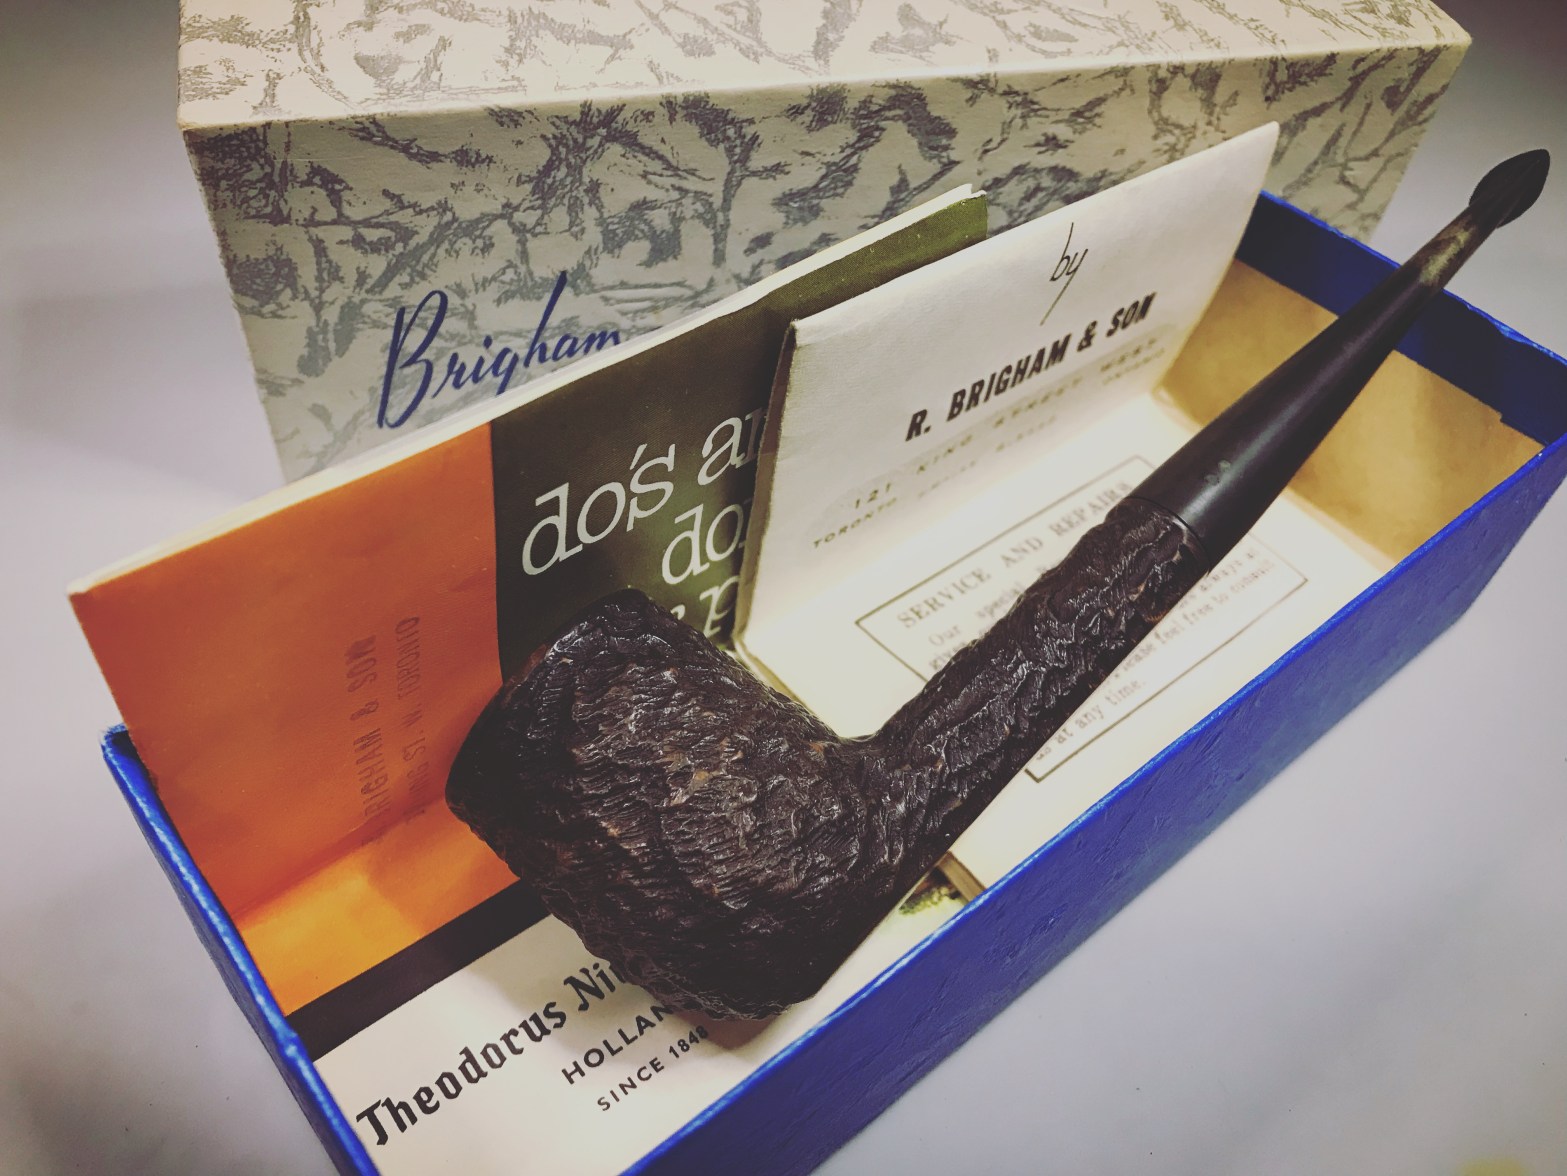
Part II of this post is another Patent Era Brigham that was in the same lot as the first. This one peiked my curiosity as well as it was accompanied by a Company Brochure as well.

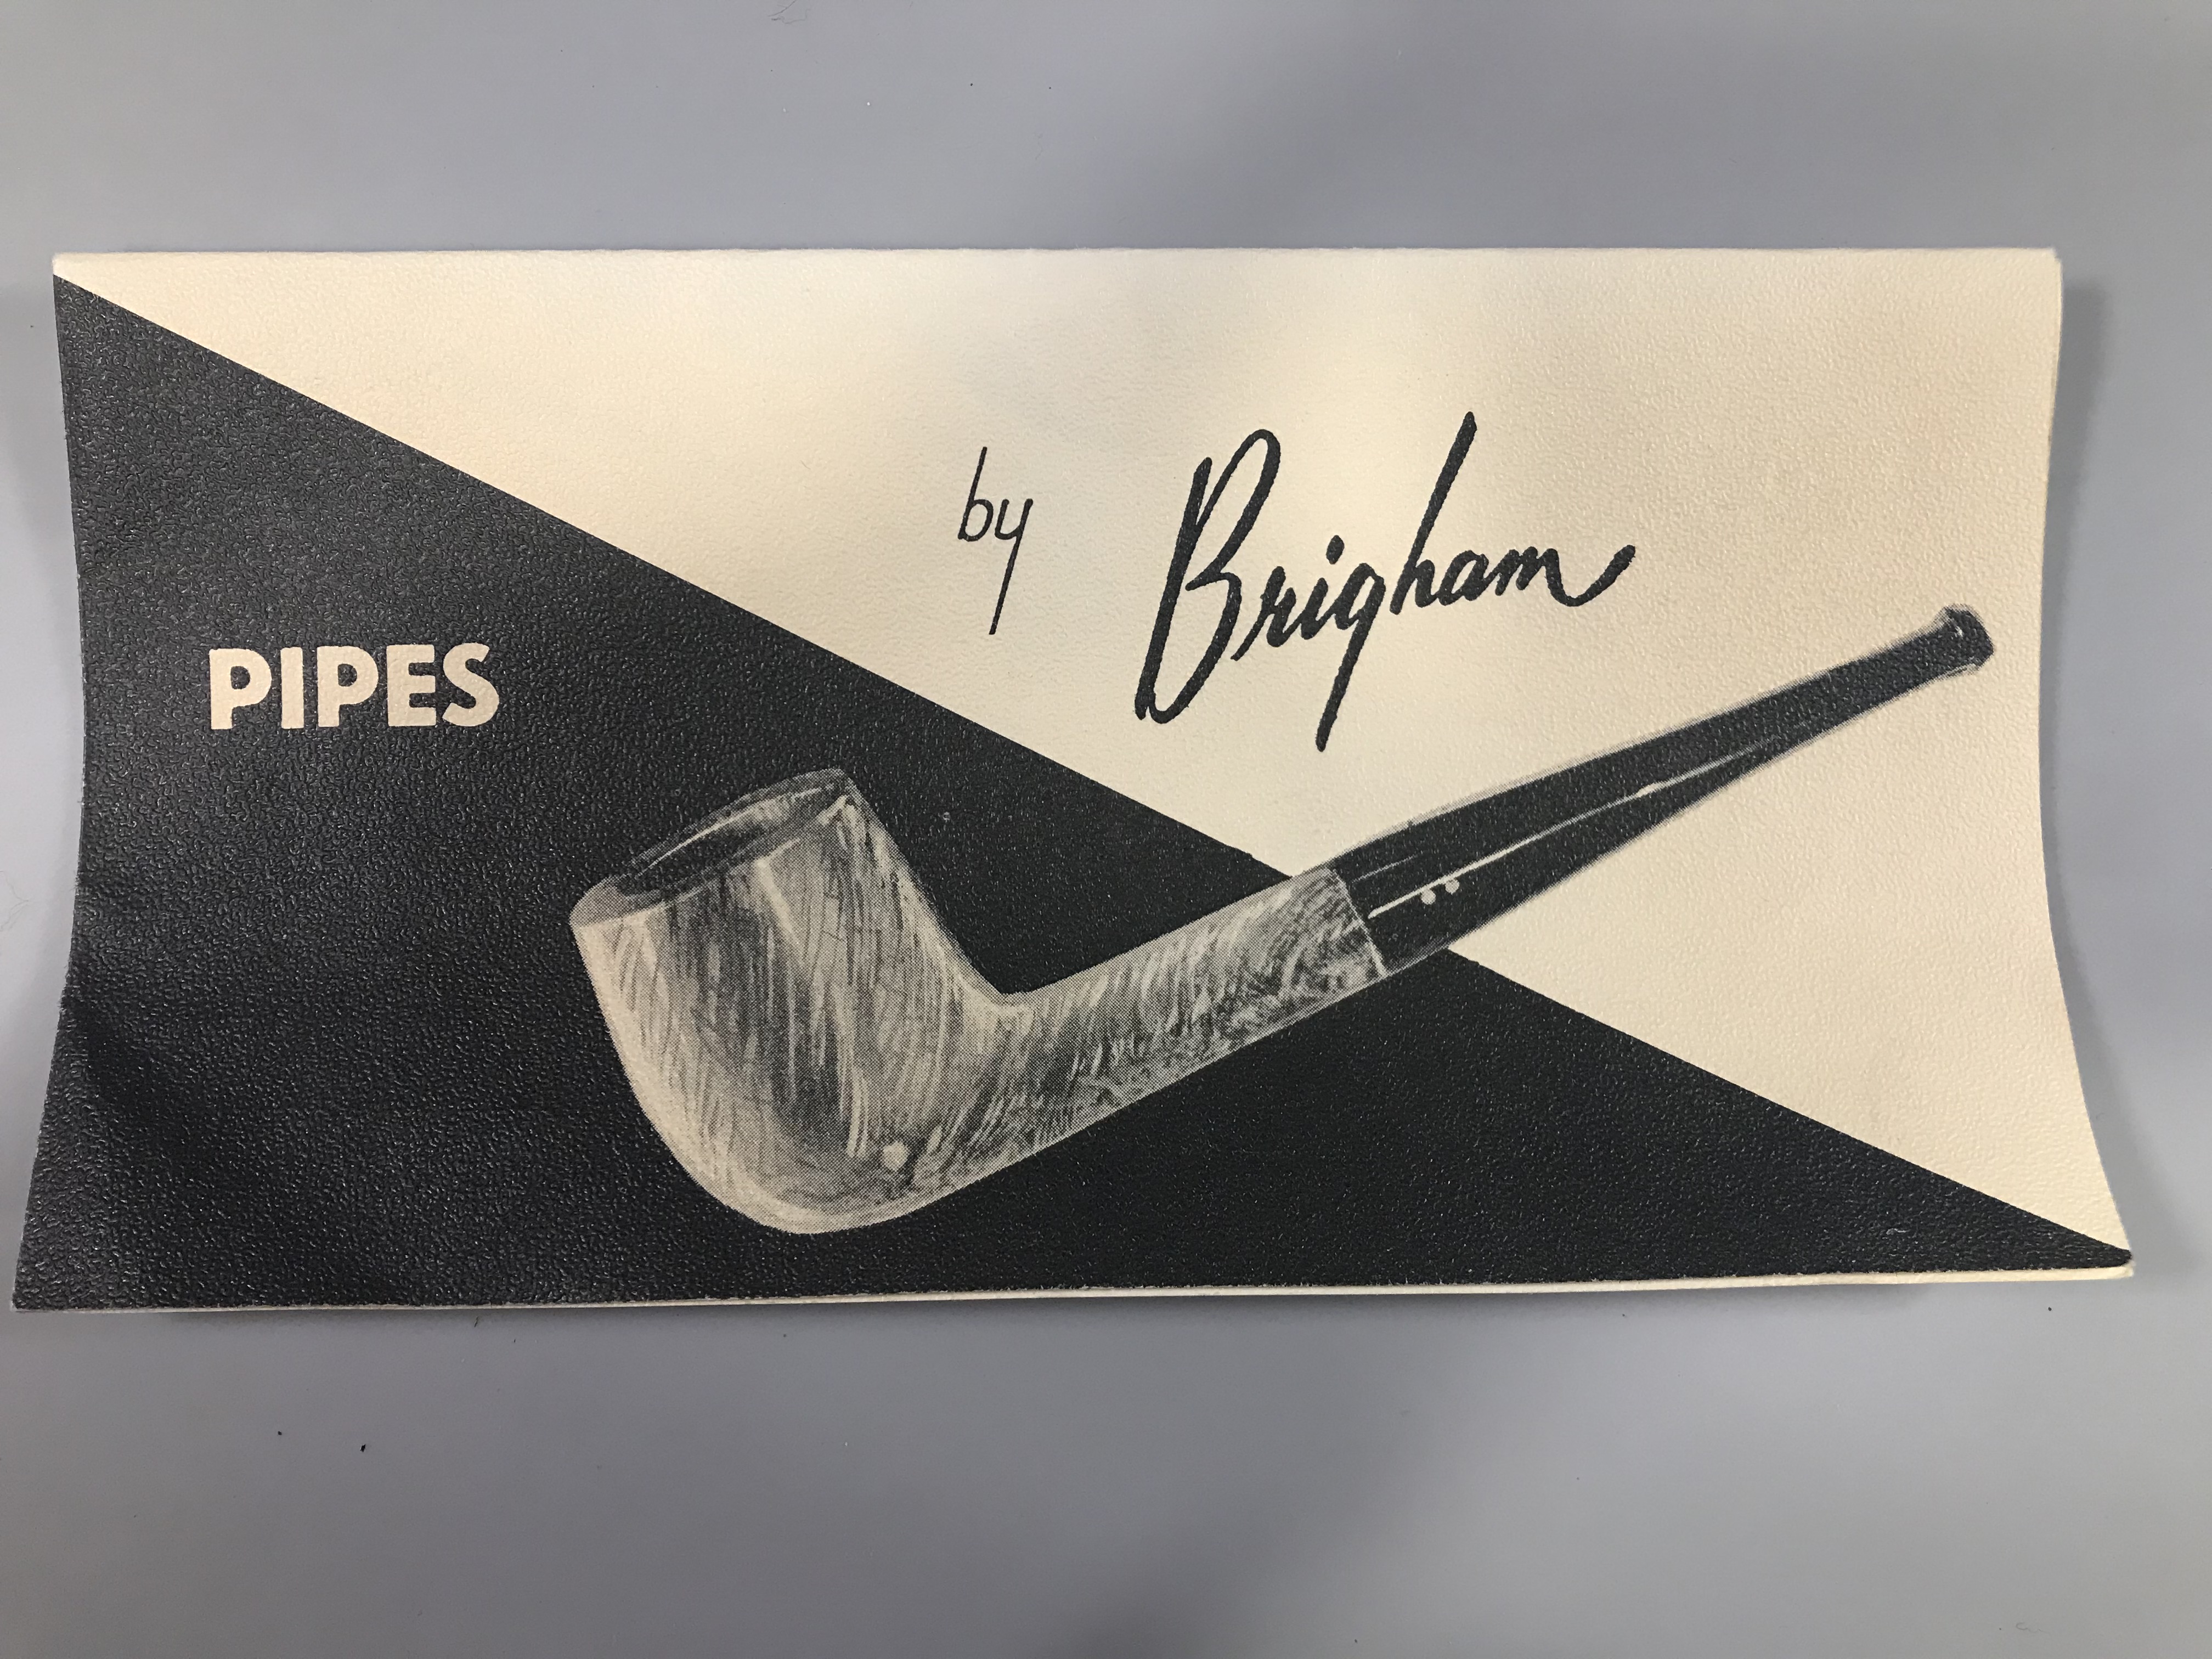
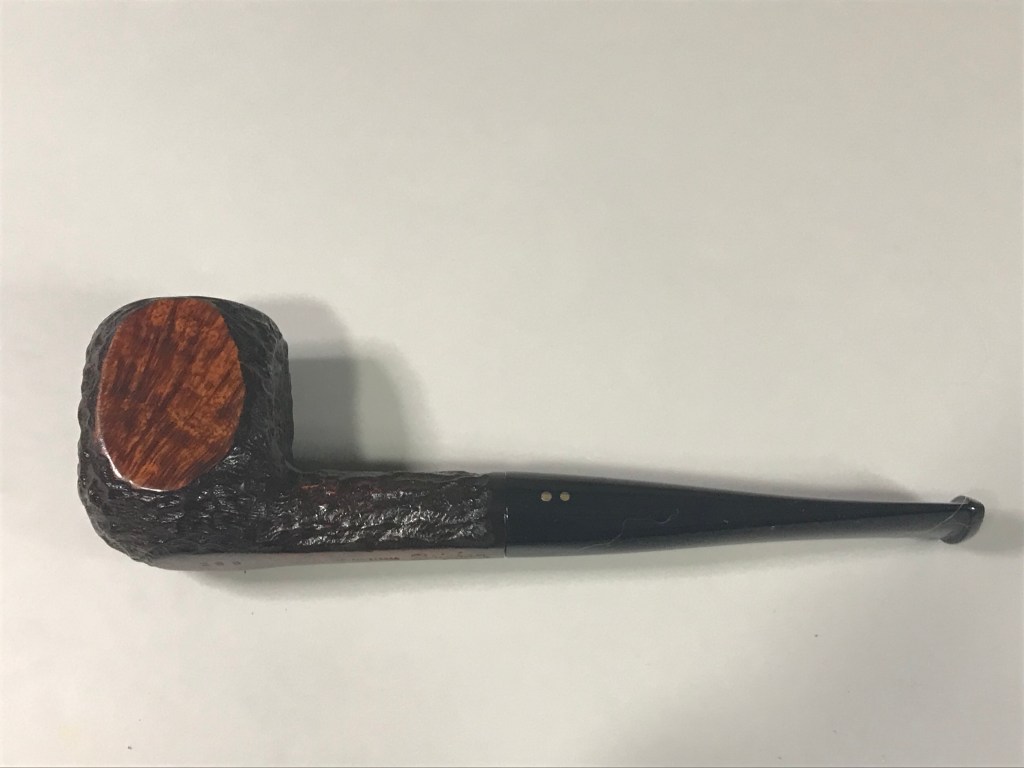
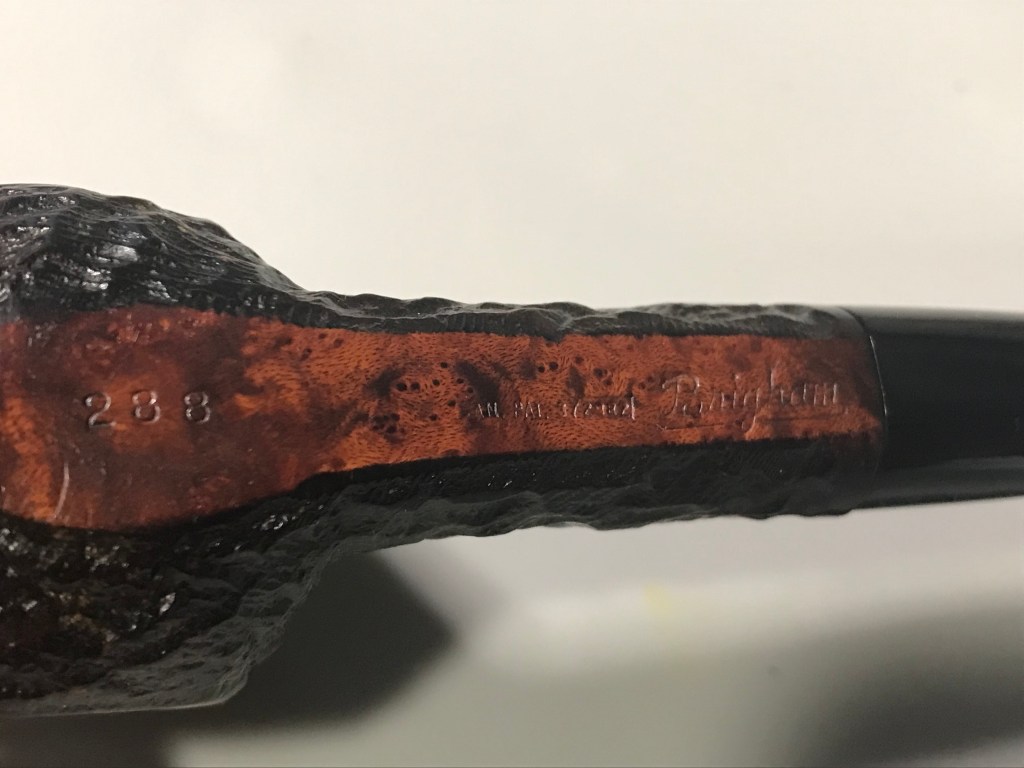
We established that Brigham didn’t move to 121 King St until 1954. This second pipe I’m going to estimate is from 1955, the last of the patent era pipes. The other curious matter is the shape. Stamped as shape (288), however; there is no reference to this a panelled billiard being available in either Brochure, and in the 1950’s how else would you know you could get one unless you shopped in person. Perhaps this was a shape only available “in store”.

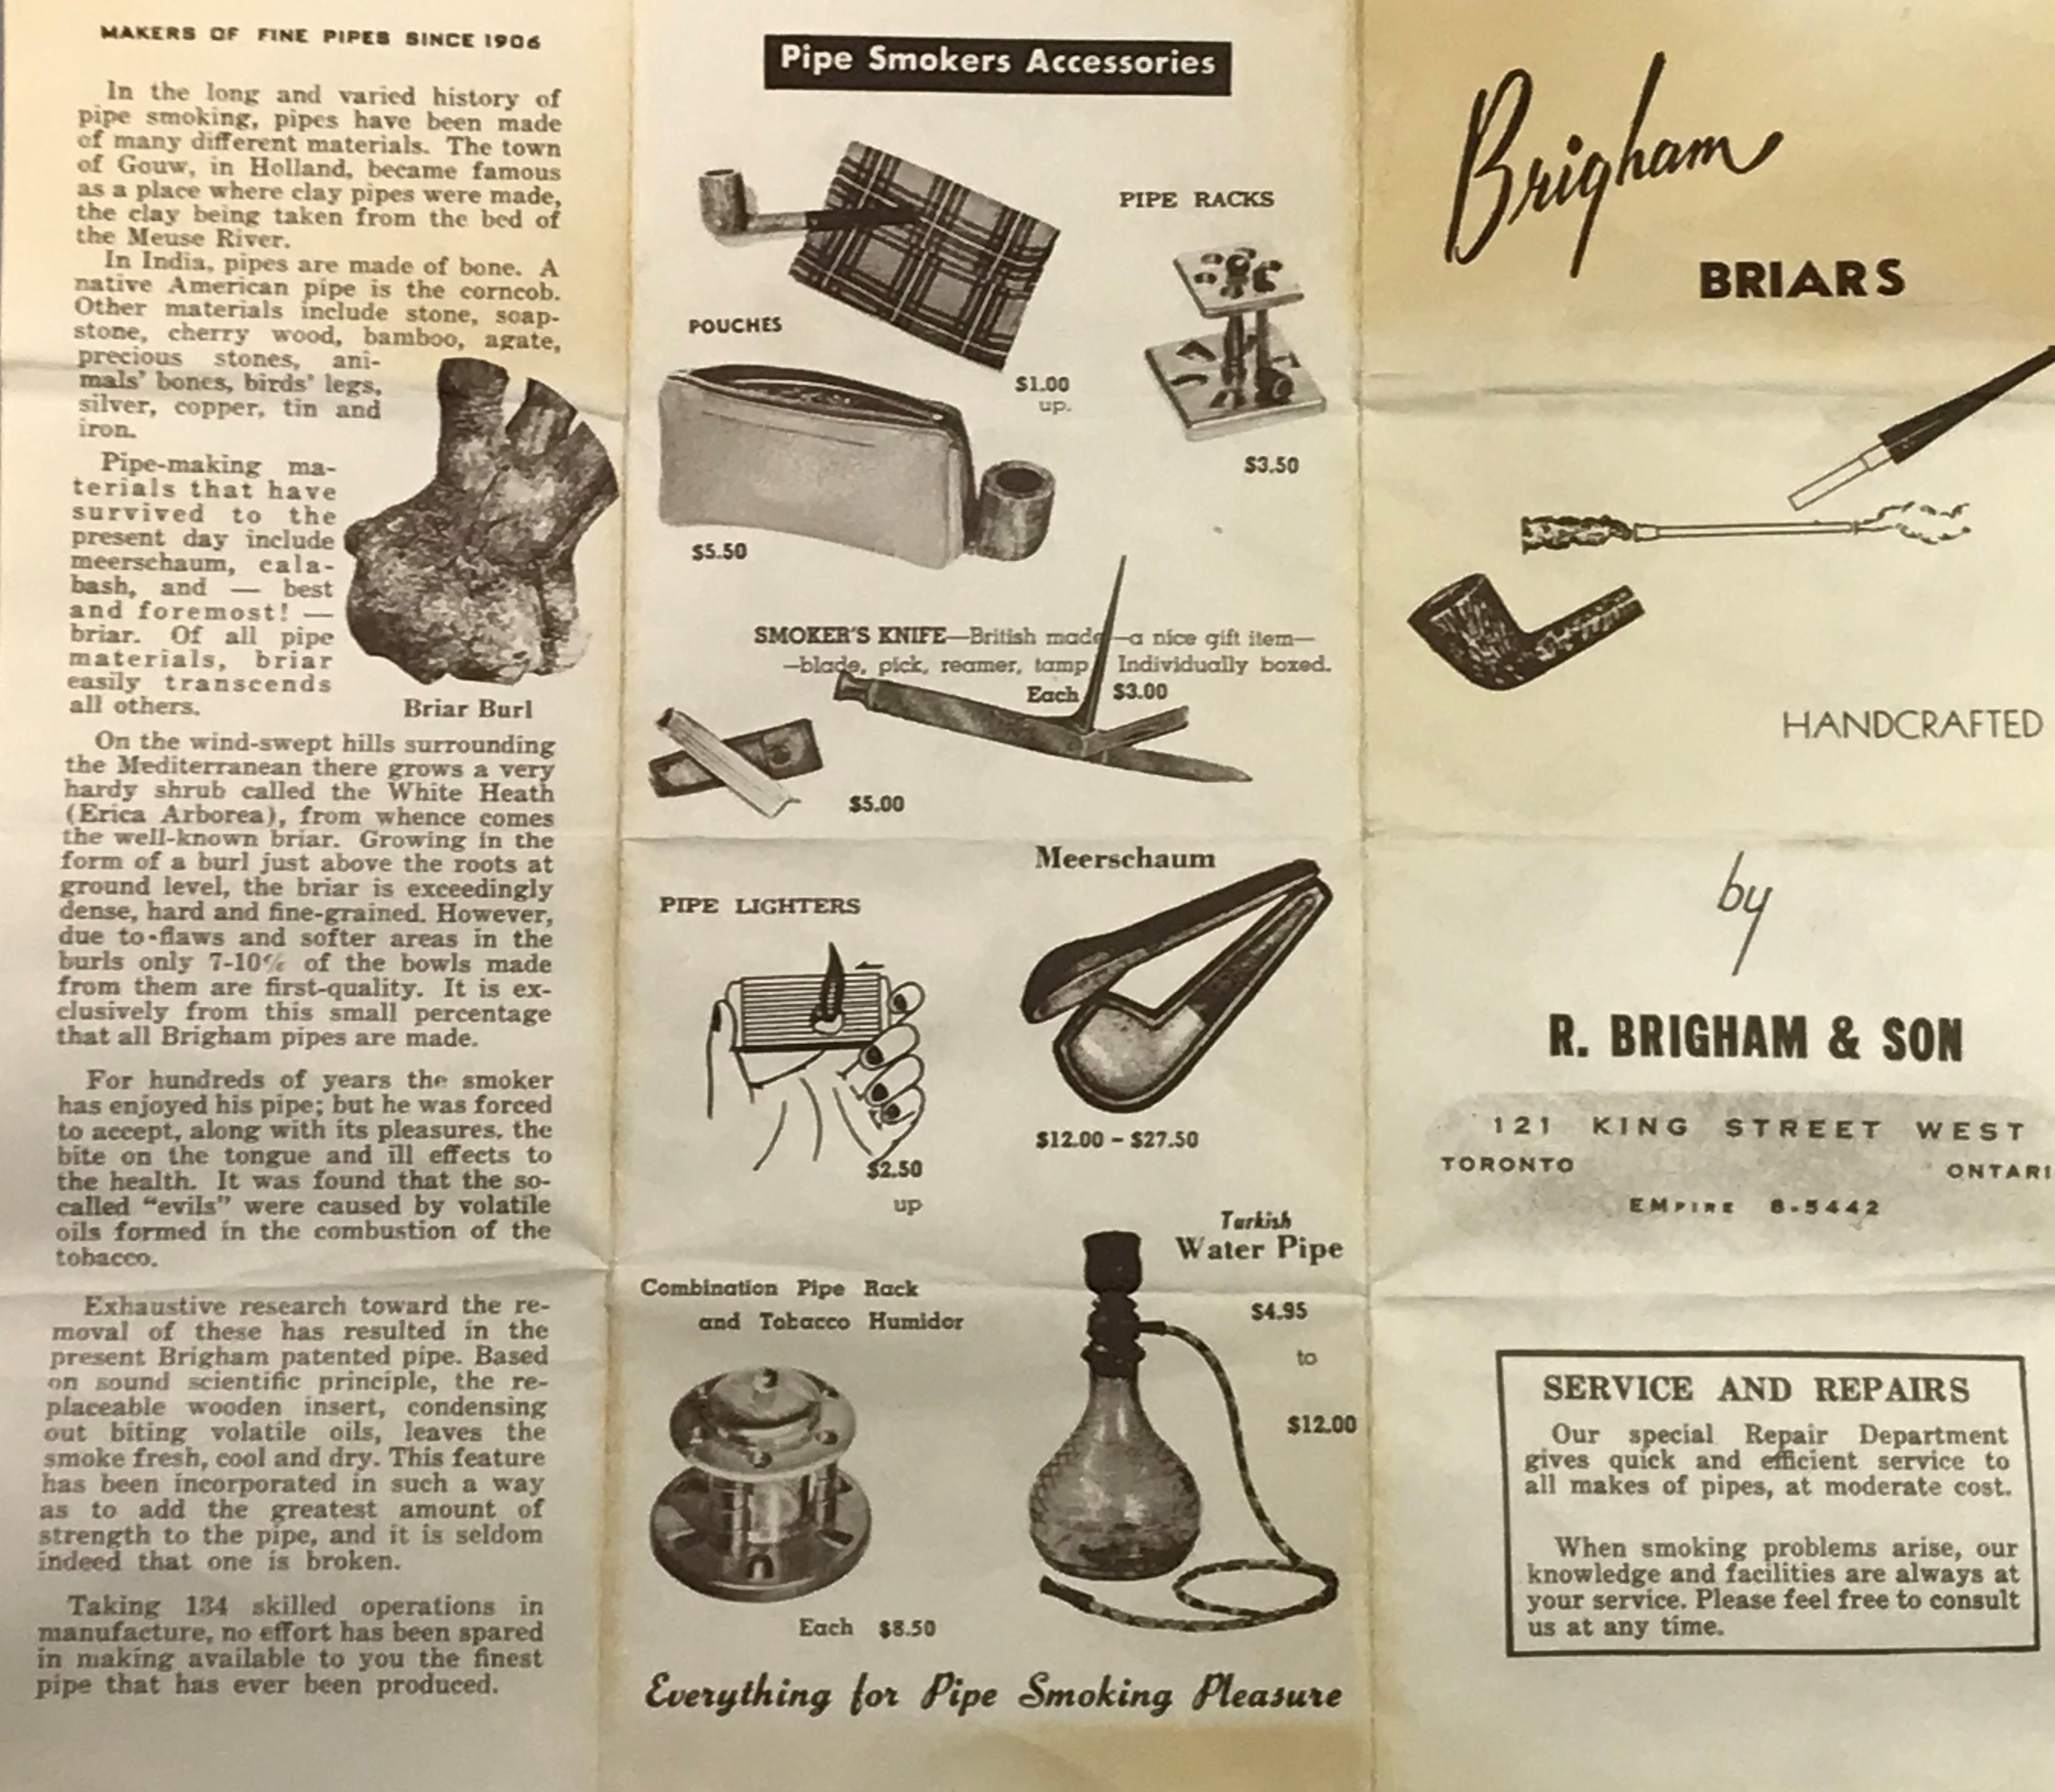
Another noticeable difference is the addition of more pipe grades. Brigham reportedly added grades from the 40’s -60’s. The previous Patent Era Brochure only offered 1-5 Pin grade options. In this brochure we can see the addition of an “Executive” and “Director” grade.

Pipes now came in grades 1-6 Pin with the “Executive” grade, a vertical 3 pin, now a total of 7 grades for Brigham. The patent era “Special Grain”, previously the 4 dot pipe, is now the 5 Dot pipe and the “Straight Grain’ is now a 6 dot, their highest grade. You can find more about Brigham Pipes history and grading here—-> Brigham Pipes – A Closer Look at Dots, Dates and Markings. Now on to the restoration.

First Impressions

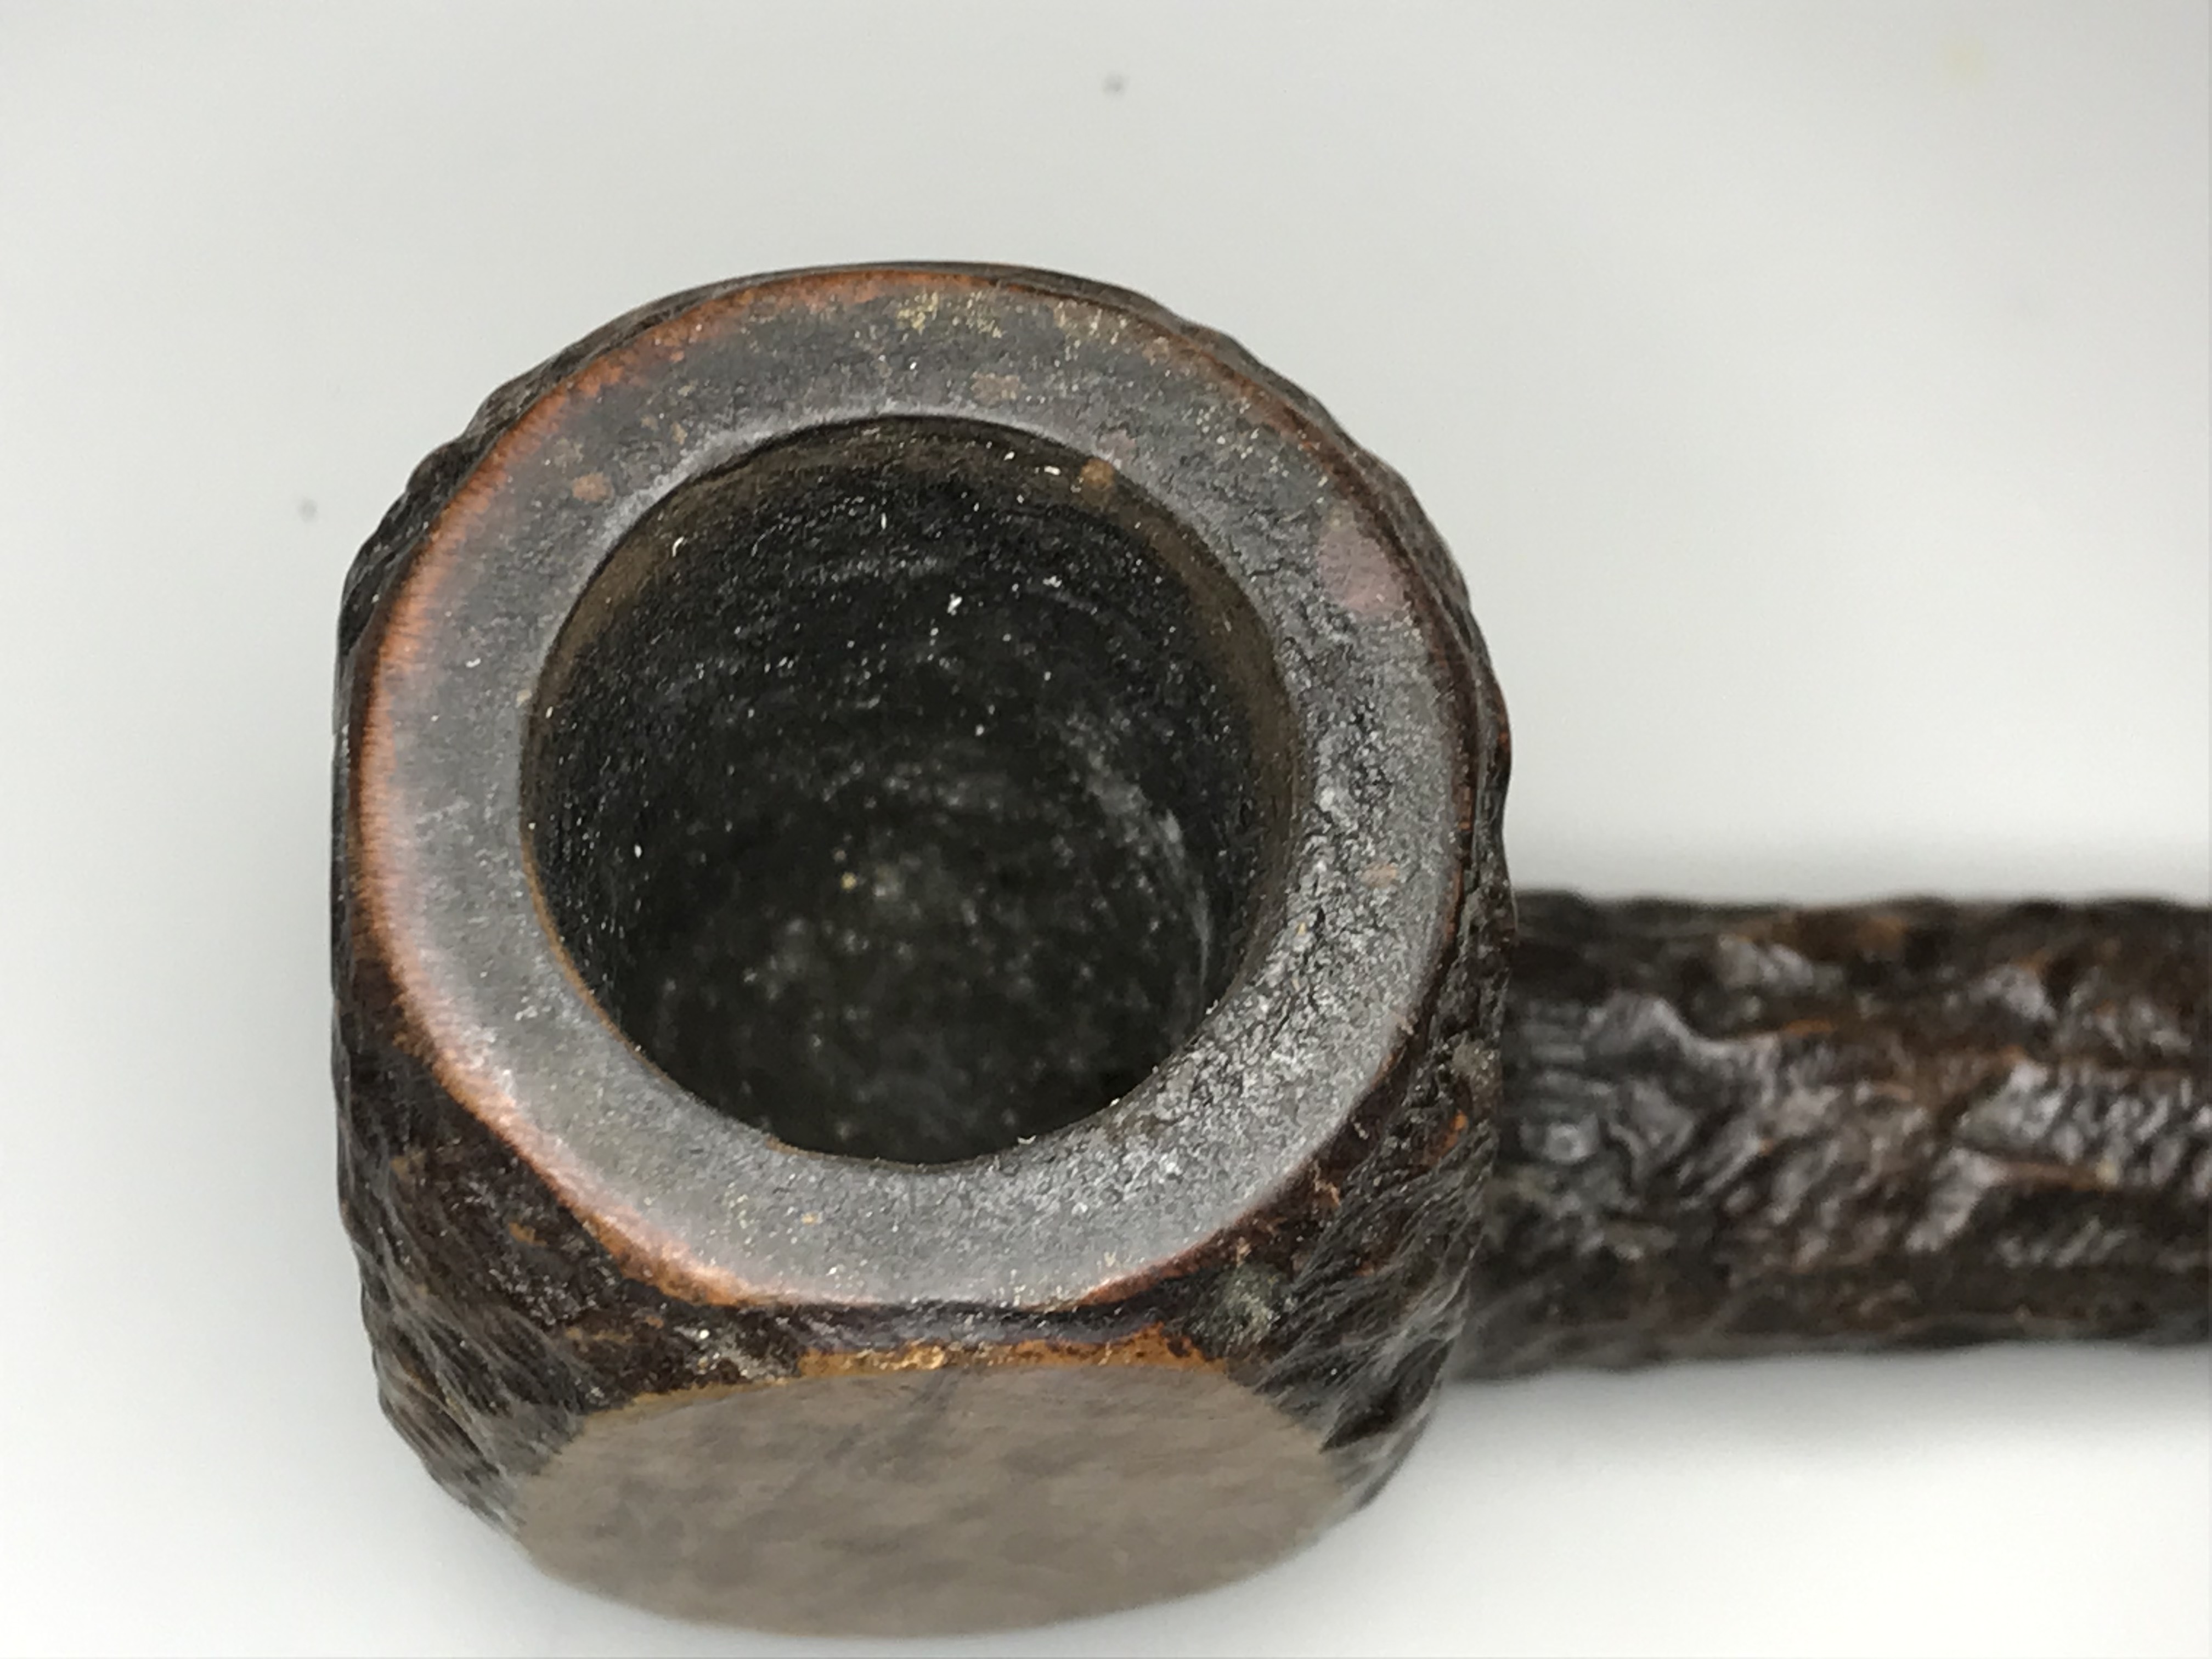
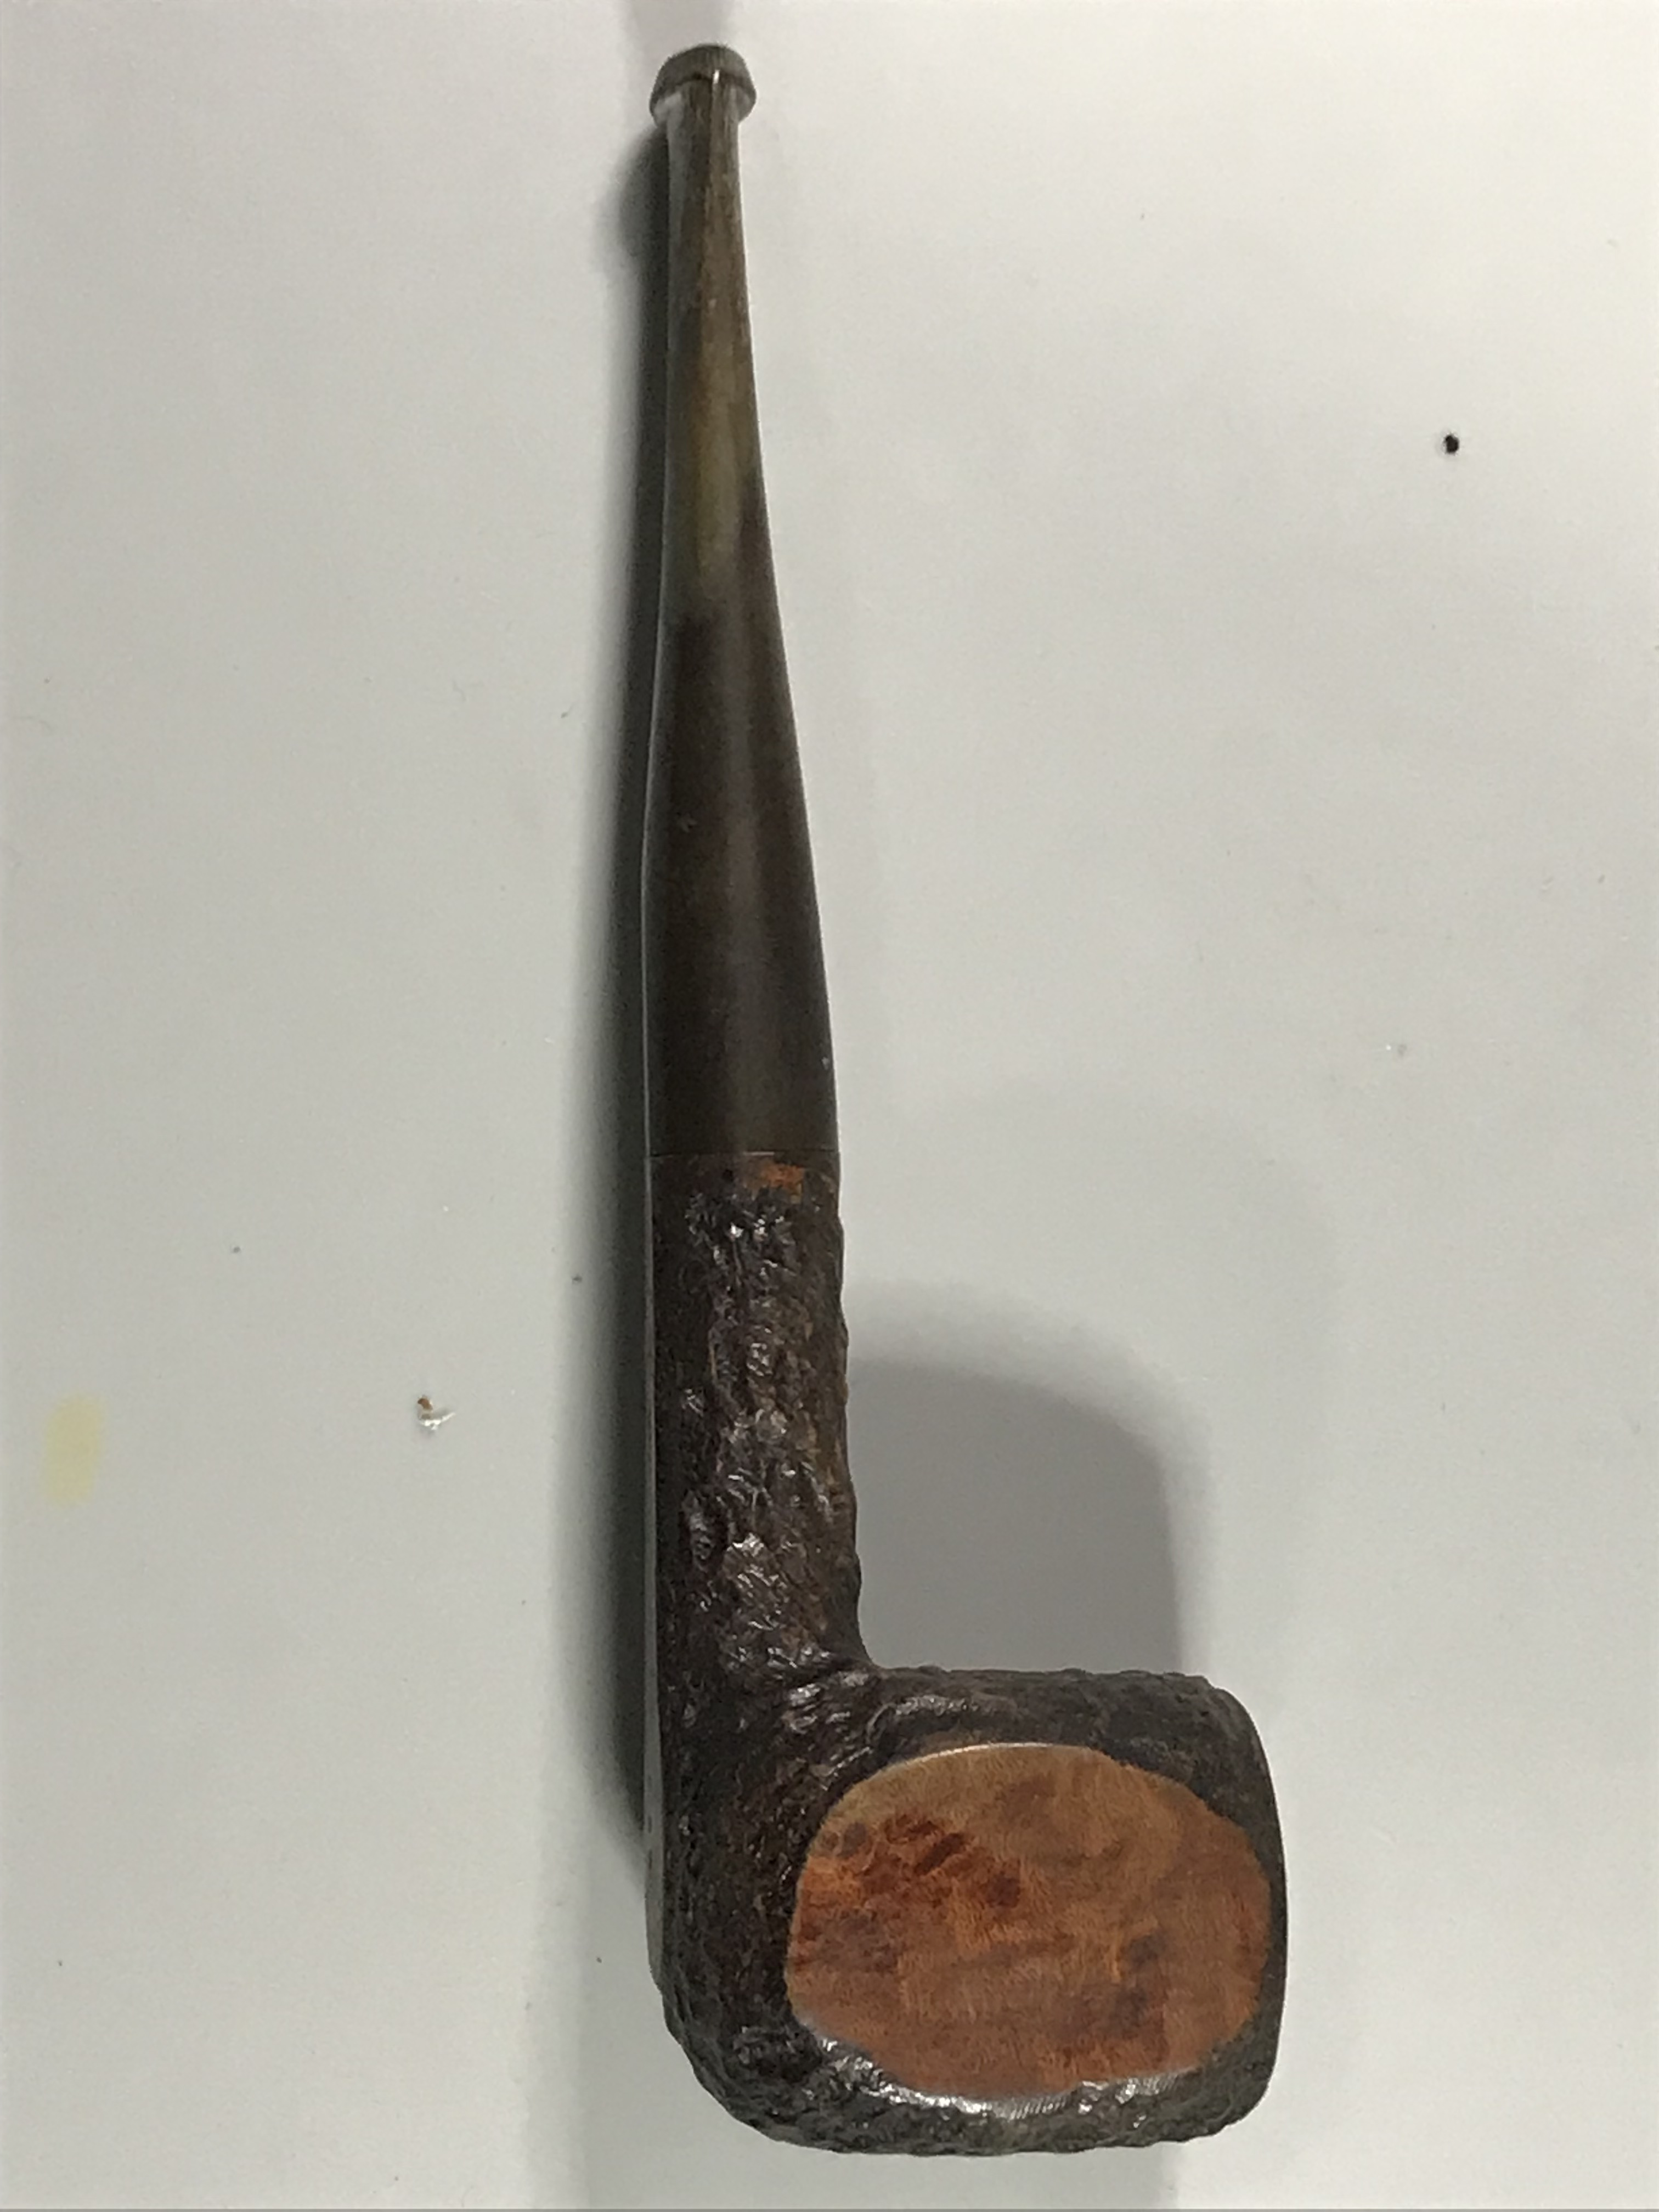
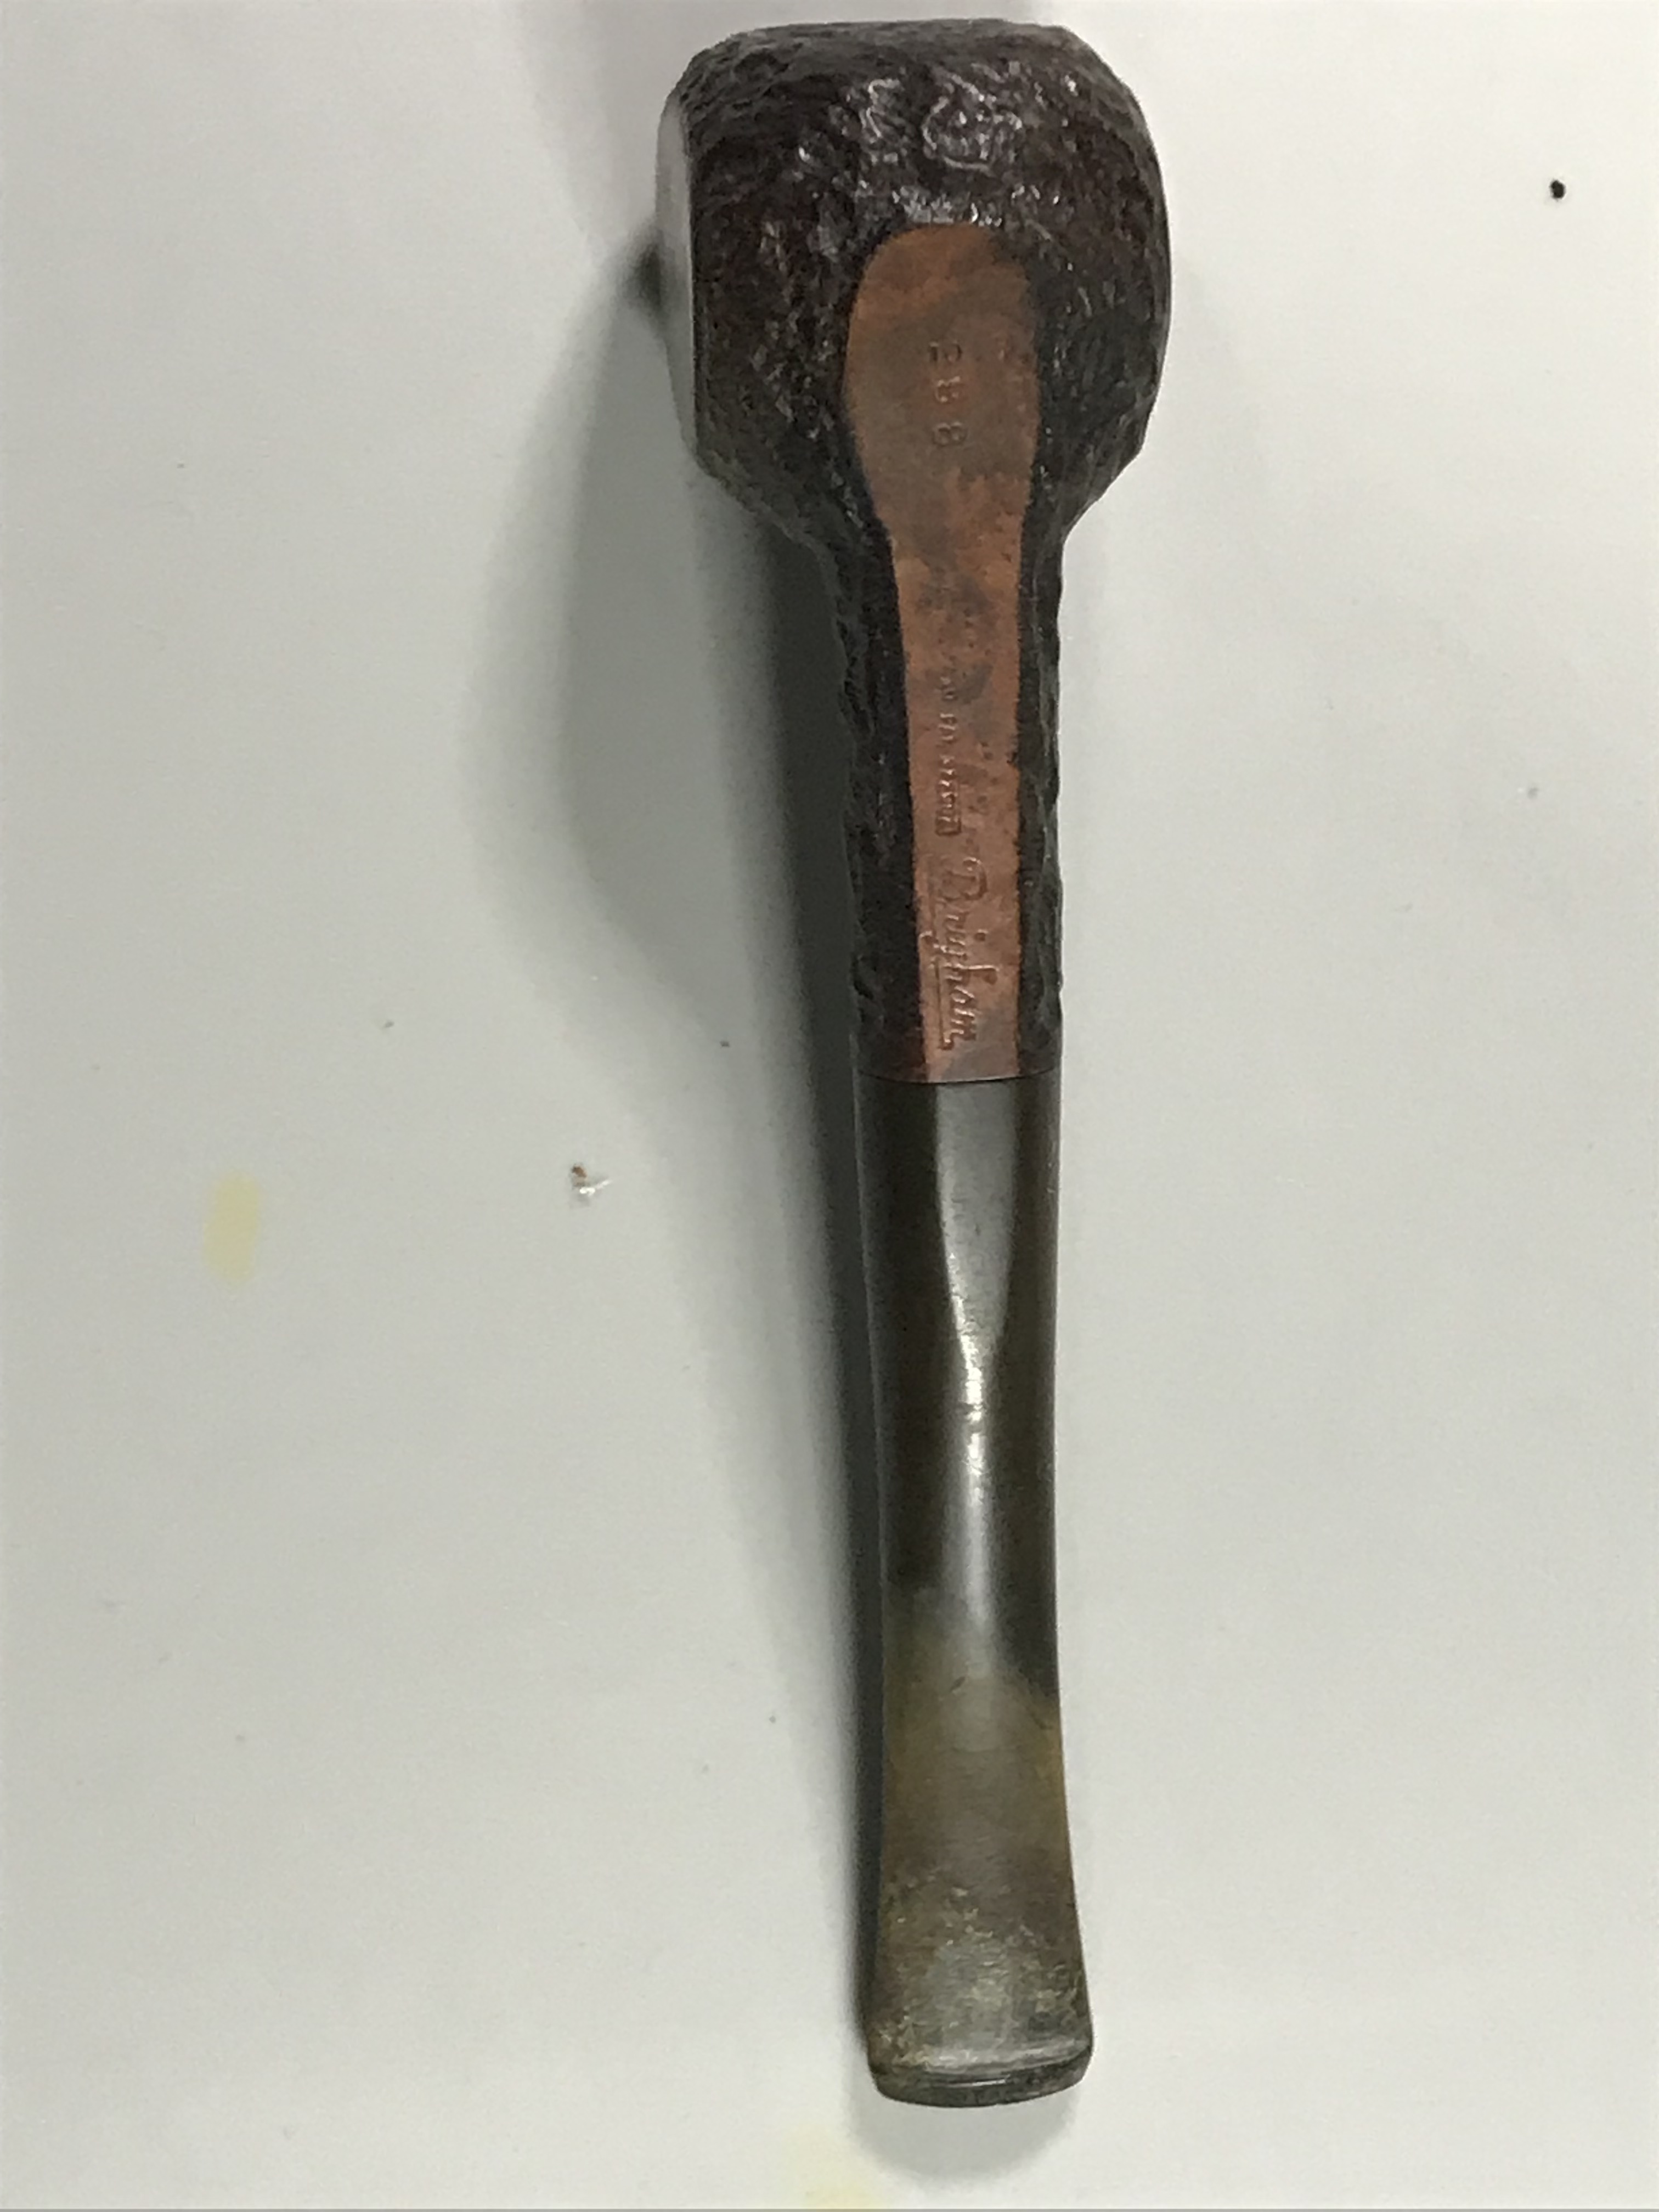
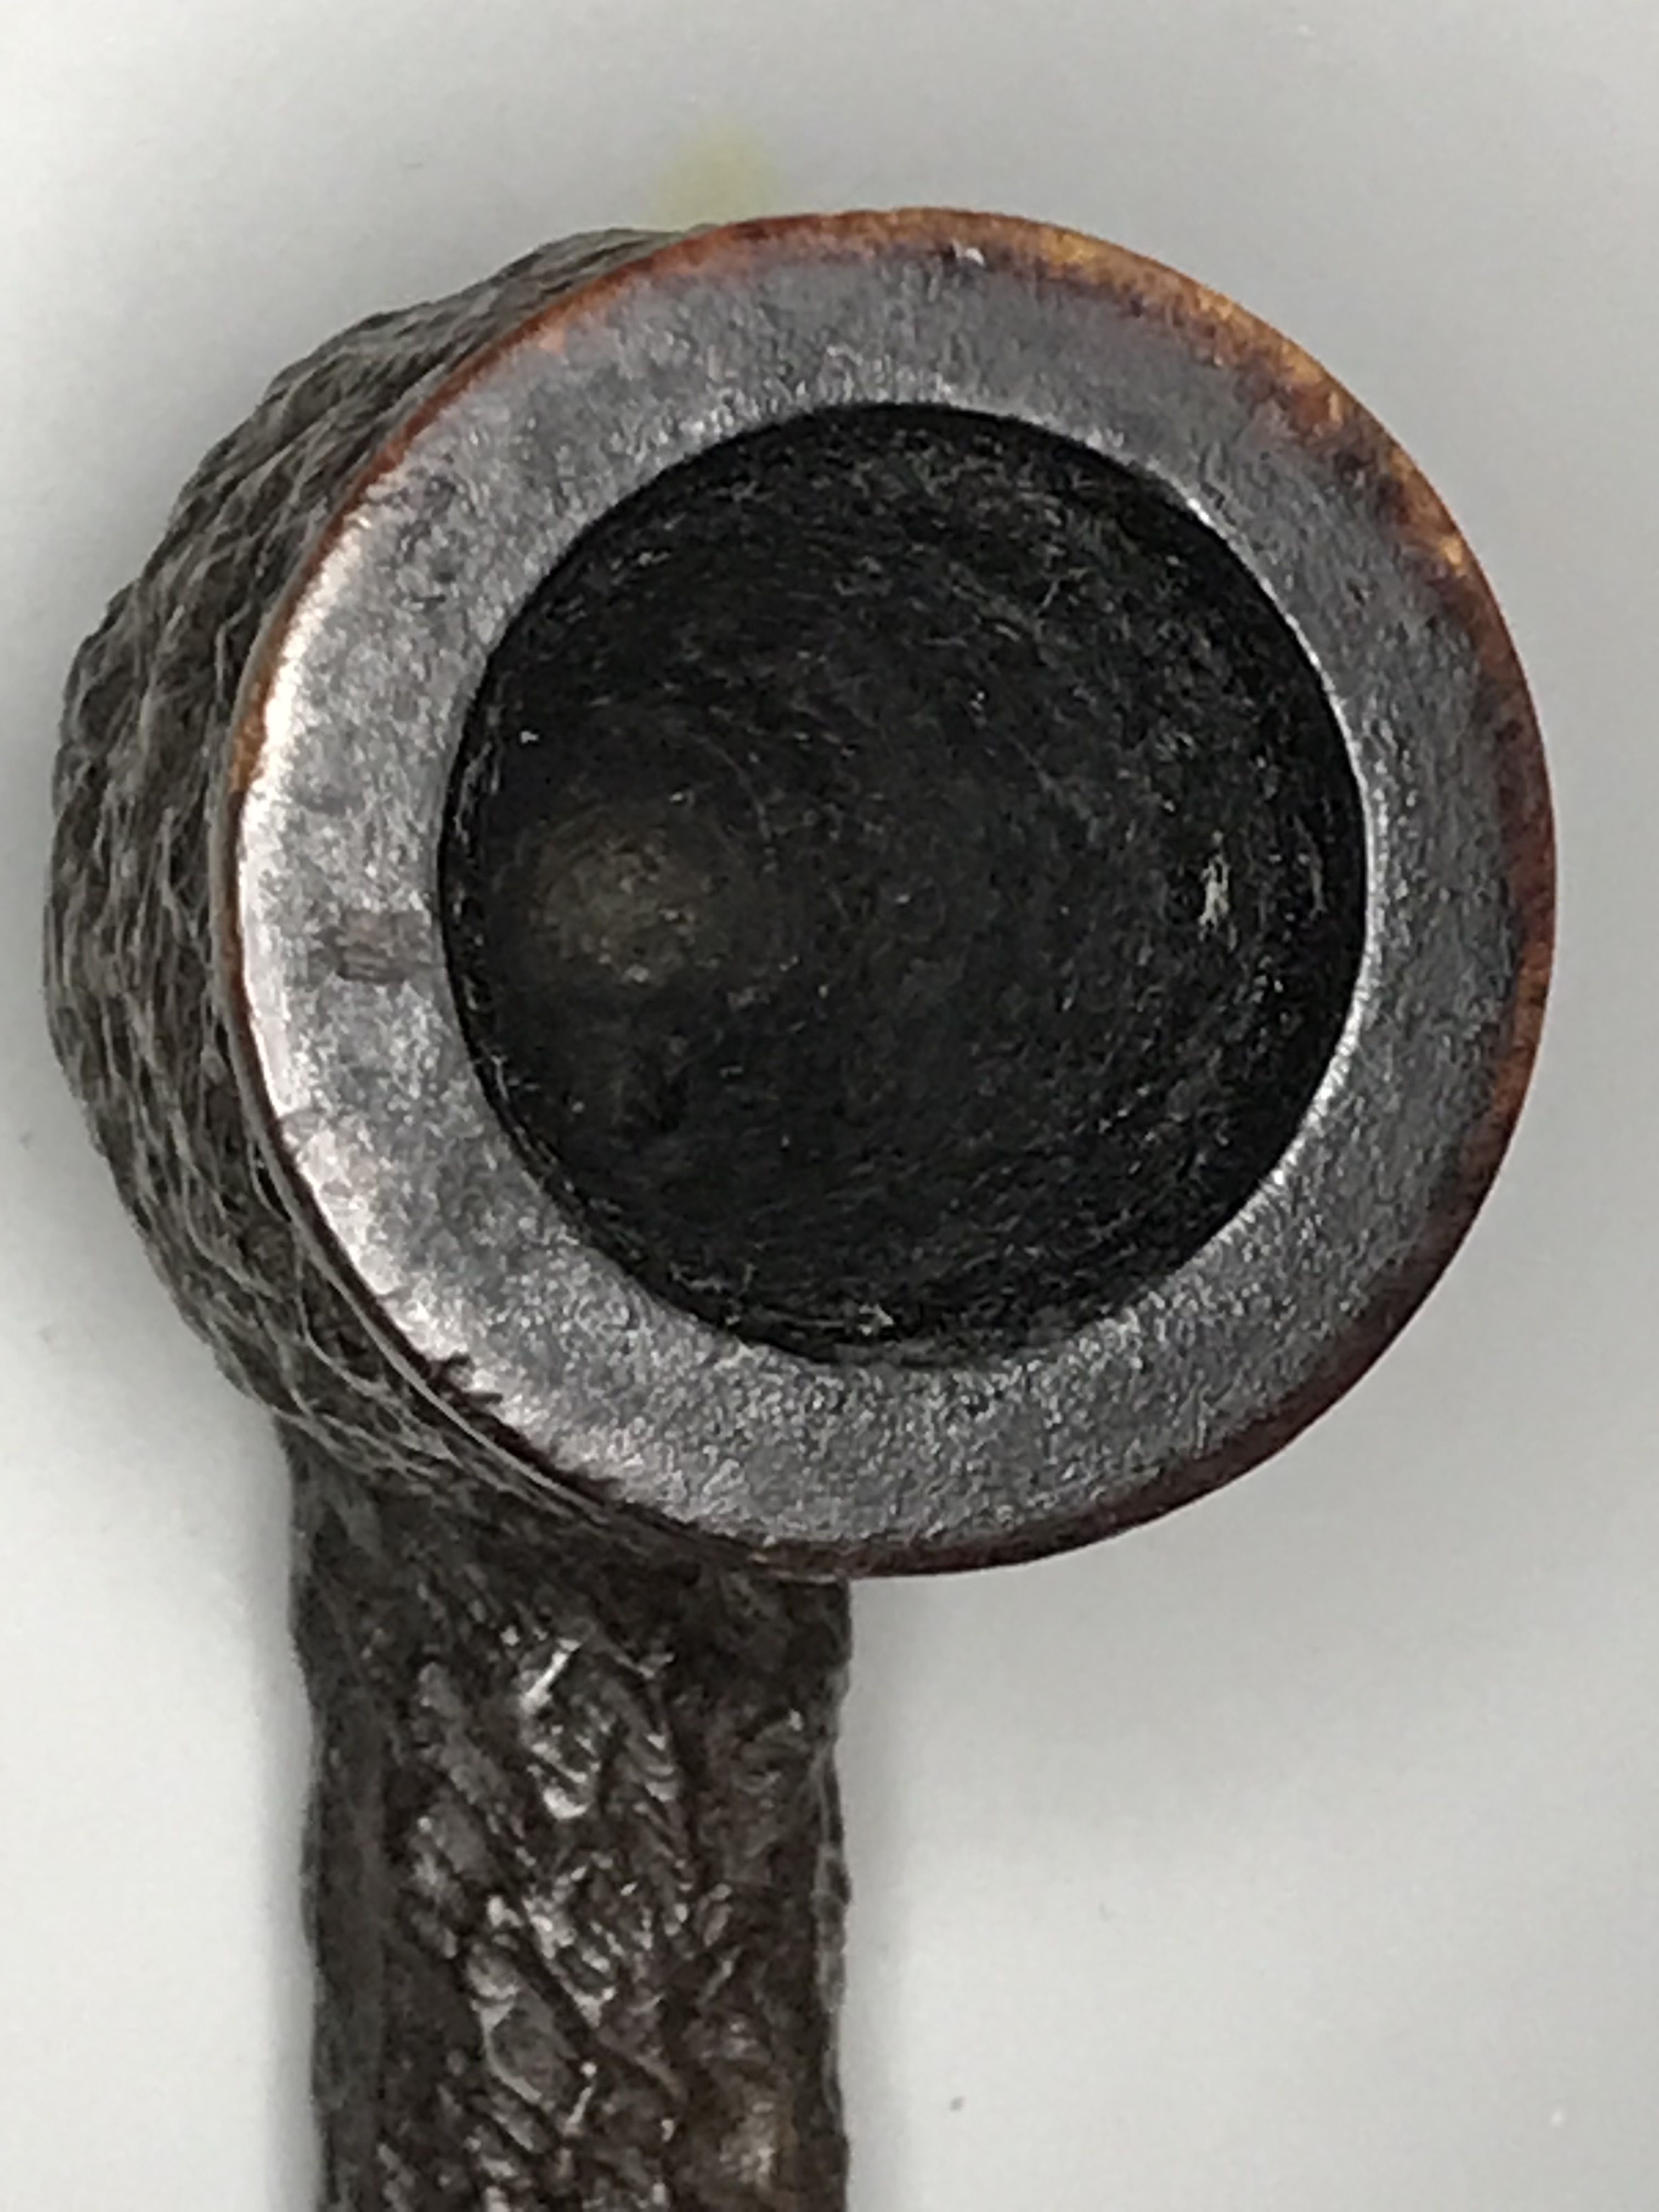
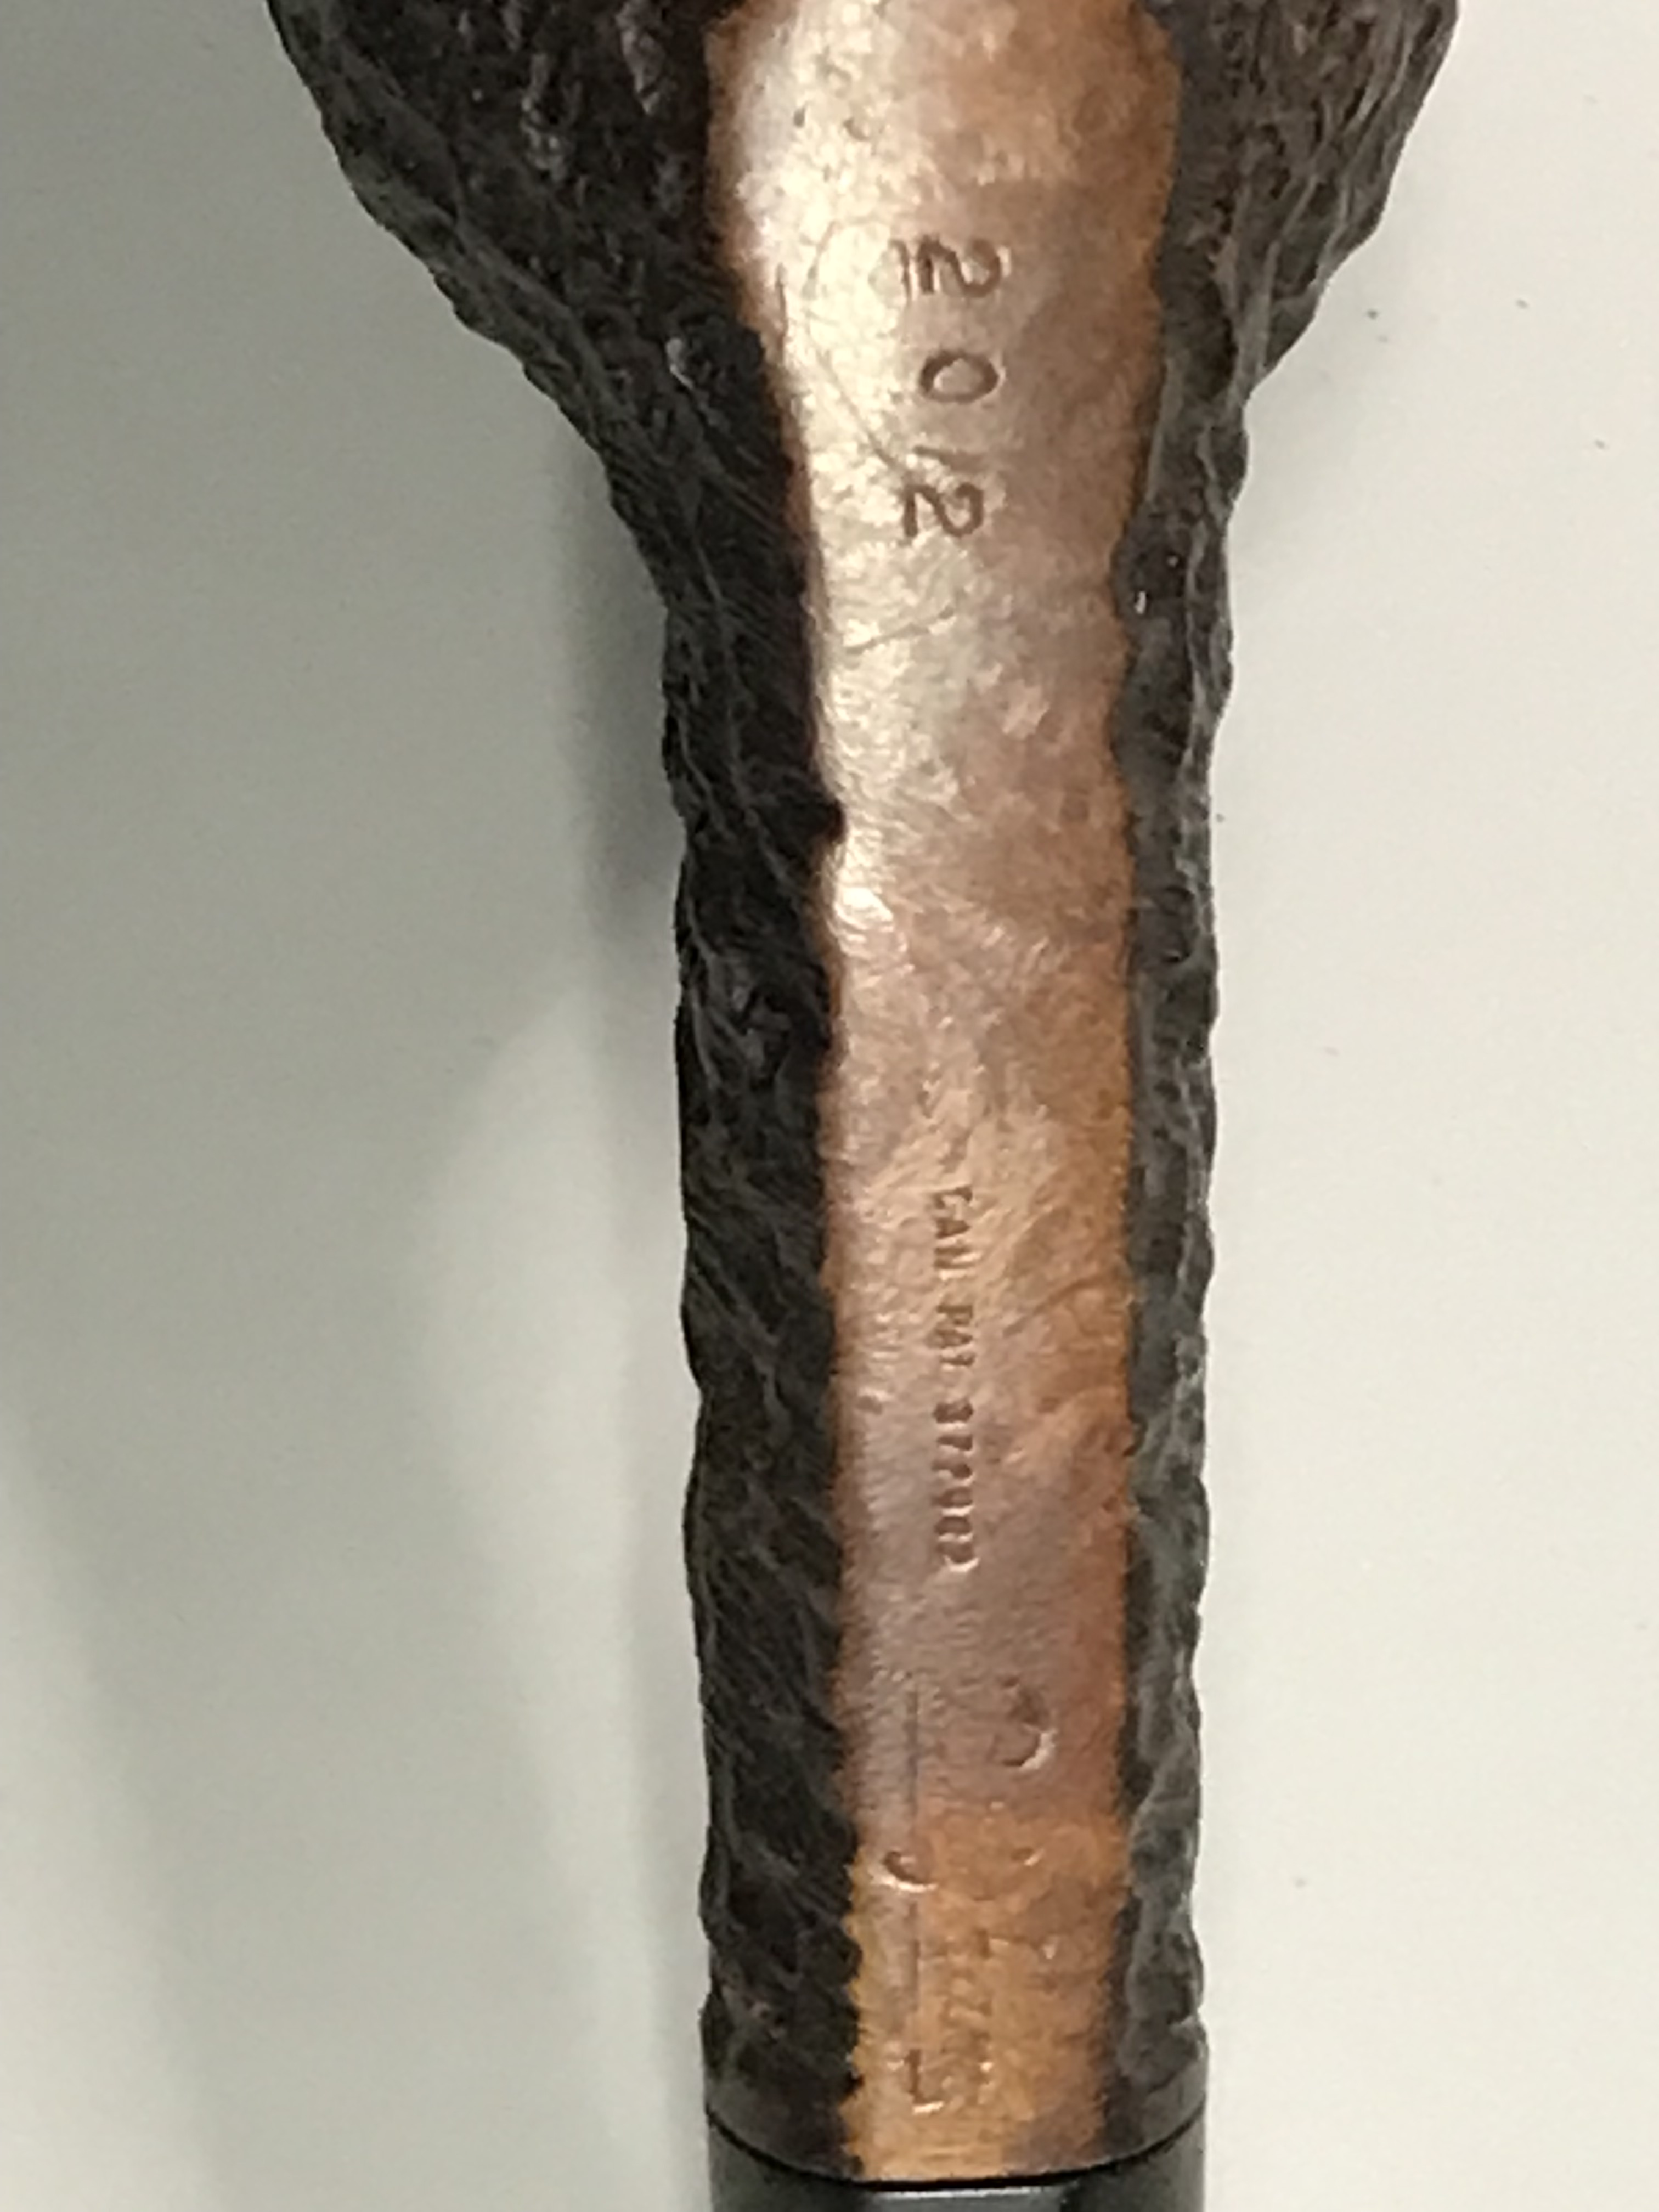
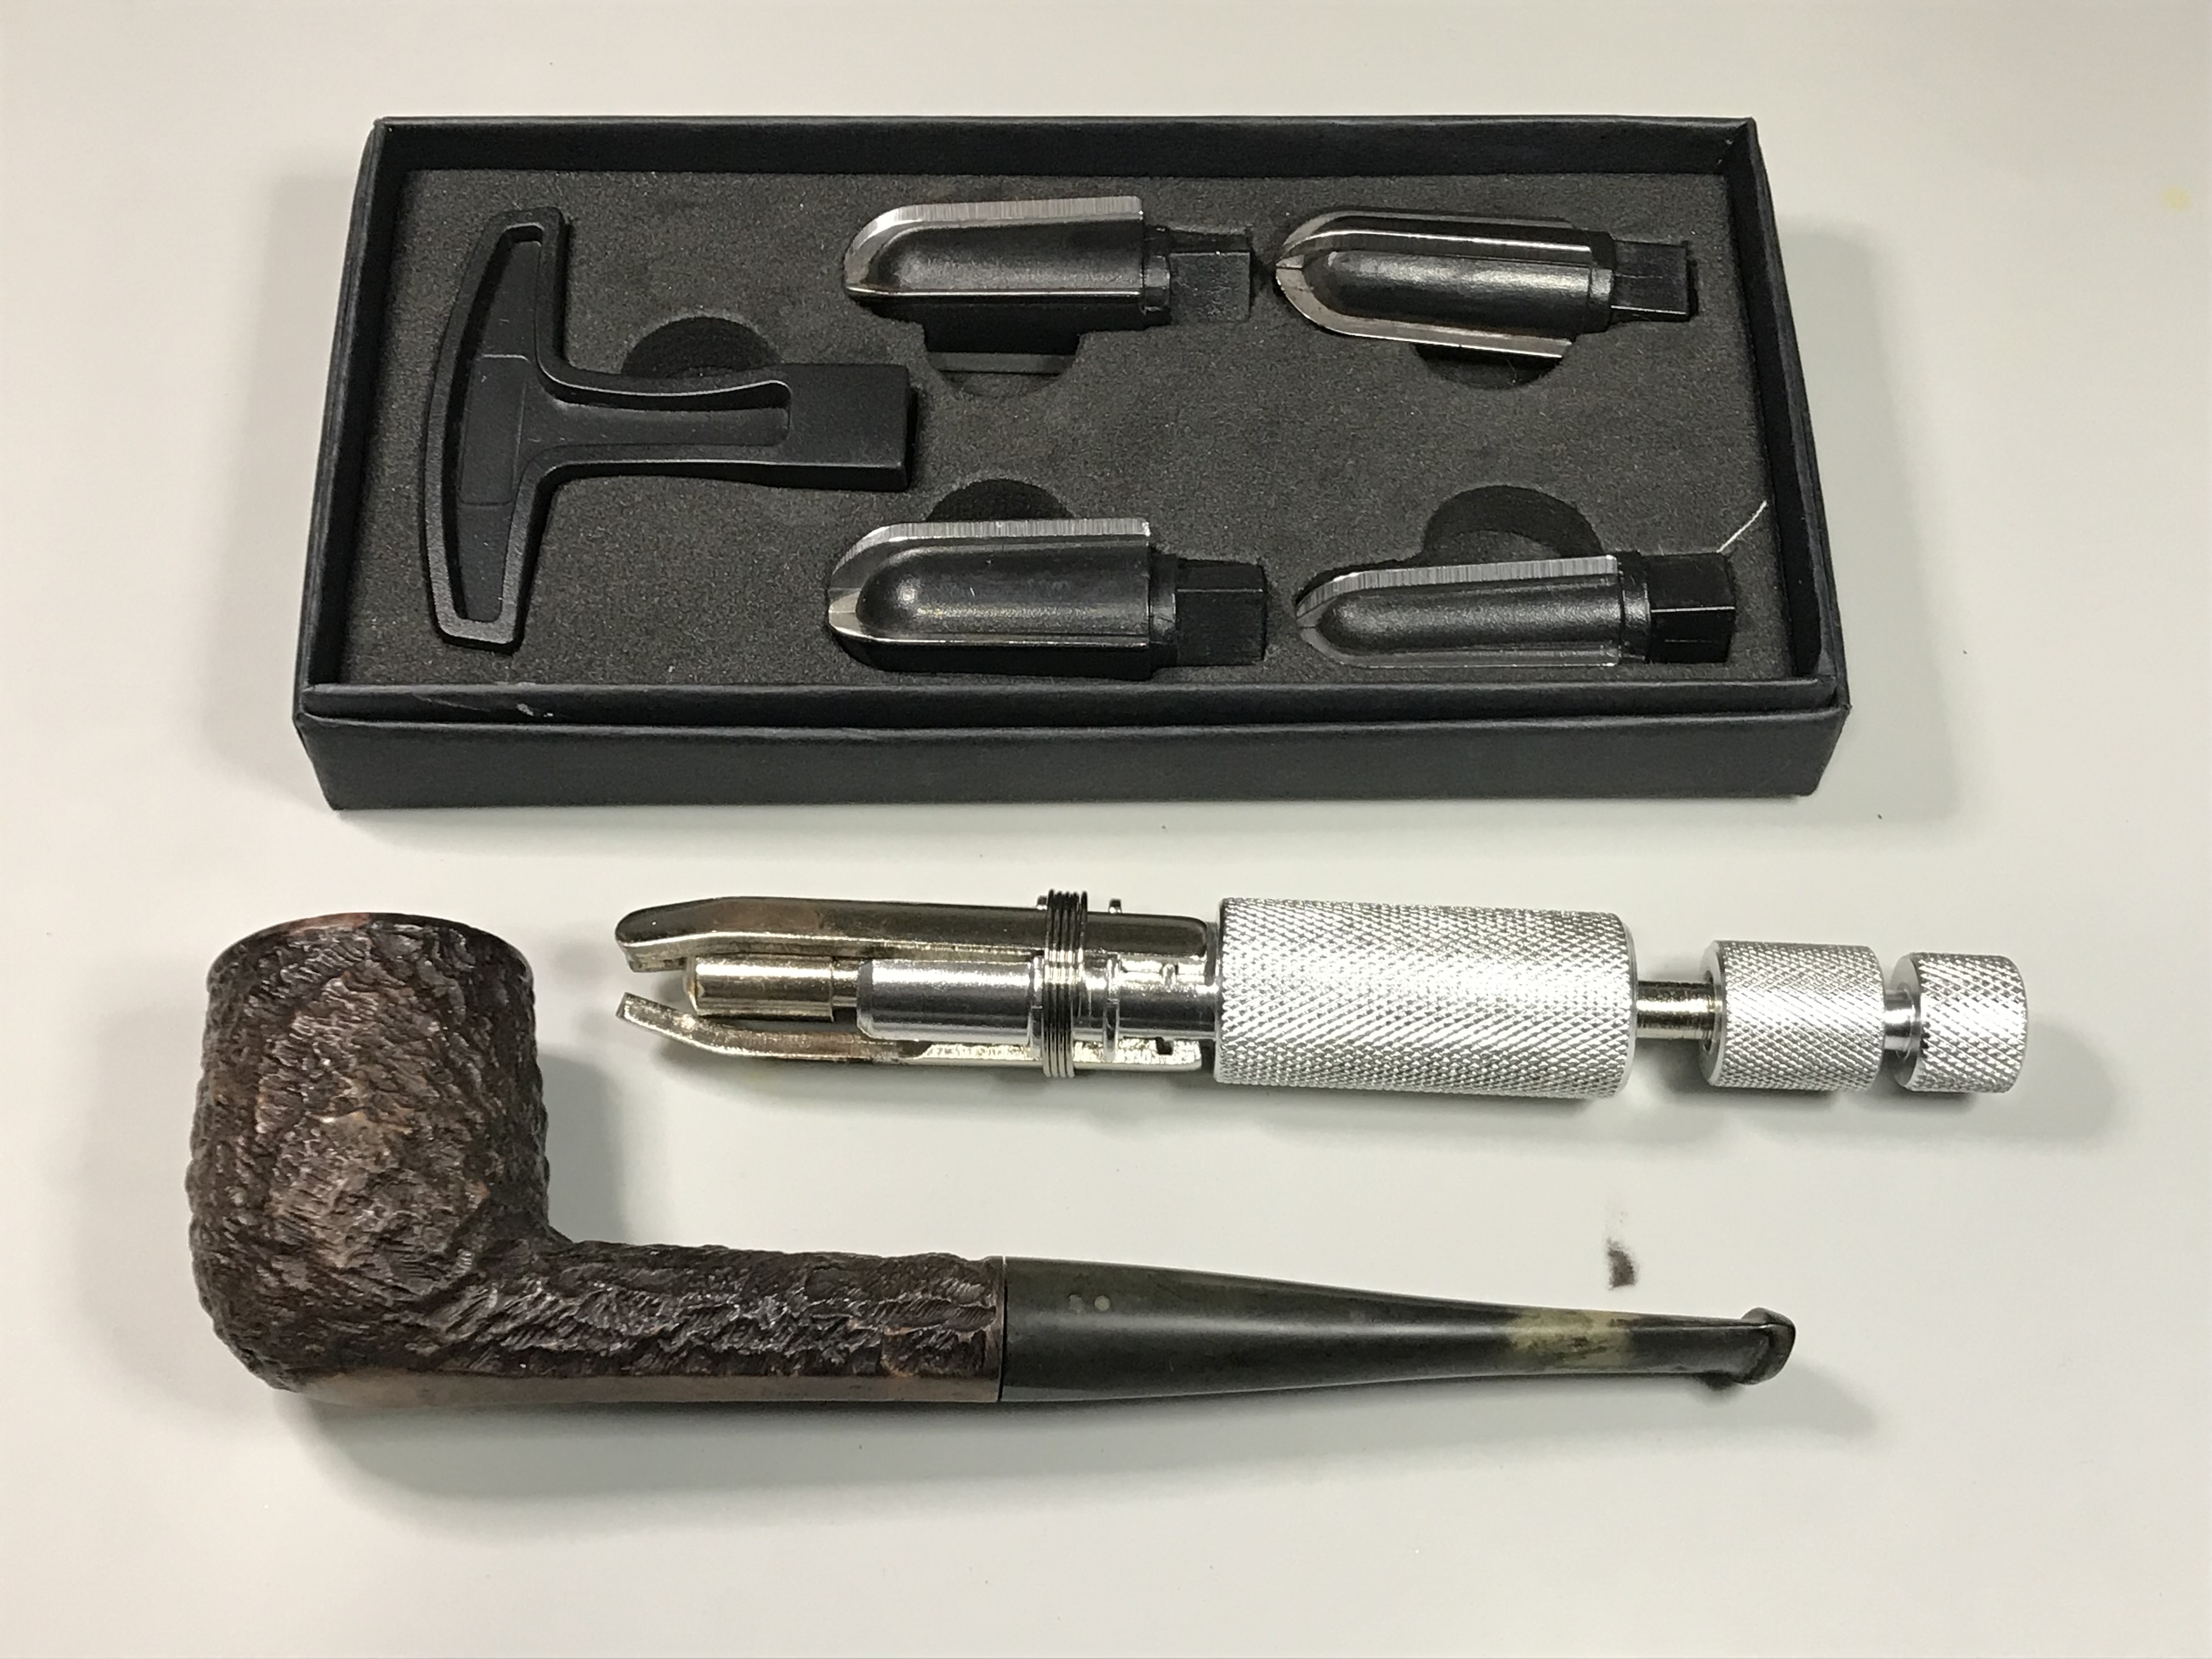
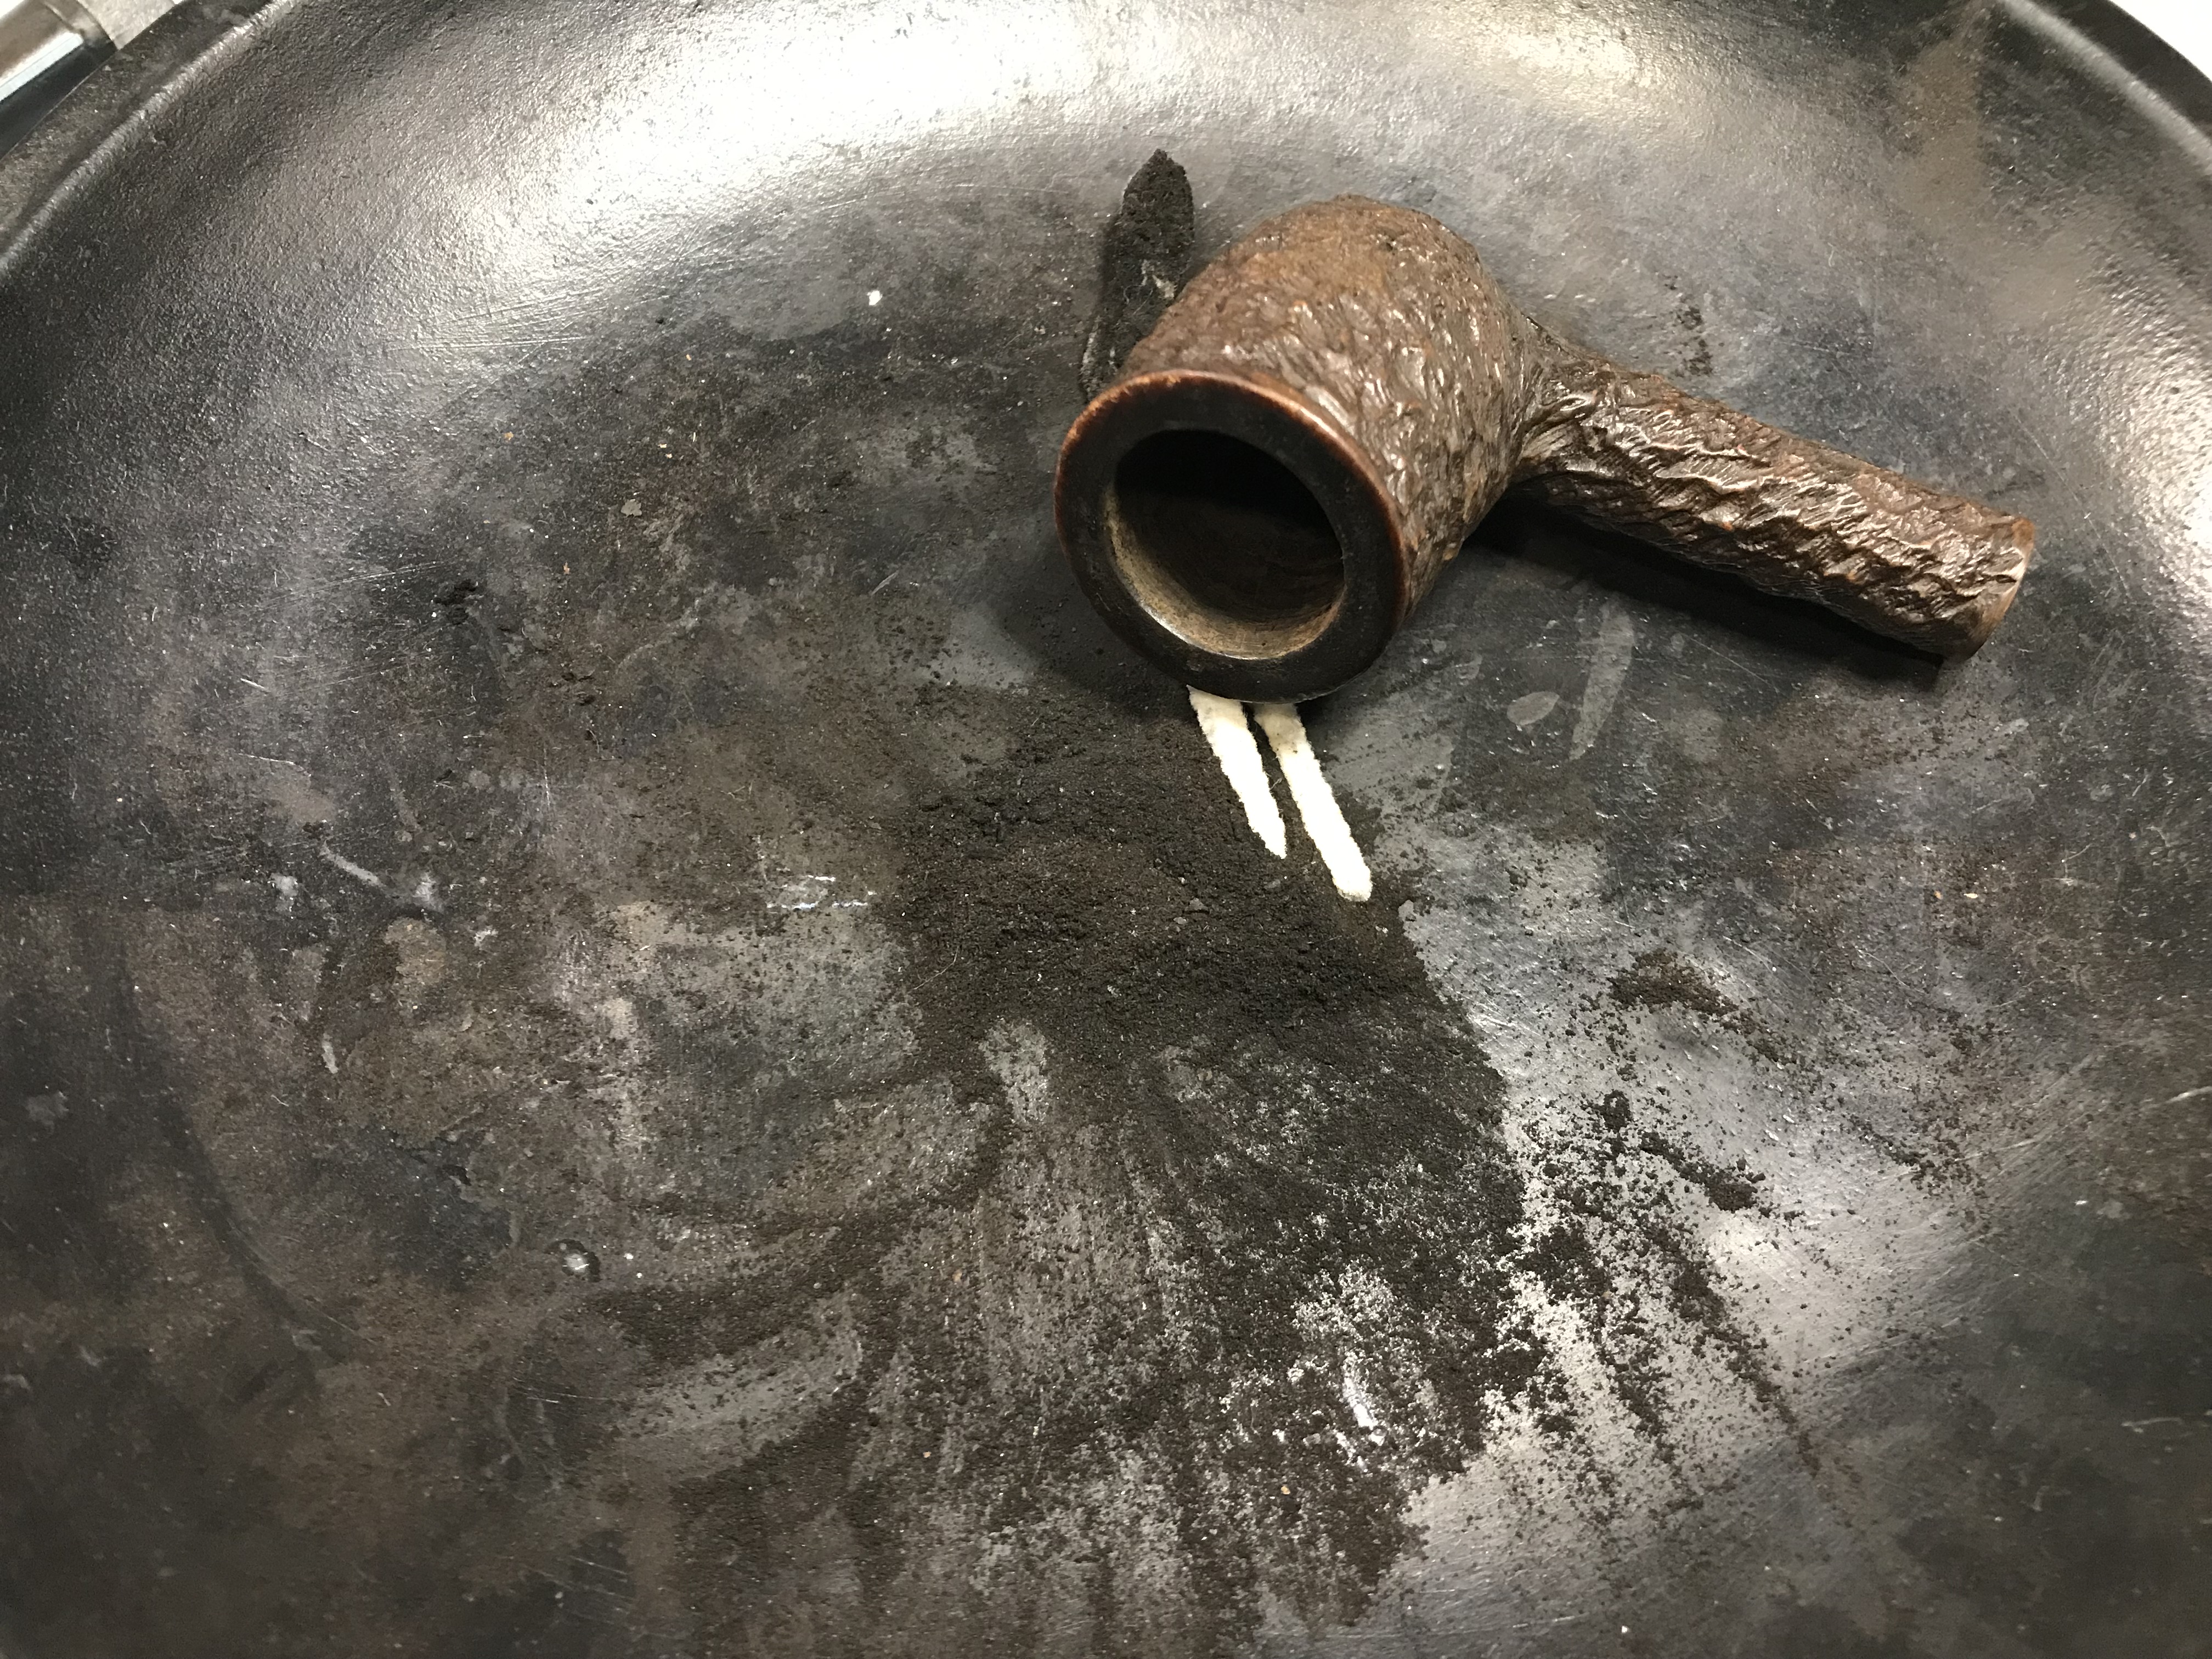
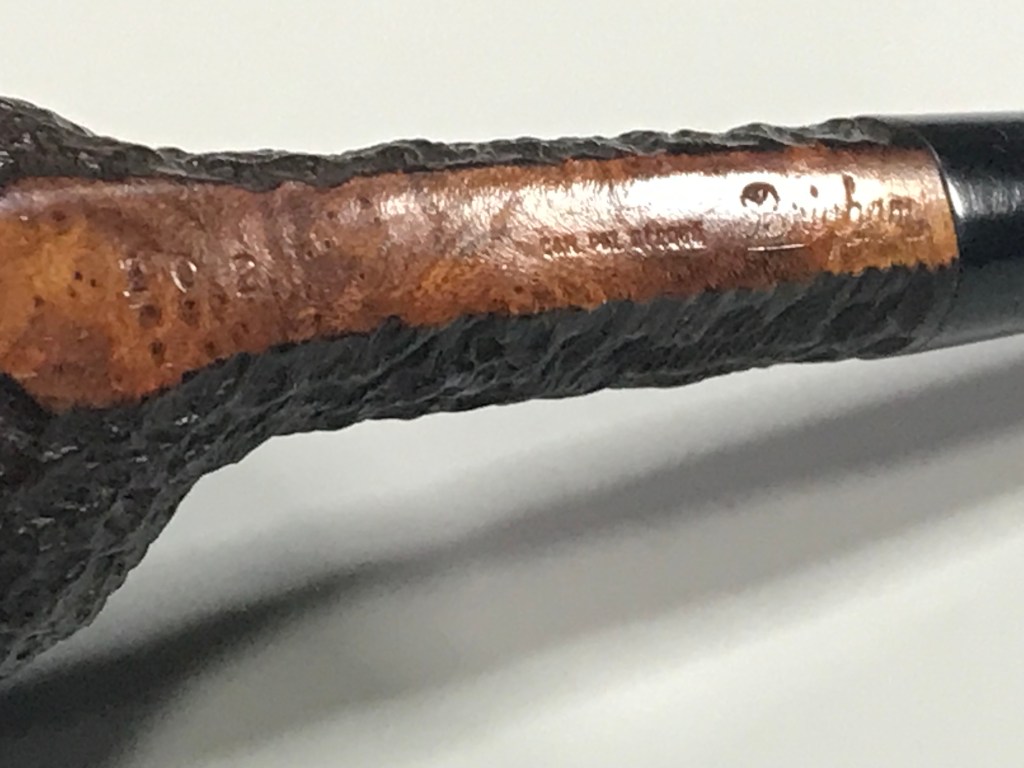
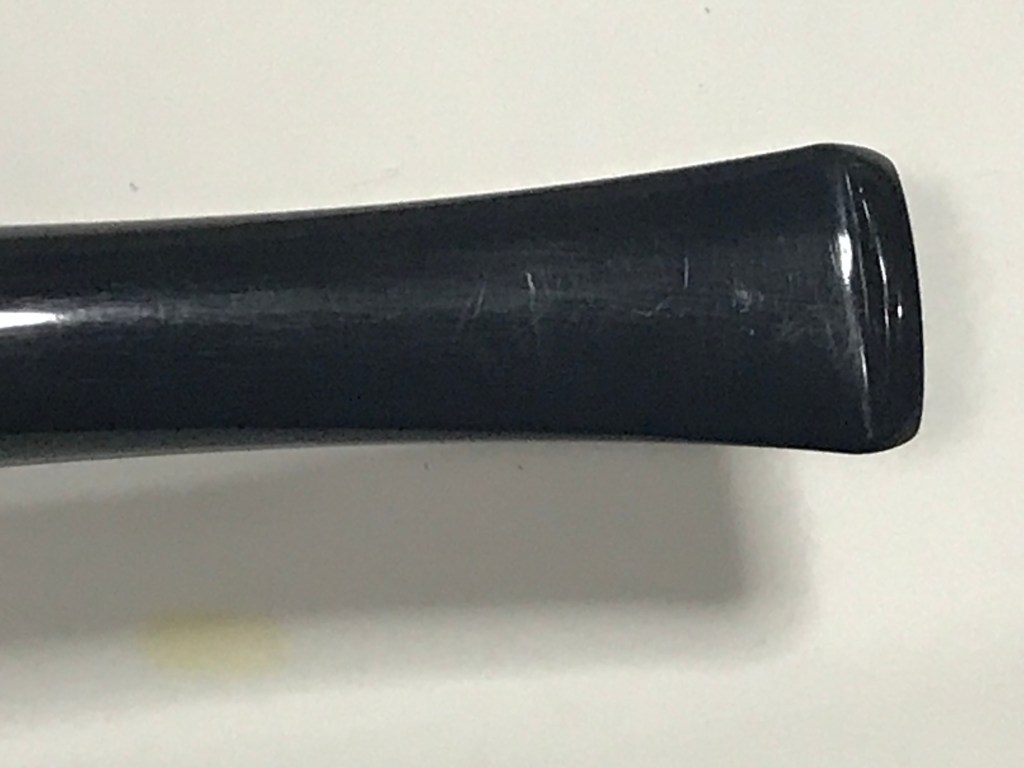
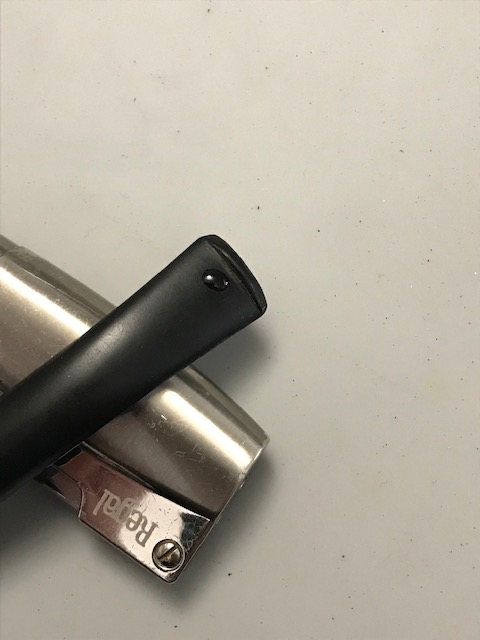
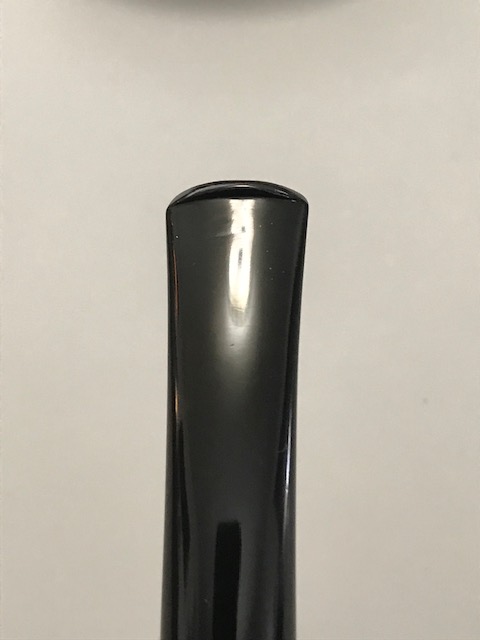
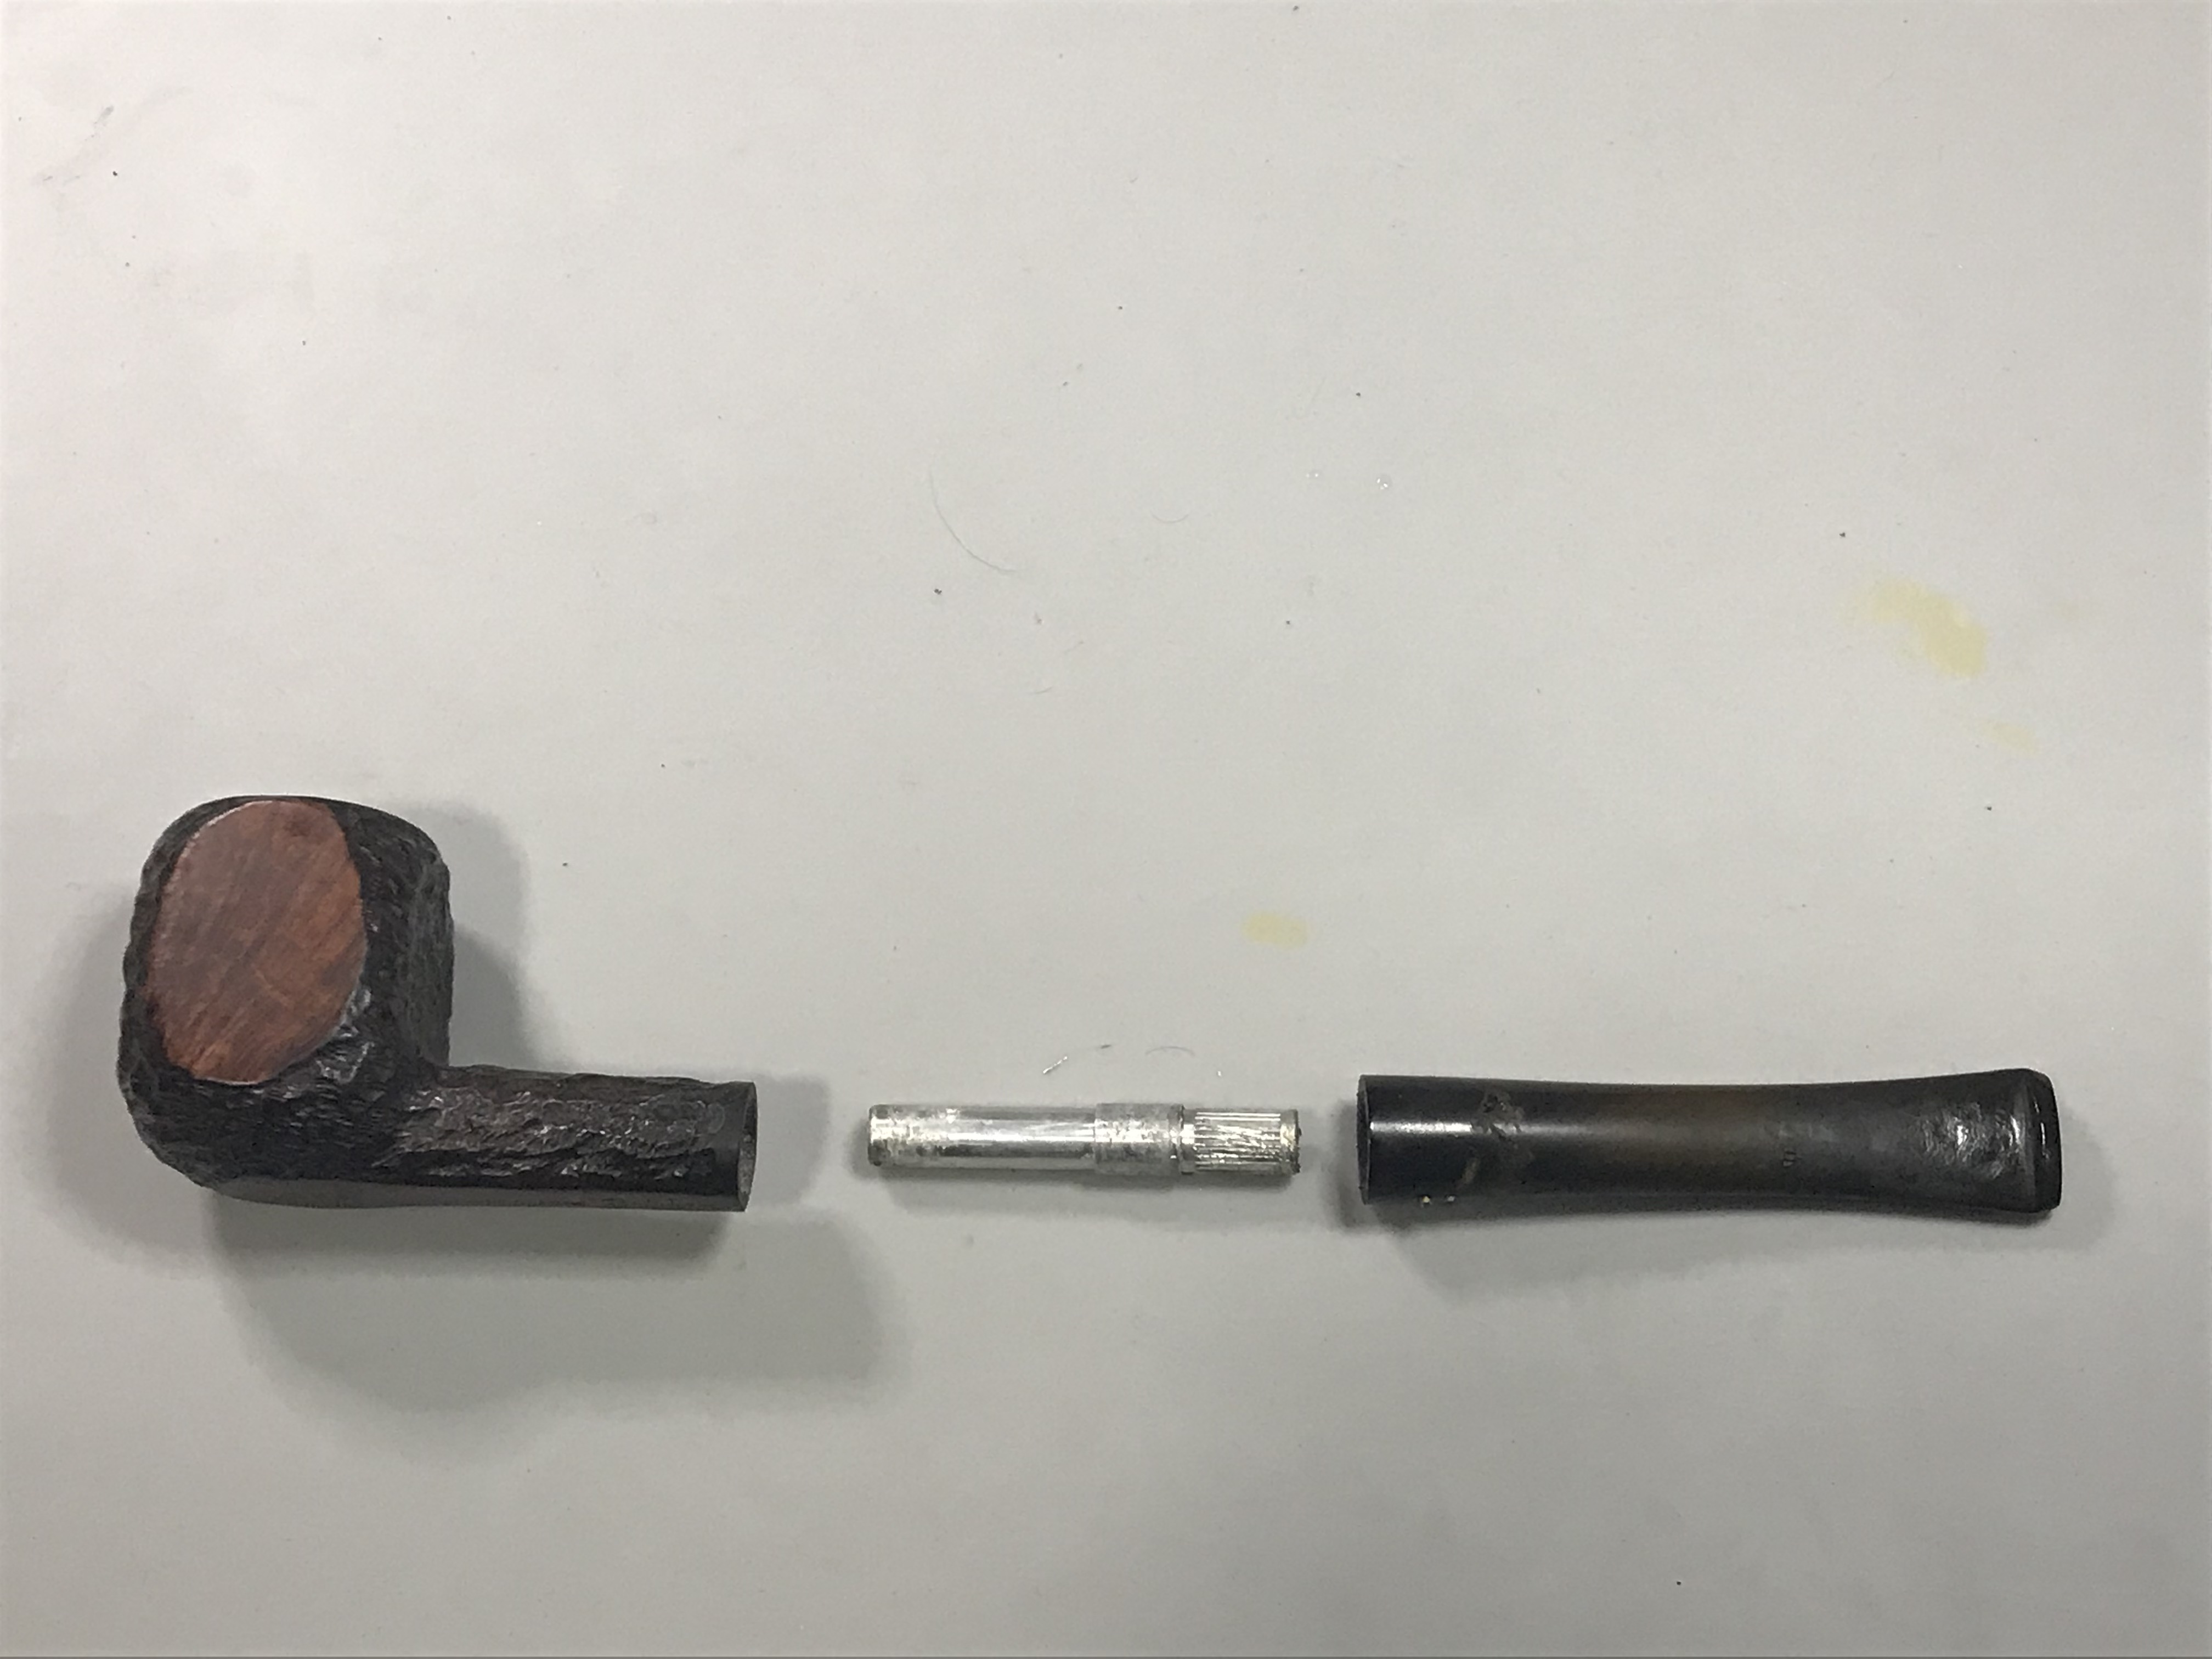
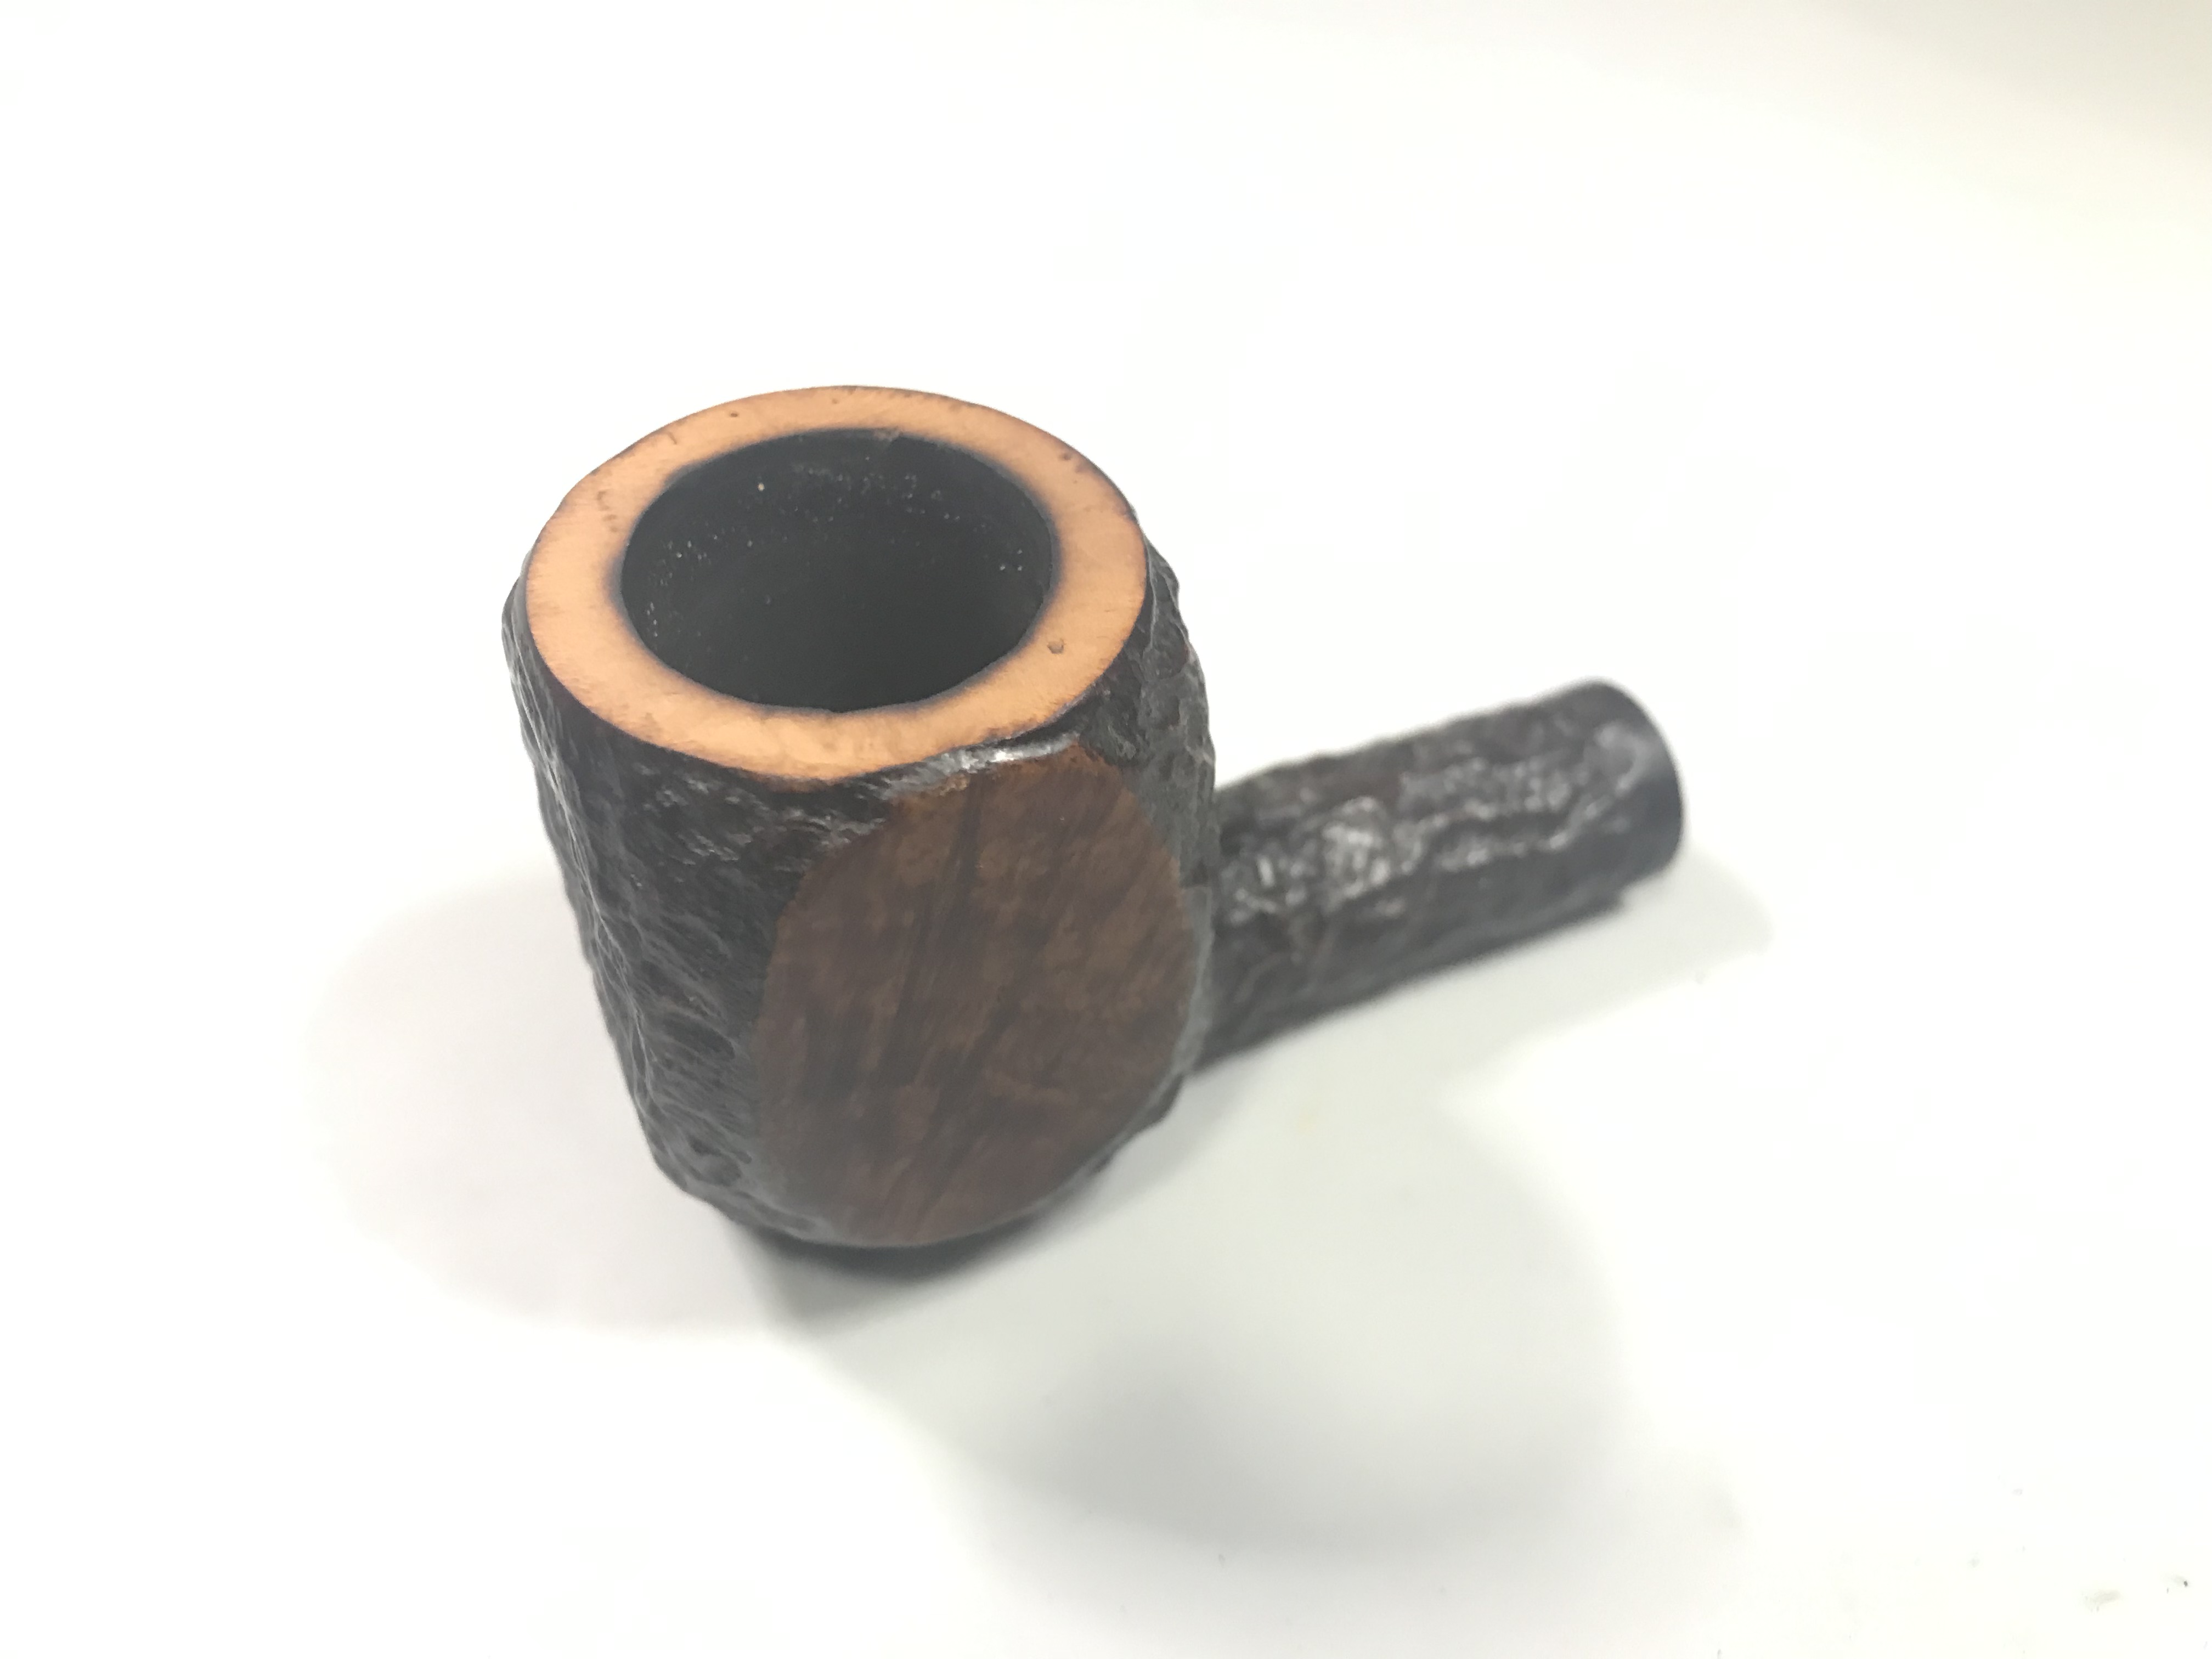
This pipe is a Patent Era Panelled Billiard, it’s a modest sized pipe stamped (288) CAN PAT 372982 with the thin script Brigham stamp. There was not a lot of carbon buildup in the tobacco chamber, but there was some carbon buildup on the rim. Both issues would be simple to remedy. The stem was oxidized but that too would be a routine cleanup with a bath in the deoxidizer.

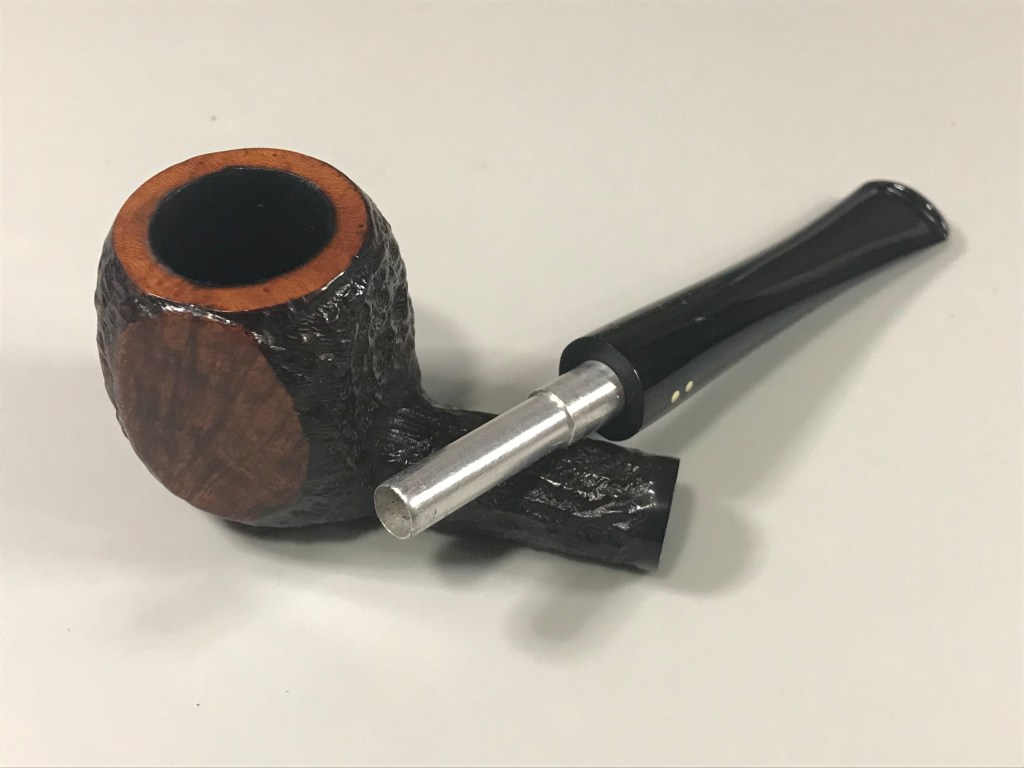
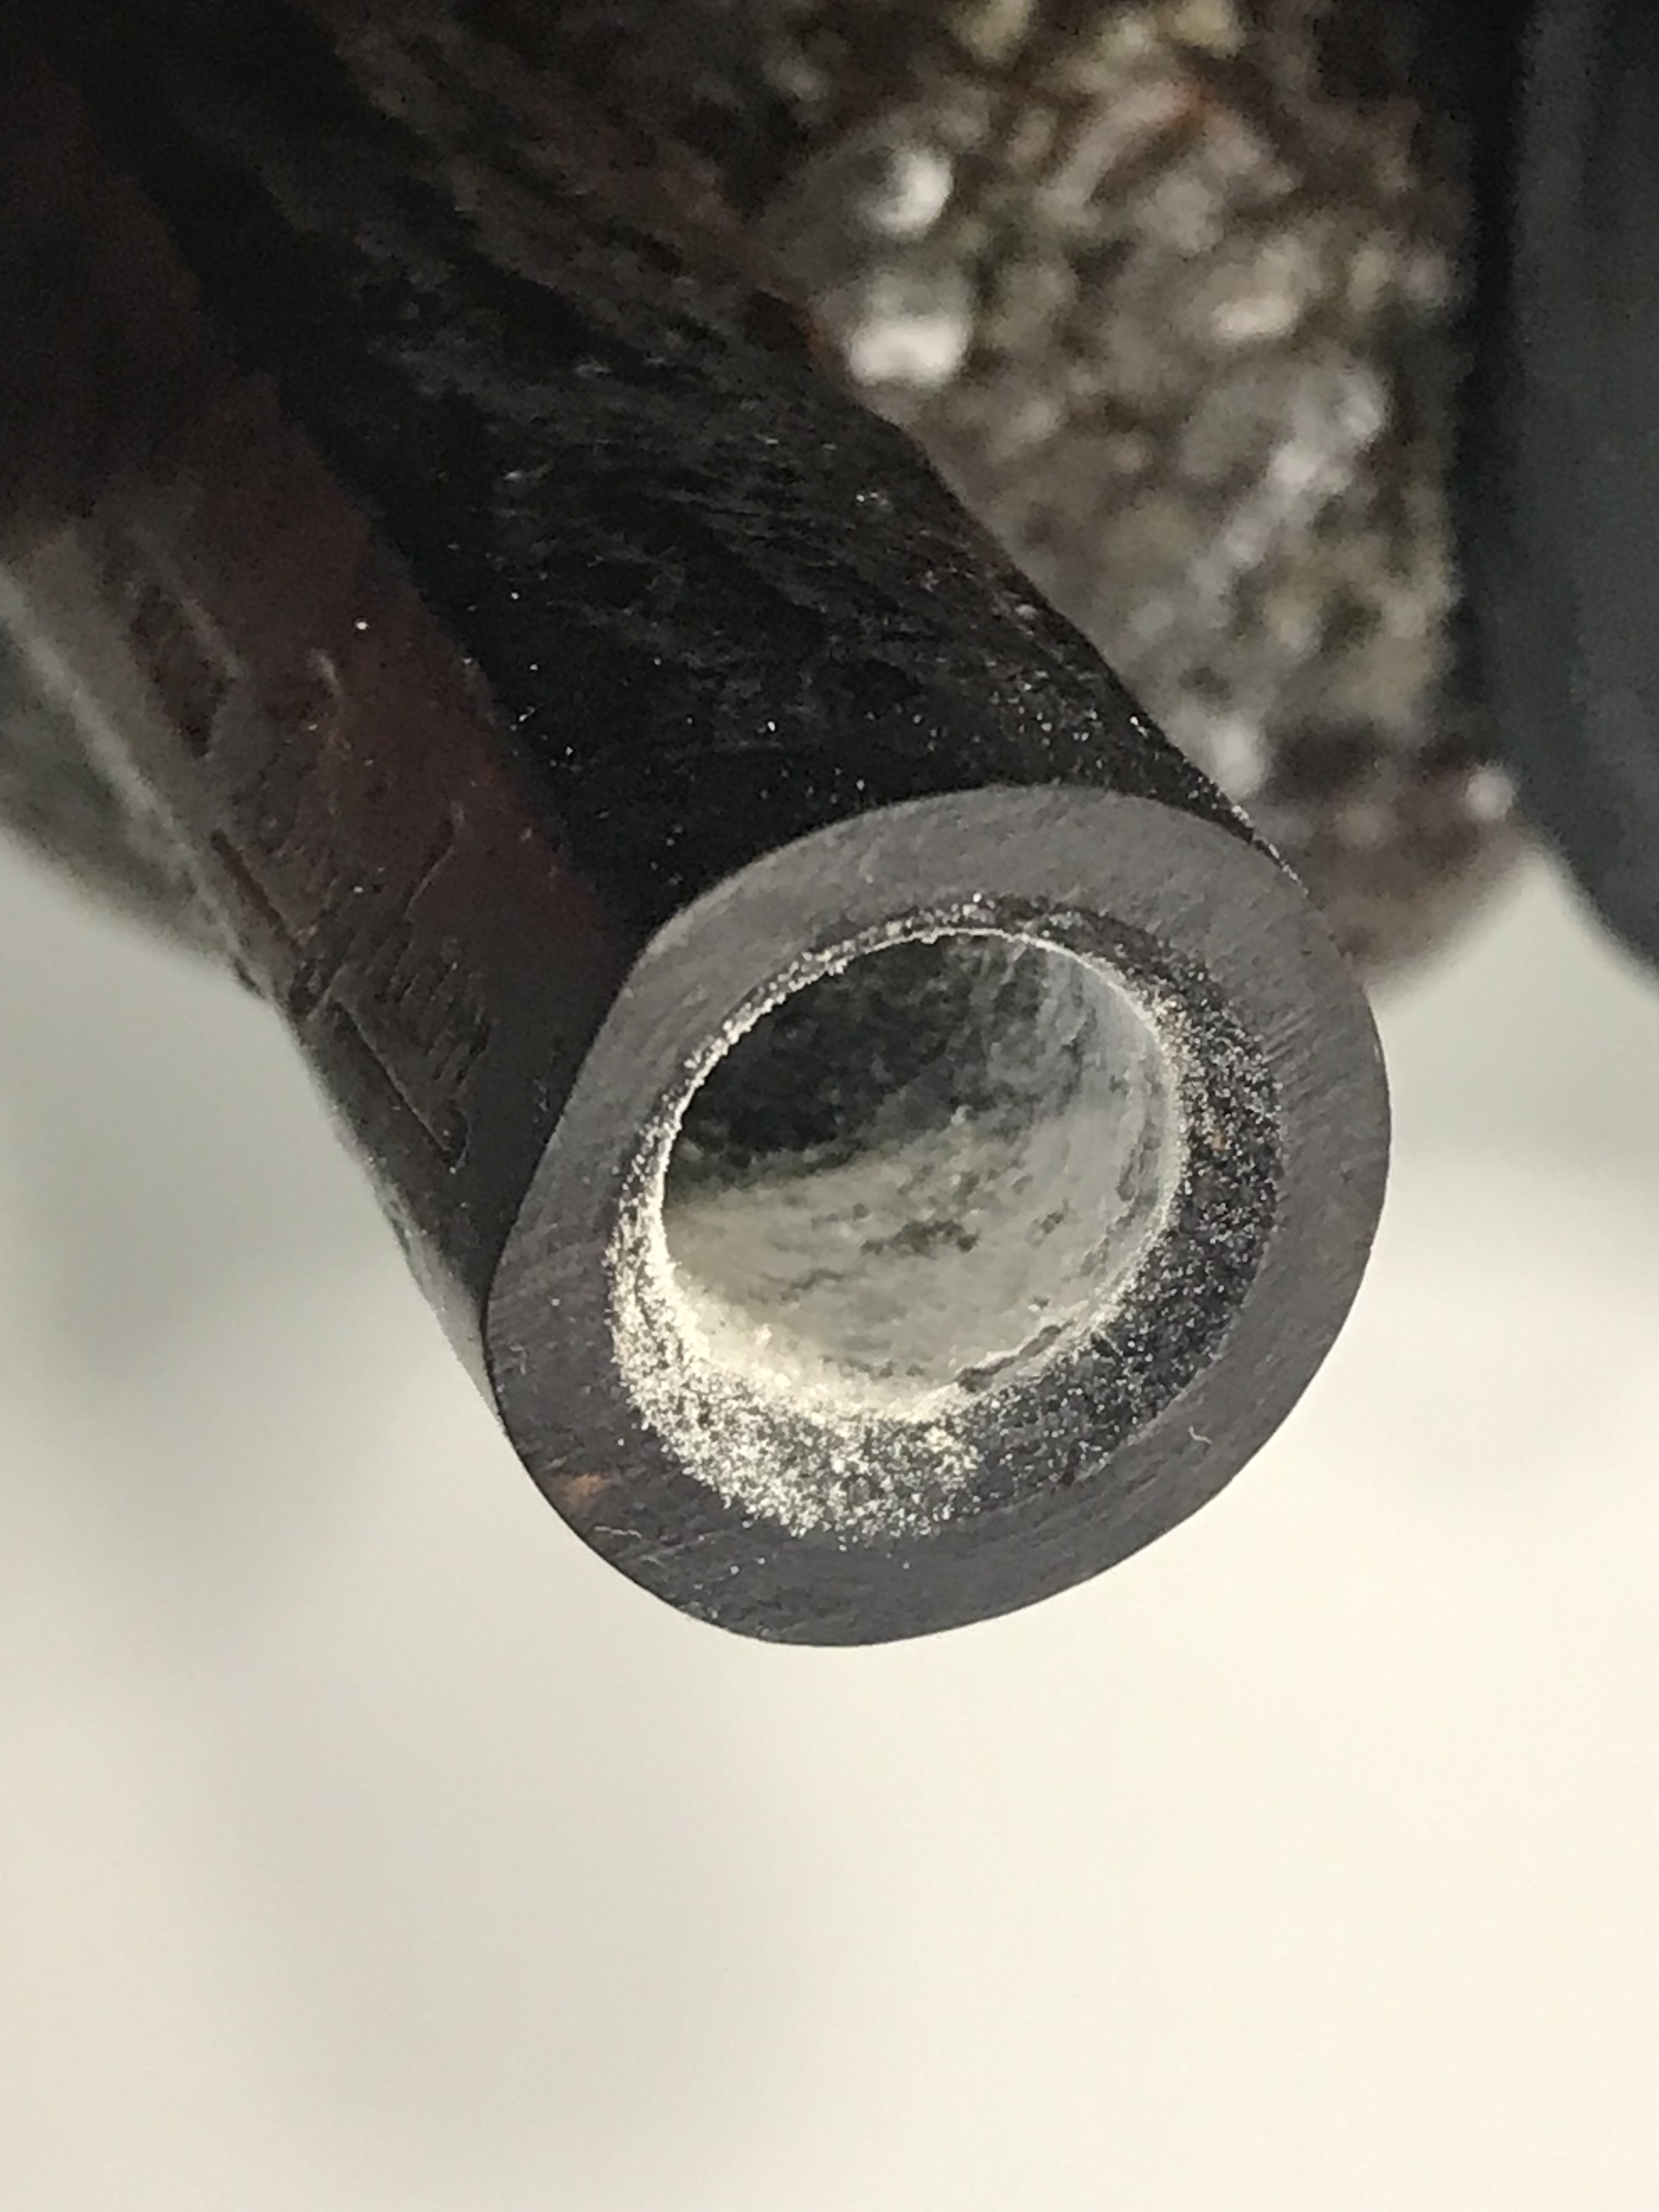
The big issue that this pipe had was only discovered when I attempted to inspect the Brigham tenon and found the stem was seized in the mortise. Any torque I put on the stem was too much stress on the shank of the pipe and would have broken it. I suspected that the aluminum tenon had begun to corrode which is why it wouldn’t budge. This will be a little more complicated to troubleshoot. I’m going to skip over some of the early steps as you can see the carbon removal process in the previous post. I’m going to skip ahead to the stem issue.

Stem Removal and Repair

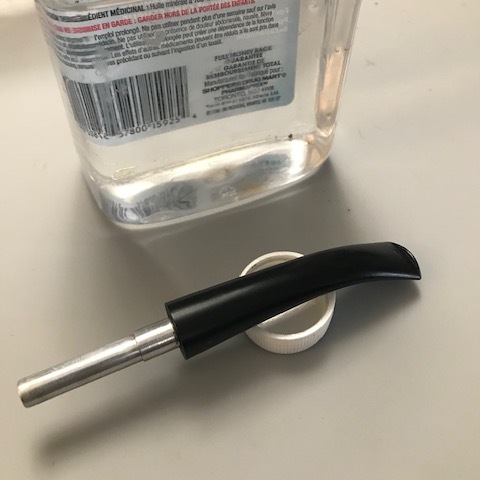
I tried several methods to coax the stem free with no success (heat, cold, alcohol), nothing worked. My last strategy is to heat the vulcanite, remove the pin securing the tenon in place and pulling the vulcanite away from the aluminum tenon. If successful, I’m hoping the tenon is intact and not decomposed in the vulcanite stem.

I used a heat gun on its lowest setting and warmed up the stem until it was pliable. That gave me enough play in the stem that I was able to wiggle first pin out and pull the stem off. The tenon was completely intact.

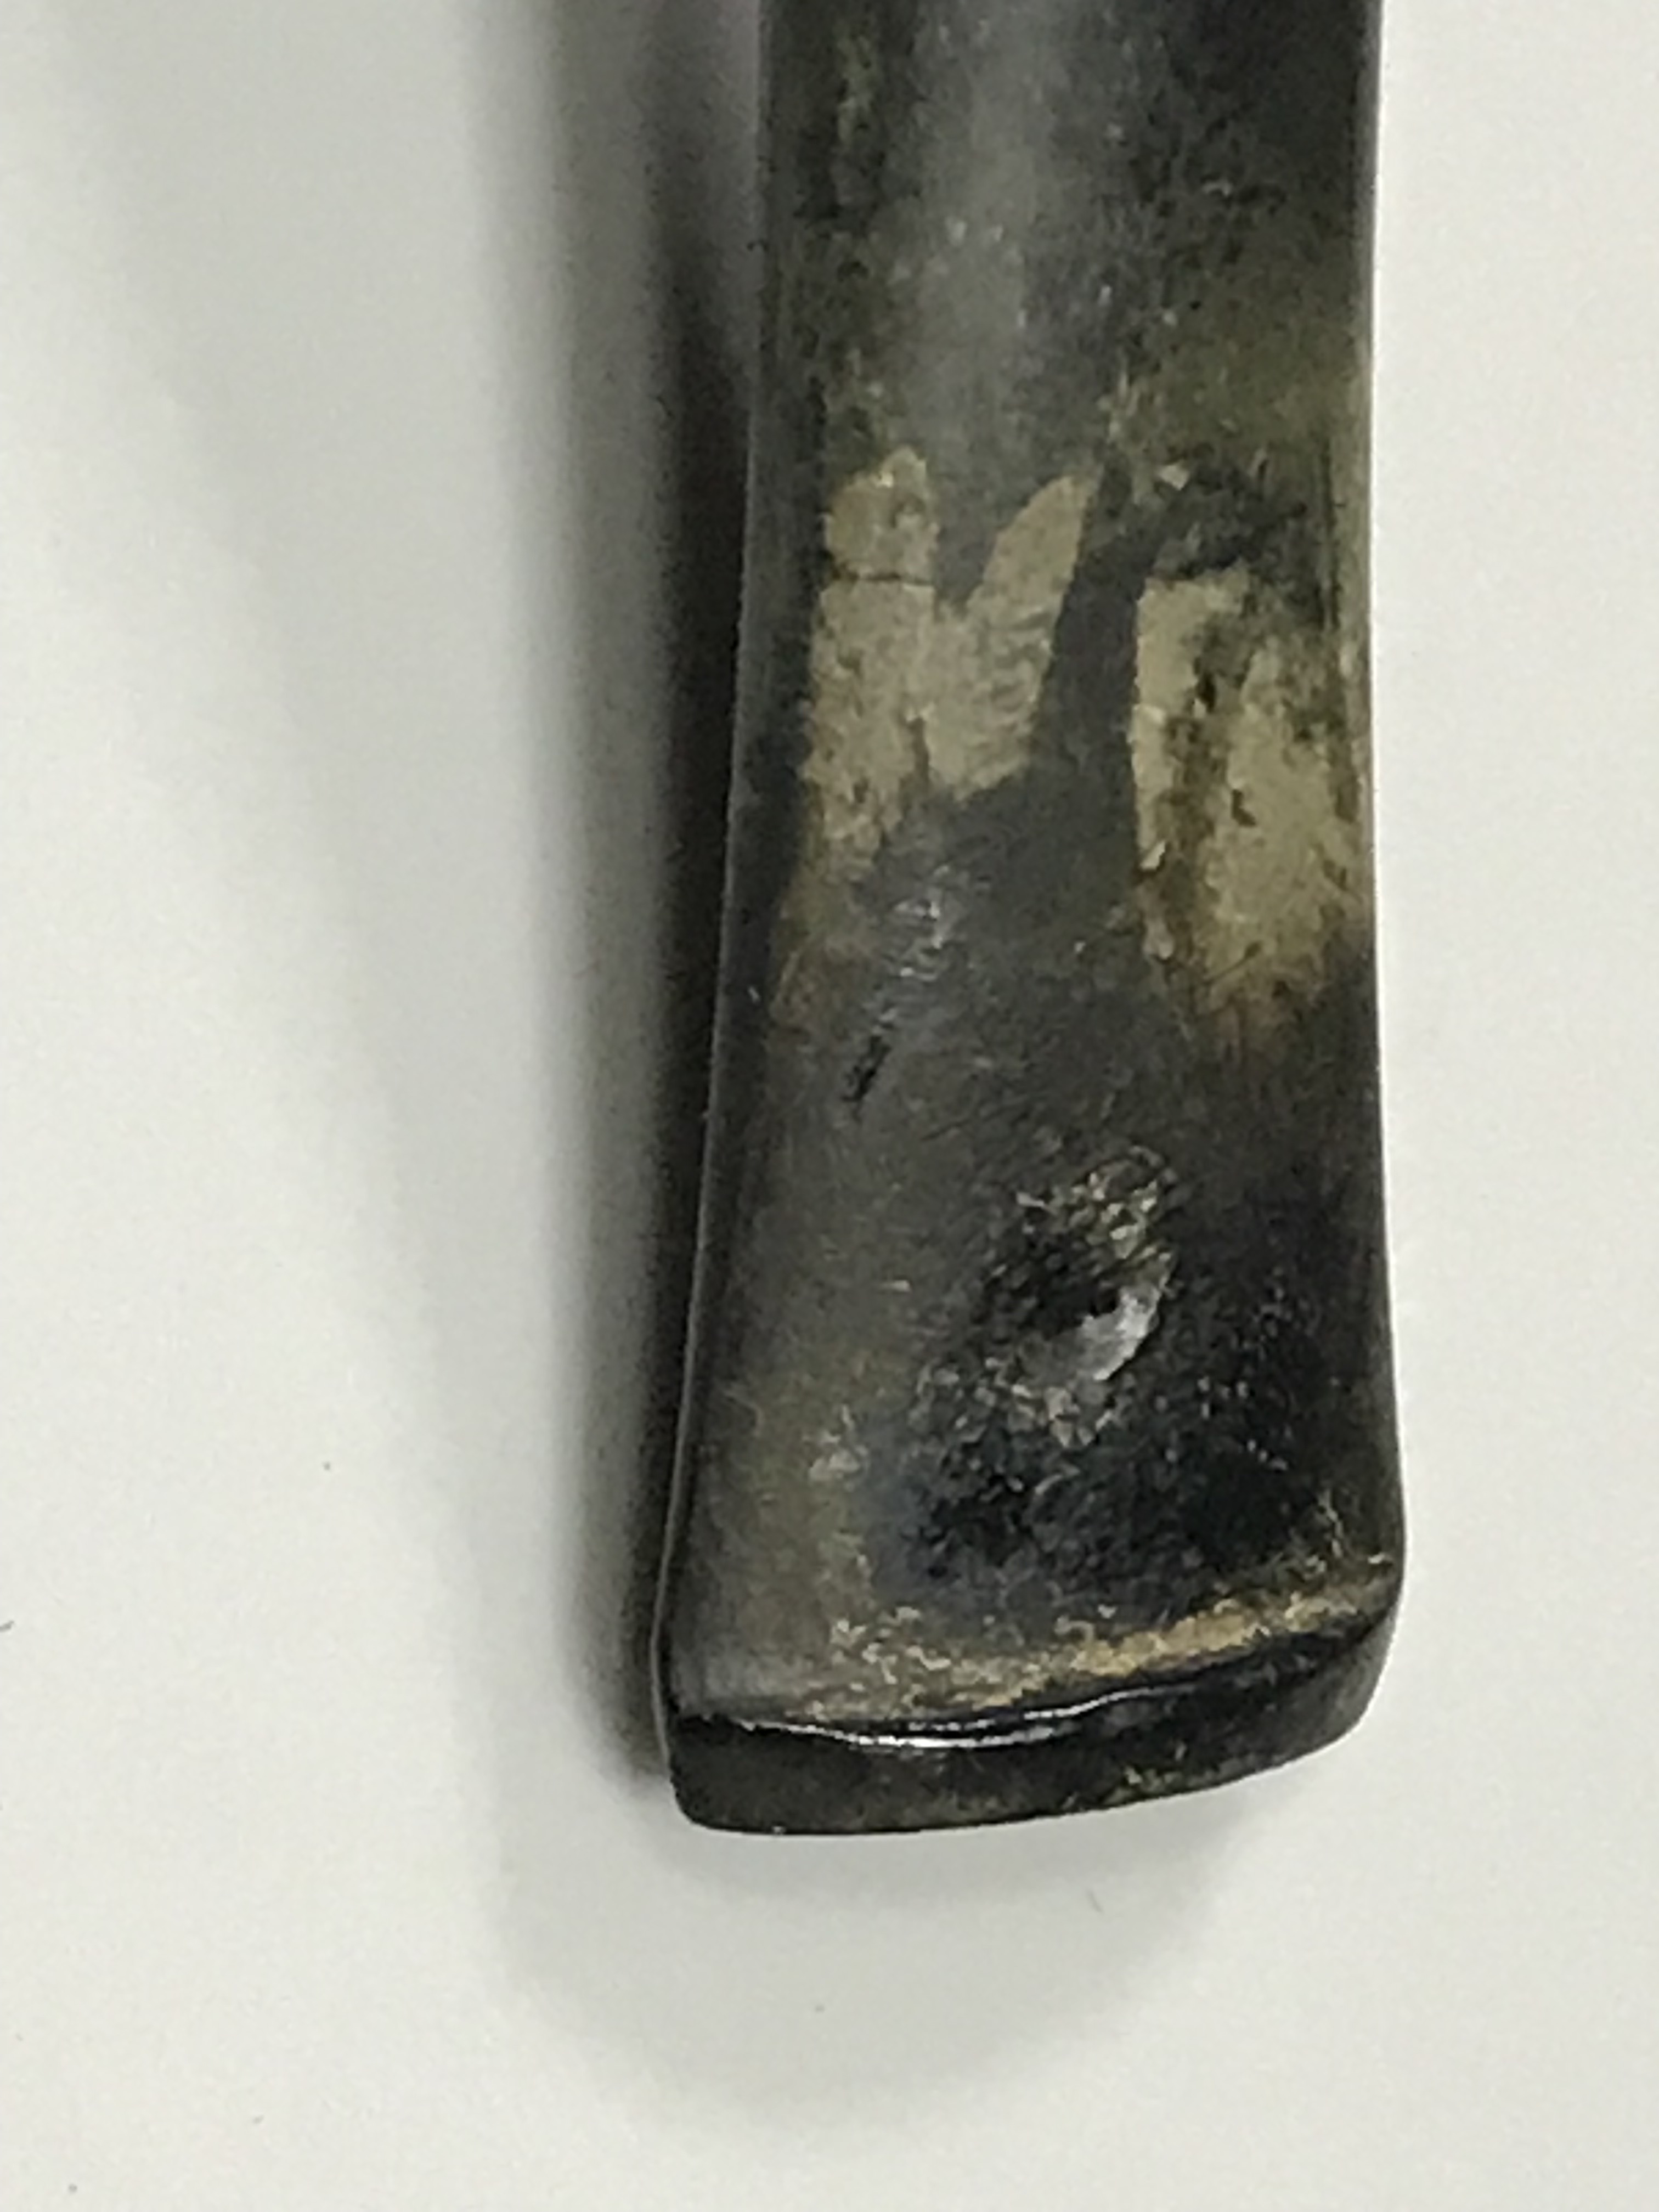
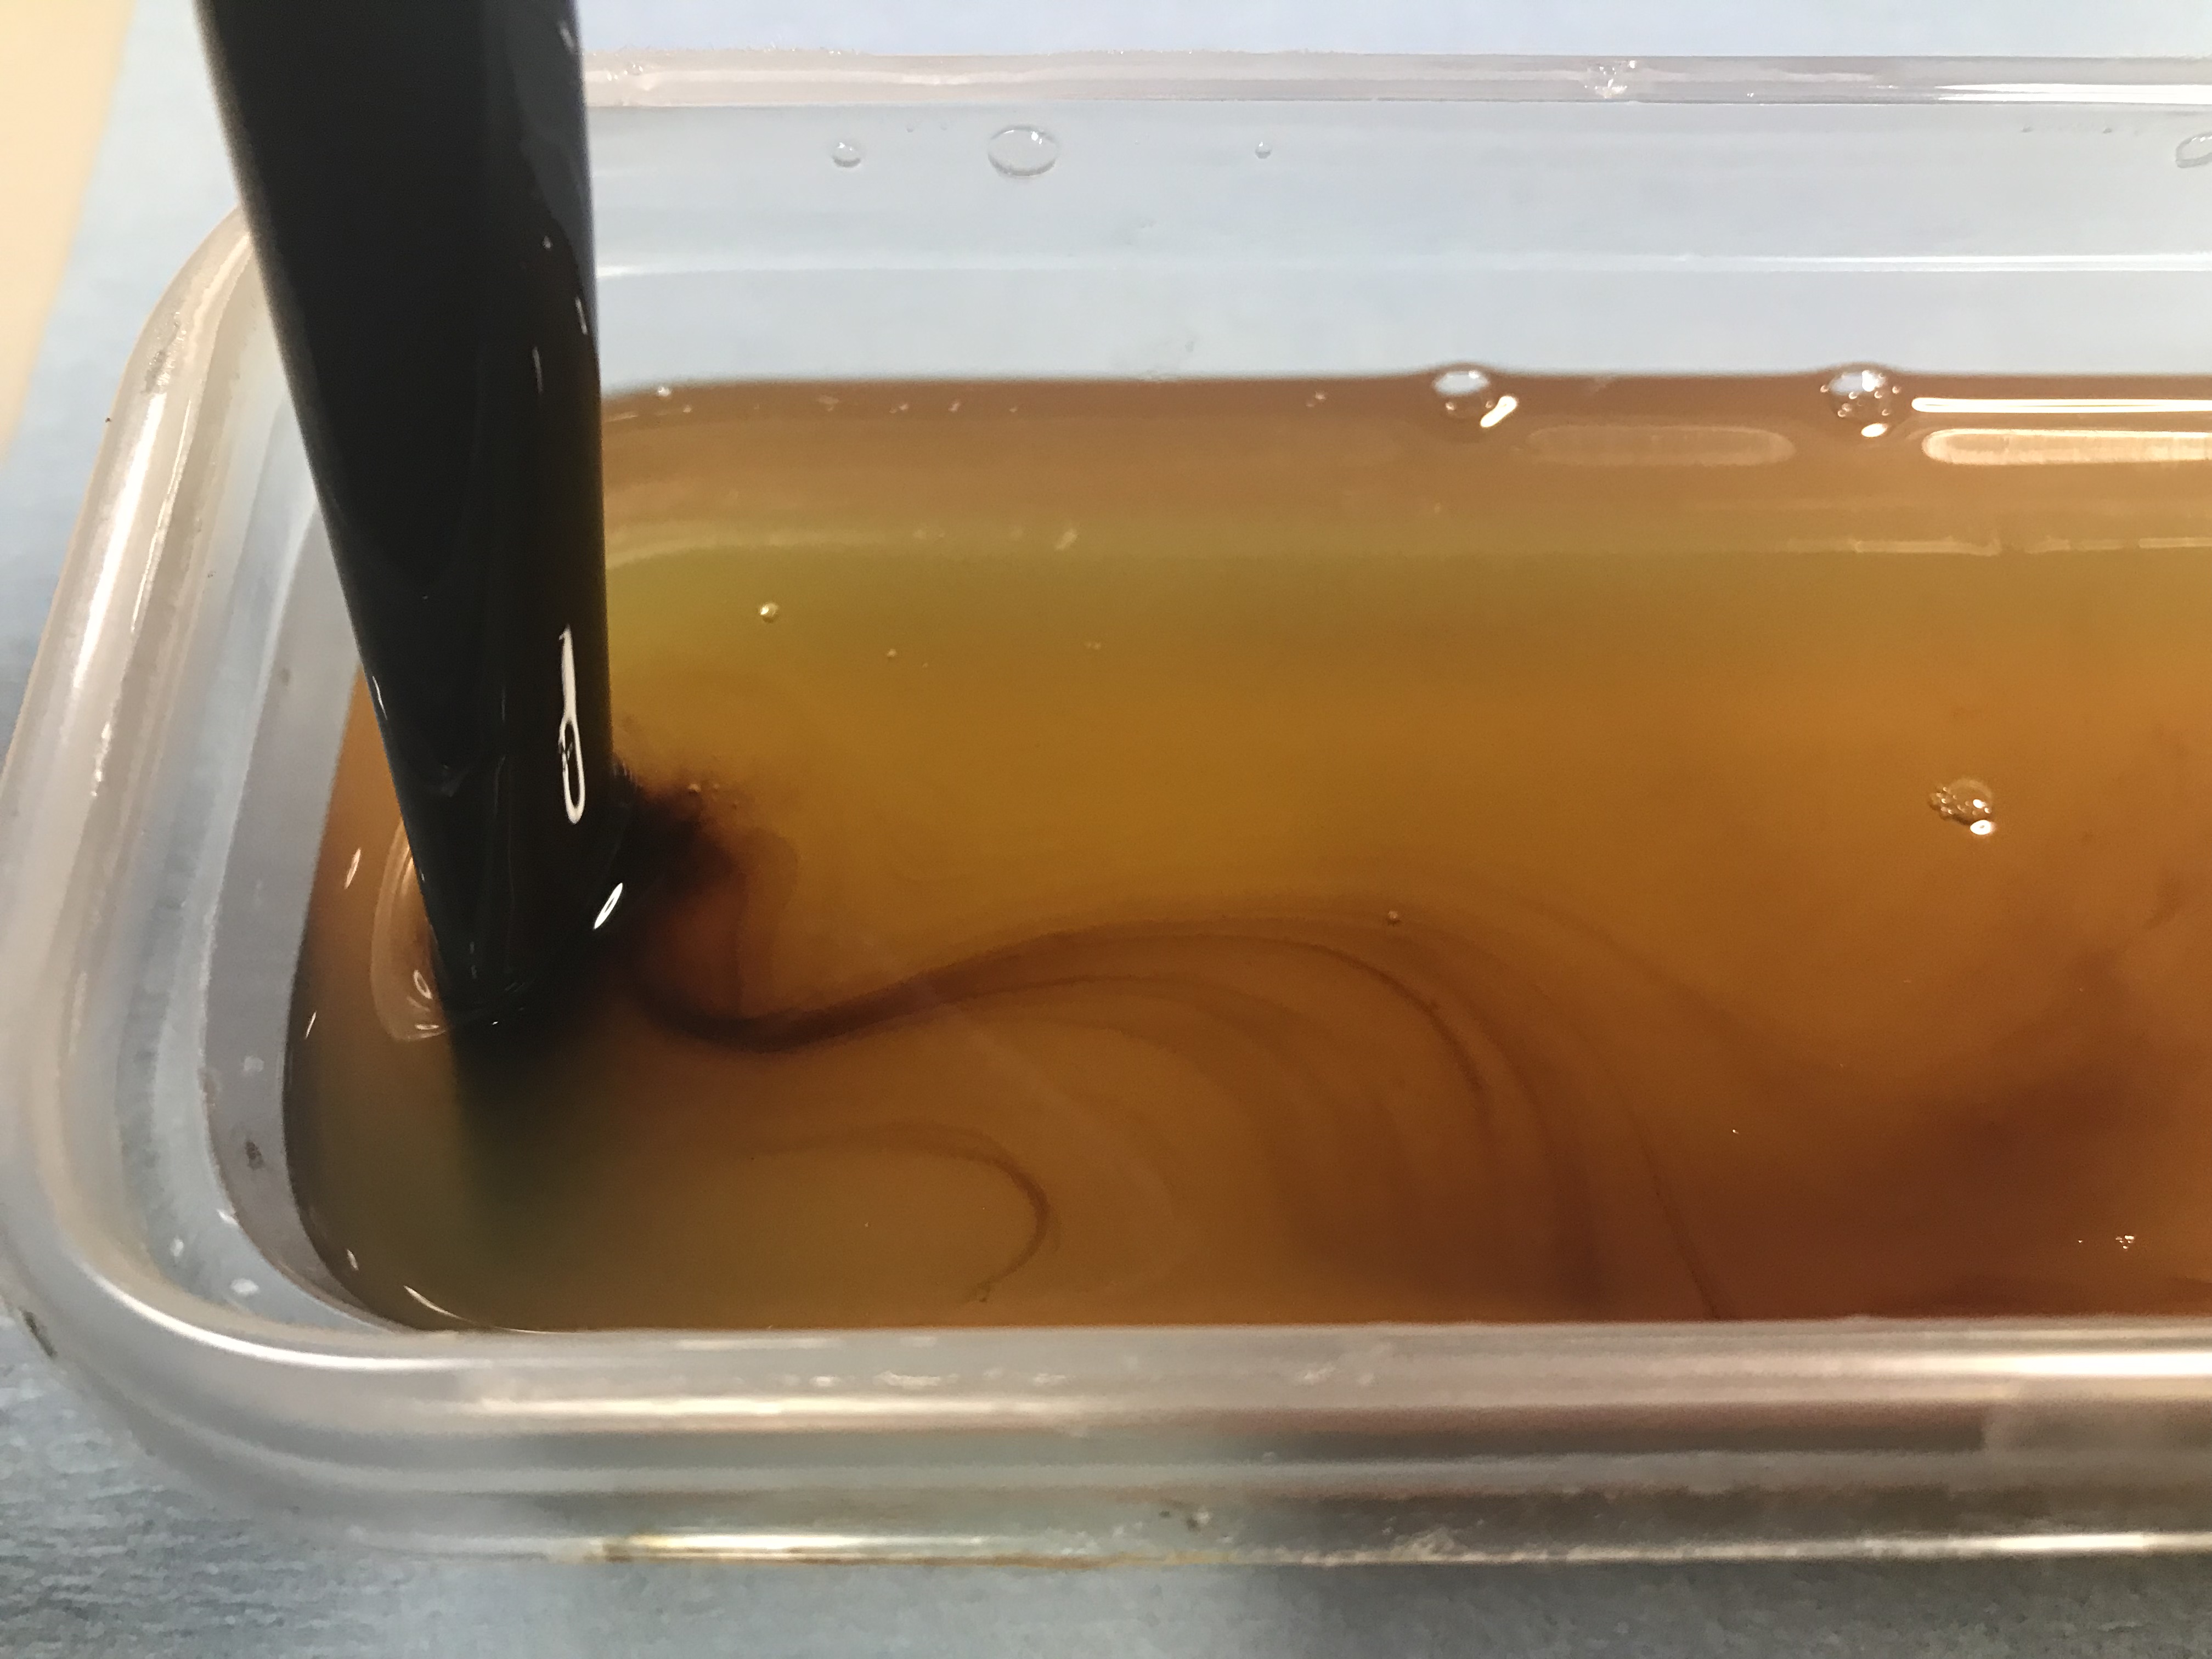
I used a set of needle nose pliers to put some direct torque on the tenon to see if that would convince it to release but it was not going anywhere. I turned my attention online to find options to dissolve aluminum corrosion. I found a solution consisting of Distilled water, lemon juice and white vinegar. I didn’t have the first two ingredients at the time but I had some Allens White Cleaning Vinegar on hand. Using a glue syringe, I applied droplets of the white vinegar as best I could between the mortise and the tenon. Nothing seemed to happen, so I heated up the tenon directly this time over the heat gun. The combination of the vinegar and the heat did the trick and the tenon came free. Left behind was the evidence of aluminum corrosion that locked it in place.

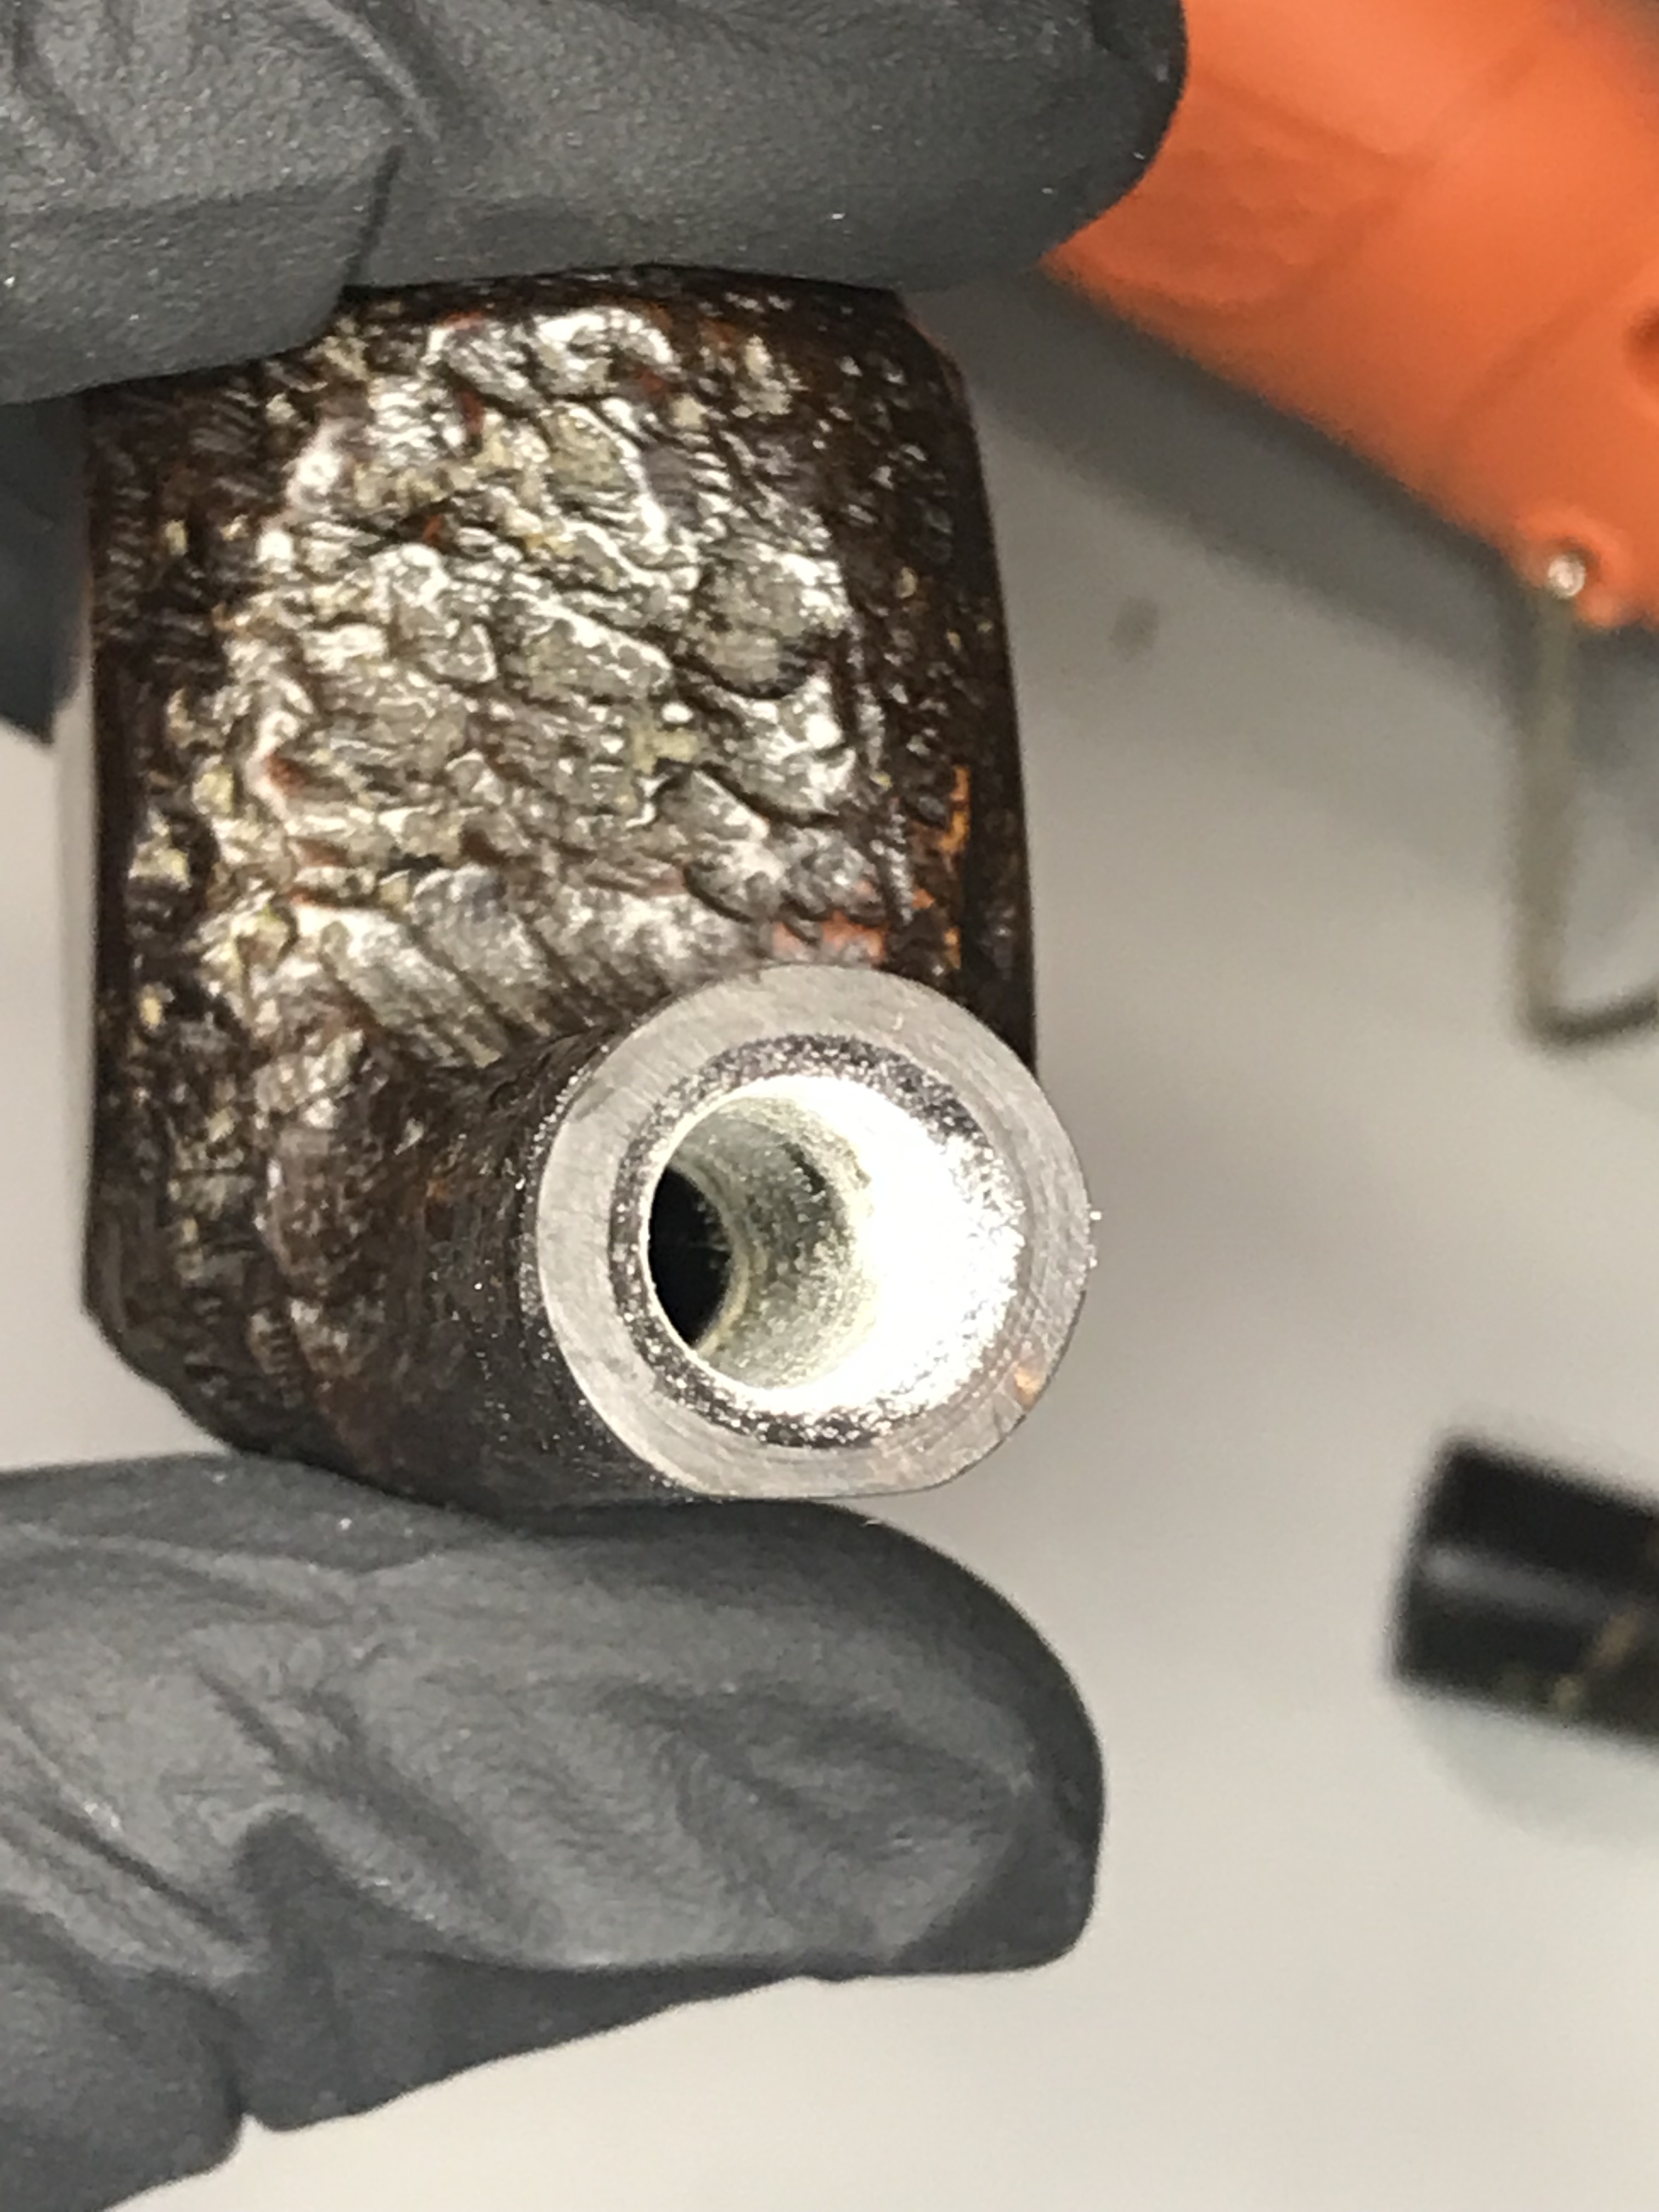
A little steel wool cleaned up the tenon nicely. Afterwards I applied heat to the stem again to soften it, then re-installed the aluminum tenon and secured it in place with the brass pin.

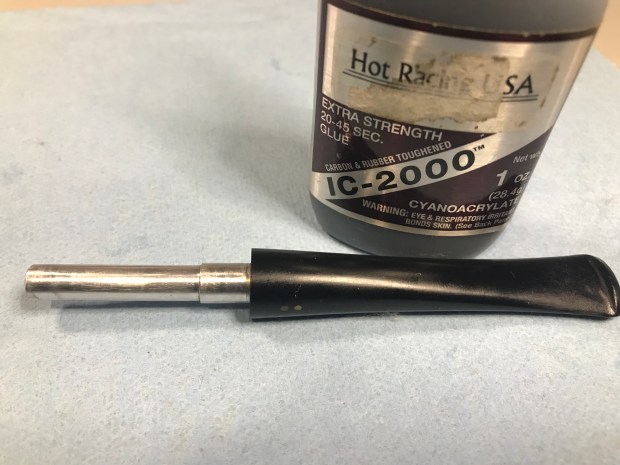
Some of the tooth dents were erased from the stem using the heat gun as the rubber warmed up. The ones that I couldn’t raise with heat I filled using Rubber toughened CA Glue.

Reconditioning and refinishing the stummel

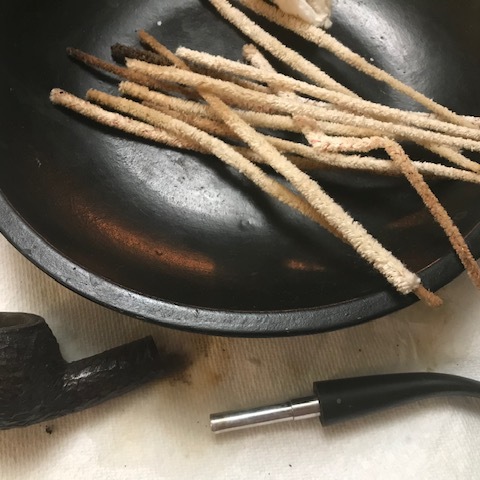
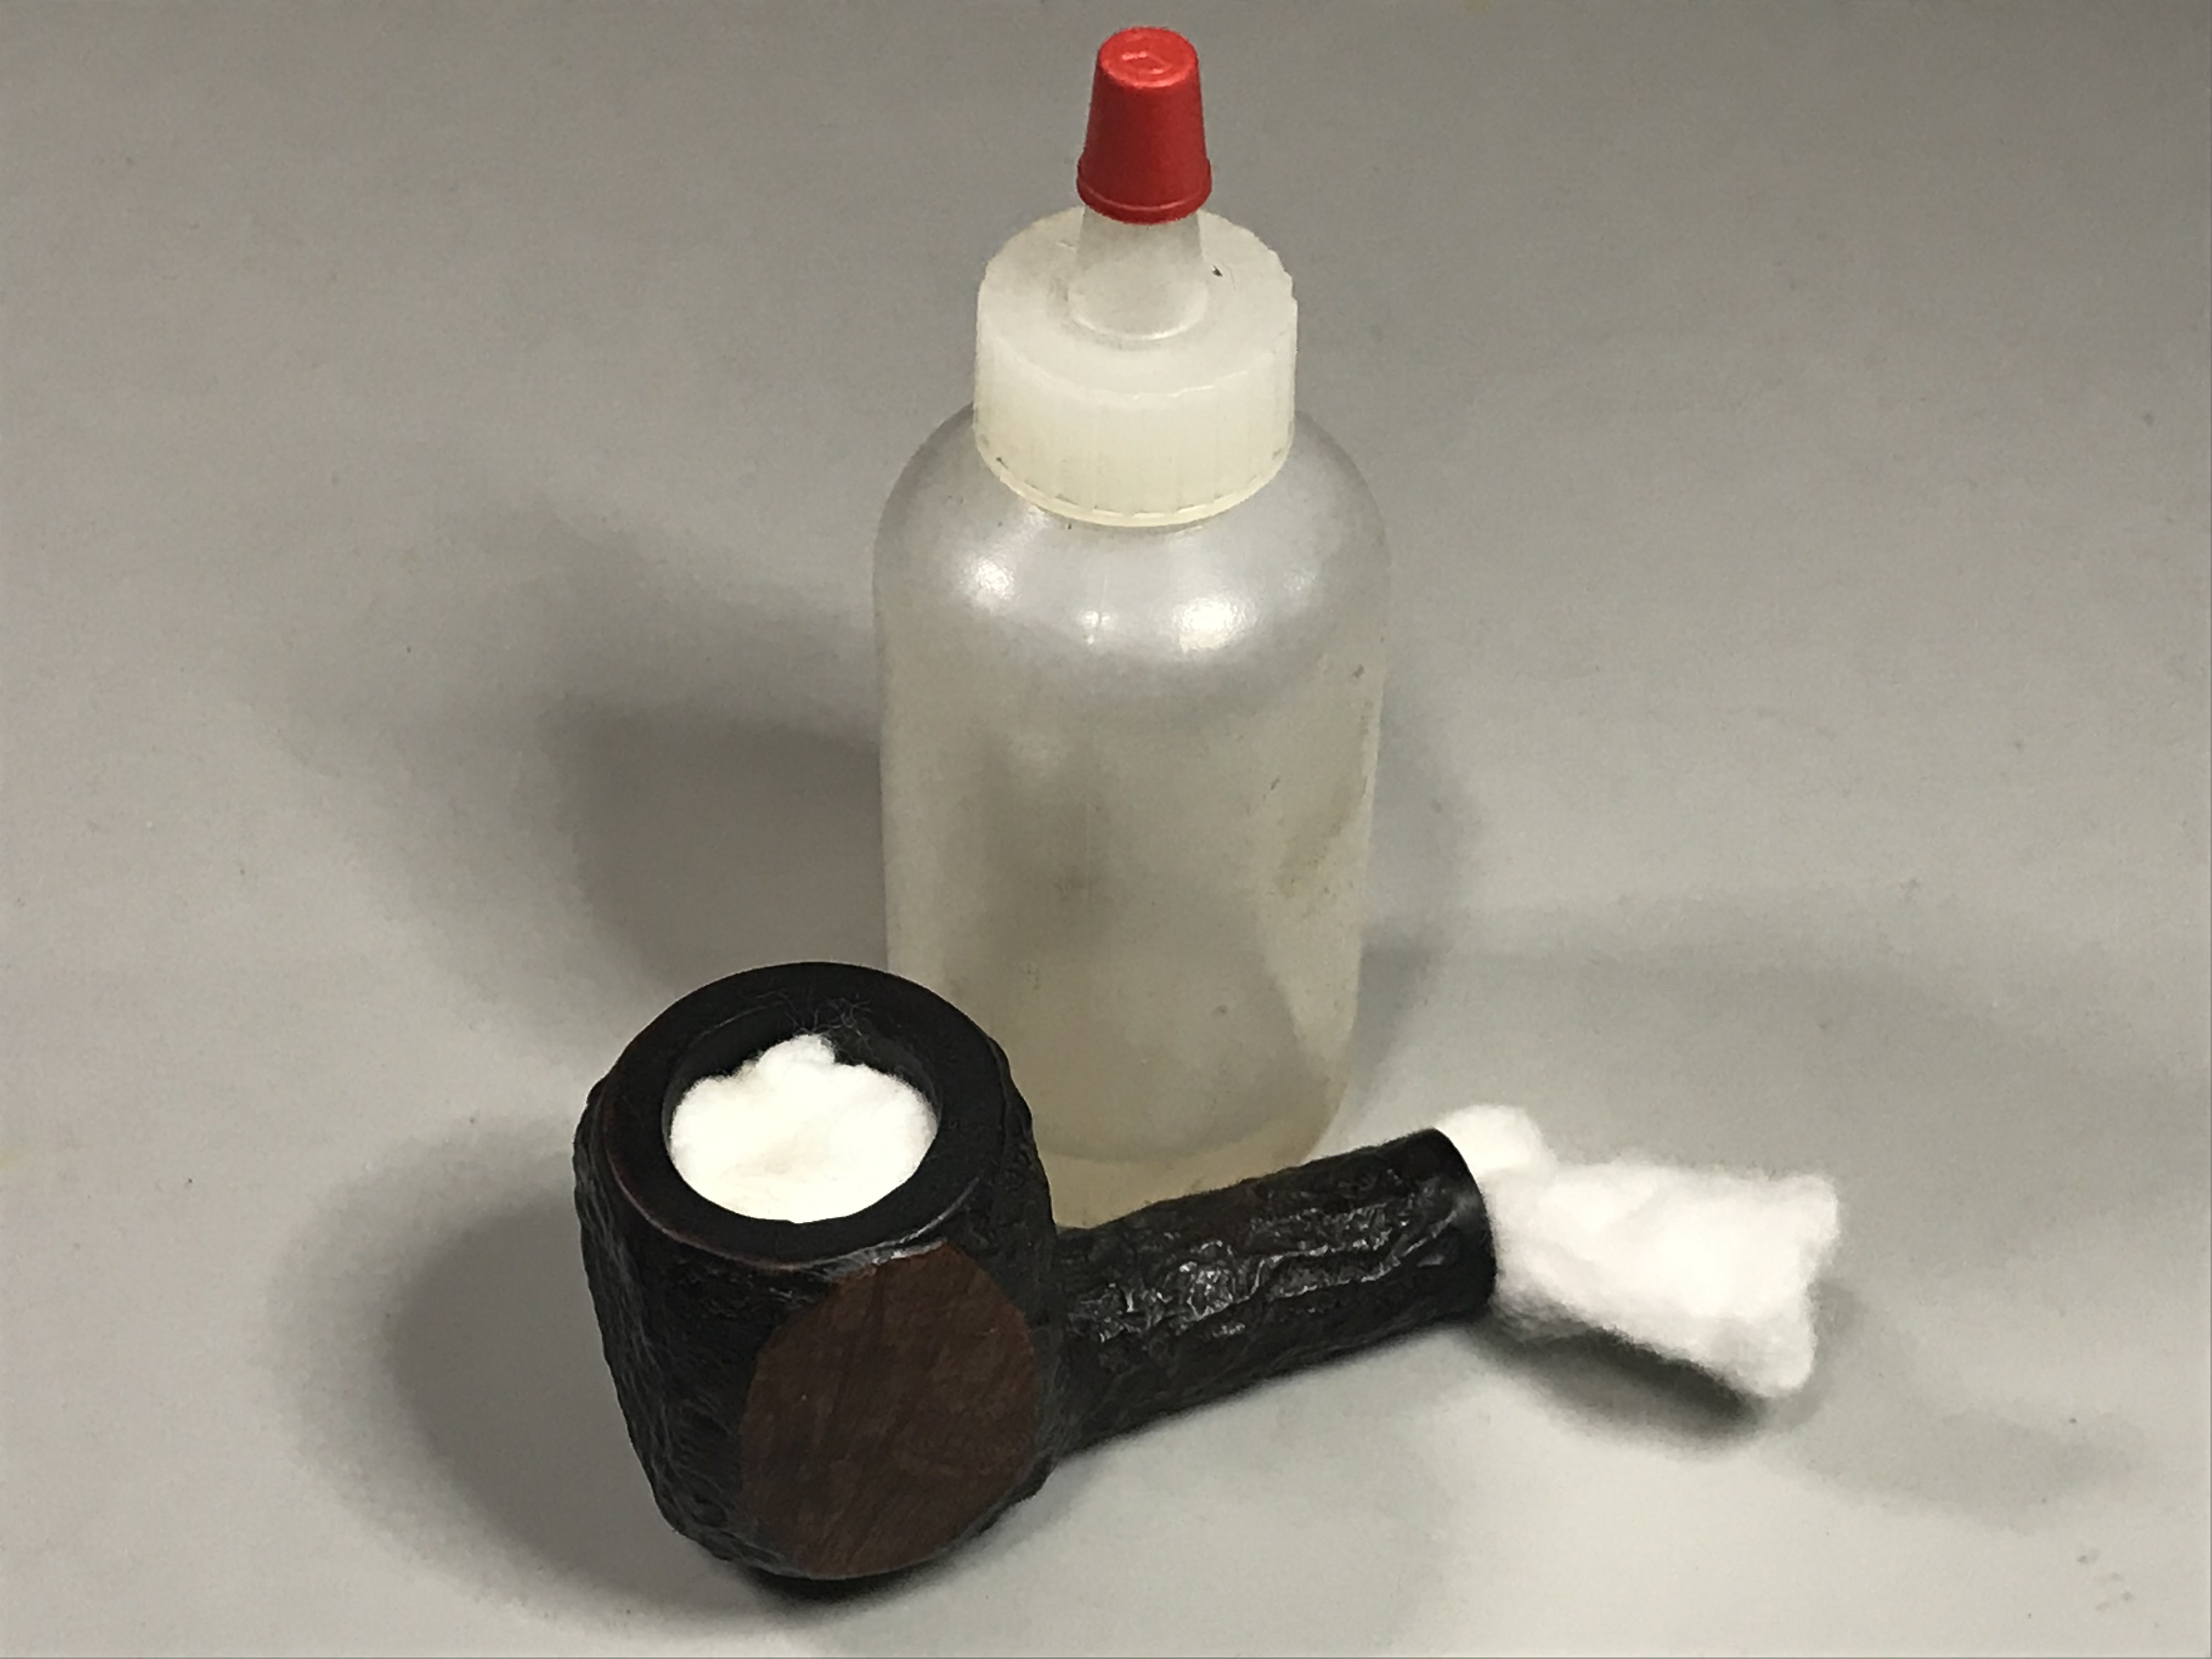
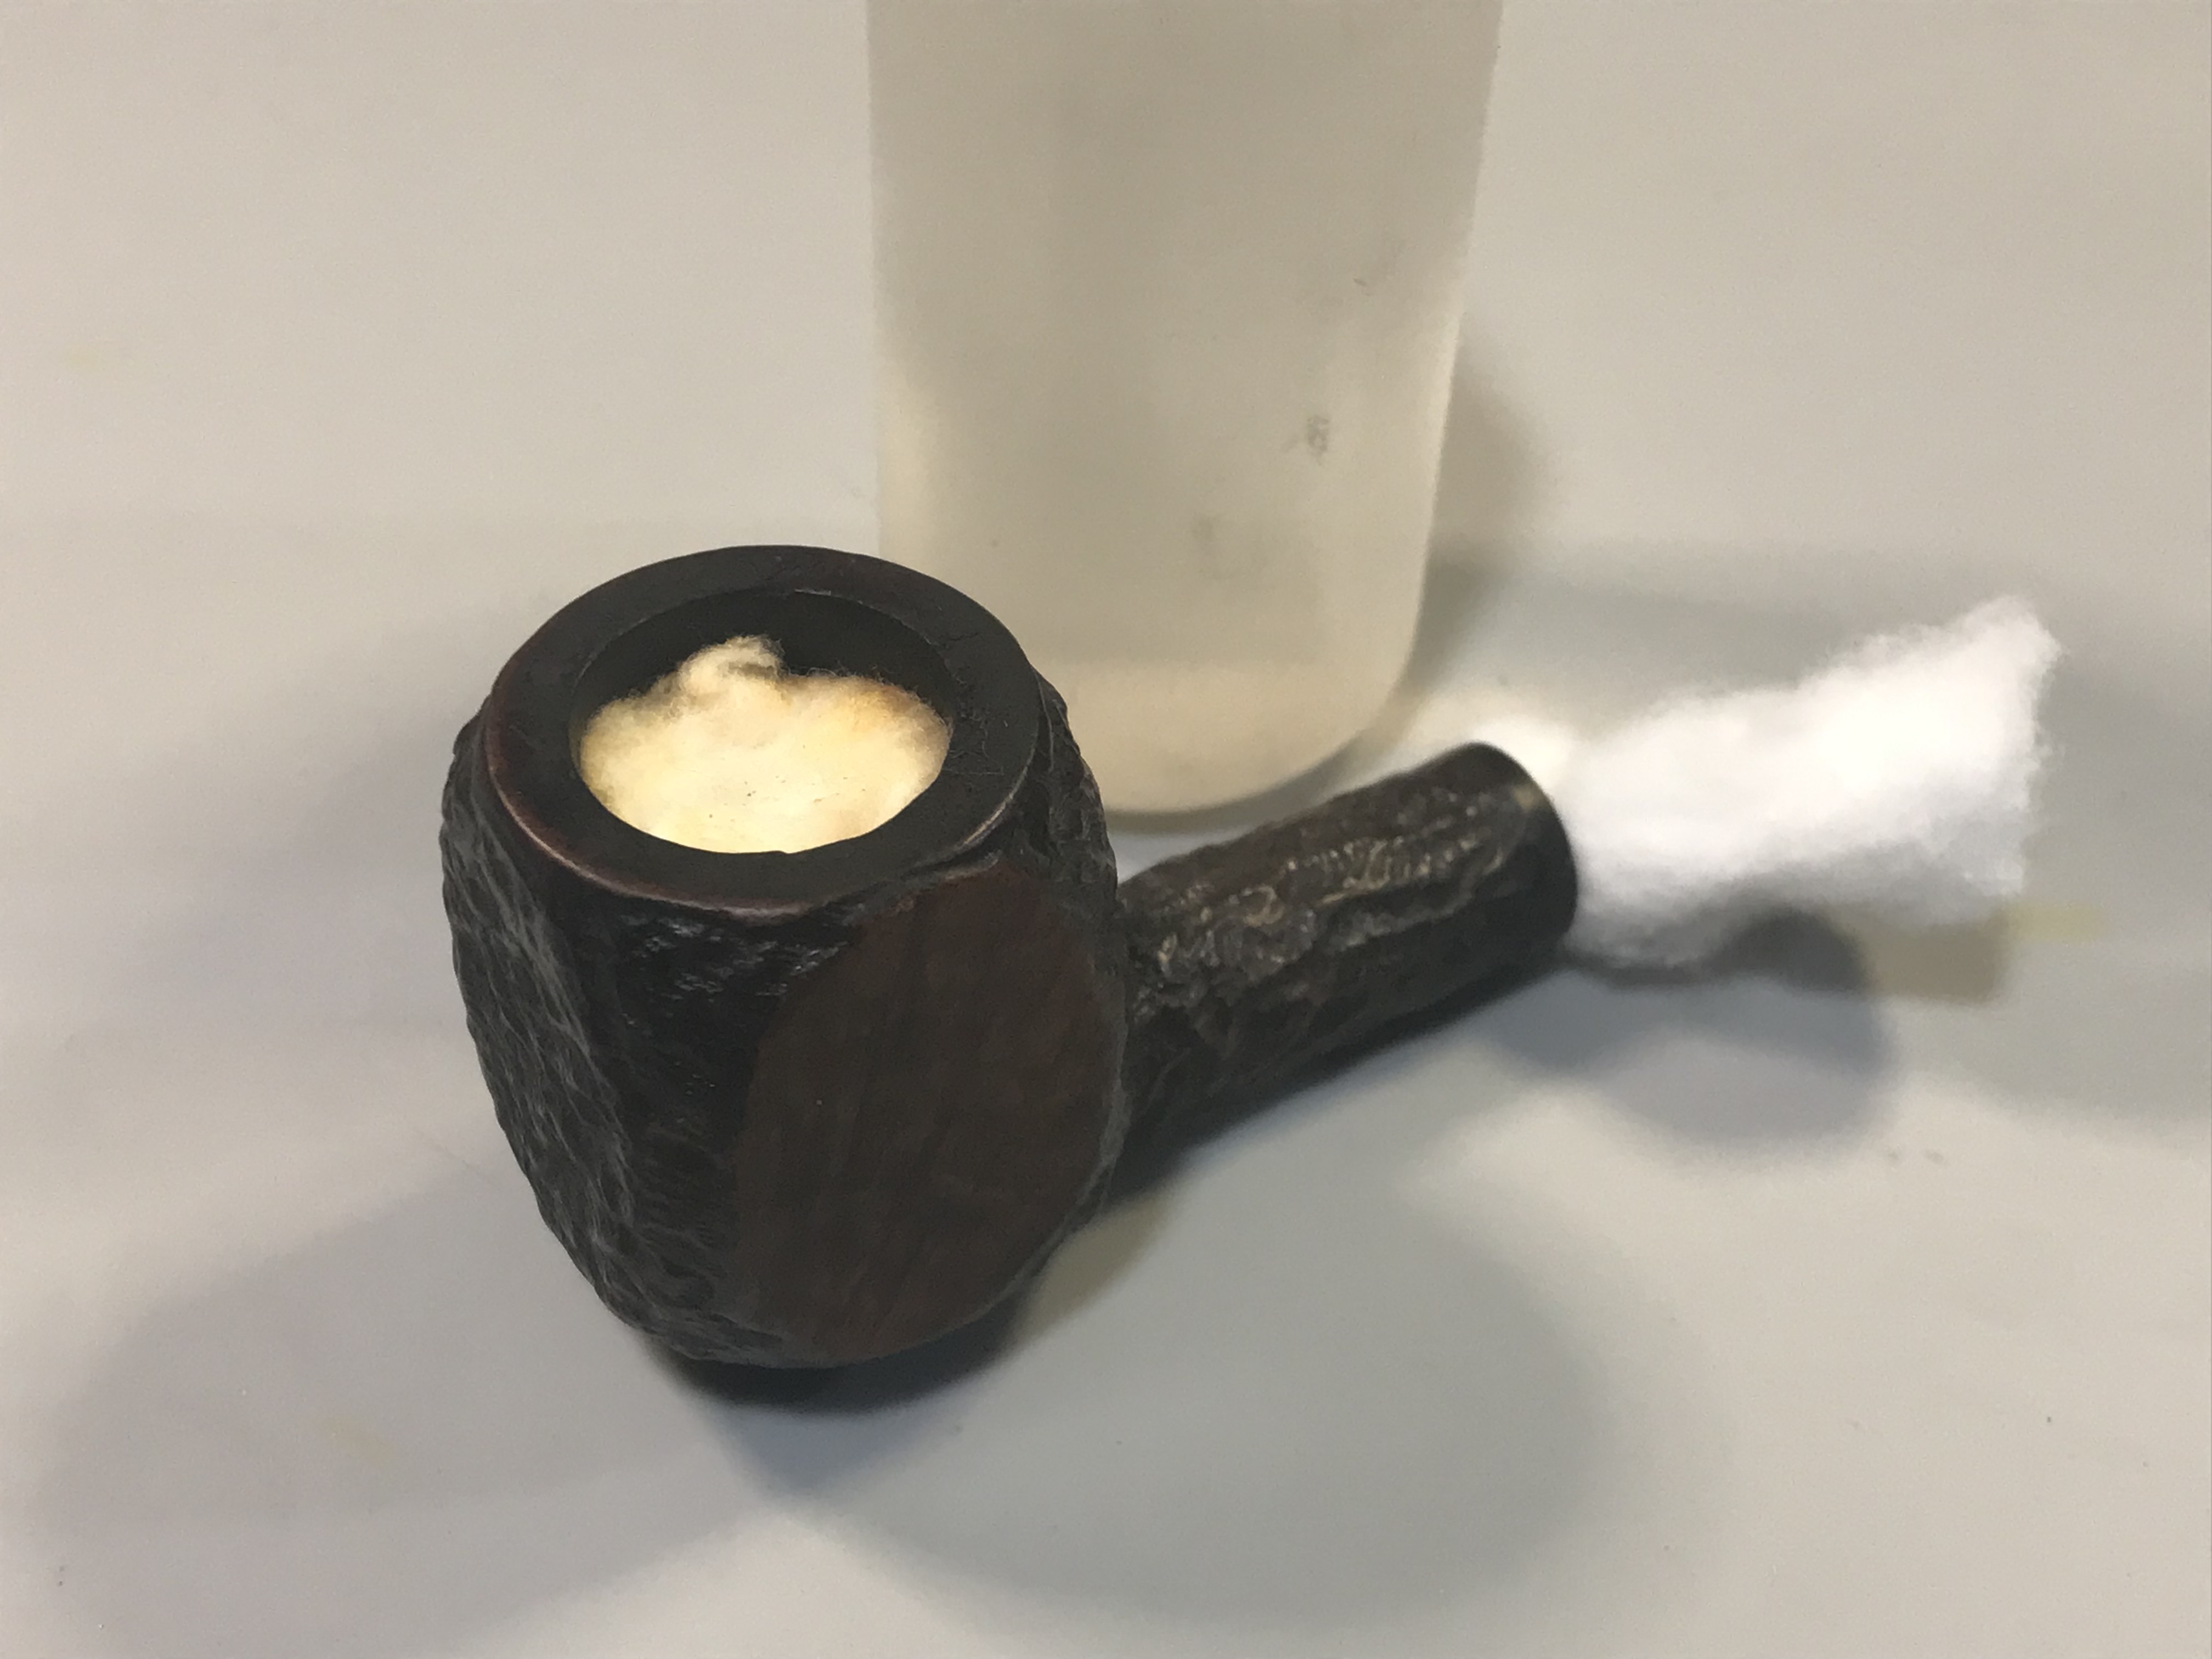
While I worked on the stem, I reconditioned the tobacco chamber with cotton balls and isopropyl alcohol. The isopropyl has more alcohol concentration than the Alcool. I tend to use the stronger stuff on the older pipes to ensure they are thoroughly reconditioned.

Afterwards the whole stummel gets scrubbed down with Murphy’s Oil Soap to remove any grime and dust accumulated over time.

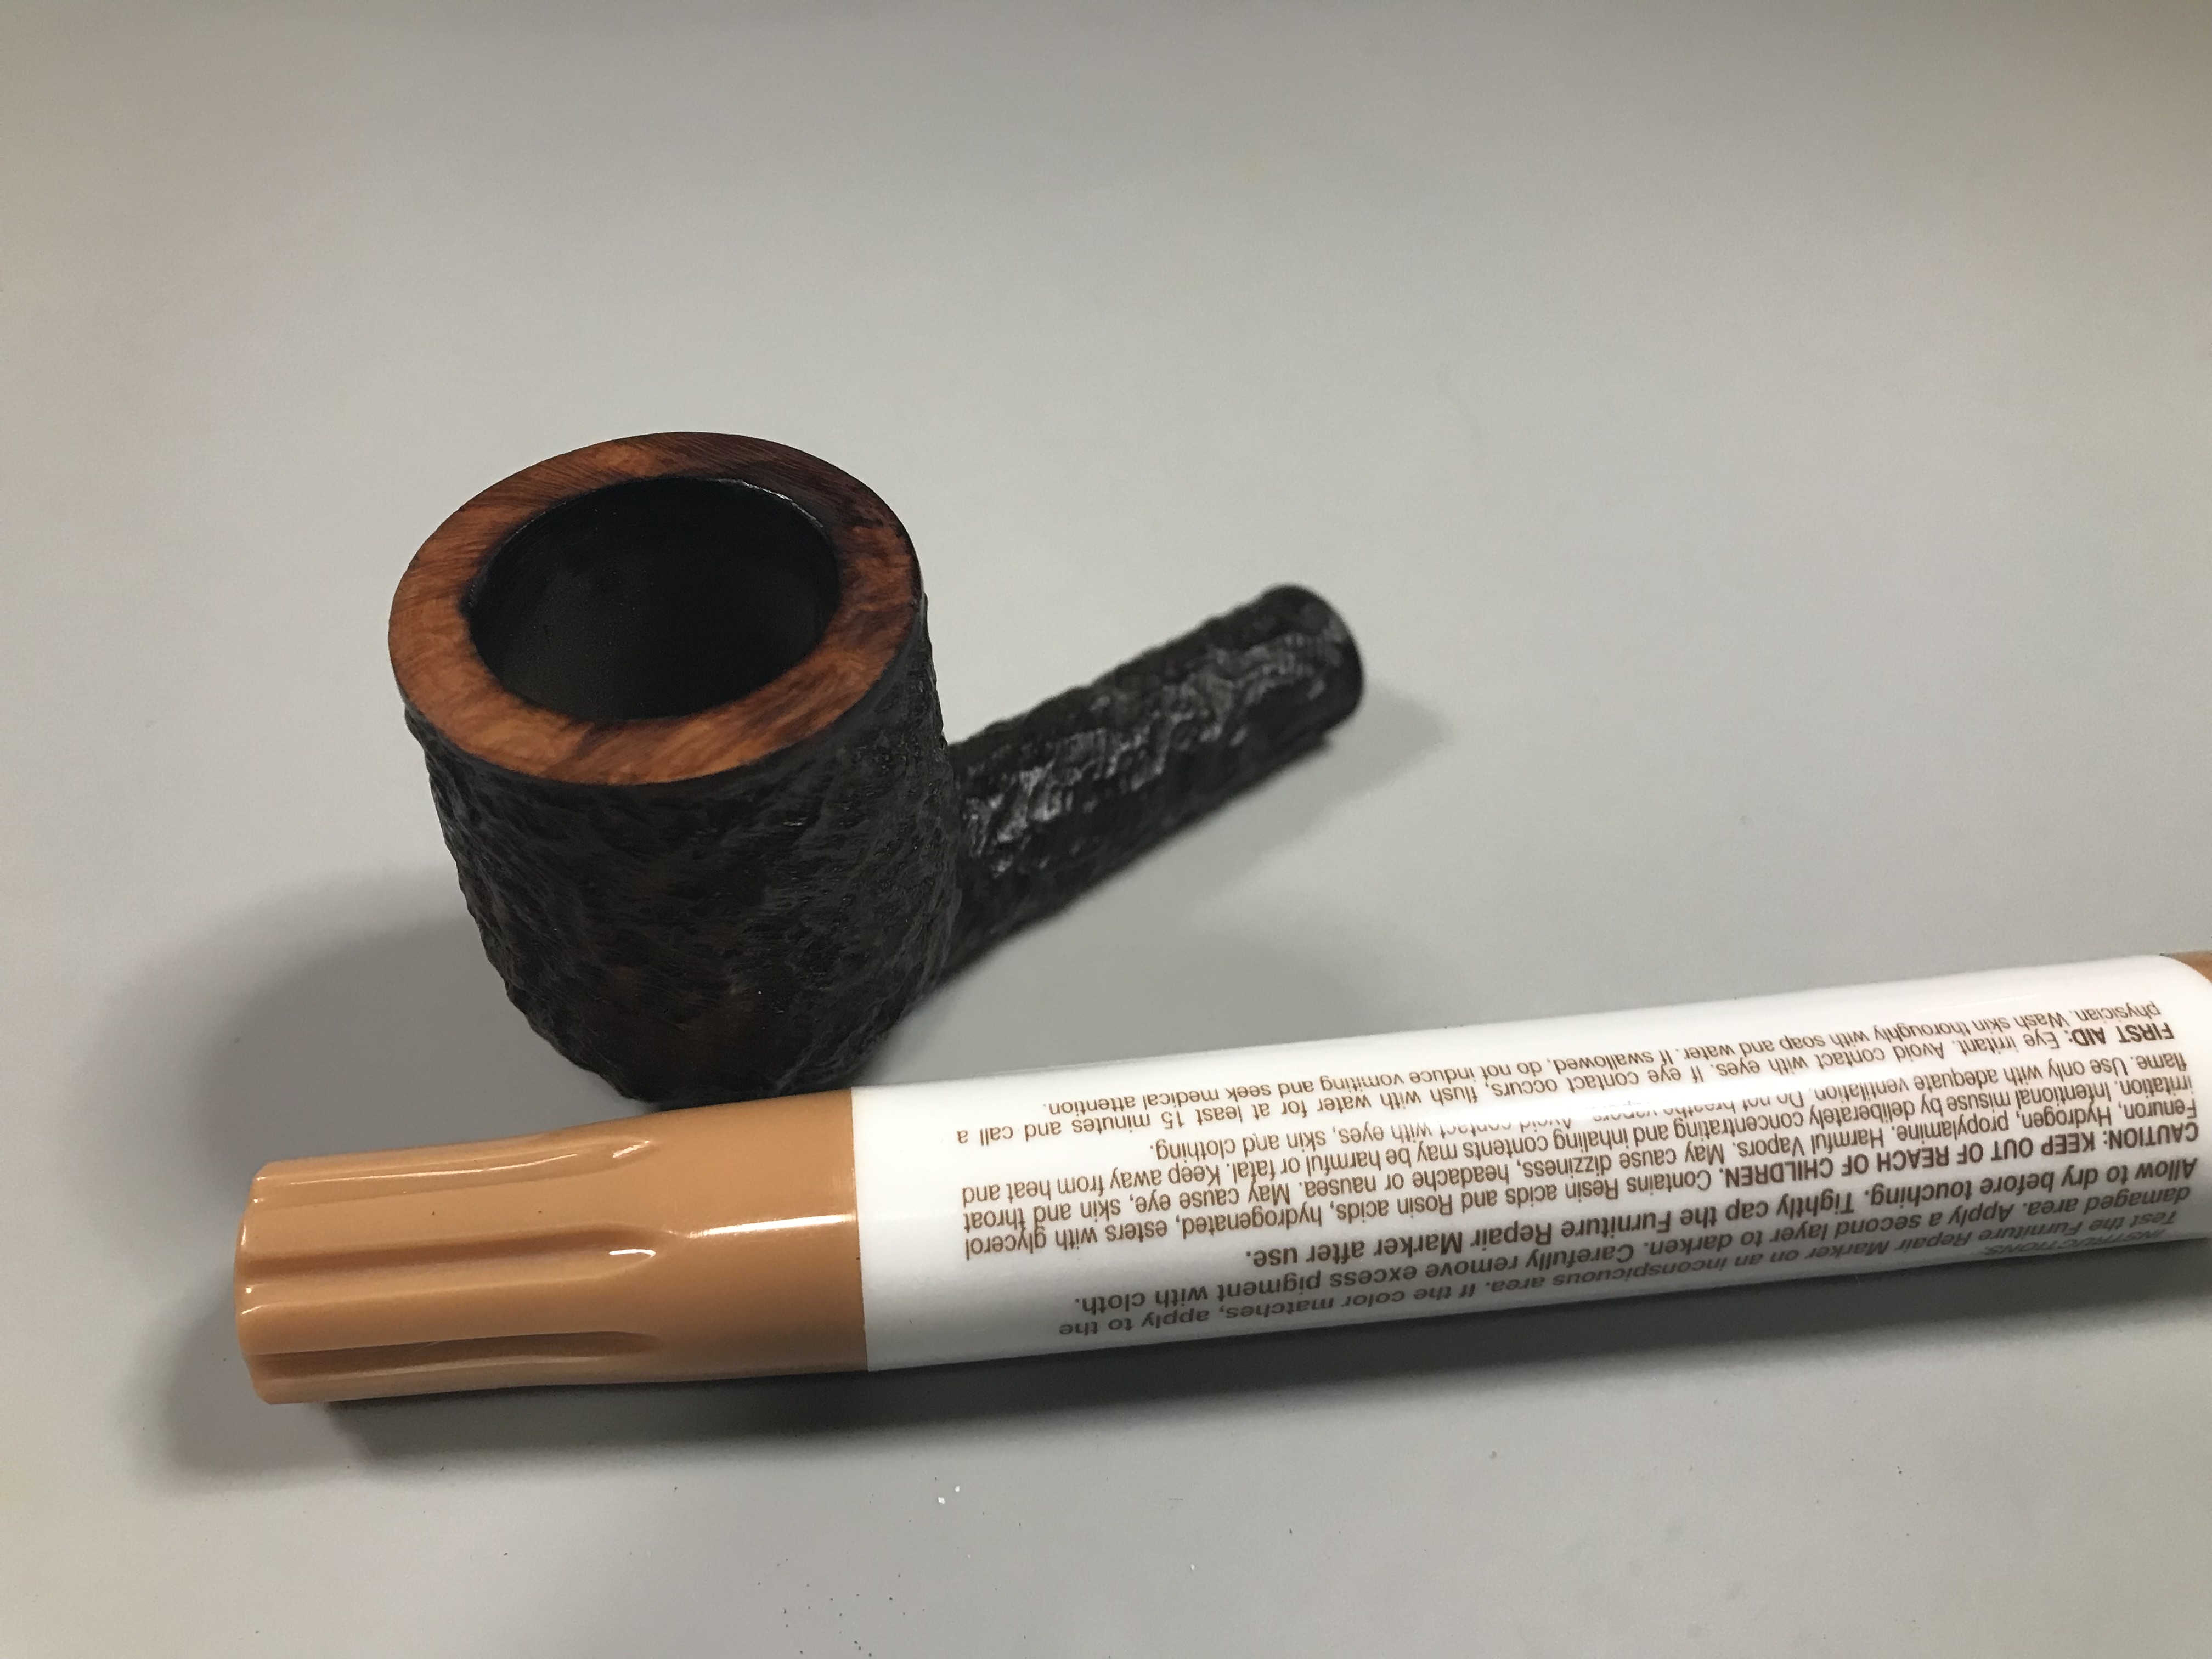
I topped the bowl using 320 grit sandpaper to remove the carbon buildup on the rim and restore the smooth rim beneath. I used subsequent grits 320-1000 to refinish the rim, then used a stain marker to match the rim to the rest of the finish.

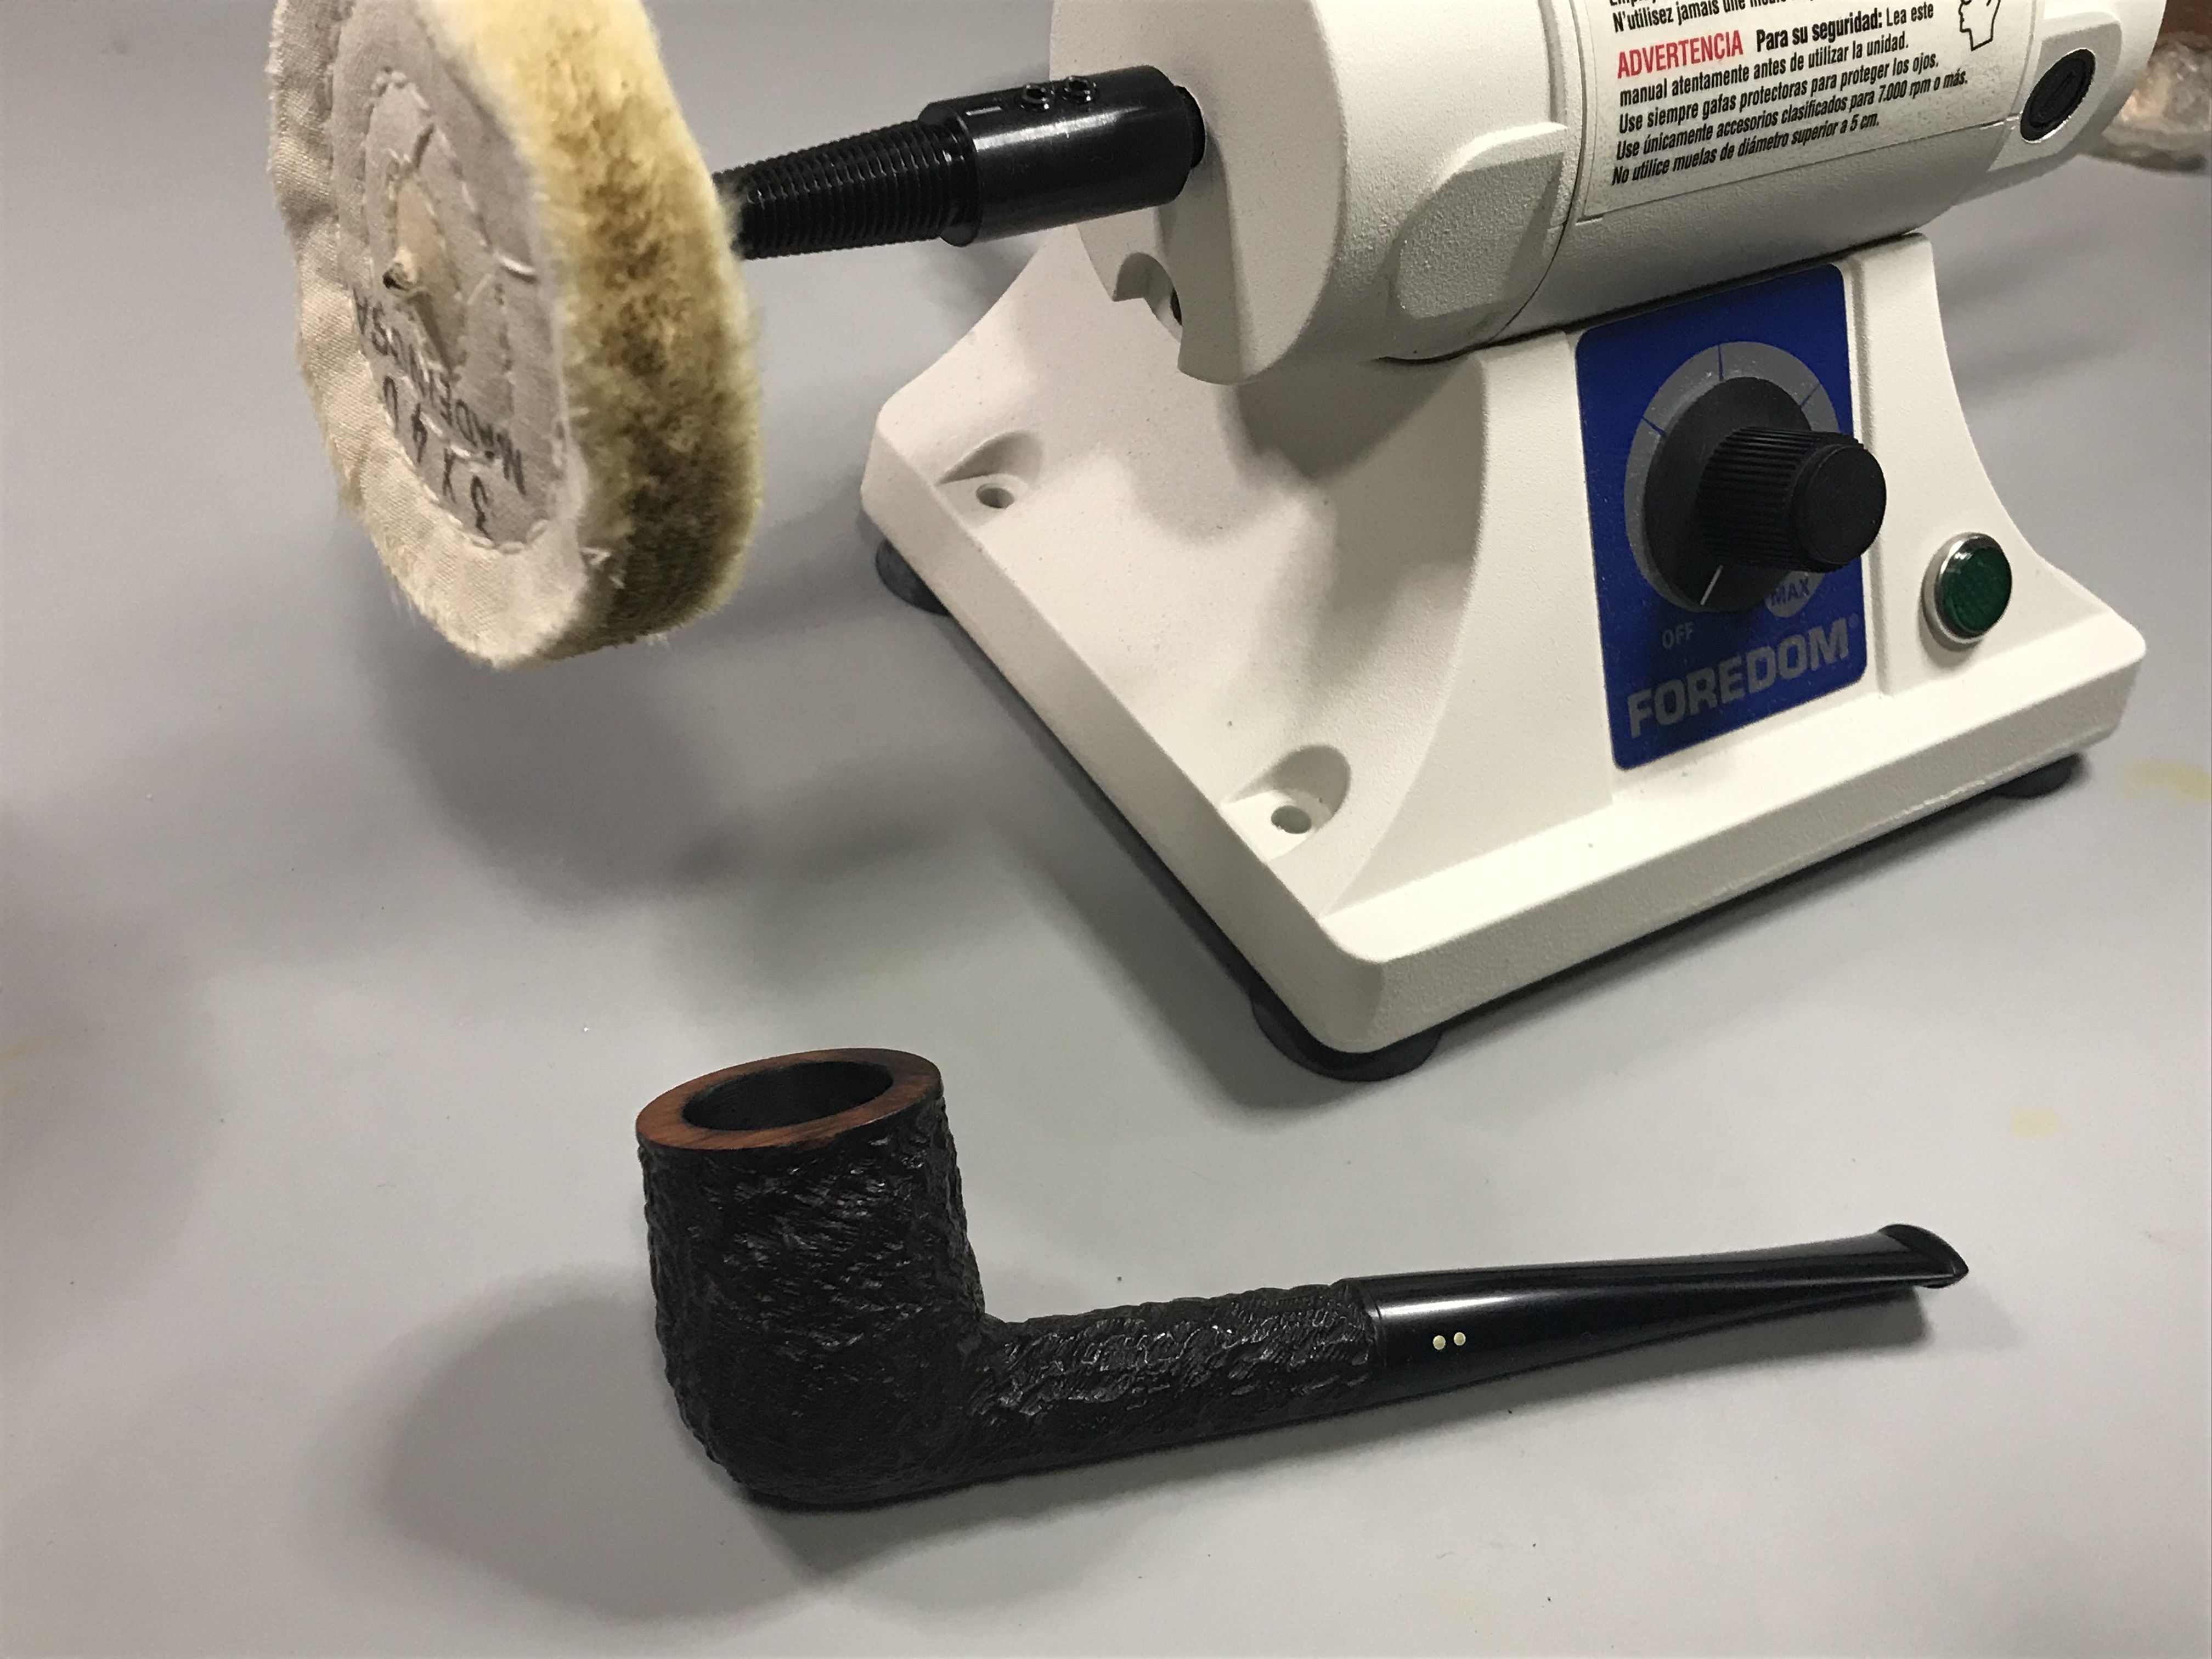
The pipe was reassembled, buffed and polished with Tripoli, White Diamond and Carnauba wax.

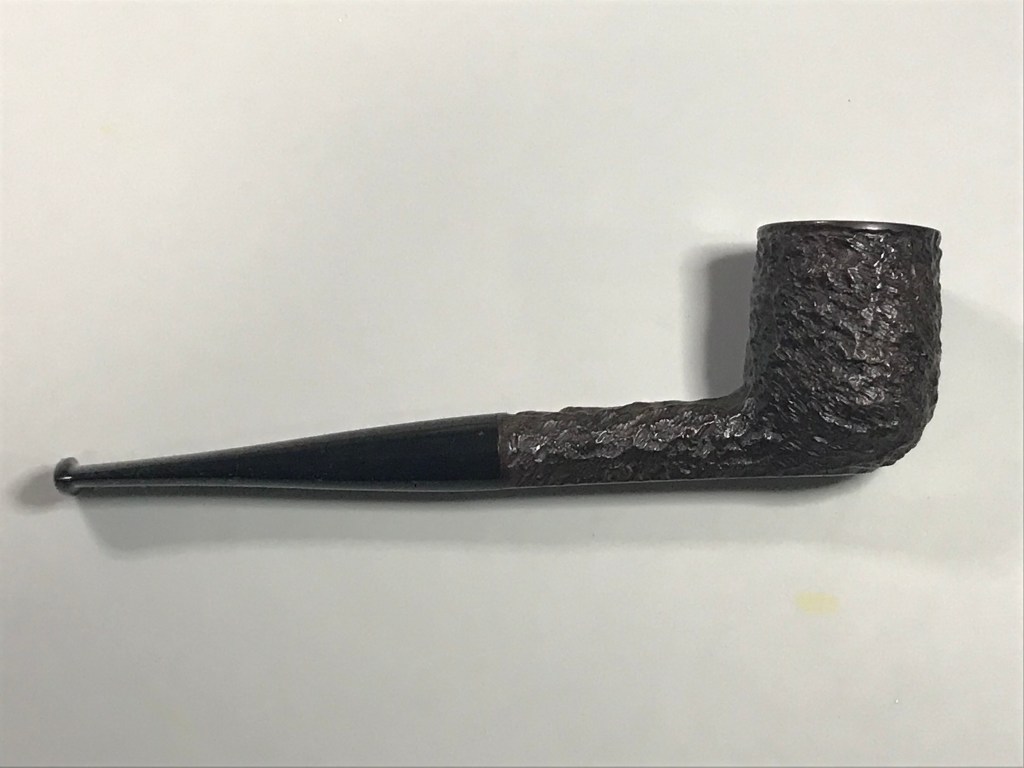
Here’s the finished pipe! You can curate this pipe for your own collection by visiting the Lunting Bear Store. The original box, pipe sock and brochures are all included with this pipe.

A tale of two Patent Era Brighams, Part 1

This is a wonderfully preserved Patent Era Brigham. This pipe was acquired with another patent era pipe, also preserved in the original box (Part II).

It is always a “fist pump” moment for me when I can find a pipe in the original box but this was a special treat for me as this one (and its companion) both came with the original brochures from their respective eras.

The R.Brigham & Son Brochure pinpoints the age of this pipe to the latter end of the patent era, 1954-1955.

What is particularly striking to me is the production of the brochure. As I gleaned over the brochure, taking in the age of the paper and chuckling at the retail prices, I shared the find with my lovely lady who has a soft spot for nostalgia and a true appreciation for talent and things that were made well. She stated quite quickly “Darling, that is all hand illustrated”. It gave me pause, and I turned my attention back to the brochure again. She was correct! The pipes were all hand illustrated!

It is quite amazing to consider that a Brochure Company or a “Graphic Design Company”, as we’d refer to them today, would have illustrators whose job it would be to provide sketches and drawings of products and even fonts. Just pause and reflect on that as we compare that to lightning speed at which we would produce a similar brochure today. I did some searching online to explore the evolution of brochure making and found some interesting information.

So how did brochures look a long time ago? Here’s a brief glimpse:

  • In the 1940s, digital photography wasn’t born yet so there was heavy reliance on hand-drawn illustrations. If one or two photographs are included in a brochure, it’s black and white and the resolution is not that great. Also, coloured printing was expensive during this decade so most printed materials are black and white.
  • In the 1950s, photography techniques and capabilities had improved, making it easier to include photos. These brochure designs still rely heavily upon hand-drawn elements and fonts. You can see a transition to photography in other designs (not shown), making the 1950s one of the transitional periods for brochures.
  • In the 1960s, it was pretty common to see coloured brochures although old school hand-drawn illustrations and fonts were still used.
  • A decade later, brochure print has gone full-colour because of the improvement in photography techniques. It has also become easier to layout printed materials and the costs of printing coloured brochures have significantly gone down.

Provenance comes in many forms and it was fun to explore the provenance of this pipe through the merchandising and brochure advertising of its day. But, I almost forgot, we were here to recondition the pipe itself, so lets go!

First Impressions

The pipe is a billiard shape, stamped 202 with the Patent stamp ( Can. Pat. 372982) and Brigham. Stamping is quite clear and crisp. The stummel is in great shape with some expected carbon buildup and rim darkening from a well loved pipe. The stem had some deep tooth chatter and some hardened sulphur oxidation at the mouth piece. I think some that crusty stuff is a bi-product of saliva from the previous smokers mouth. Based on the indents in the stem, I’d conclude they were a clencher. Overall, the stem is in good condition, no issues that cannot be remedied.

Step 1: Carbon Removal

For reaming the tobacco chamber I typically use a few tools, a pipe reaming set with the four bits, a mechanical reaming tool and 220 grit sand paper. The mechanical reaming tool I tend to find rather useless for this task.

Step: Clean and Recondition

I used Isopropyl Alcohol soaked cotton balls to recondition the tobacco chamber overnight. As the alcohol evaporates the cotton ball absorbs matter from the tobacco chamber, evident by the brown cotton ball.

Afterwards I scrubbed the internals with pipe cleaners. Other than the carbon buildup on the rim, the pipe was kept quite clean inside. It didn’t take long to have it clean. Lastly I scrubbed the whole stummel with Murphy’s Oil soap to scrub away any build up dirt or grime.

Step 3: Stem repairs & reconditioning.

I submerged the stem in Mark Hoover’s Before & After deoxidizer available at lbepen.com. I have found where the oxidation is from age and not sun damage, this product is ideal for stripping away the oxidation from the surface. As you can see by the colourful swirl in the second picture, that is the oxidation left behind in the solution after a 24 hr bath. Some paper towel and mineral oil removes the residue from the stem revealing the untarnished vulcanite underneath. Unfortunately, stems that have been bleached or sustained heavy sun damage will require a lot of sanding at lower grits to get rid of the oxidation, sometimes the stem is a lost cause and needs to be replaced. Thus far I haven’t had a “lost cause” stem but I have had one or two that were close to it. I would highly recommend Mark’s product for routine restoration of vulcanite stems. Saves a lot of sanding!

After I cleaned up the stem, I used a CA glue containing rubber to fill the tooth dents on the stem. Bob Smith Industries carries this glue and is ideal for seamless stem repairs.

Step 4: Rim restoration

With the stem repairs complete, I turned my attention back to the stummel and removed the remaining carbon adhered to the bowl using 320 grit sandpaper. I placed the bowl, rim down, on the sandpaper and moved the bowl in a circular motion to sand the rim back to bare briar. This pipe had a smooth rim, so this was an easy decision to quickly bring it back. Afterwards I worked through progressive sandpaper grits 400, 600, 800 then 1000.

I utilized one of my stain markers to match the pigment of the stain on the bottom of the pipe where the stamping was located. These stain applicators are a great way to apply pigment without the mess. They are not useful or efficient over larger areas, but does a great job on the rim of a pipe.

Step 5: Buff and Polish

Using my newly acquired Foredom Buffing lathe, I polished the pipe using Tripoli, White Diamond, then Carnauba Wax.

Here is the finished pipe! You can purchase this pipe for your own collection exclusively at the Lunting Bear store! Thanks for stopping by!

Reconditioning a 1978 Brigham 129 (1 Dot)

This pipe came to me from a pipe lot acquired in Toronto. I was able to piece together who I think the smoker was based on the items within the lot. From what I could determine he used to be a Doctor, there were other items with the lot that pointed to physician. He was definitely a former cigarette smoker because there were old Cigarettes in the lot. This chap enjoyed cigarettes, pipes and cigars from what I can surmise. Unfortunately, the pipes in the lot were in a state of neglect when I acquired them. There seemed to be a lot of pipe smokers who just filled their pipe, smoked it, let it rest then repeated the same process over and over until they needed a new pipe. But if it wasn’t for their lack of pipe care regimen, I wouldn’t have this wonderful hobby!

The pipe is a 1978 Brigham, shape 129 (1 Dot). You can find additional information about Brigham —>Here. Overall first assessment revealed there wasn’t any significant issues with the pipe, it just needed a good cleaning and a little stem work.

Step1: Ream & Clean the Stummel

This pipe had a pretty modest amount of cake buildup and I was able to ream the bowl back to briar pretty quickly. Next I used a salt and alcohol treatment to recondition the tobacco chamber.

I use a combination of methods when I clean a pipe. I ream the pipe of old cake, and sand the tobacco chamber to further remove any carbon buildup. I will then use an alcohol soak in either kosher salt or a cotton ball which appears to draw out unwanted matter such as tars or nicotine. Next, to get the stummel really clean, I will use an alcohol retort. Lastly, pipe cleaners, pipe cleaners, and more pipe cleaners. I will scrub the draught hole and mortise until the pipe cleaners are free of heavy tar and carbon. A slight tint to the pipe cleaner passing through is acceptable.

Step 2: Deoxidize & Clean the Stem.

There are a variety of ways to remove the oxidation on a stem, whichever method you choose to use, sweat equity will be a key ingredient in removing the oxidation. But there are products to make it easier. One such product is Mark Hoover’s Deoxidizer for hard rubber, you can purchase Mark’s product at La Belle Epoque Vintage & Modern Fountain Pens. Once I familiarized myself with how it worked, it was quite helpful. In this restoration I used Mark’s product. I soak the stems overnight as it just aligns with the timing of my hobby hours. I use cotton swabs to wipe the product off into the container then use paper towels to scrub the oxidation and remaining product off of the stem. You’re going to need to clean out the draught hole on the stem as well to get all the goop out. Lastly I rub the entire stem with mineral oil using a microfiber cloth and pass a pipe cleaner dipped in the oil through the stem as well. I just let it sit afterwards.  **Note: I wrap the aluminum Brigham Tenon in electrical tape. The deoxidizer has a reaction with the aluminum and causes a slight calcification on it. You can remove the calcification with steel wool, but you could end up with a loose fitting Tenon by doing so.**

Step 3: Scrub the exterior of the stummel

The pipe had a buildup of carbon around the rim which filled in some of the craggily rustication on the rim. I used a wire brush to scrub it off and preserve the rustication. You can also use 0000 Steel Wool to achieve the same result. If you are using a wire brush, I would not recommend using a brass brush. They are softer bristles, you likely will end up transferring metal from the bristles to the stummel and end up with a metallic sheen on some parts, which you then have to remove. Lastly I like to use undiluted Murphy’s Oil Soap on the outside of the stummel. I just dip a toothbrush in the soap and scrub the stummel to remove dirt and grime.

Step 4: Stem restoration

With the stem deoxidized I moved on to reconditioning the stem. There was some tooth chatter that I was able to correct using flame from a lighter. However; there were a few spots that I couldn’t lift out with heat. When that happens, for vulcanite stems, I like to use Bob Smith Industries IC-2000 CA Glue.  It is infused with Carbon and Rubber and matches the stem perfectly for me.

I missed taking pictures of a few steps, but once the CA Glue has dried, you can file it down with a small hand file. Once I have filed down the patch to bring it within the profile of the rest of the stem I sanded the bite area with various grits. I will start with 800 if I’m fortunate enough to not make any deep scratches. After that I turn to micro mesh pads and sand from 1500-12,000, lastly the stem is buffed with using my rotary tool and some buffing bits.

I reassembled the stummel and stem, buffed and polished the whole pipe with carnauba wax. Here’s the finished pipe.

This pipe is will be available at the LuntingBear Pipe Store **COMING SOON**