Cleaning up a 1976 Dunhill Bruyere (213)

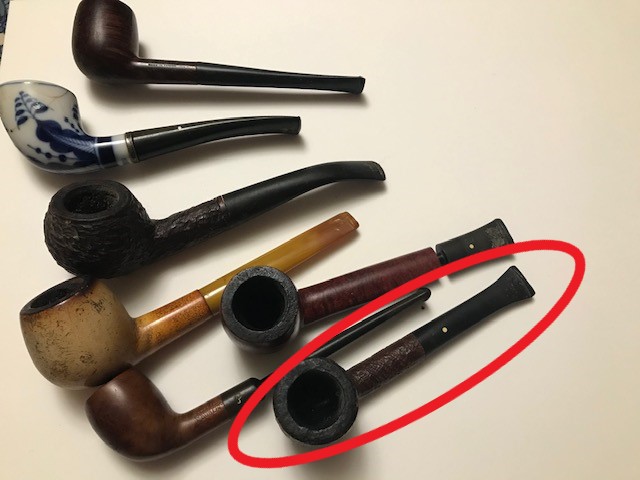
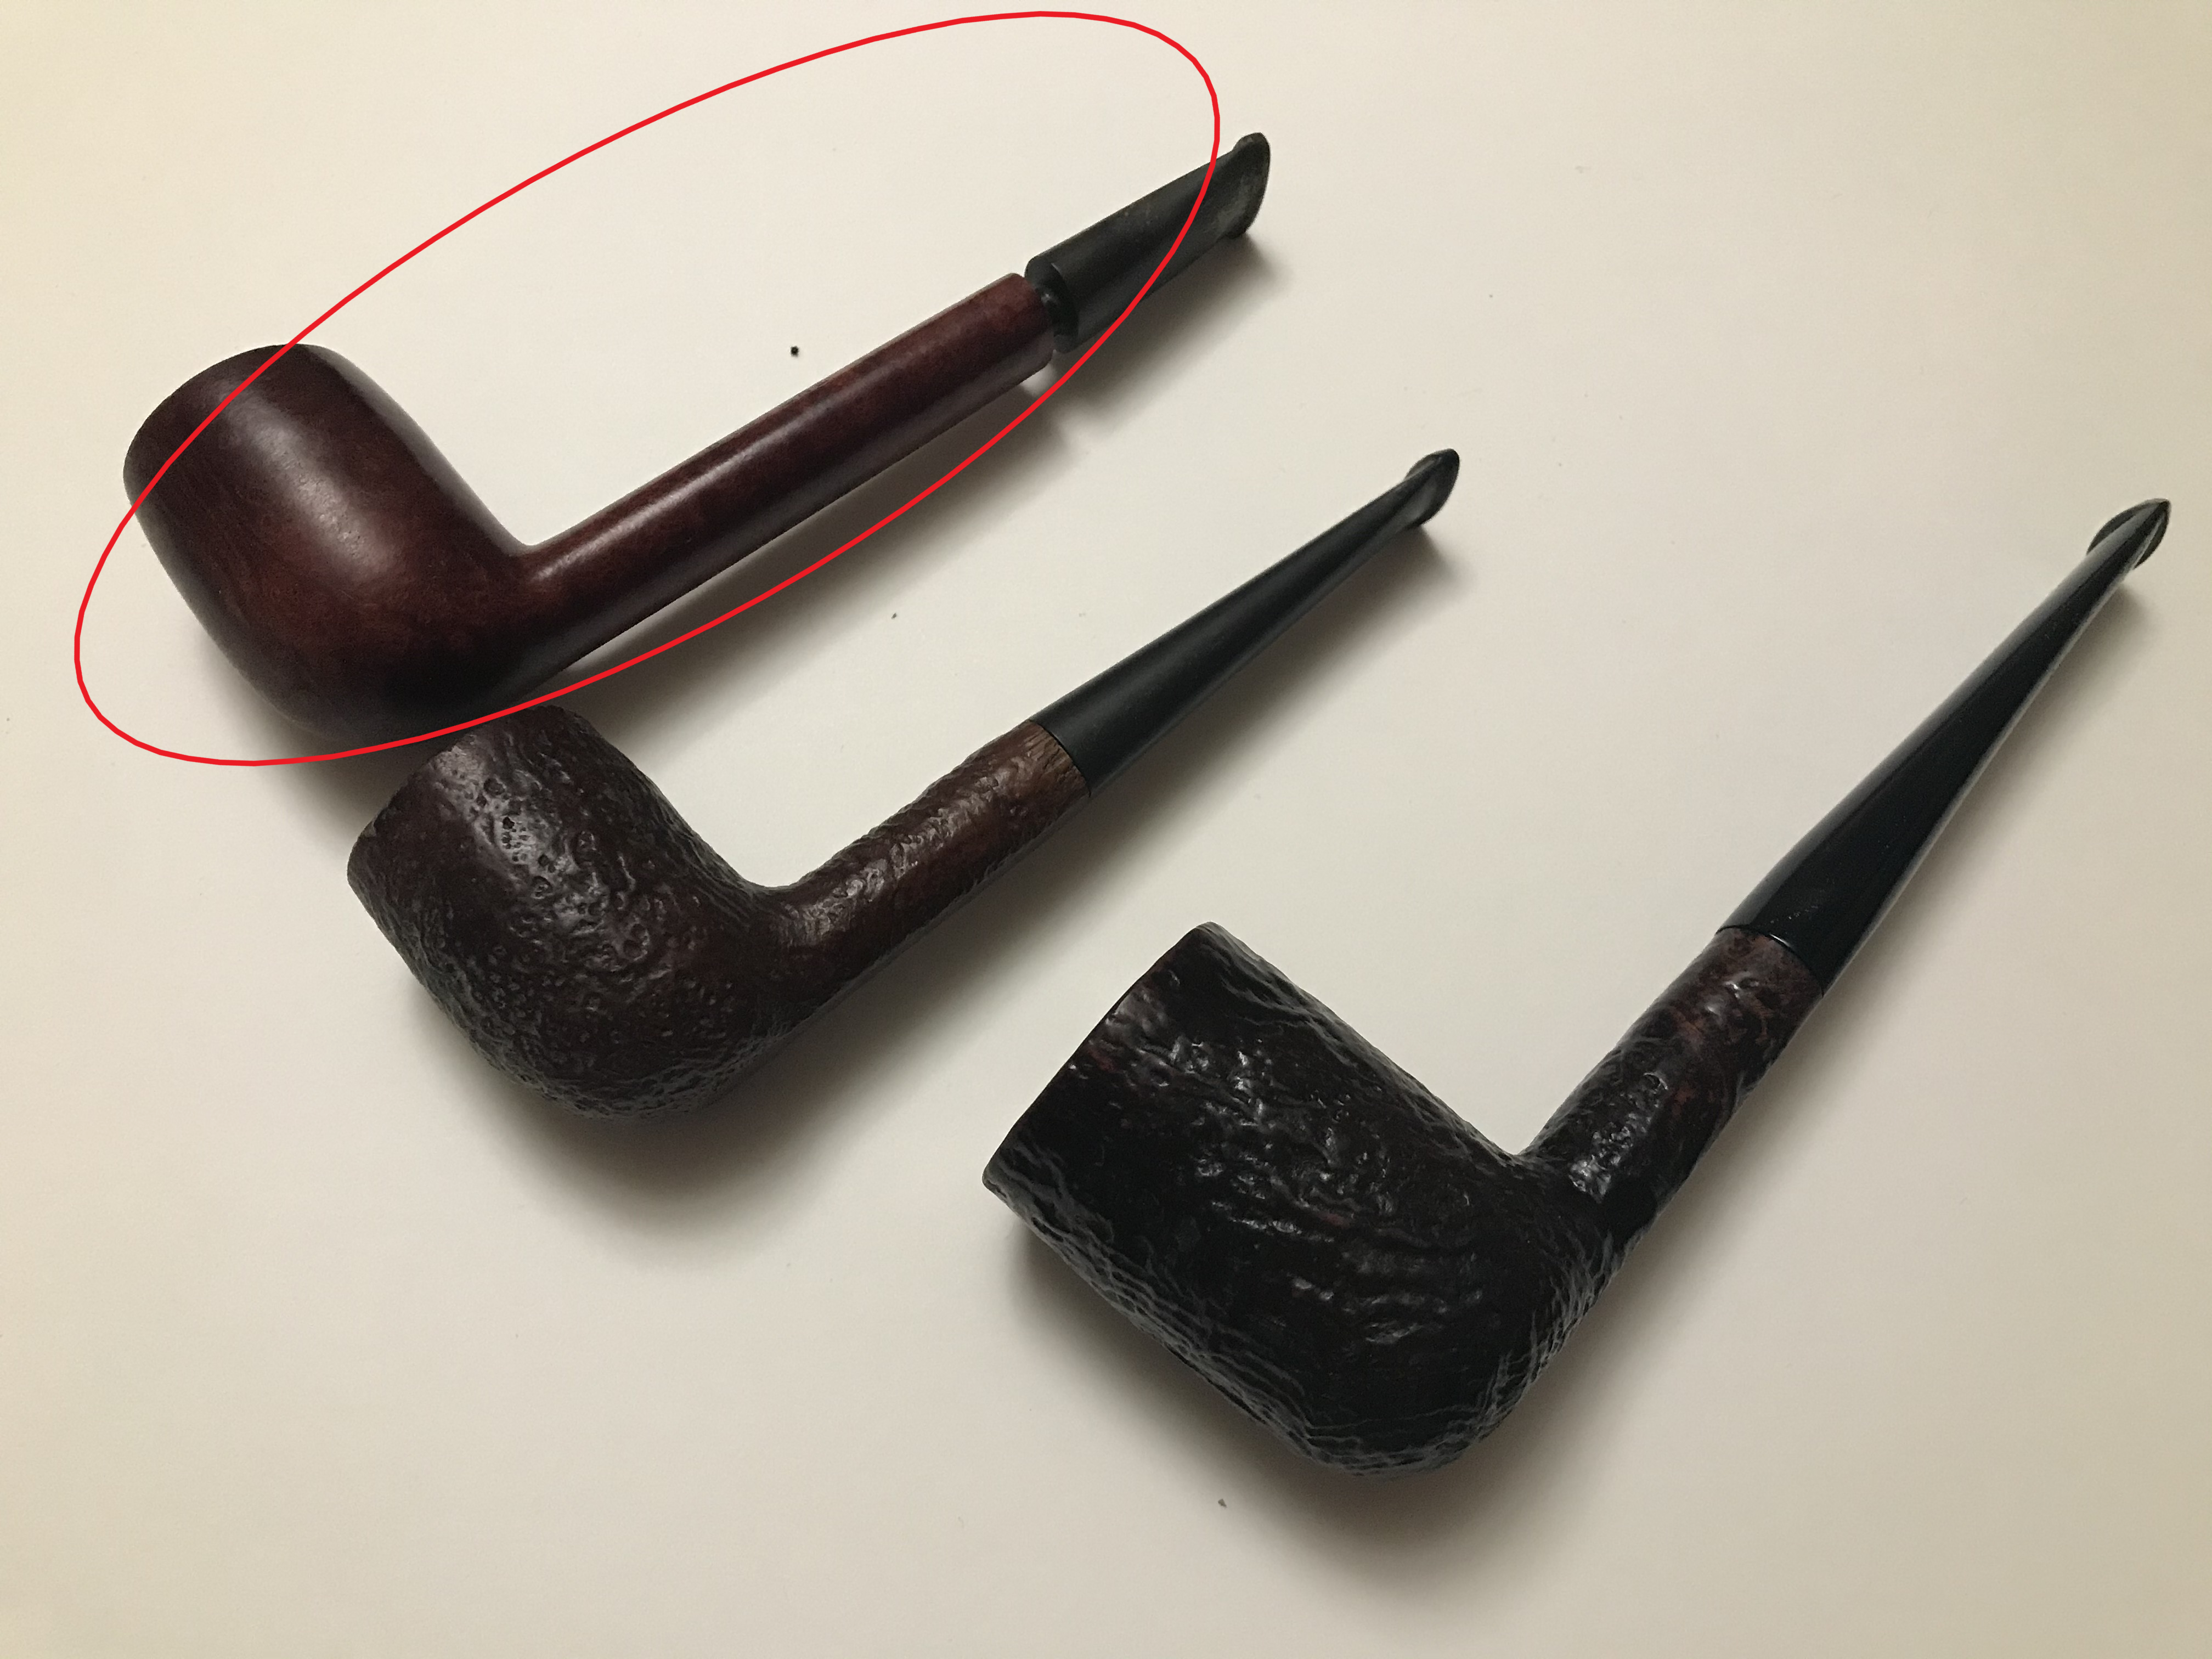
This was the second Dunhill in the lot I acquired in Toronto. On the picture on the right you can see it is similar in size to a Group 1, the Shell Briar at the bottom is my Father’s Group 4 for comparison.

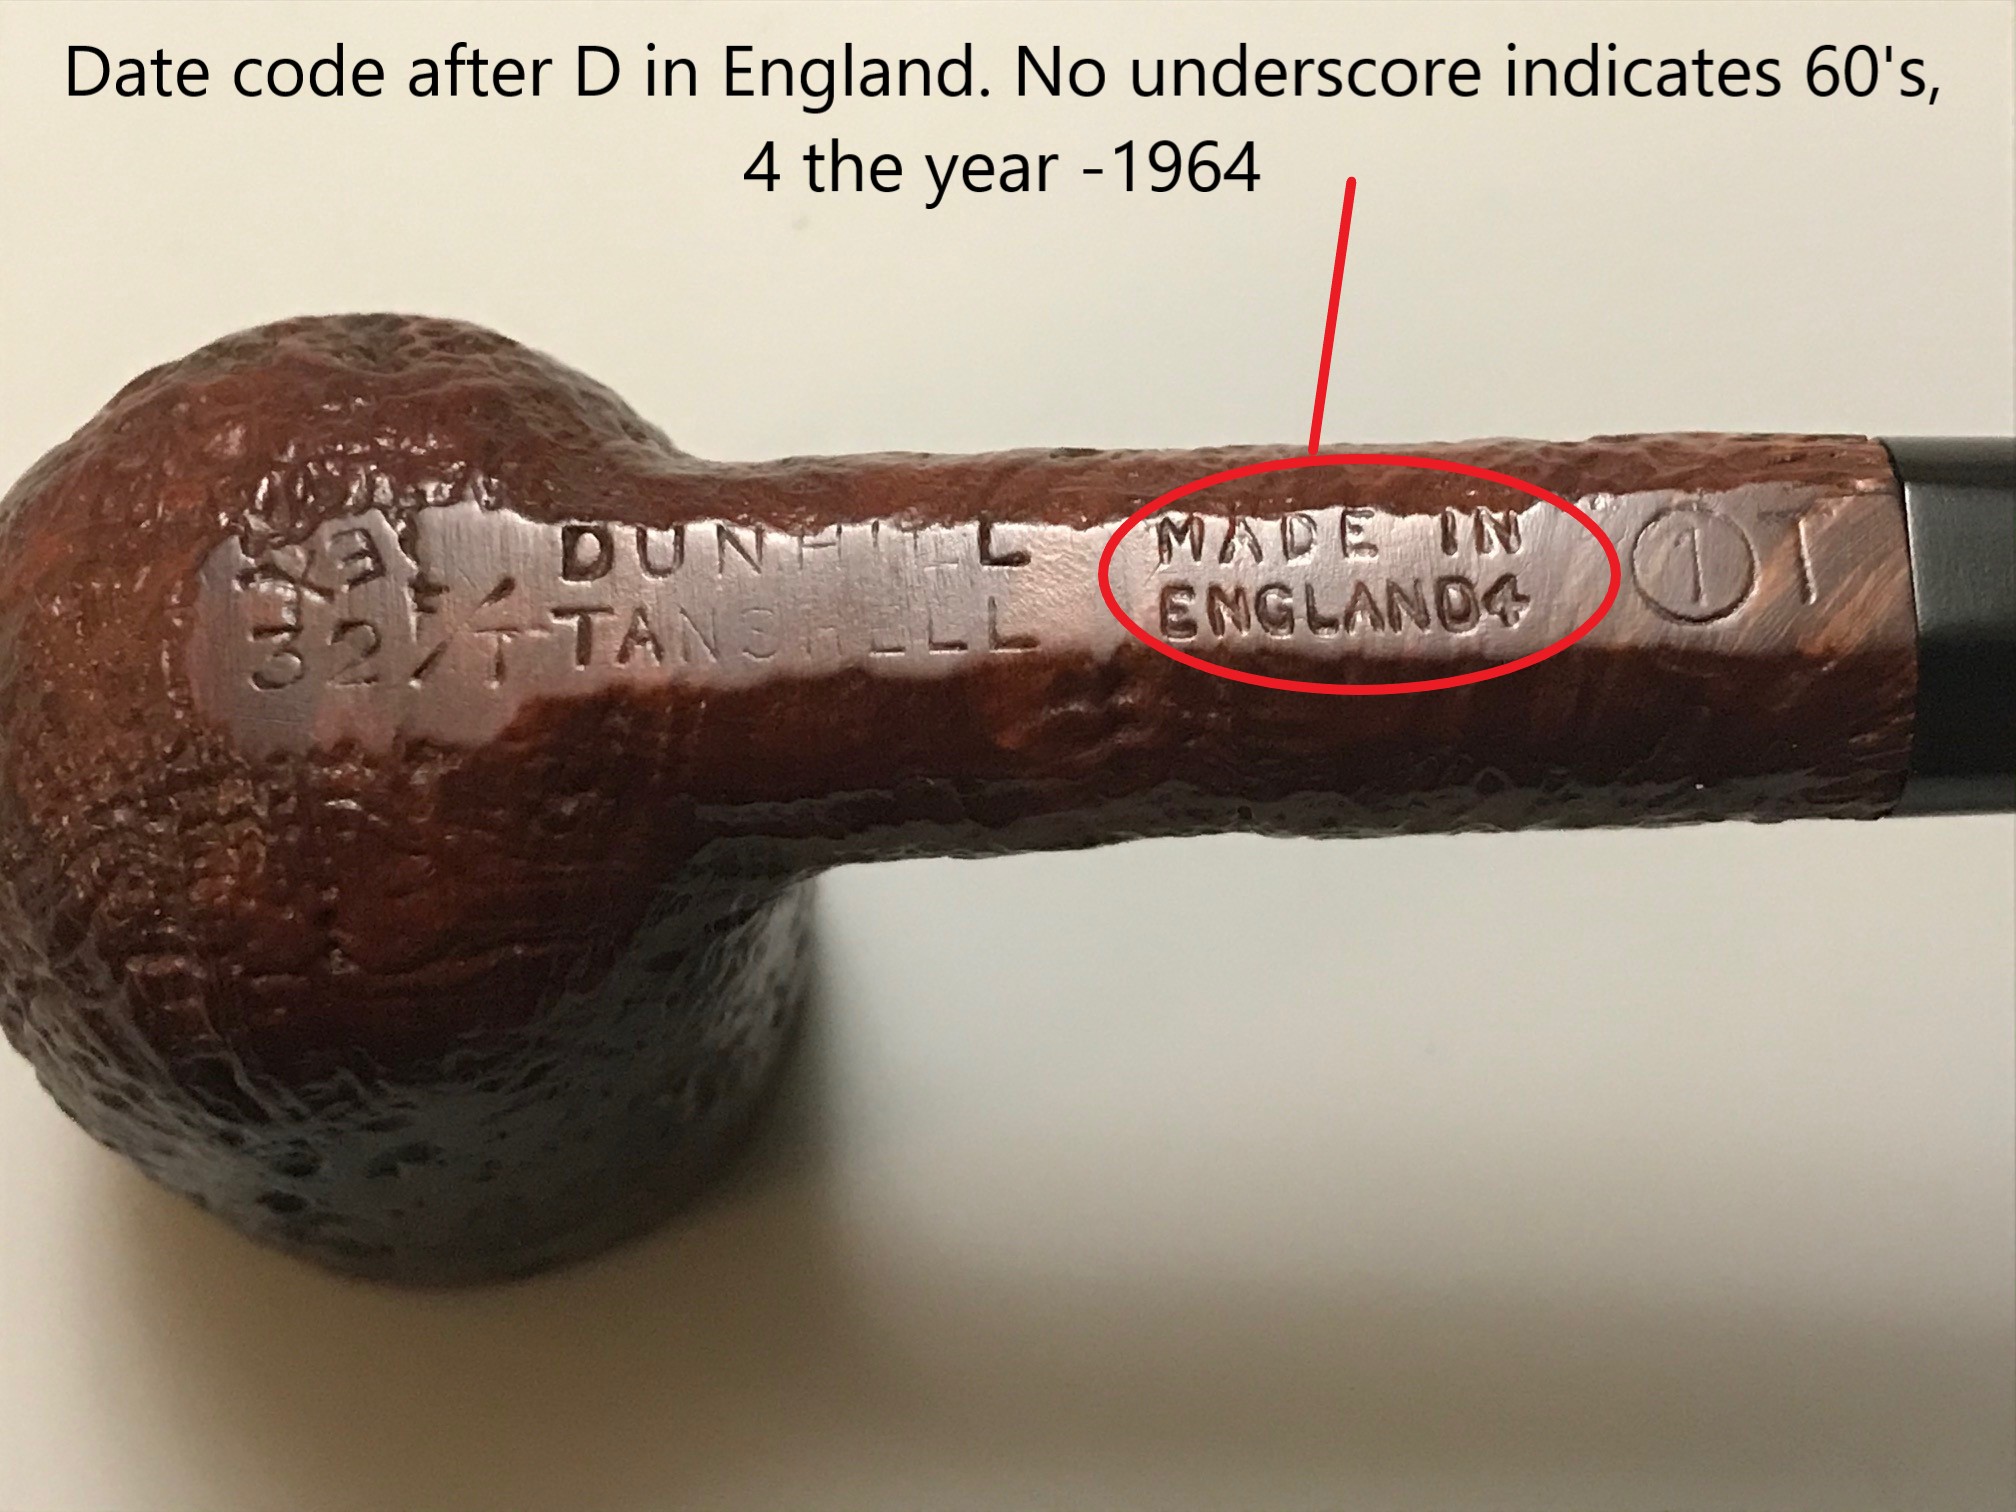
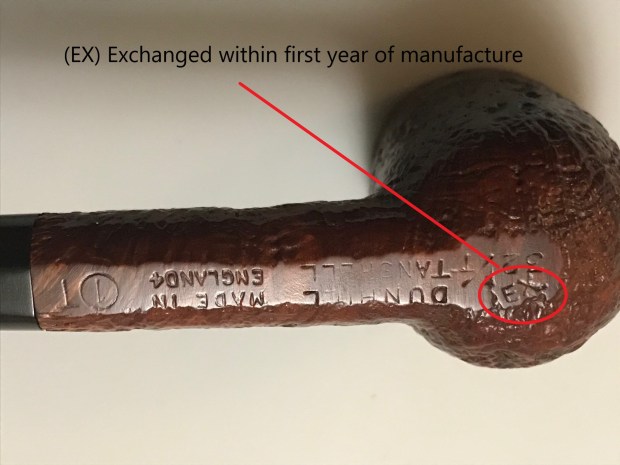
In 1976 a 3-digit system (“Interim”) was developed that showed a logical approach to identify pipes in terms of size & mouthpiece (this was soon to be replaced). Conveniently this pipe is stamped in the exact year that this interim system was developed. The pipe was stamped DUNHILL BRUYERE, (213), MADE IN ENGLAND16. The dating code for pipes from this era was used from 1955 – 1994. From 1970-1994 the date code was determined by adding the double suffix number to the year 1960. In this case the double suffix number is 16, therefore 1960 + 16 = 1976, et voilà!

Pipedia Dunhill Dating Guide

First Impressions

This is one filthy pipe. This pipe was well smoked, carbon buildup was moderate in the tobacco chamber but had also deposited itself on the rim as well bonding with the finish. There was some minor tooth chatter on the stem which wasn’t too badly oxidized and could be fixed easily. The red top finish that a Bruyere is known for was gone, it still had a nice luster but it had faded completely. The Bruyere finish is a brown under stain with a red top coat. That can be remedied easily.

Step 1: Ream & Clean

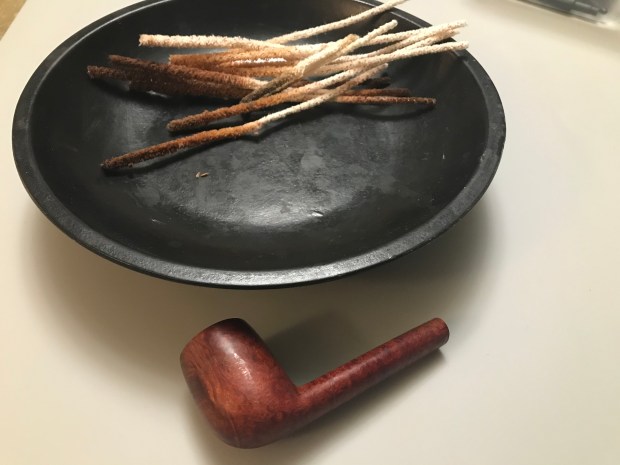
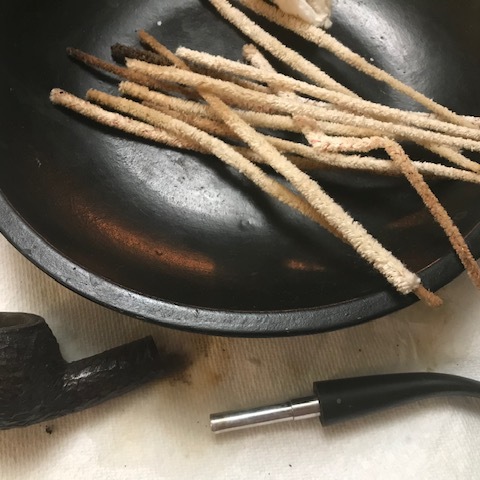
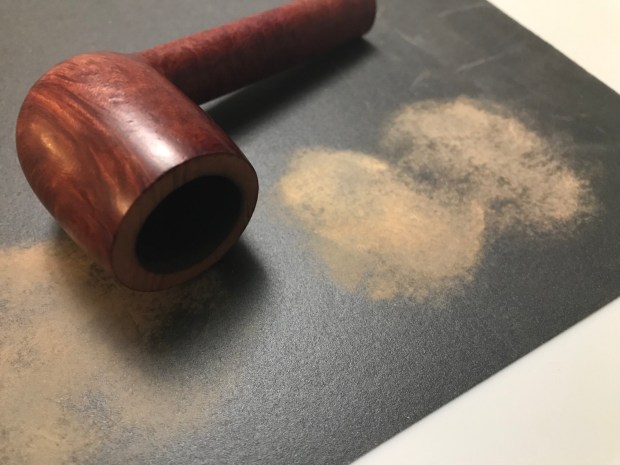
Several passes with a pipe cleaner were returning black, this was a very long process. It was definitely a favoured pipe of our previous smoker. I scrubbed, and scrubbed, and scrubbed the internals with pipe cleaners until the airway was clean. Lastly I applied a salt and alcohol treatment to the tobacco chamber using Kosher Salt and Alcool. Alcool is food grade alcohol and is 95% Alcohol. I live in Ontario where it is available at the LCBO by permit only (BTW you just email them and they will ask you some questions to ensure you’re not making moonshine then give you the permit).

As you can see, after 24 hours, the salt had turned a nice amber brown colour from all the matter it absorbed from the tobacco chamber. Better in the salt than in the bowl! After this step was complete I performed an alcohol retort on the pipe and drew out any remaining tars and nicotine. With the internals in better shape I moved on to the stem.

Step 2: Stem deoxidation and repairs

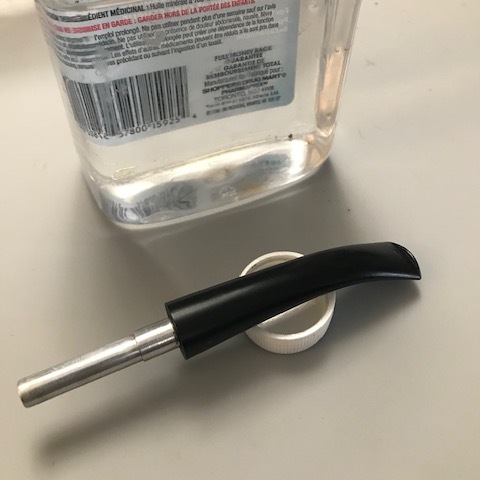
Once again I turned to Mark Hoover’s Deoxidizer formula. If you read the other two blogs related to this pipe lot you will see I’m recycling the pictures because the stems all took a bath at the same time. After removing all the deoxidizer and oxidation from the stem, I always use mineral oil to rejuvenate and protect the stem from re-oxidizing. Once the oil has penetrated the vulcanite and dried I wipe it down and begin any necessary repairs.

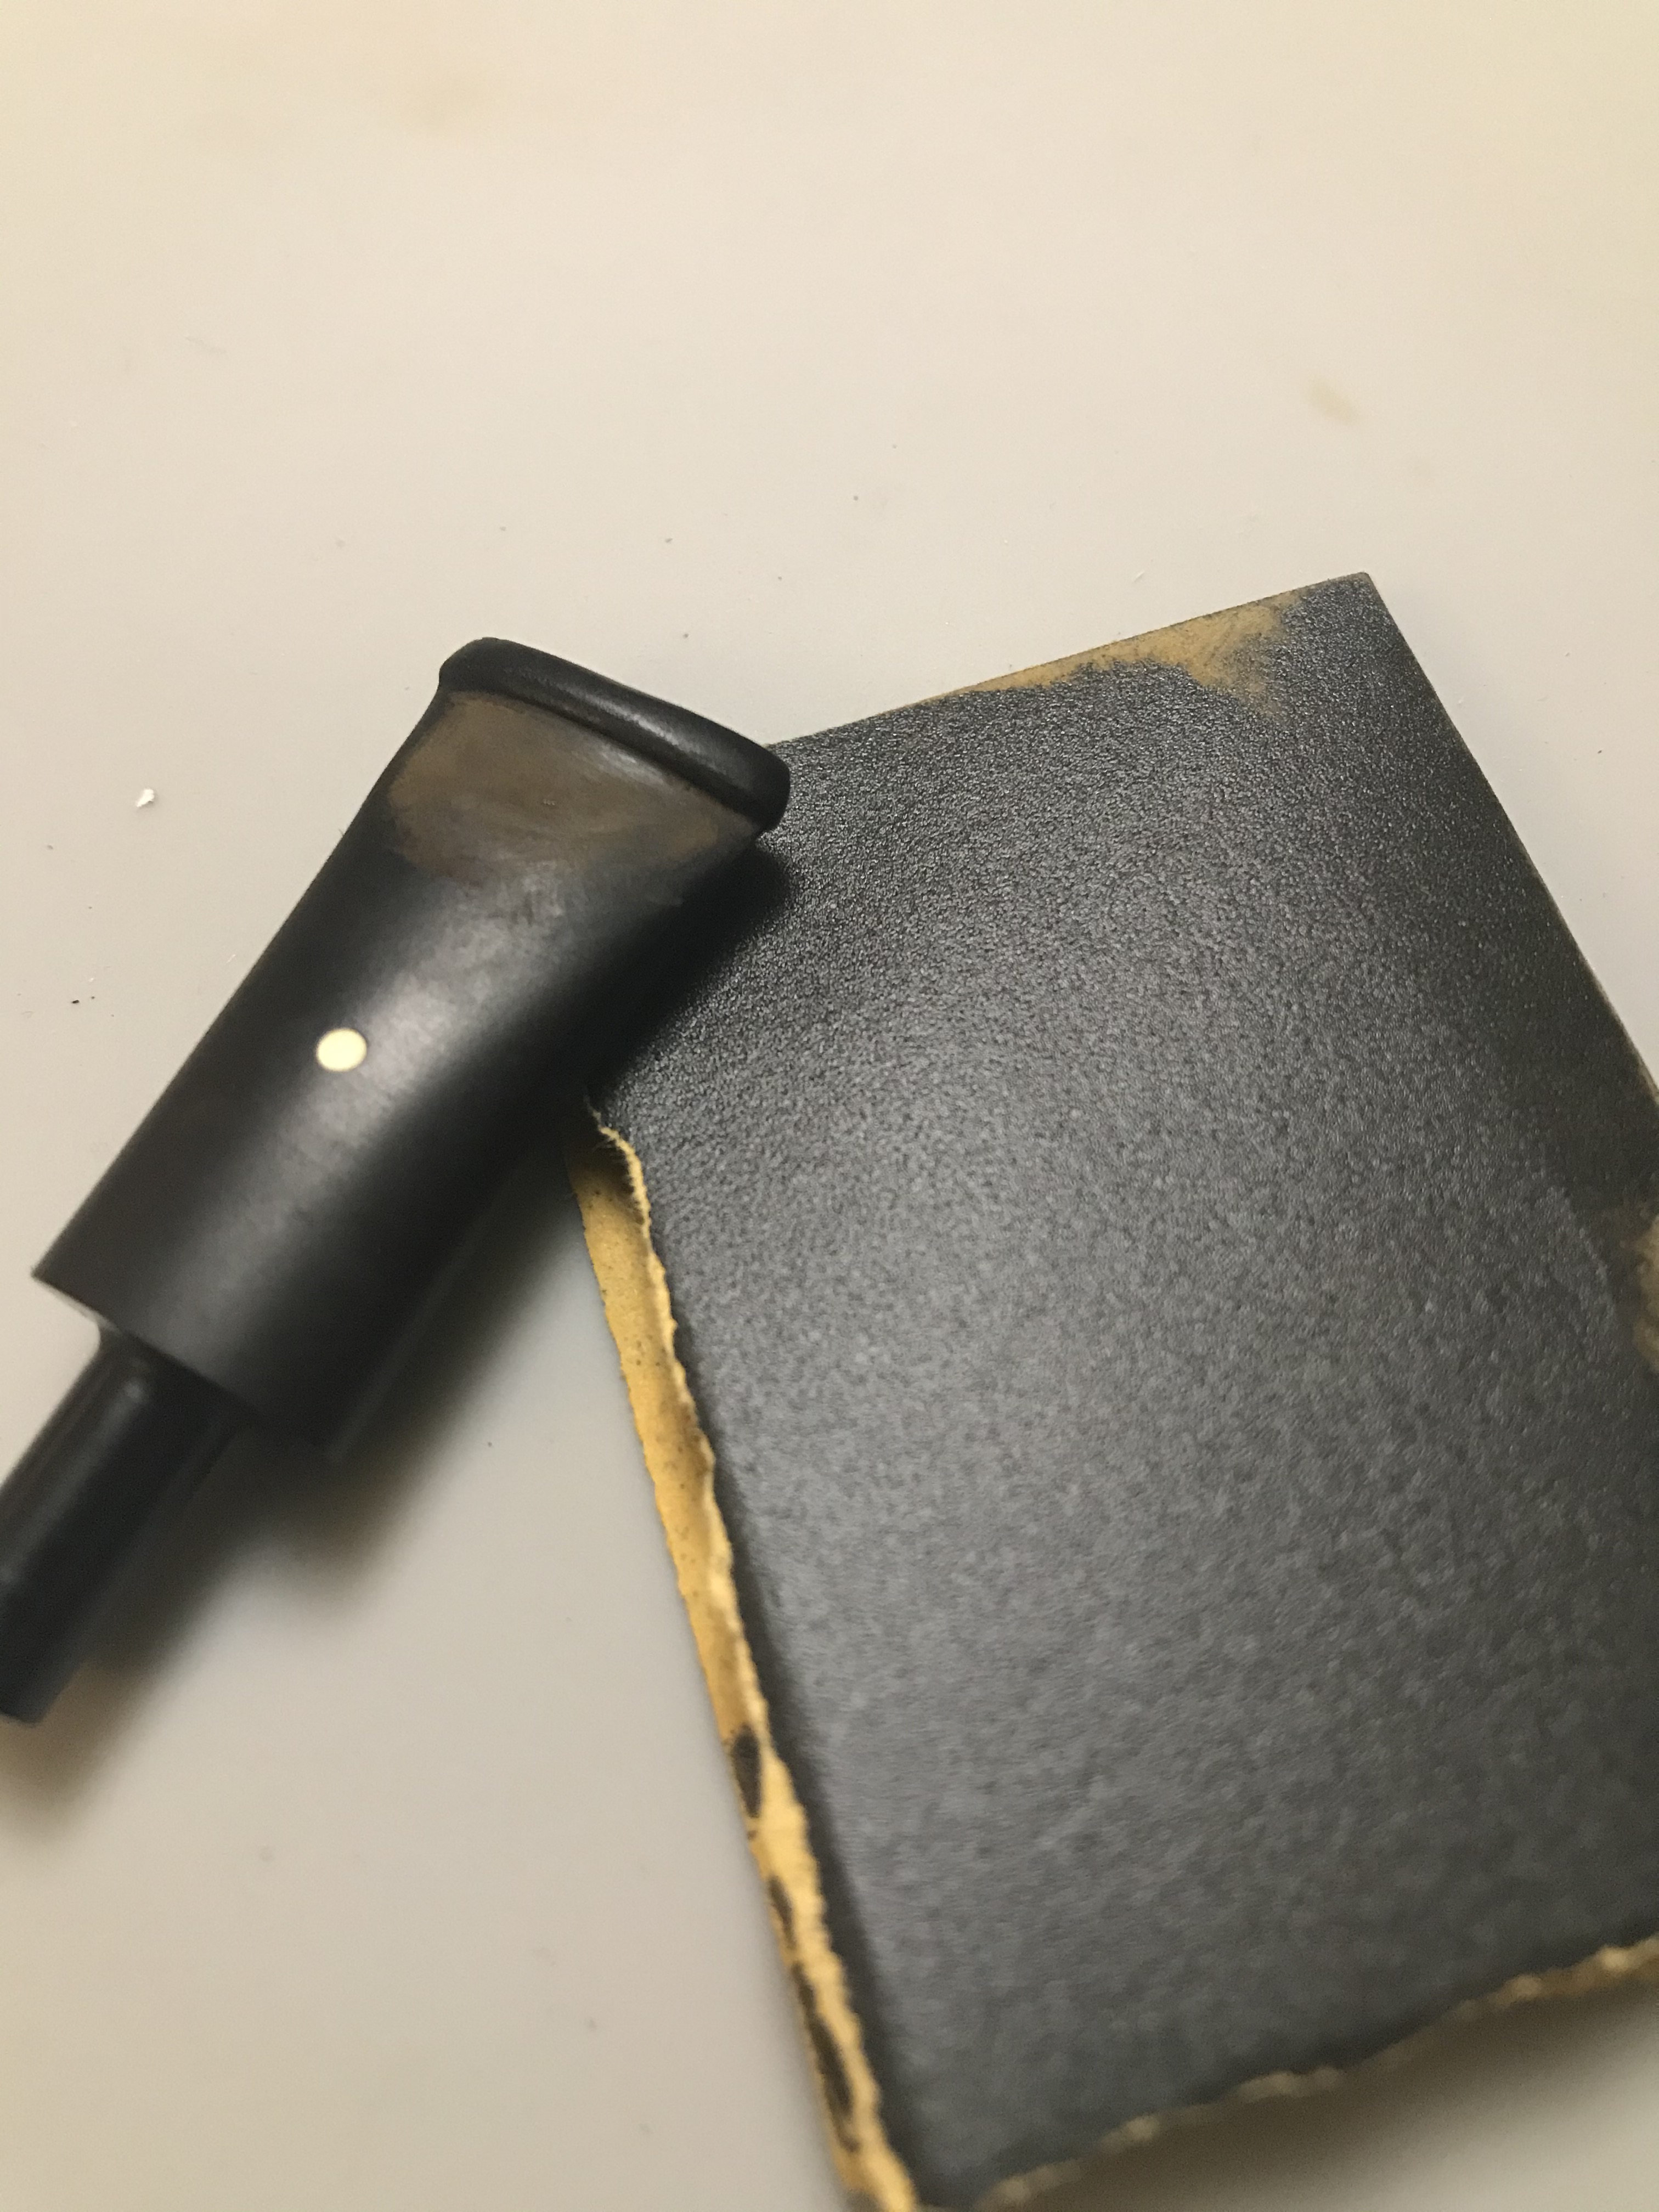
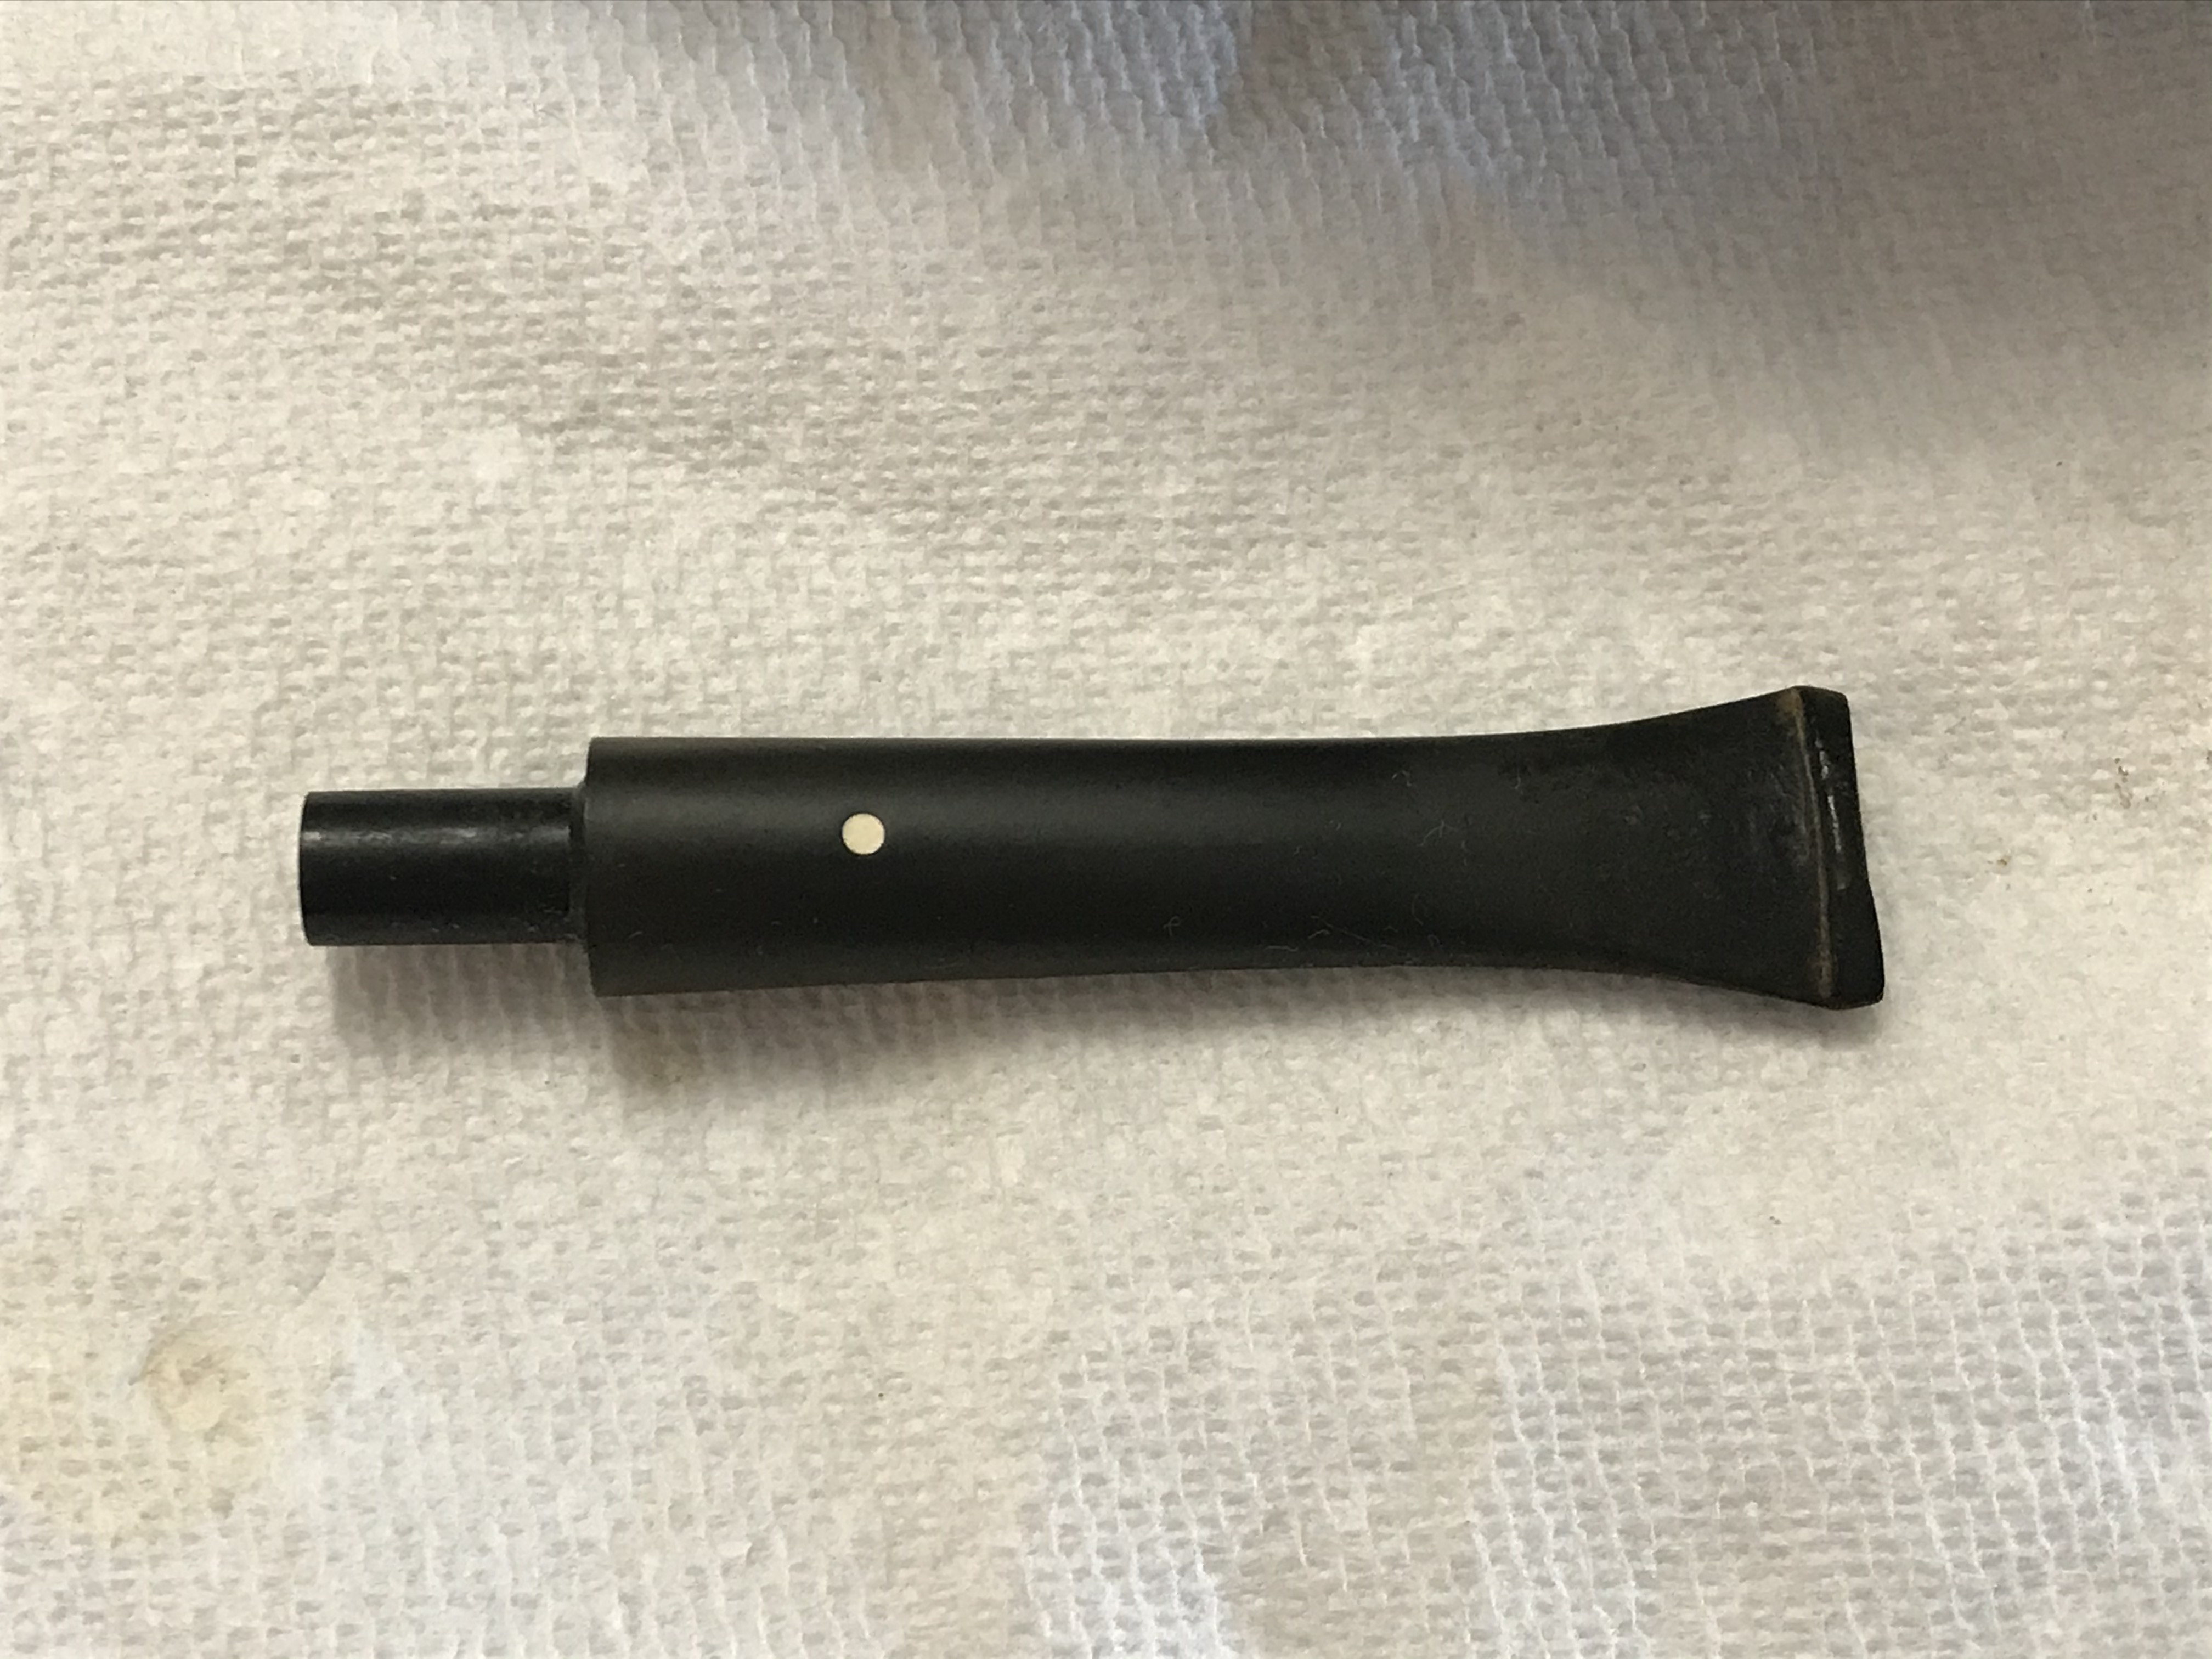
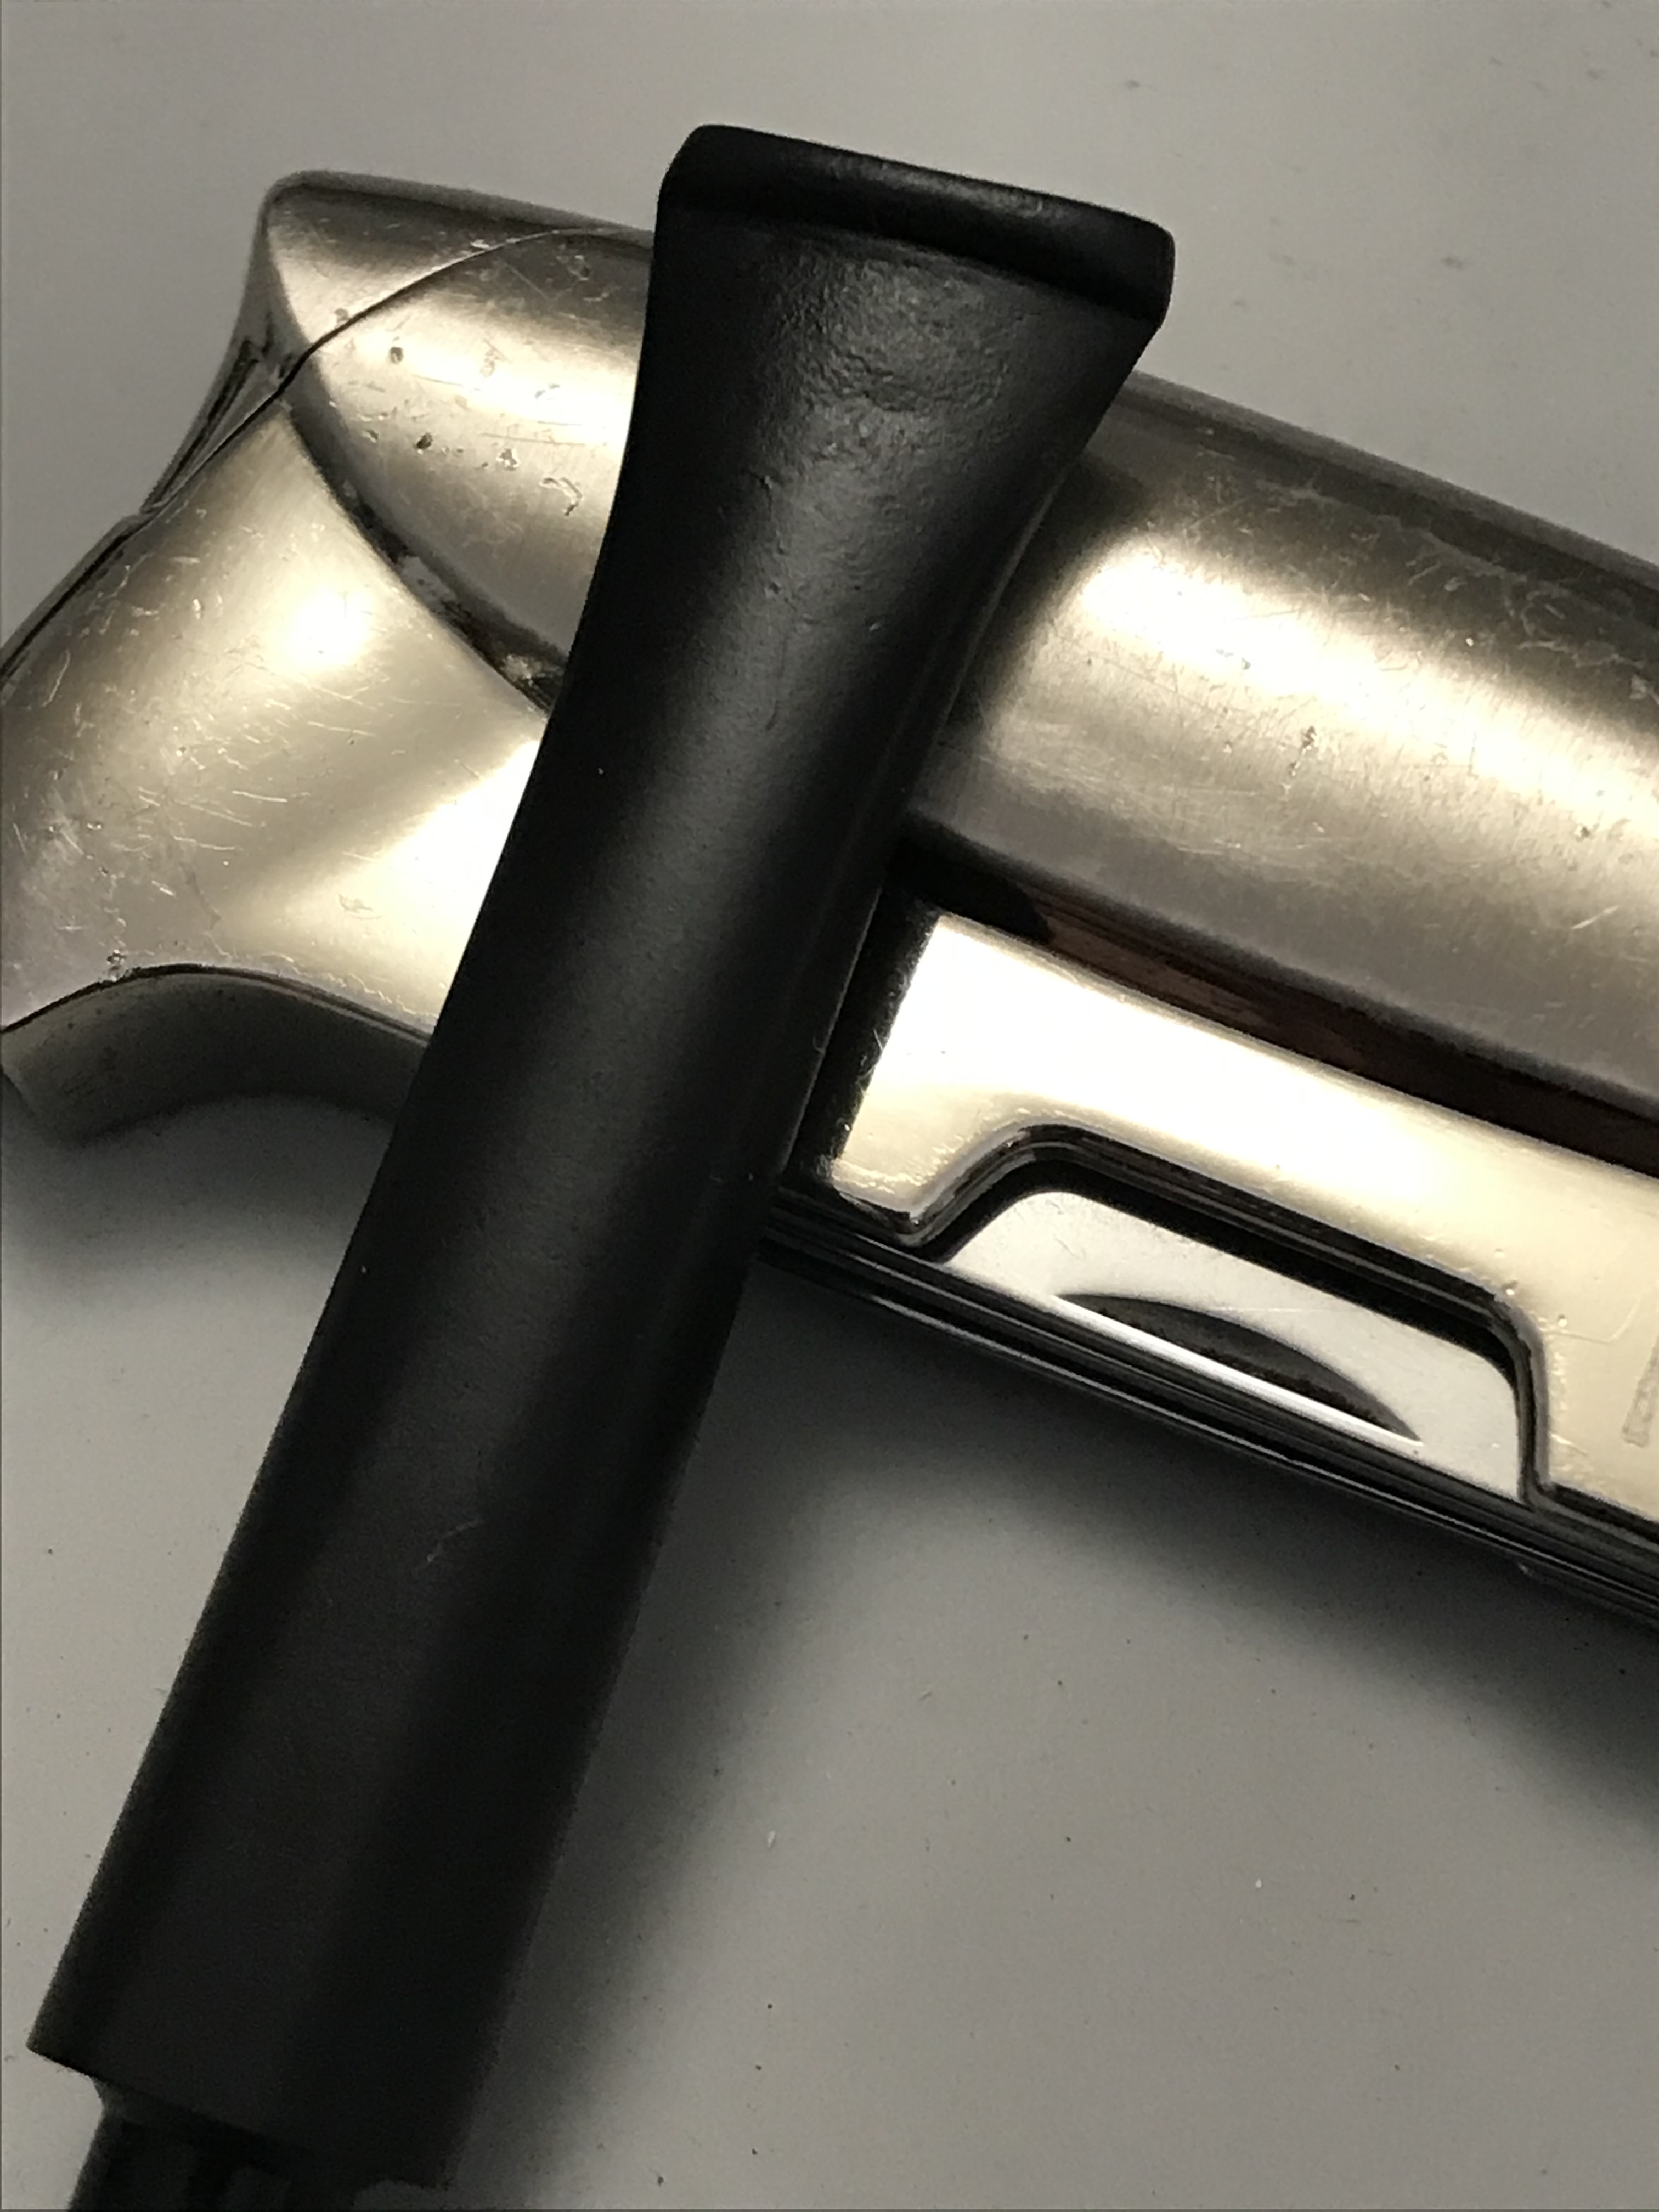
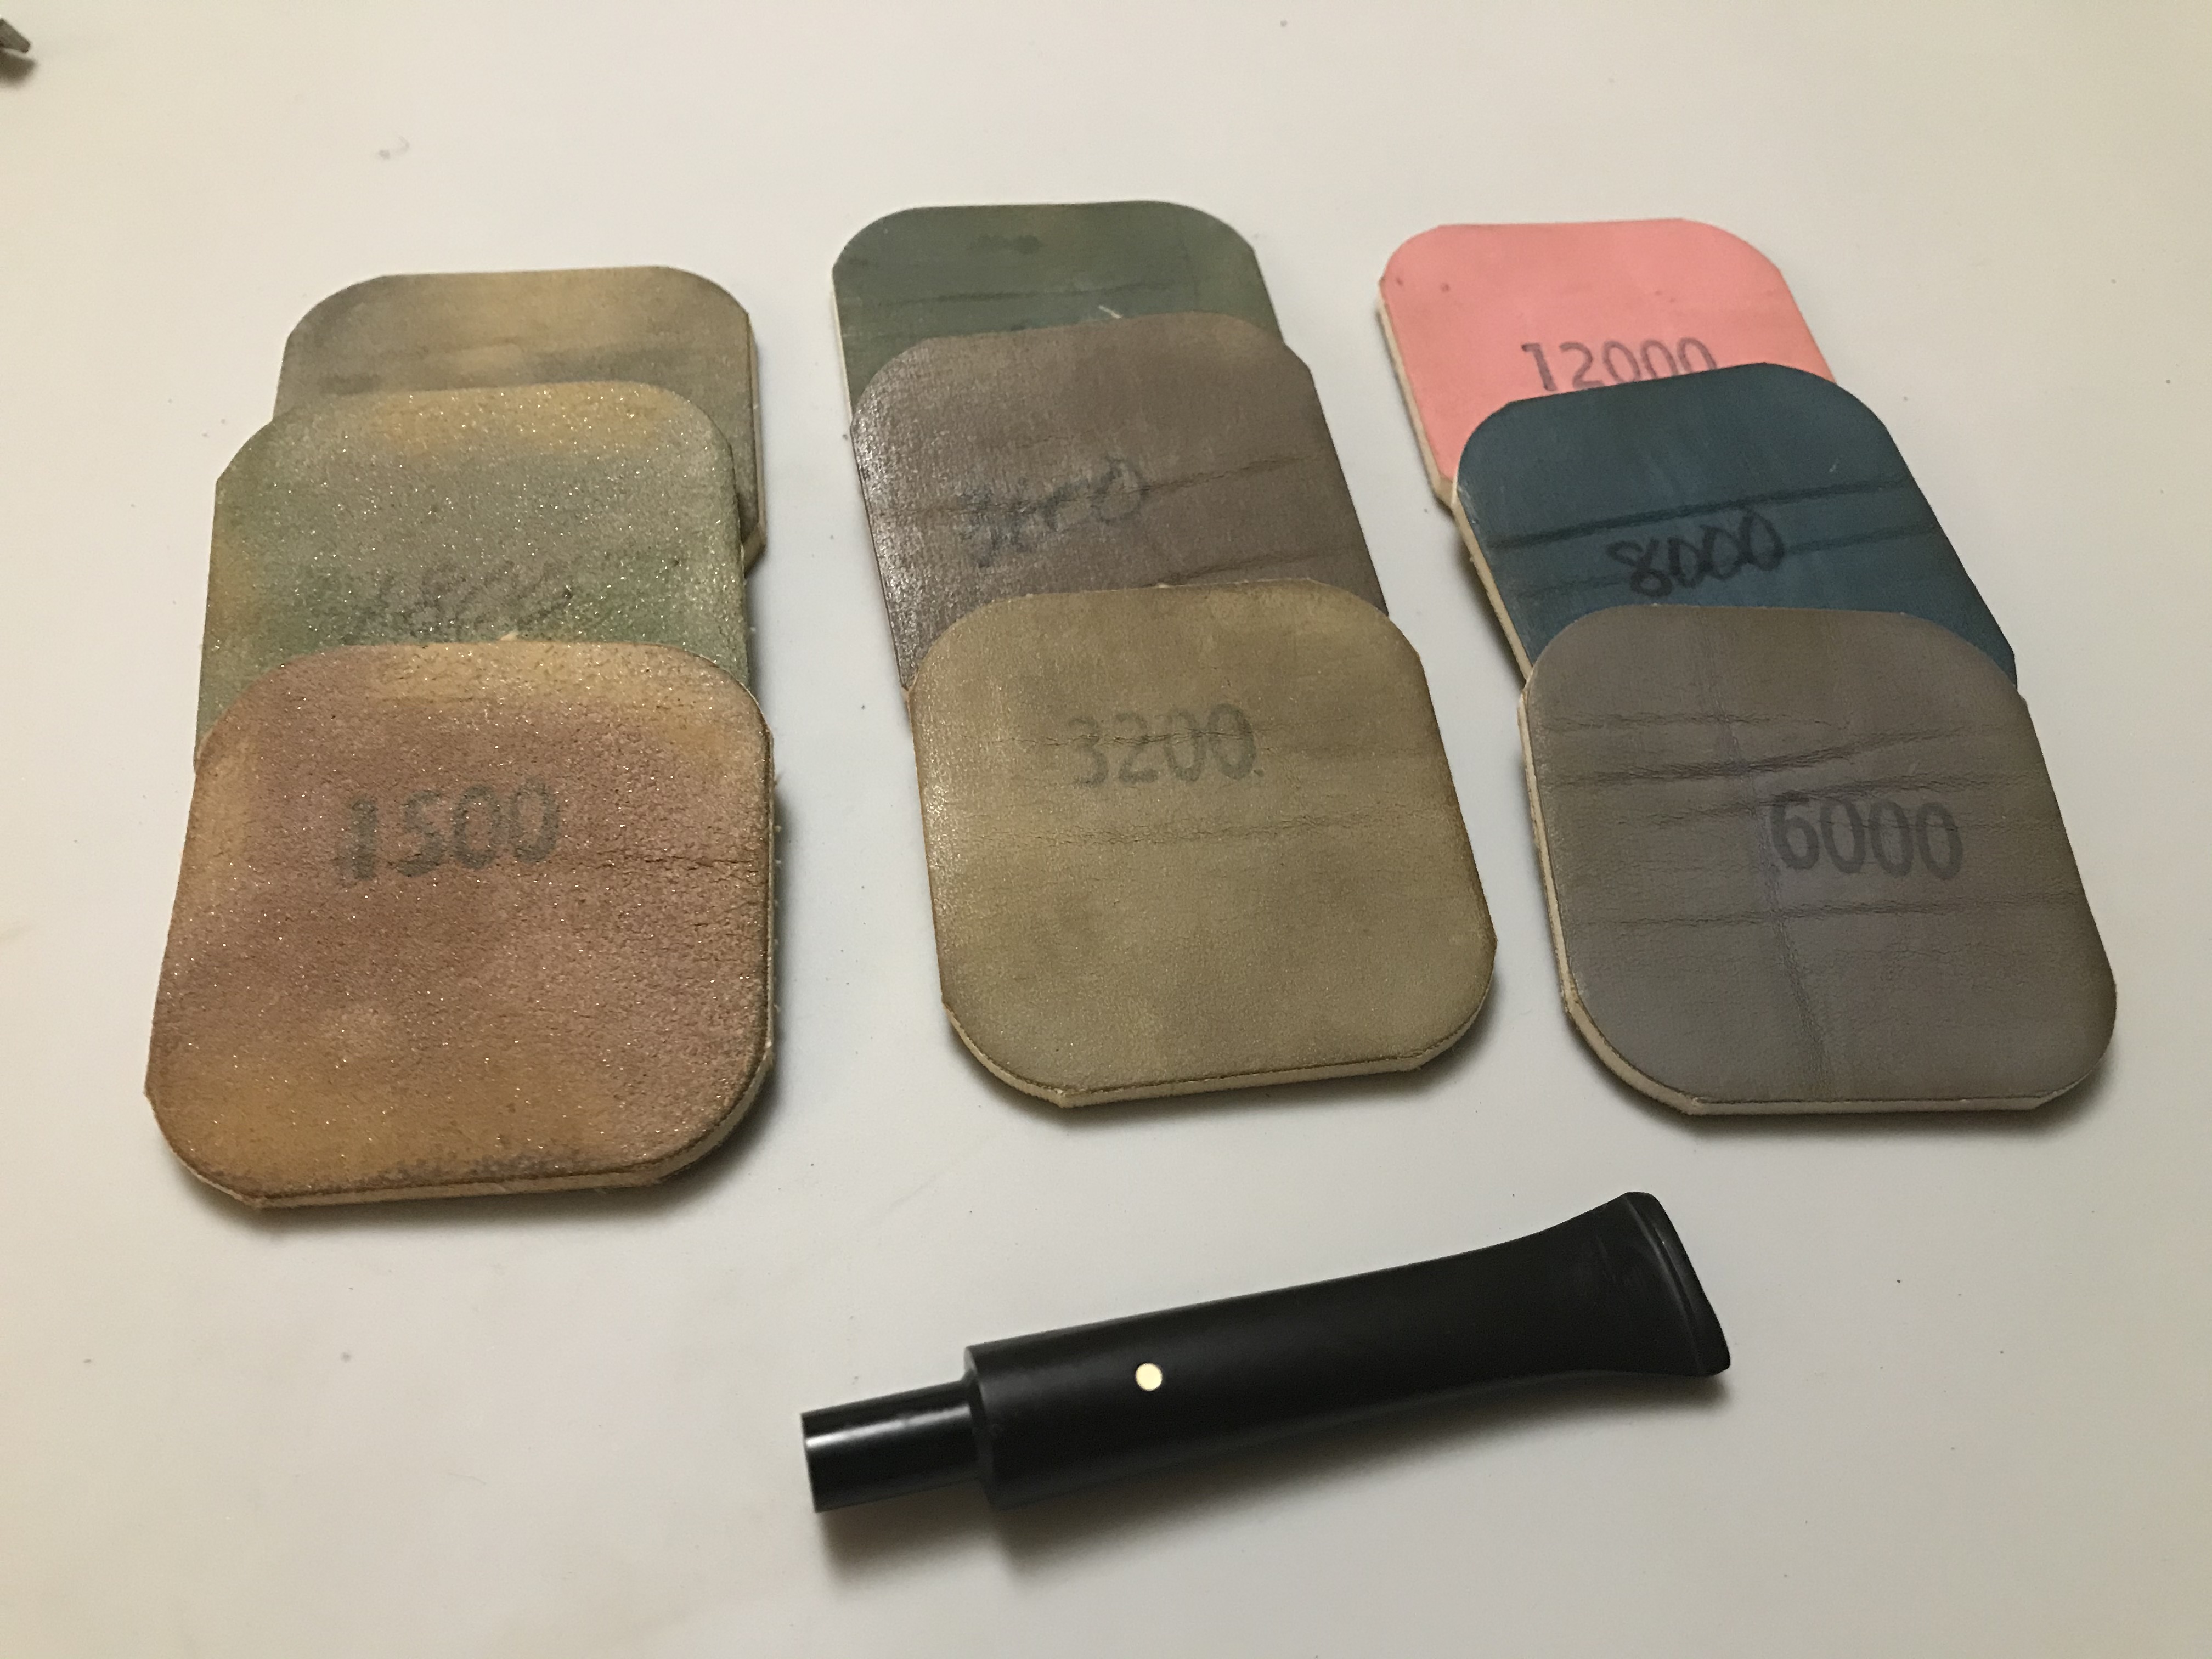
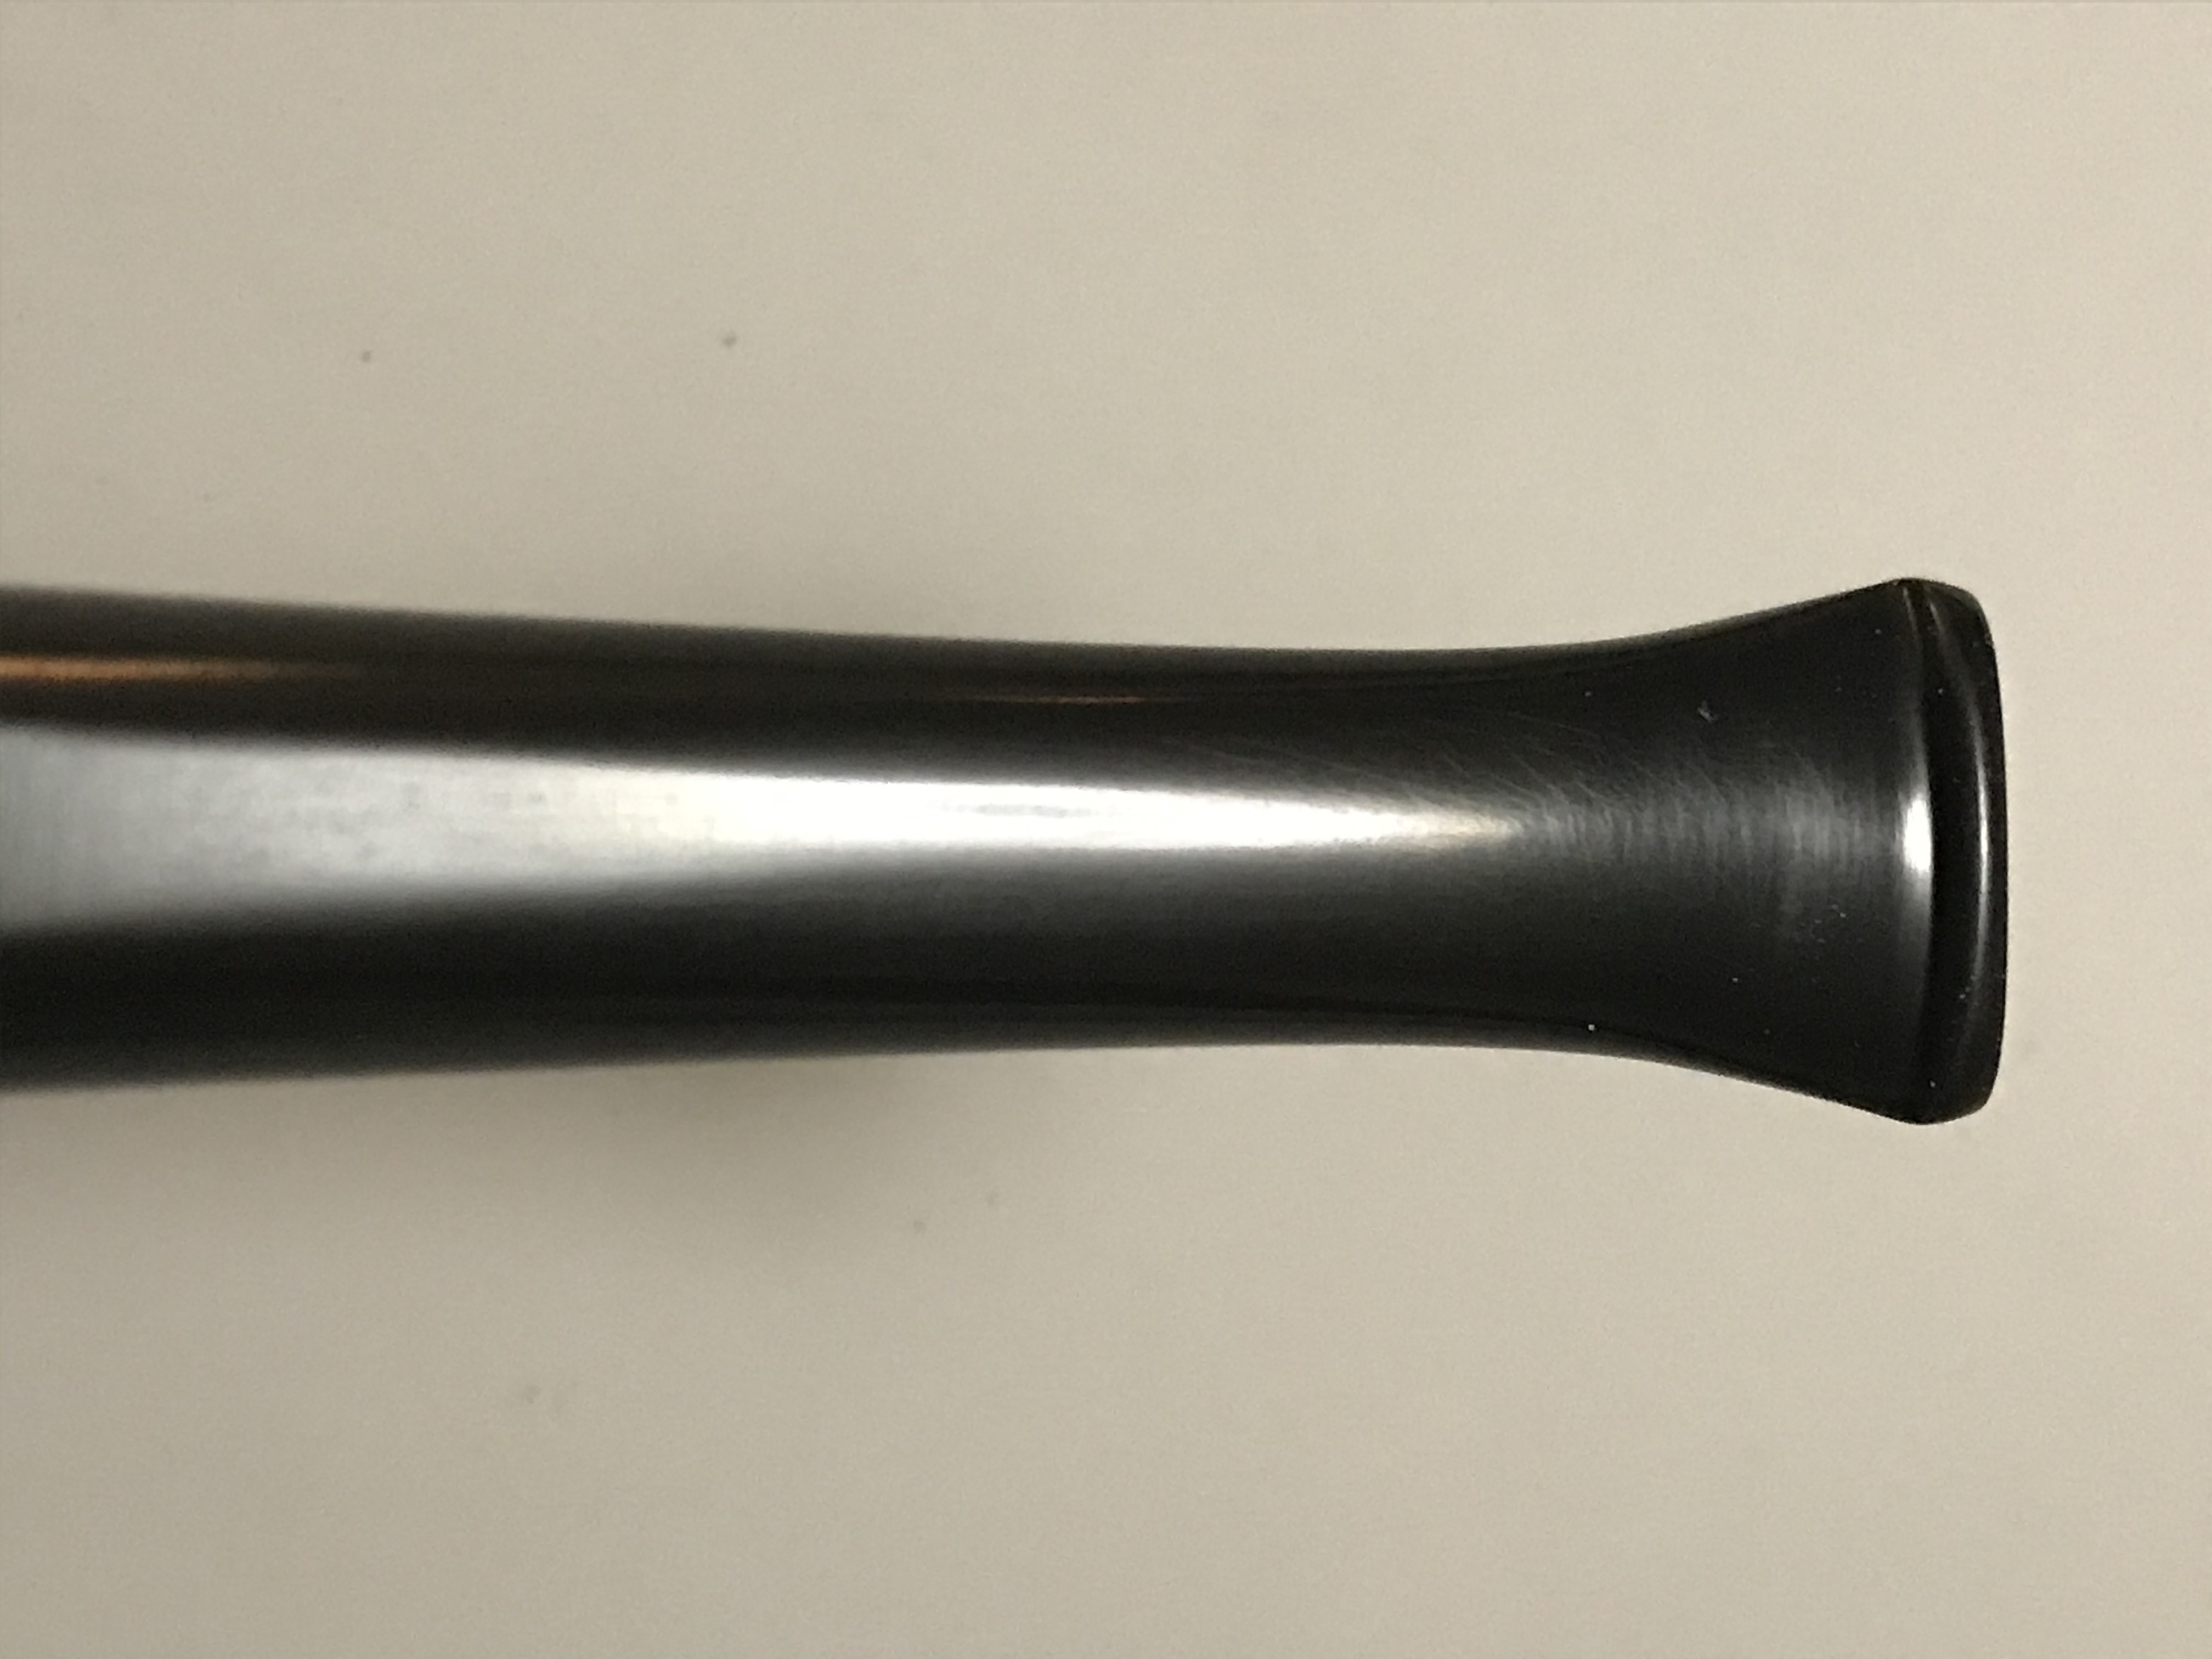
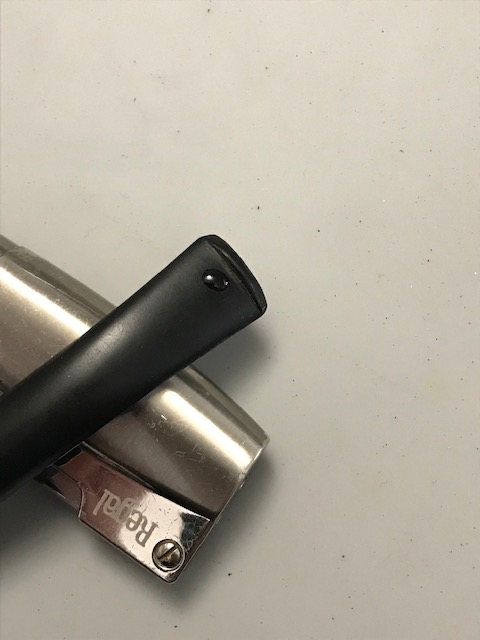
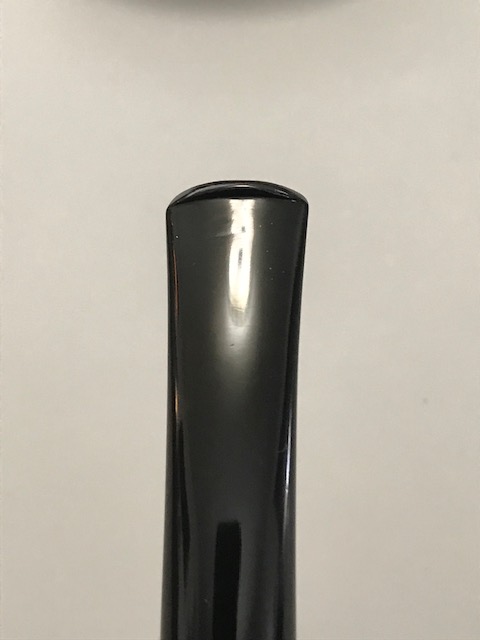
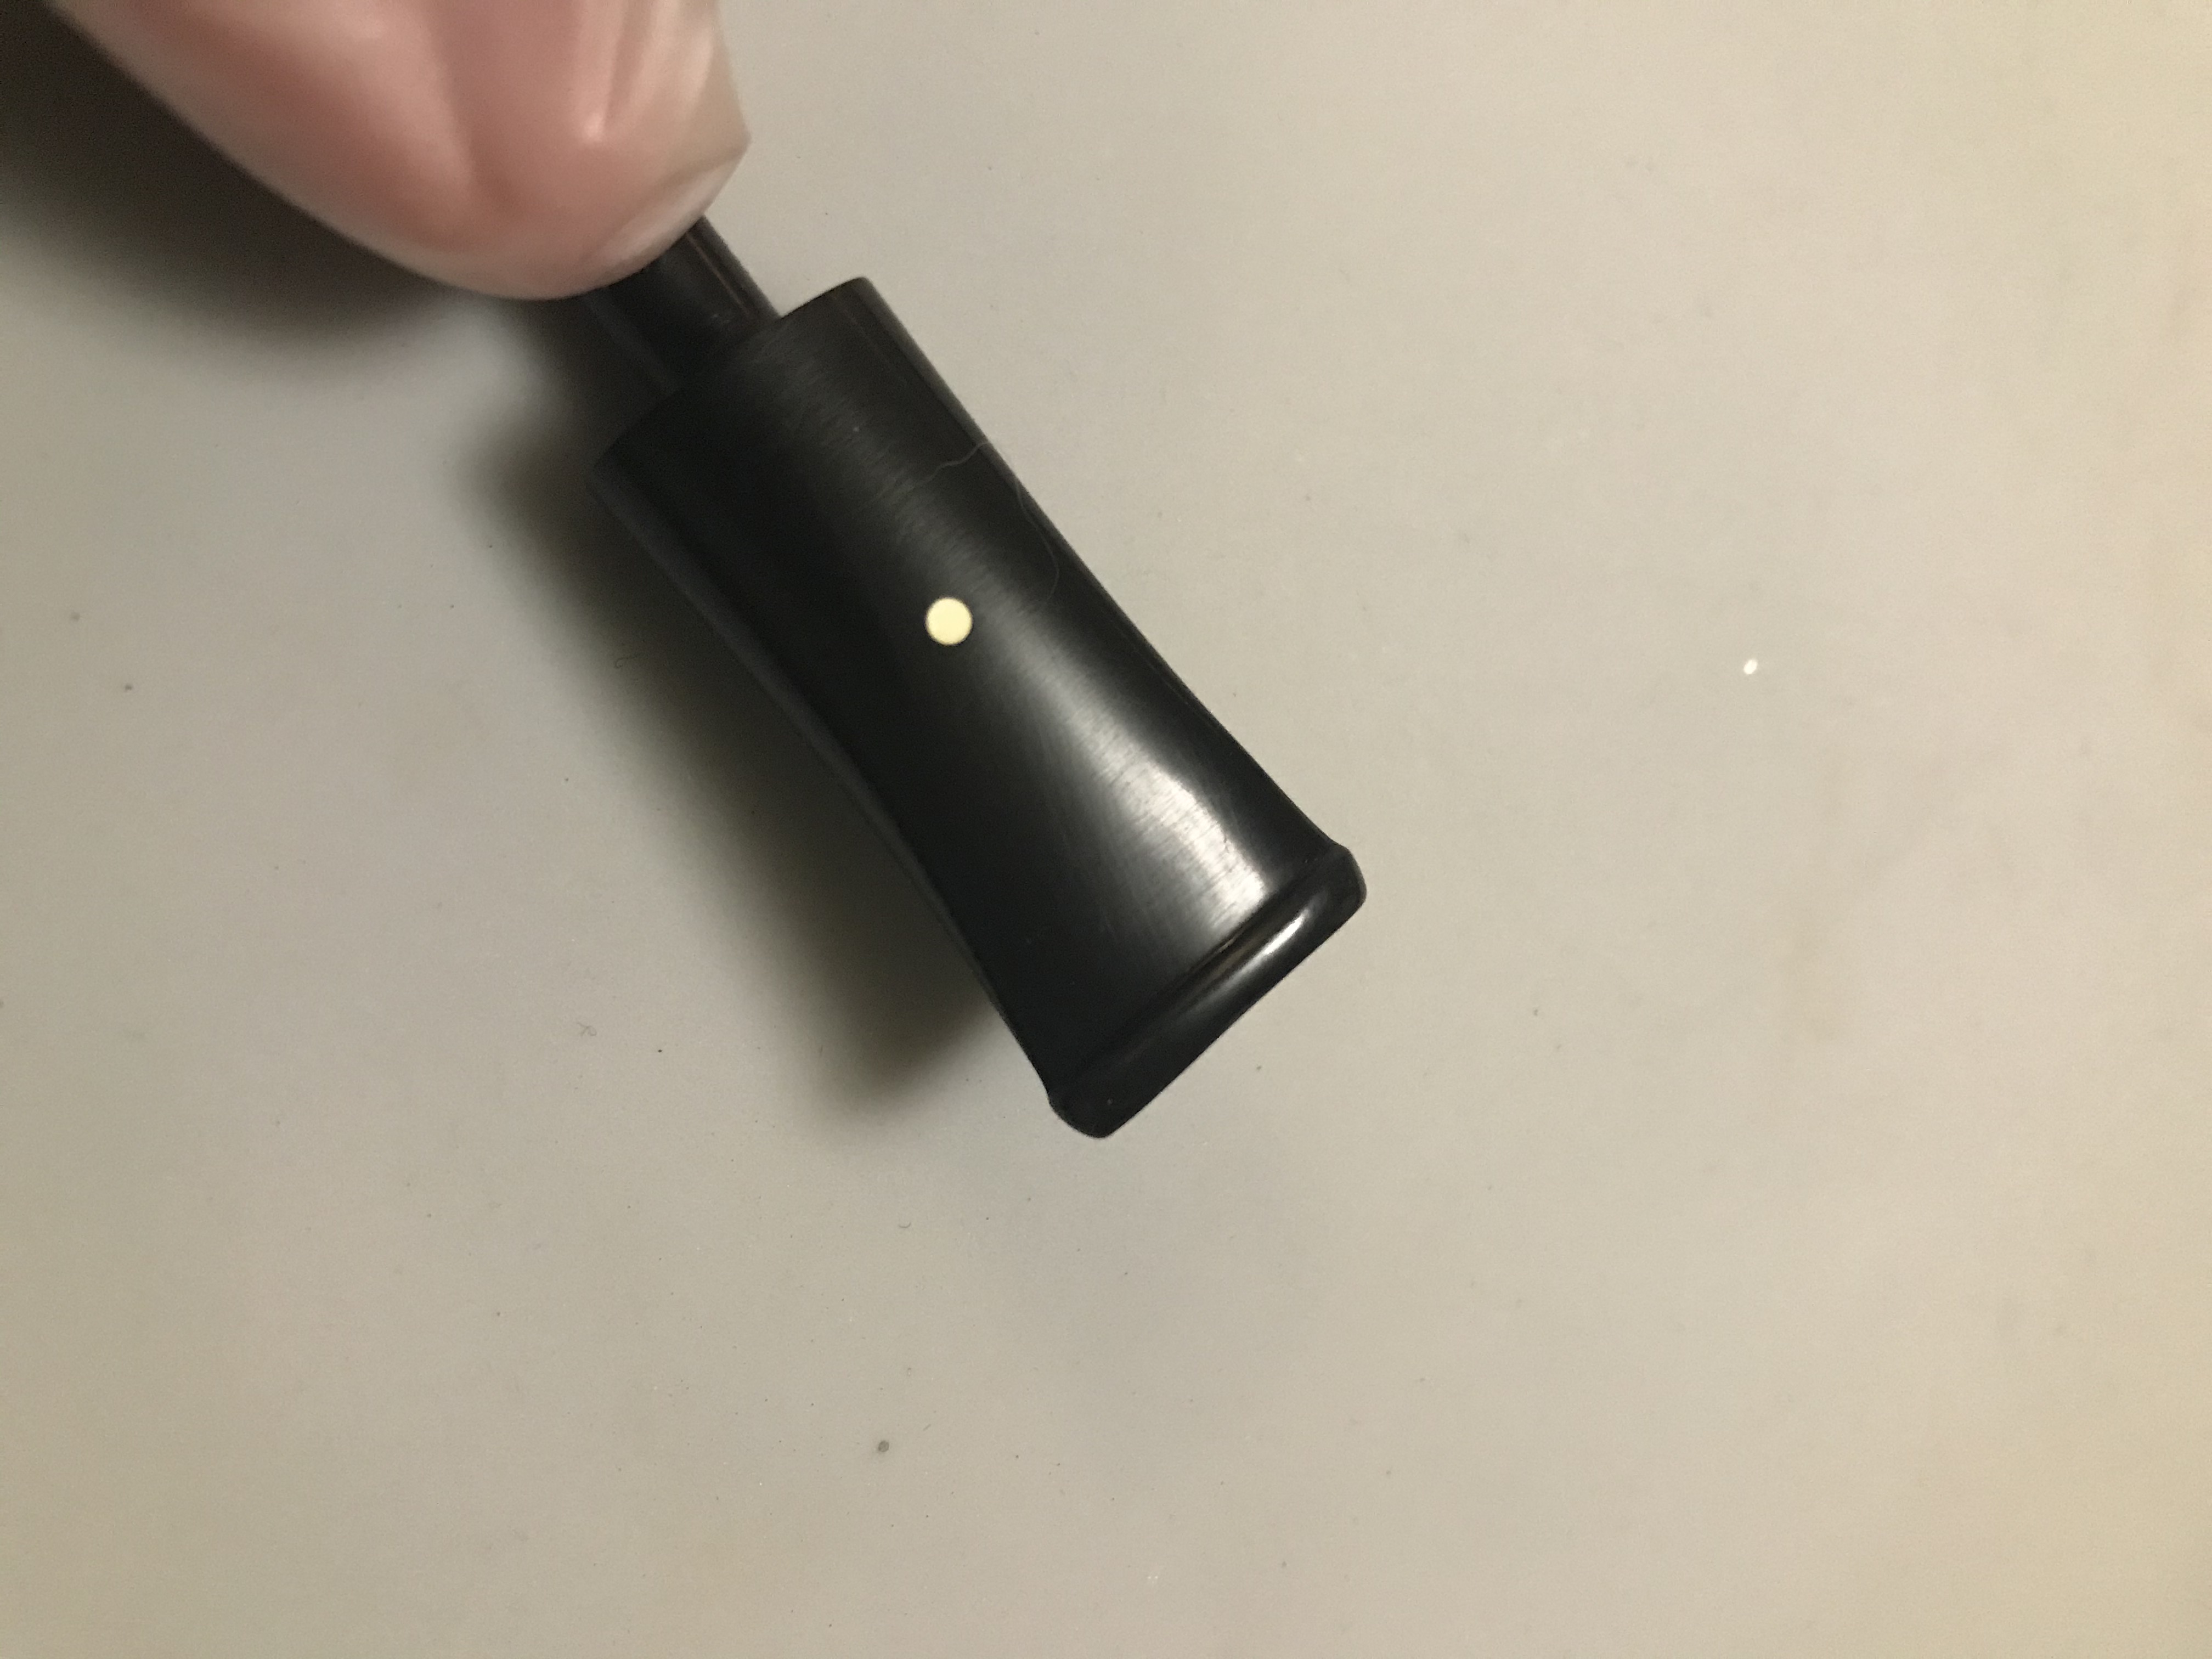
I was able to pull all the tooth chatter out of this stem using a flame. I used my butane lighter and pass the flame along the bite zone slowly, heating up the vulcanite. Vulcanite has “muscle memory” I guess you could call it, heating it swells the vulcanite back to its orginal form. In this case, sans bite marks. Sometimes the flame will dull the luster of the stems so you almost inevitably need to sand. I started with 800 Grit and work my way up to 12,000 using micro mesh pads. Below is a before and after comparison.

Move the slider back and forth to reveal the before and after

Step 3: Stummel repairs and refinishing

With the stem work complete, I moved my attention back to the stummel. By now all the alcohol in the pipe has evaporated. Passing the pipe under my nose I do not detect any evidence of ghosting whatsoever. Back to the task at hand. Working on the stummel is my favourite and most rewarding part of this hobby. Restoring the finish on a pipe is so satisfying!

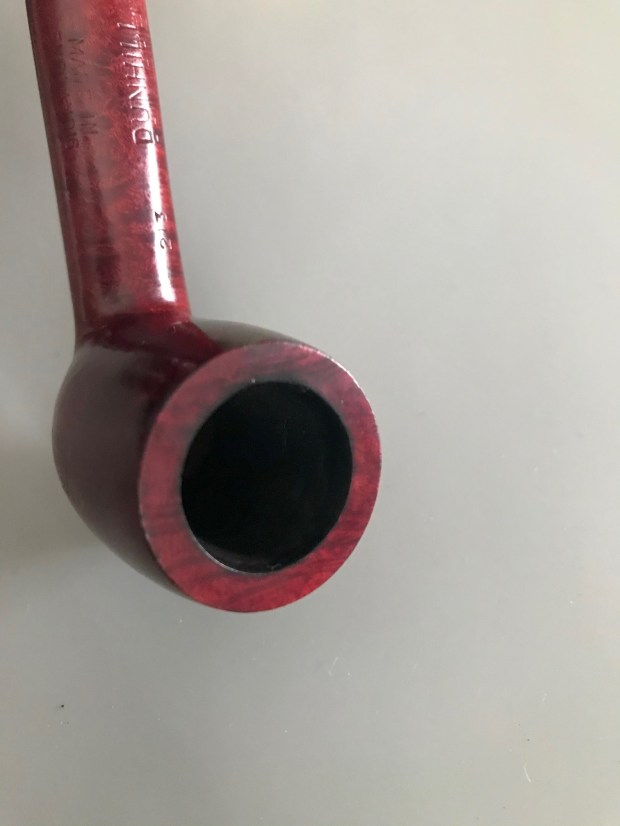
As I pointed out earlier, the rim was heavily caked in carbon buildup. Topping the bowl, I decided, was the best remedy. You don’t want to use a really low grit on this other wise you’re going to have to keep sanding to higher grits to achieve a finish grade. For this I’m just using 800 grit. Moving in circular motions, I sand the rim until remove the finish layer.

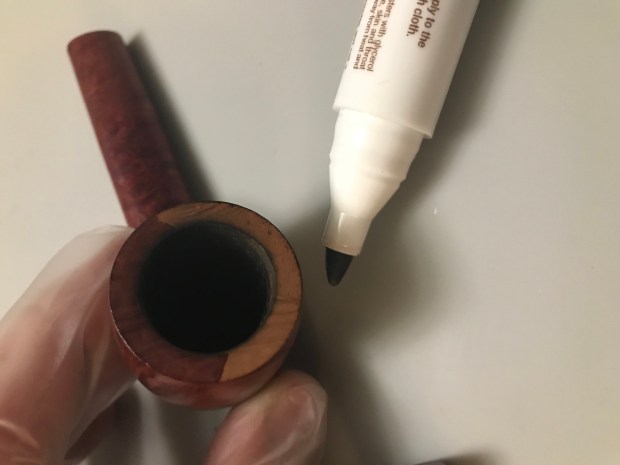
Once I’ve removed the carbon buildup and the finish layer, I continue in higher grits but only to 1000. We’re not polishing the rim we just want to prepare it receive a stain again. Next I use a stain marker to match the rim to the brown under stain. These stain markers work remarkably well and are perfect for this.

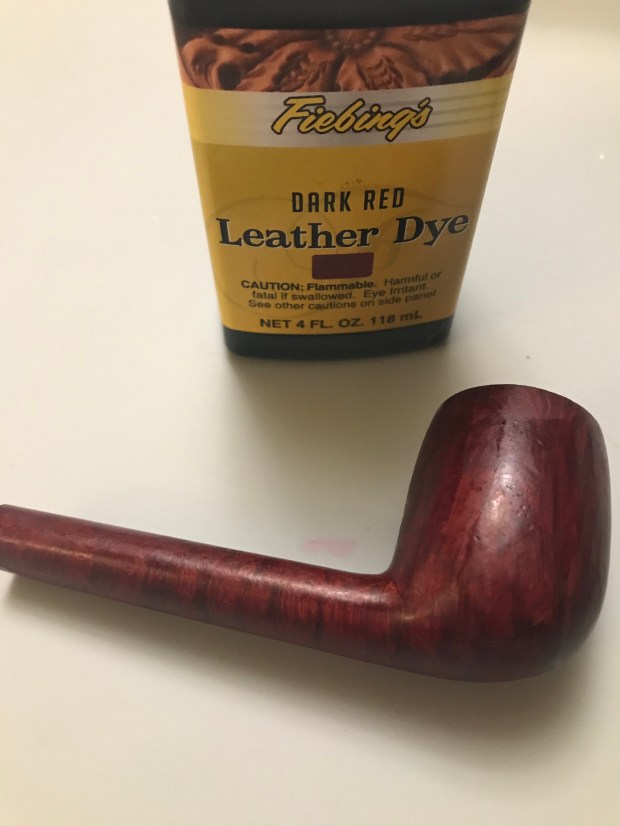
With the rim looking sharp and stained to match the brown under stain, its time to restore the red top stain that the Bruyere finish is known for. For this I turn to Fiebings Dark Red Leather Dye. I use a pipe cleaner to apply the stain to the whole stummel then let it sit for 24 hours. Yeah you can get fancy and Flambé if you like but it also works to just let it rest and absorb the pigment.

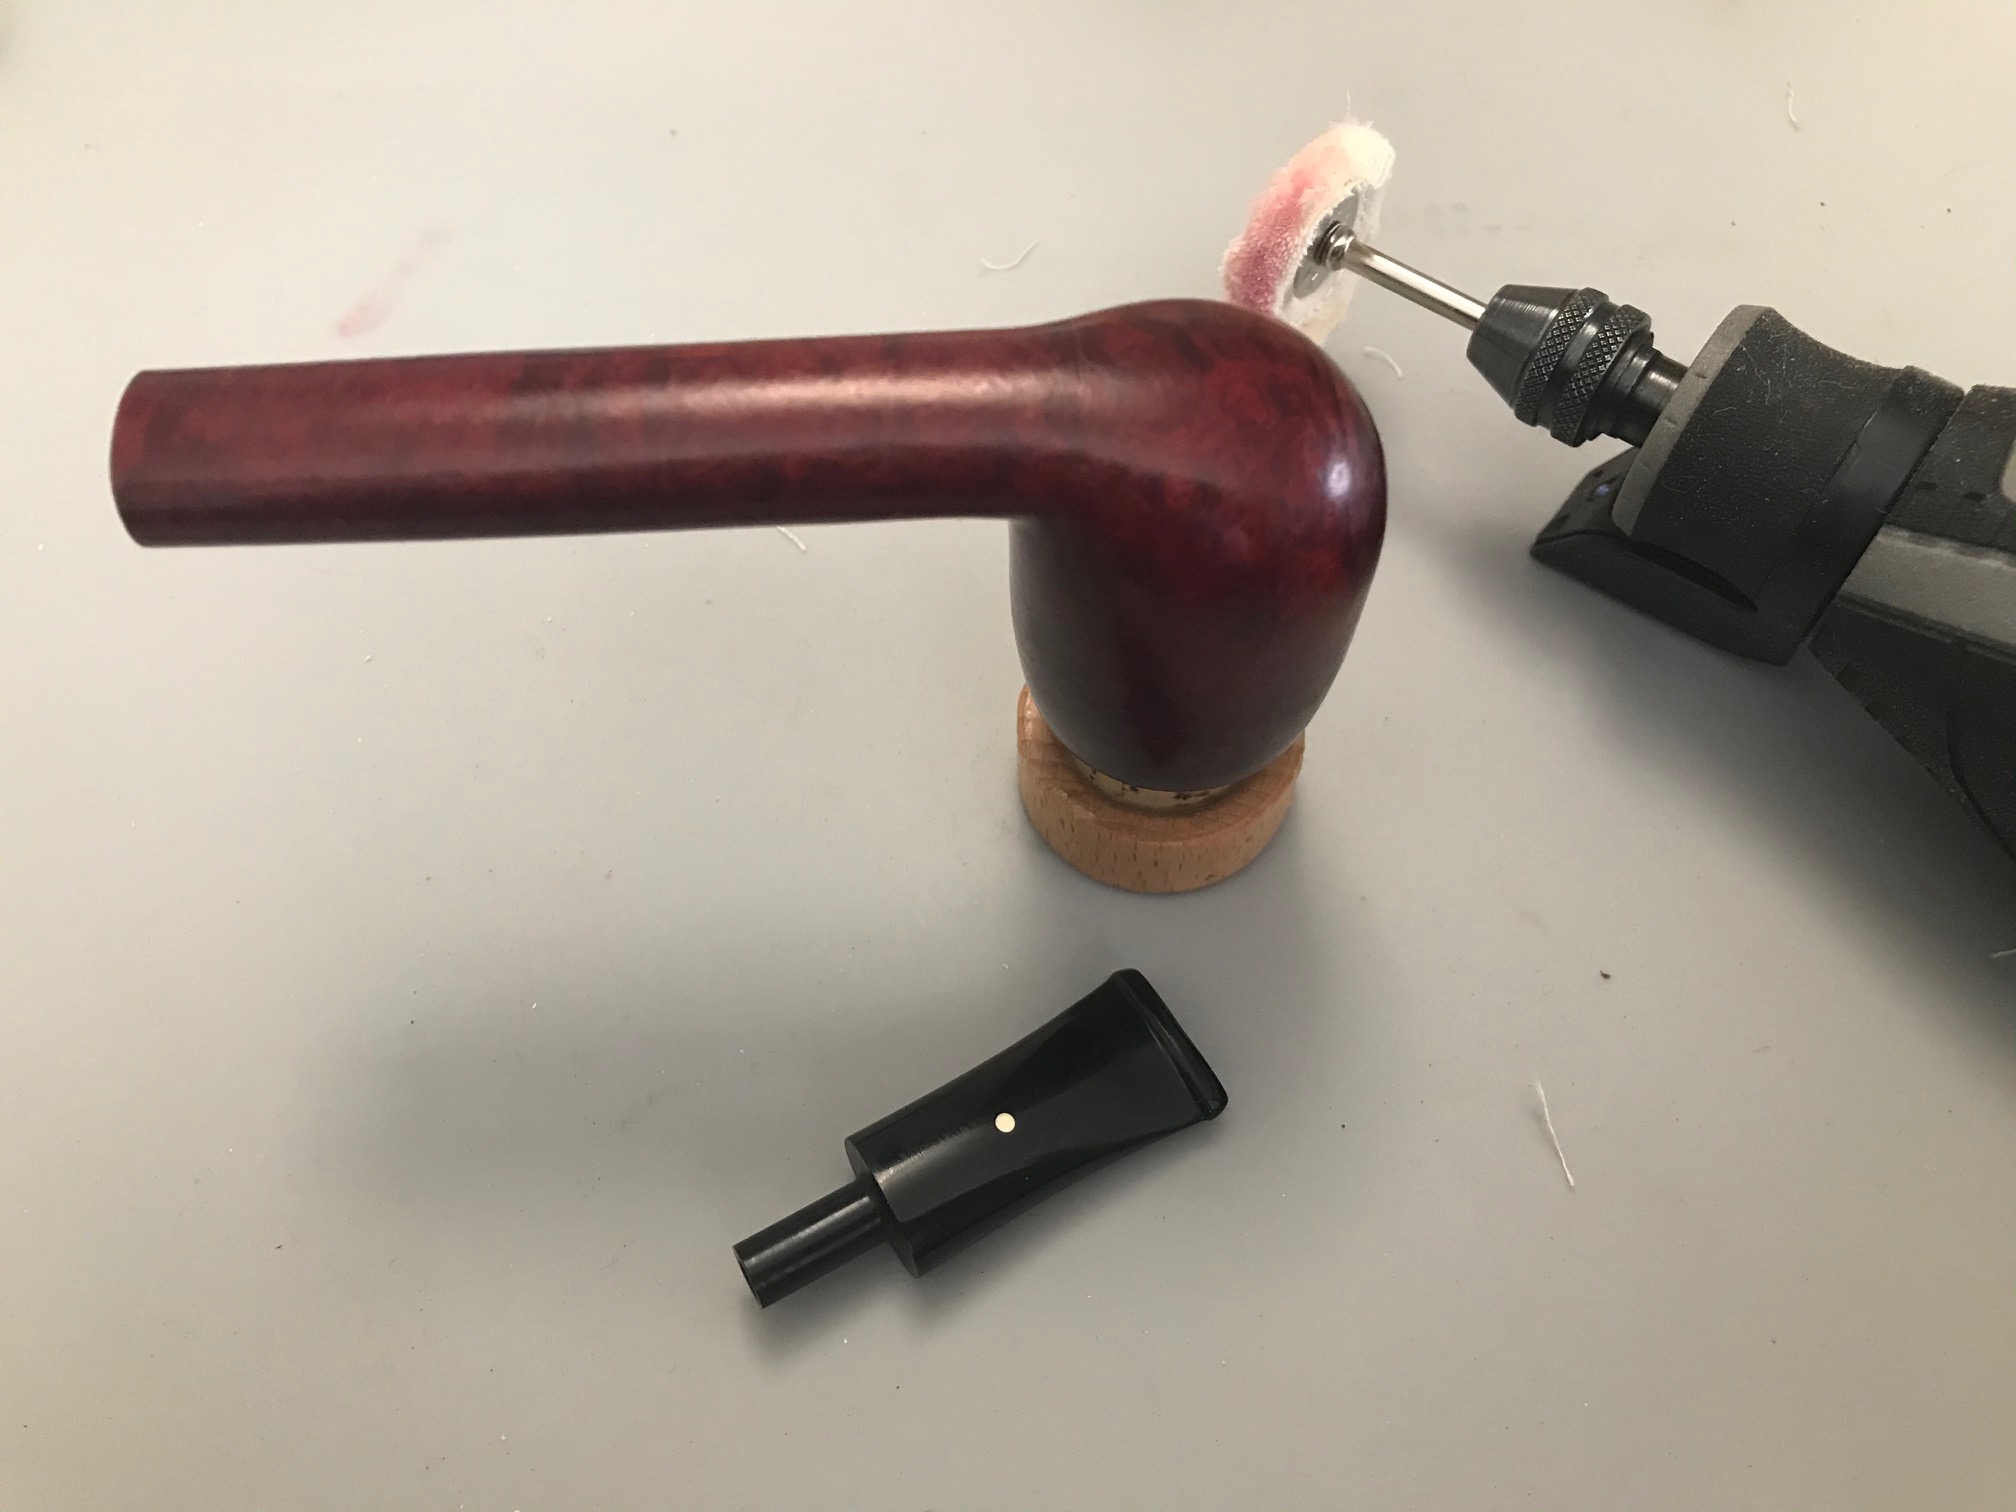
Once set, I unwrap the stain using a buffing wheel on my rotary tool and red tripoli to reveal the finished result. This process both unwraps the stain and buffs at the same time. After this I will assemble the pipe and buff both the stem and stummel together with red tripoli, then white diamond and lastly carnauba wax.

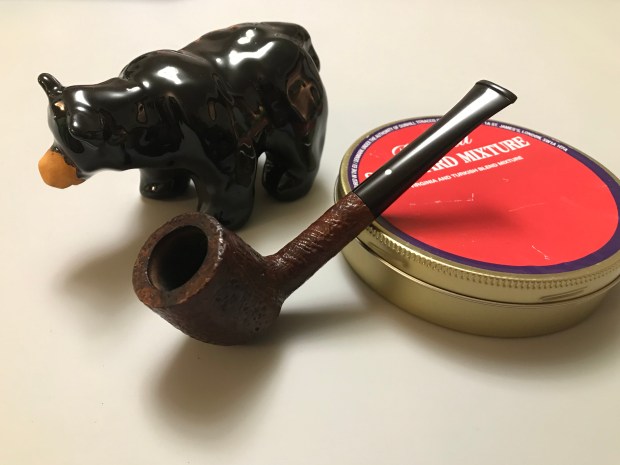
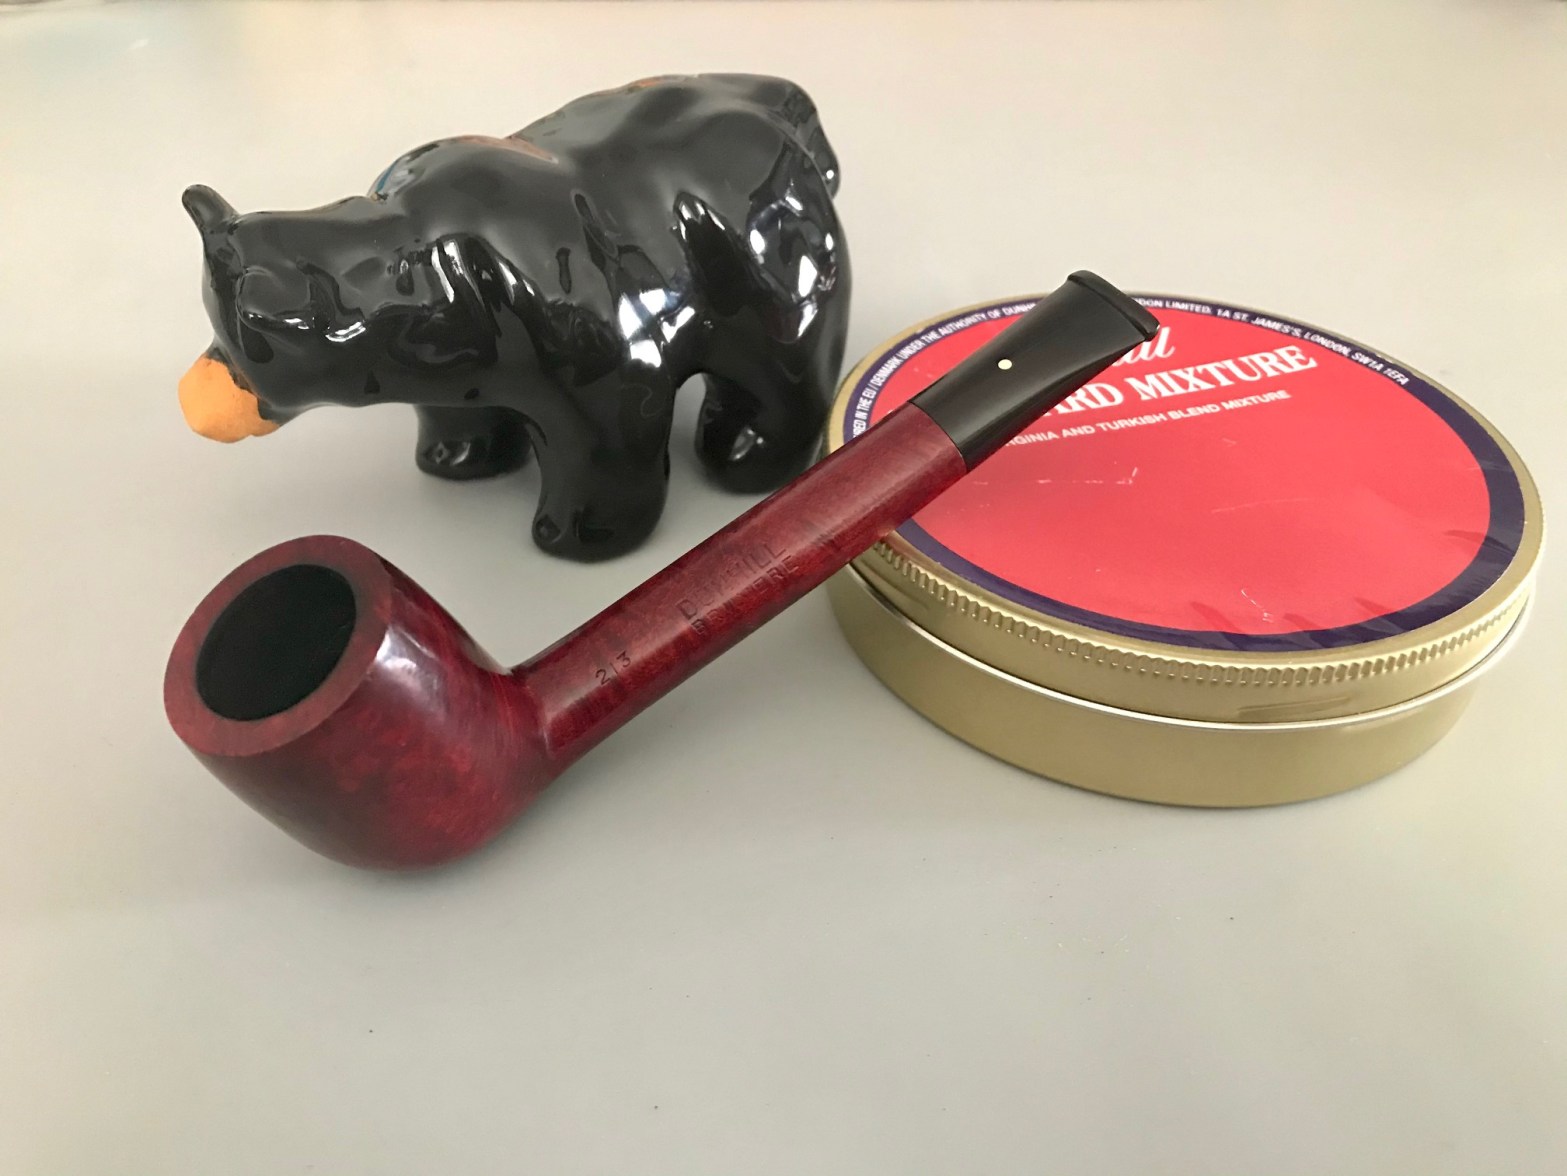
Here is the finished pipe!

Restoring the rim of a 1964 Dunhill Tanshell

In 1964 the Beatles were introduced to American and our pipe smoker was introduced to this Dunhill Tanshell billiard. For over 100 years Dunhill has developed a provenance as a world renowned pipe manufacturer, a reflection of a pipe smokers class and style. As a 3rd generation pipe smoker, I have a soft spot for the white spot, made familiar to me by my Father and Grandfather.

“Dunhill Pipes creates some of the highest quality smoking instruments and accessories in the world. They are inventive, glamorous, worldly, effortless and of ultimate quality – the definitive source of pleasure and status for people the world over.”

https://dunhillpipes.com/

For comparison, in the middle is the Group 1 Tanshell featured in this article, at the bottom is my Father’s Group 4 Shell Briar.

The Tanshell finish was introduced in 1952, this pipe is stamped DUNHILL TANSHELL (32) (FT) (1)T (EX). So what does that all mean? Sometimes trying to decipher the stamping on a pipe can be an exercise in futility but thankfully we have some great resources to turn to at the Pipedia Dunhill Dating Guide. As illustrated below, this pipe is a *inhale* Dunhill Tanshell, Shape 32 (32), with a fish tail (FT) stem, Group Size 1T(Tanshell), Made in England4 (1964) *exhale*…phew.

“EX” Stamp & Dunhill Lifetime Warranty

I could not find much about Dunhill’s old warranty policy other than anecdotal information. My Father recalled that Dunhill had a “lifetime” warranty on their pipes. If there was a flaw or an issue with the pipe, simply return it to the place of purchase and it would be replaced with a new pipe.

The “EX” stamp on the stummel above the shape number indicates that the pipe or the stem was replaced within the first year of manufacture. I’m surmising then that Dunhill would stamp the pipe after doing a stem replacement or replacing the pipe thus fulfilling and voiding the warranty.

First Impressions

This pipe was heavily smoked by its previous owner. There was a moderate amount of carbon buildup in the tobacco chamber as well as the rim of the pipe. The carbon buildup had obscured the blast finish on the rim. One can also assume that he was a clencher as there was a lot of tooth chatter on both sides of the stem in the bite area as well as indentations from his teeth.

Step 1: Ream and Clean

I reamed the tobacco chamber and did a cursory clean of the draught hole. Initially it didn’t seem that bad. I used Kosher salt and 94% Alcool alcohol to recondition the tobacco chamber and draw as much matter out of the briar as possible. There was no ghosting present in the pipe prior to the treatment. After a day I returned to see the salt had done its job, however some of the matter leached up the cotton swab and around the shrink wrap I used to plug the mortise with. This pipe needed a thorough cleaning!

Unfortunately I cannot take pictures and do an alcohol retort at the same time, so you’ll have to use your imagination. I can tell you though, on the first pass with the retort, the fluid return almost black. I repeated the process two or three times then scrubbed the internals with bristled pipe cleaners until the draught hole had reached a standard I was satisfied with.

I scrubbed the stummel with undiluted Murphy’s Oil Soap and set it aside while I worked on the stem.

Step 2: Stem Cleaning & Deoxidation

I used Mark Hoover’s Before & After Hard Rubber Deoxidizer for this pipe. You can find all of marks products ====>HERE. I must say it works really well. I have noticed that it works better on what I would categorize as high quality vulcanite vs. what could be a lower grade vulcanite we sometimes see on old estate pipes. The oxidation was virtually gone after an overnight soak.

To remove the product and oxidation from the stem I used a cotton swab to wipe it off into the container, then scrub the stem vigorously with a paper towel. Once it starts getting tacky, I switch to a cotton paid and continue to scrub away the product with mineral oil.

After removing all the product from the exterior and interior of the stem I rubbed it down with Mineral Oil as well as passing a pipe cleaner through the interior of the stem with oil as well. In my experience, the oil dramatically reduces the possibility of the stem oxidizing again.

Step 3: Stem restoration

I used a butane flame on the bite zone to heat the stem. Vulcanite, when heated, will sometimes return to shape. I do this to reduce the need fill the tooth marks with CA Glue. Once I was satisfied with tooth chatter removal, I switched to sanding starting with 320 Grit and progressing up to 1000grit.

After reaching 1000grit I switch to Micro Mesh sanding pads and polished the stem from 1,500 – 12,000.

Step 4: Restoring the Rim

With the stem work complete I turned my attention back the stummel and the rustication on the rim. Although I used minor abrasive methods to remove the carbon buildup on the rim, the detail was too far gone, it was almost smooth. The rim also had evidence of rim charring on the one side. I thought it best to sand the rim, just enough to remove any staining and revealing the charred area. I didn’t need to sand it back to smooth as I fully intend to replicate the blast on the rim manually.

I grabbed a scrap piece of briar to try some different methods to replicate the blast finish. Using my rotary tool and a carving bit, I walked the bit along the rim of the pipe and just let the bit bounce off the surface. This created the craggly part of the finish. I blended that in with a wire wheel on my rotary tool. The results turned out great.

Lastly I used a stain marker to match the rim to the tanshell stain. It is quite impressive how well the stain markers are able to match the original finish. I have Fiebings Leather Dye in my arsenal, but for small repairs such as this, they are ideal. I recommend picking up a decent set from your local hardware store or retailer.

I gave the inner tube a good clean and scrubbed it with some 0000 Steel wool, then reassembled the pipe and polished it with Red Tripoli, White Diamond and then Carnauba Wax. Here’s the finished pipe!

Reconditioning a 1978 Brigham 129 (1 Dot)

This pipe came to me from a pipe lot acquired in Toronto. I was able to piece together who I think the smoker was based on the items within the lot. From what I could determine he used to be a Doctor, there were other items with the lot that pointed to physician. He was definitely a former cigarette smoker because there were old Cigarettes in the lot. This chap enjoyed cigarettes, pipes and cigars from what I can surmise. Unfortunately, the pipes in the lot were in a state of neglect when I acquired them. There seemed to be a lot of pipe smokers who just filled their pipe, smoked it, let it rest then repeated the same process over and over until they needed a new pipe. But if it wasn’t for their lack of pipe care regimen, I wouldn’t have this wonderful hobby!

The pipe is a 1978 Brigham, shape 129 (1 Dot). You can find additional information about Brigham —>Here. Overall first assessment revealed there wasn’t any significant issues with the pipe, it just needed a good cleaning and a little stem work.

Step1: Ream & Clean the Stummel

This pipe had a pretty modest amount of cake buildup and I was able to ream the bowl back to briar pretty quickly. Next I used a salt and alcohol treatment to recondition the tobacco chamber.

I use a combination of methods when I clean a pipe. I ream the pipe of old cake, and sand the tobacco chamber to further remove any carbon buildup. I will then use an alcohol soak in either kosher salt or a cotton ball which appears to draw out unwanted matter such as tars or nicotine. Next, to get the stummel really clean, I will use an alcohol retort. Lastly, pipe cleaners, pipe cleaners, and more pipe cleaners. I will scrub the draught hole and mortise until the pipe cleaners are free of heavy tar and carbon. A slight tint to the pipe cleaner passing through is acceptable.

Step 2: Deoxidize & Clean the Stem.

There are a variety of ways to remove the oxidation on a stem, whichever method you choose to use, sweat equity will be a key ingredient in removing the oxidation. But there are products to make it easier. One such product is Mark Hoover’s Deoxidizer for hard rubber, you can purchase Mark’s product at La Belle Epoque Vintage & Modern Fountain Pens. Once I familiarized myself with how it worked, it was quite helpful. In this restoration I used Mark’s product. I soak the stems overnight as it just aligns with the timing of my hobby hours. I use cotton swabs to wipe the product off into the container then use paper towels to scrub the oxidation and remaining product off of the stem. You’re going to need to clean out the draught hole on the stem as well to get all the goop out. Lastly I rub the entire stem with mineral oil using a microfiber cloth and pass a pipe cleaner dipped in the oil through the stem as well. I just let it sit afterwards.  **Note: I wrap the aluminum Brigham Tenon in electrical tape. The deoxidizer has a reaction with the aluminum and causes a slight calcification on it. You can remove the calcification with steel wool, but you could end up with a loose fitting Tenon by doing so.**

Step 3: Scrub the exterior of the stummel

The pipe had a buildup of carbon around the rim which filled in some of the craggily rustication on the rim. I used a wire brush to scrub it off and preserve the rustication. You can also use 0000 Steel Wool to achieve the same result. If you are using a wire brush, I would not recommend using a brass brush. They are softer bristles, you likely will end up transferring metal from the bristles to the stummel and end up with a metallic sheen on some parts, which you then have to remove. Lastly I like to use undiluted Murphy’s Oil Soap on the outside of the stummel. I just dip a toothbrush in the soap and scrub the stummel to remove dirt and grime.

Step 4: Stem restoration

With the stem deoxidized I moved on to reconditioning the stem. There was some tooth chatter that I was able to correct using flame from a lighter. However; there were a few spots that I couldn’t lift out with heat. When that happens, for vulcanite stems, I like to use Bob Smith Industries IC-2000 CA Glue.  It is infused with Carbon and Rubber and matches the stem perfectly for me.

I missed taking pictures of a few steps, but once the CA Glue has dried, you can file it down with a small hand file. Once I have filed down the patch to bring it within the profile of the rest of the stem I sanded the bite area with various grits. I will start with 800 if I’m fortunate enough to not make any deep scratches. After that I turn to micro mesh pads and sand from 1500-12,000, lastly the stem is buffed with using my rotary tool and some buffing bits.

I reassembled the stummel and stem, buffed and polished the whole pipe with carnauba wax. Here’s the finished pipe.

This pipe is will be available at the LuntingBear Pipe Store **COMING SOON**

A journey’s beginning..

As a young boy I recall the time spent with my Father going to Toronto to get our haircut. Going to the Barber was a cherished ritual I enjoyed, often it included going out for lunch at a Delicatessen or simply a walk and some “Street Meat” from a local Hot Dog Vendor.

On one of these outings I recall walking by the Dunhill store in Toronto, located on Bloor St., East of Avenue Rd, and asking my Father to go in, at the time I must have been between 8-10. I don’t recall much reluctance from my Father as I charged forward into the store, a young stocky kid with no business being in there. I don’t remember much resistance from the staff when I walked in either! Immediately I was bathed in the luxury and beauty that was an Alfred Dunhill store. I recall standing in the humidor and smelling the rich earthy aromas of the cigars, as well as the nausea from the same aromas as I was clearly not mature enough for such decadence. I fantasized one day about being a cigar aficionado. The pipes on the wall reminded me of my Grandfather and the sweet smell of a recently smoked pipe, still warm, resting, waiting to be picked up again.

Right or wrong, I had a love affair with premium Tobacco and pipes at a very early age. It wasn’t complicated, I just connected to it, a passion. It was not until I was 40 years old that a well placed image happened across my phone while looking at men’s fashions. It was an image of a dapper dressed fellow, his chin tilted down with a pipe clenched in his mouth as he drew a lit match to the pipe. In an instant I recalled all the feelings of that day in the Dunhill store, of my Father and my Grandfather. Was pipe smoking still a thing?

To my delight it was! In fact it had seen a resurgence and I dropped right into the middle of it! I quickly announced my arrival to the world of pipe smoking to little or no fan fair, HA! It was like I found my tribe after being lost for so many years. The hobby found me during a time of conflict and heartache as my marriage slowly died away. It connected me back to that kid in the Dunhill store with his Father.

Soon after discovering this hobby, I had also began antique hunting. I had no idea that the two interests would collide as they did. I started seeing pipes EVERYWHERE. I realized I could curate a collection for myself and busy my hands by cleaning them up. There was also a presence online dedicated to Pipe Restoration, these tutors showed me the way and I quickly developed a passion and skill for the hobby.

Welcome, to Lunting Bear Pipe Restoration! Grab your favourite pipe and stay for a while.